
Okay, yarn lovers. This is your sign to dig into that stash and pull out those beautiful cotton skeins you’ve been saving for "the right project." The Dusty Rose Floral Granny Square Tote is exactly that project.
Get the Ad-Free PDF Pattern
You can find the free pattern below, or you can purchase the ad-free printable PDF from my shop.
Get the Printable PDF →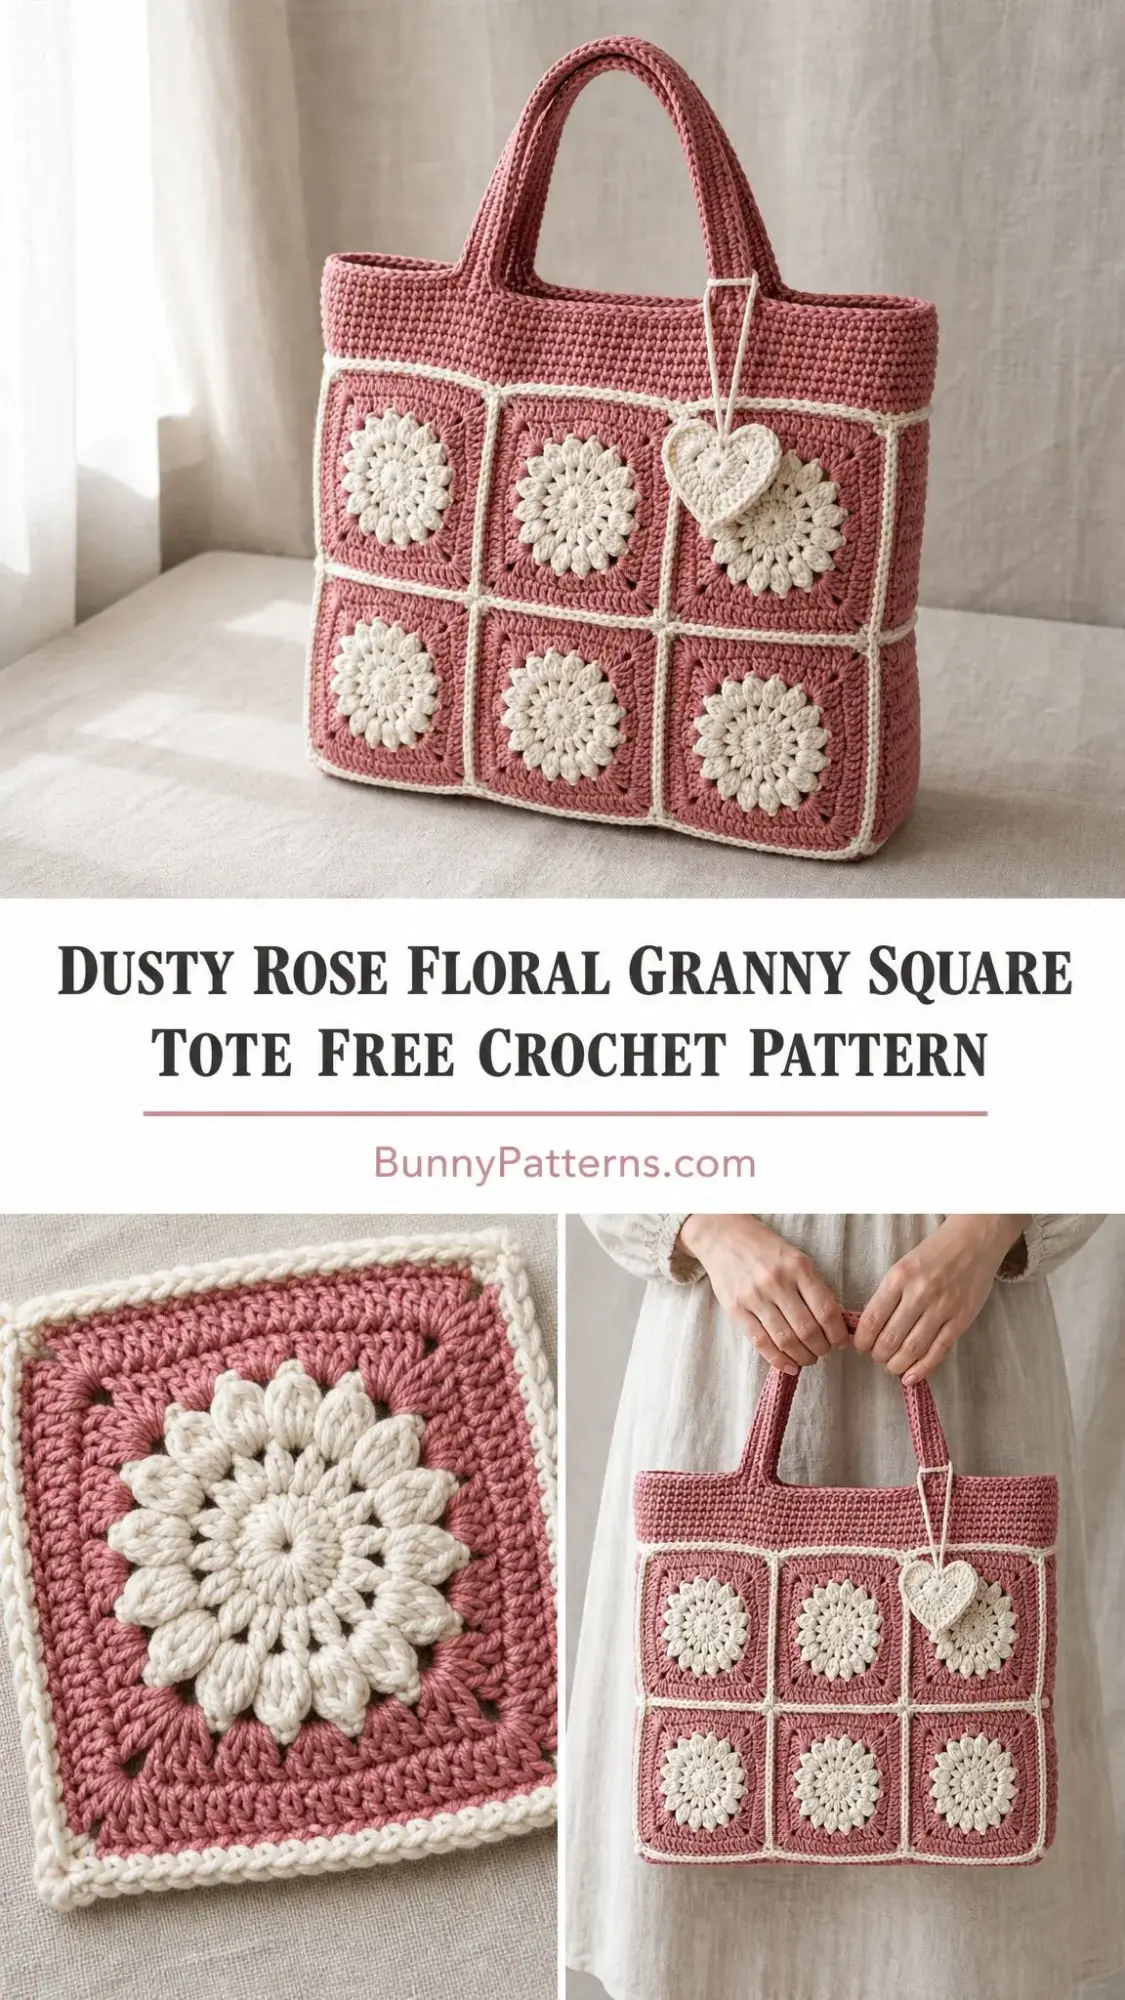
This bag combines raised floral granny squares with a structured, boxy construction that looks far more complicated than it actually is. The puff petals create gorgeous dimension, and the cream joins frame each dusty rose square like a perfectly styled grid.
Fair warning: this is an intermediate project. You’ll be working puff stitches, joining motifs, and building a three-dimensional bag. But if you’ve made granny squares before and you’re ready to level up, you’ve absolutely got this.
About This Dusty Rose Floral Tote Pattern
This structured tote is built from 19 raised floral granny squares joined into a firm rectangular bag. The construction includes three motifs across the front, two motifs high, and one motif deep at the sides. You’ll add a sturdy crocheted top band, padded handles, and an adorable heart charm to complete the look.
The cream contrast color creates those crisp grid lines you see framing each dusty rose square. It’s the kind of detail that makes people stop you on the street and ask, "Did you make that?"
Finished Dimensions:
Skill Level: Intermediate
Time to Complete: 12 to 16 hours
Materials You’ll Need
Before you start, gather everything so you can work without interruption. There’s nothing worse than getting halfway through a project and realizing you’re short on yarn.
Yarn:
Yarn Suggestions: Lion Brand 24/7 Cotton, Paintbox Cotton Aran, or Hobbii Friends Cotton 8/8. You want a smooth worsted cotton or cotton-acrylic blend that blocks neatly and holds a firm square.
Hooks:
Notions:
Gauge
Getting gauge right is crucial for this project. If your squares are off by even a quarter inch, your finished bag won’t come together properly.
One blocked floral square should measure 4.25 inches / 10.8 cm.
In plain single crochet (sc), which means inserting your hook, pulling up a loop, and pulling through both loops: 16 stitches and 18 rounds equals 4 inches / 10 cm using the larger hook.
Match the motif size first. The single crochet gauge is just a secondary guide.
Abbreviations (US Terms)
This pattern uses American crochet terminology. If you’re more familiar with UK terms, I’ve included a conversion note below.
UK Conversion: US sc = UK dc, US dc = UK tr, US tr = UK dtr
Special Stitches
These two special stitches create the beautiful texture in your floral motifs. Don’t skip this section.
Puff Petal
This stitch creates those plump, dimensional flower petals in the center of each square.
To work a puff petal: [Yarn over, insert hook in indicated stitch or space, yarn over and pull up a tall loop] 4 times, yarn over and pull through all 9 loops on hook, chain 1 to close.
Tip: Keep your loops even and plump. If they’re too tight, the petal will look squished. If they’re too loose, it’ll be floppy.
2-dc Cluster
This creates a nice decorative element without adding bulk.
To work a 2-dc cluster: Yarn over, insert hook in indicated stitch, yarn over and pull up loop, yarn over and pull through 2 loops. Repeat once more in the same stitch, then yarn over and pull through all 3 remaining loops on hook.
Flat Slip-Stitch Join
This technique joins your blocked motifs with a clean, visible seam.
Hold two blocked motifs with wrong sides together. Using CC and the smaller hook, insert your hook through the back loop only of the matching edge stitch on the front motif AND the back loop only of the matching edge stitch on the back motif. Slip stitch. Continue across all 18 edge stitches. Don’t pull too tightly or your seams will pucker.
Important Pattern Notes
Read these before you start. They’ll save you headaches later.
Floral Granny Square Instructions (Make 19)
Use your larger hook (US G/6 / 4.0 mm). Each finished blocked square should measure 4.25 inches / 10.8 cm, with 18 single crochet stitches along each edge (not counting the corner chain-2 spaces).
Round 1
With CC (cream), make a magic ring. Chain 1, work 12 single crochet into the ring, slip stitch to the first single crochet to join. (12 sc)
Round 2
Chain 3, work a 2-dc cluster in the same stitch, chain 3, slip stitch in the same stitch. Slip stitch in the next stitch, chain 3, work a 2-dc cluster in the same stitch, chain 3, slip stitch in the same stitch. Repeat from around. Fasten off. (12 petals)
Round 3
Join CC in any space between petals. Work a puff petal in the space between petals, chain 1. Repeat from around, slip stitch to the first puff. Fasten off. (12 puff petals, 12 chain-1 spaces)
Round 4
Join MC (dusty rose) in any chain-1 space. Chain 3, work 2 double crochet in the same space, chain 1. Work 3 double crochet in the next chain-1 space, chain 1. Repeat from around, slip stitch to the top of the chain-3. (12 clusters / 36 dc)
Round 5
Slip stitch to the next chain-1 space. Chain 3, work 2 double crochet, chain 2, then 3 double crochet in the same space for your first corner. Work 3 double crochet in each of the next 2 chain-1 spaces, then work (3 dc, ch 2, 3 dc) in the next chain-1 space for the corner. Repeat from 3 more times, omitting the final corner on the last repeat. Slip stitch to join. (48 dc + 4 corners)
Round 6
Chain 3. Double crochet in each double crochet around. In each corner chain-2 space, work (2 dc, ch 2, 2 dc). Slip stitch to the top of the chain-3. Fasten off MC. (64 dc + 4 corners)
Round 7
Join CC in any corner chain-2 space. Chain 1, work (sc, ch 2, sc) in the corner. Single crochet in each double crochet across to the next corner, work (sc, ch 2, sc) in the corner. Repeat from around, slip stitch to the first single crochet. Fasten off. (72 sc + 4 corners; 18 sc per edge)
Checkpoint: After blocking, each motif should be square, flat, and measure close to 4.25 inches / 10.8 cm. If yours are cupping or ruffling, adjust your hook size and re-block firmly.
Panel Layout and Joining
Now comes the fun part: turning 19 individual squares into a beautiful bag.
Arrange all your motifs with the flowers facing outward:
Step 1
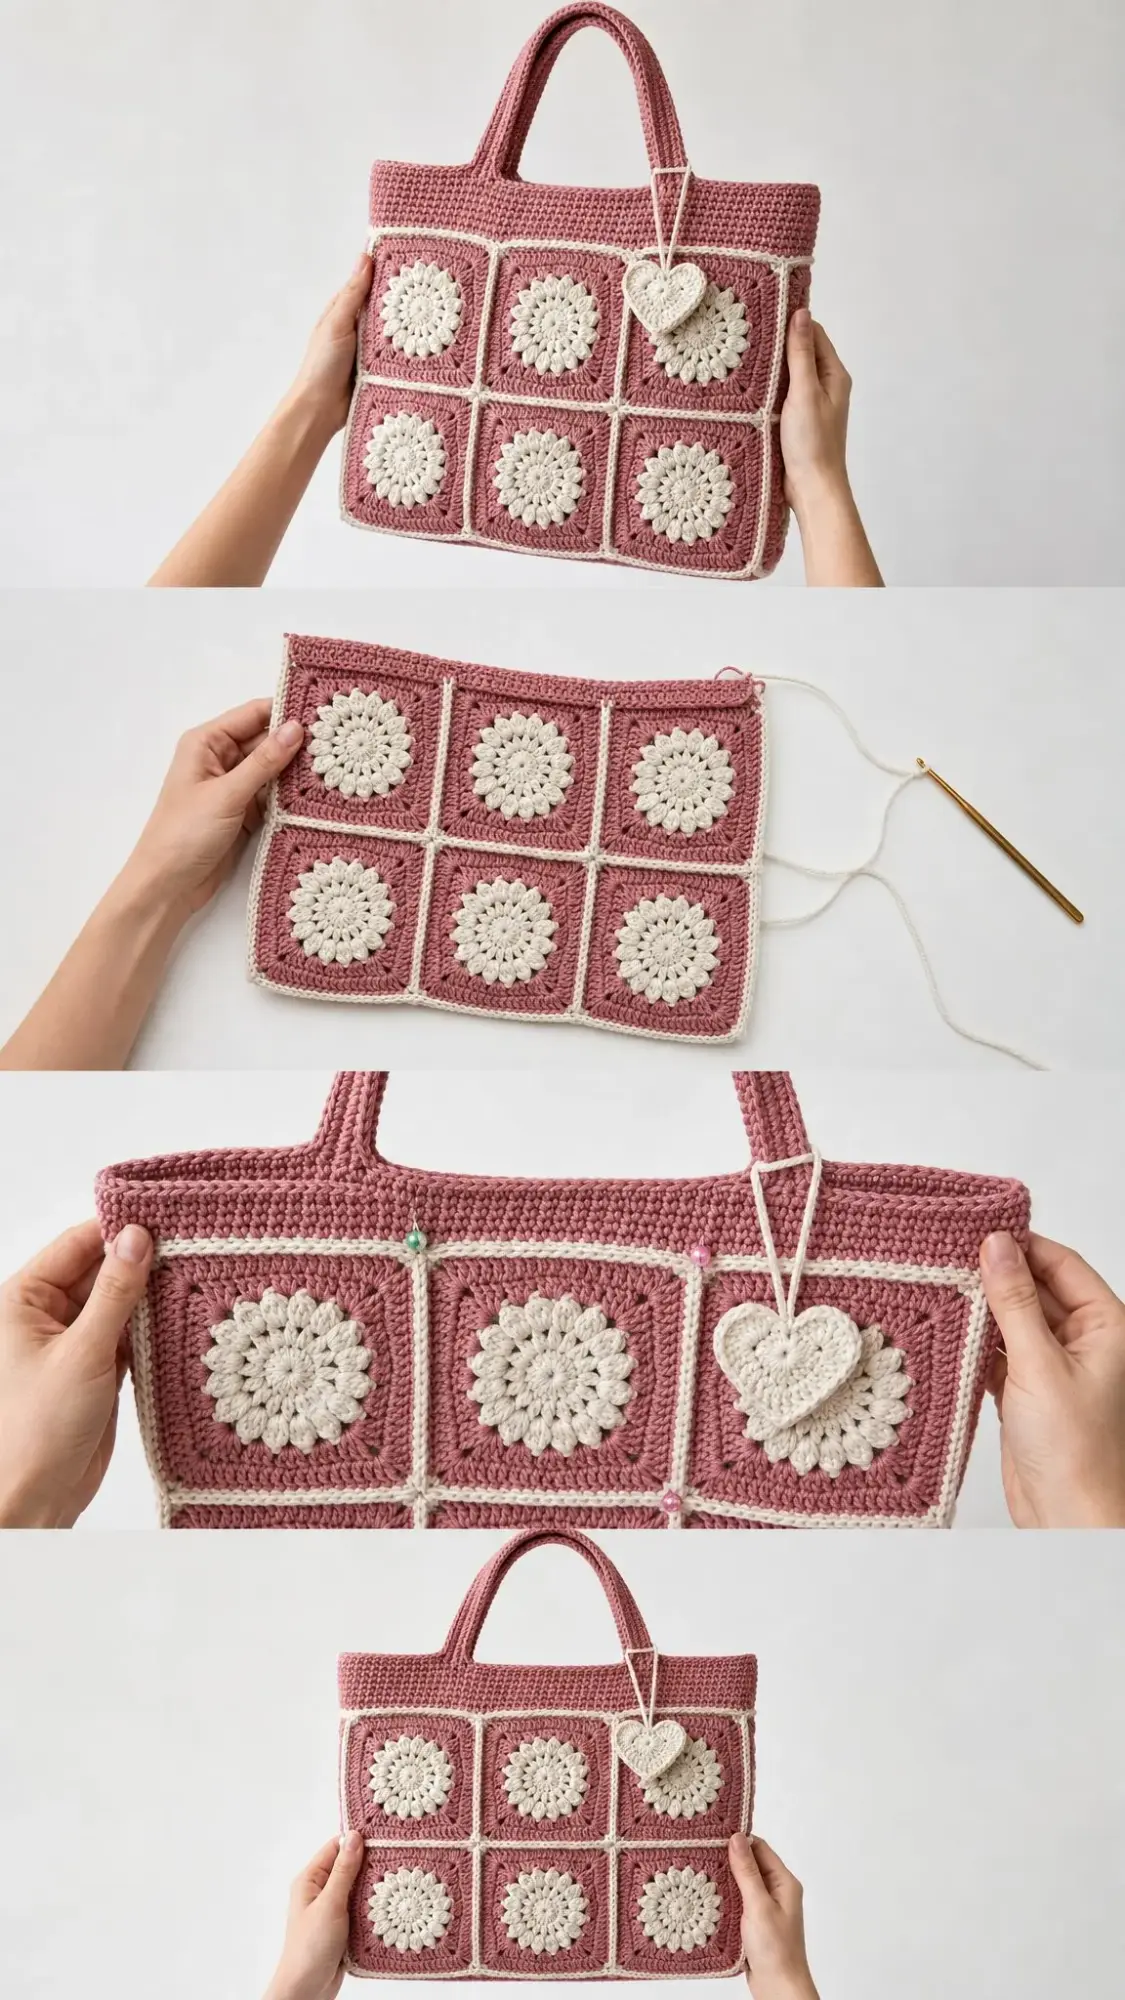
Join 6 motifs into the front panel. First join 3 motifs across for Row A. Then join 3 motifs across for Row B. Finally, join Row A to Row B. Repeat this entire process for the back panel.
Step 2
Join 2 motifs vertically for each side panel.
Step 3
Join the base panel by connecting 3 motifs in a row.
Step 4
Join the side panels to the front panel, then to the back panel. Join the base panel to the lower edges of the front, back, and sides.
Step 5
At every corner where seams meet, secure with an extra whip stitch in CC so the grid lines meet cleanly.
Checkpoint: Before adding the top band, your bag body should measure about 13.5 inches / 34 cm wide, 9 inches / 23 cm tall, and 4.5 inches / 11.5 cm deep.
Top Band Instructions
The top band adds structure and that polished look. You’ll work it in joined rounds around the upper edge of your assembled bag.
With MC and the larger hook, join yarn at a back side seam with the right side facing. You’ll be working around the upper edge of 8 exposed motif edges: front 3, side 1, back 3, side 1.
Round 1
Chain 1, single crochet evenly around, placing 18 single crochet across each of the 8 motif edges. Slip stitch to the first single crochet to join. (144 sc)
Rounds 2 through 12
Chain 1, single crochet in each stitch around, slip stitch to the first single crochet. Keep the seam straight. (144 sc each round)
Round 13
Switch to CC. Chain 1, work crab stitch (also called reverse single crochet) in each stitch around for a firm upper rim. Slip stitch to finish. (144 crab stitches)
Checkpoint: Your top band should add about 2.5 inches / 6.5 cm of height and feel firm, not floppy. If it’s flaring out, go down one hook size or decrease 4 stitches evenly on Round 2.
Handle Instructions (Make 2)
These padded handles are comfortable and sturdy. You’ll make two identical rectangles and sew them to the bag.
Row 1
With MC and the larger hook, chain 58. Half double crochet in the 3rd chain from the hook and in each chain across. Turn. (56 hdc)
Rows 2 through 4
Chain 2, half double crochet in each stitch across. Turn. (56 hdc)
Edging
With CC, single crochet evenly around the entire long rectangle, working 3 single crochet in each corner. Fasten off, leaving a long sewing tail. (Approximately 128 sc)
Attaching the Handles
Sew one handle to the front and one to the back. Center each handle over the middle motif. Place each handle end over 8 top-band stitches, with 22 top-band stitches between the inner edges of the handle.
For durability, stitch a box shape with an X through it. This distributes the weight and prevents the handles from pulling away over time.
Heart Charm Instructions
This sweet little detail adds personality to your finished tote.
With CC and the larger hook, make a magic ring. Into the ring, work: chain 2, 3 treble crochet, 3 double crochet, chain 1, 1 treble crochet, chain 1, 3 double crochet, 3 treble crochet, chain 2, slip stitch into the ring. Tighten the ring.
Work one round of single crochet evenly around the heart, placing 2 single crochet in the lower point and 3 single crochet in each upper curve. Fasten off.
For the hanging cord, chain 60 and fasten off. Thread the cord through the top of the heart and tie it to one handle.
Finishing and Blocking
You’re almost there! These final steps make the difference between a homemade-looking bag and a professional-looking one.
Size Customization Tips
Want to make this bag bigger or smaller? Here’s how to adjust:
Wider bag: Add one motif to the front and back panels, then add one motif to the base length. Your top band will increase by 36 single crochet stitches per added motif pair.
Taller bag: Add one full row of motifs before the top band.
Longer handles: Add 4 chains for each extra 1 inch / 2.5 cm of handle length you want.
Care Instructions
To keep your tote looking beautiful for years:
Hand wash in cool water or use a gentle cycle in a mesh laundry bag. Reshape while damp and dry flat with the bag stuffed lightly to preserve that boxy shape. Avoid hanging while wet, as this can stretch the cotton.
Troubleshooting Common Issues
Motifs cup or ruffle: Adjust your hook size and block firmly. Round 7 should lie flat with 18 single crochet per edge.
Bag leans after joining: Re-block your motifs to one consistent size and rejoin with relaxed slip stitches. Tight joins shorten the seams.
Top band flares: Go down one hook size for the band rounds, or decrease 4 stitches evenly on Round 2. Keep a multiple of 2 for a balanced rim.
Handles stretch: Use cotton yarn (which stretches less than acrylic), sew through several rows when attaching, and consider adding a fabric ribbon or slip-stitch reinforcement on the wrong side.
You Did It!
Thank you so much for choosing this pattern for your next crochet project. I truly hope you love making this Dusty Rose Floral Granny Square Tote as much as I loved designing it. If you make one, I would absolutely love to see it! Tag me on Instagram or share a photo in our Facebook group.
If this pattern is calling your name, go ahead and save it to your Pinterest boards so you can find it when you’re ready to start. And please drop a comment below if you make one. I love seeing your color choices and hearing about your crochet adventures!
Want a Quick & Easy Printable Version?
Get a clean, beautifully formatted PDF of this pattern — easy to follow step by step, ready to print or save on any device. No scrolling, no distractions, just the pattern.
Get the Printable PDF →You Might Also Like
- Dusty Rose T-Shirt Yarn Backpack Free Crochet Pattern
- Lavender Dream Kitty Tote Bag Free Crochet Pattern
- Sage Green Boho Crochet Backpack Free Pattern
- Sage Wildflower Crochet Backpack Free Pattern