
This one is going to absolutely BLOW YOUR MIND! If you have been looking for a showstopper project that combines granny squares, adorable daisy appliques, and a functional accessory all in one, you have found it. This pastel rainbow daisy backpack is the kind of project that looks incredibly impressive but breaks down into totally manageable steps.
Get the Ad-Free PDF Pattern
You can find the free pattern below, or you can purchase the ad-free printable PDF from my shop.
Get the Printable PDF →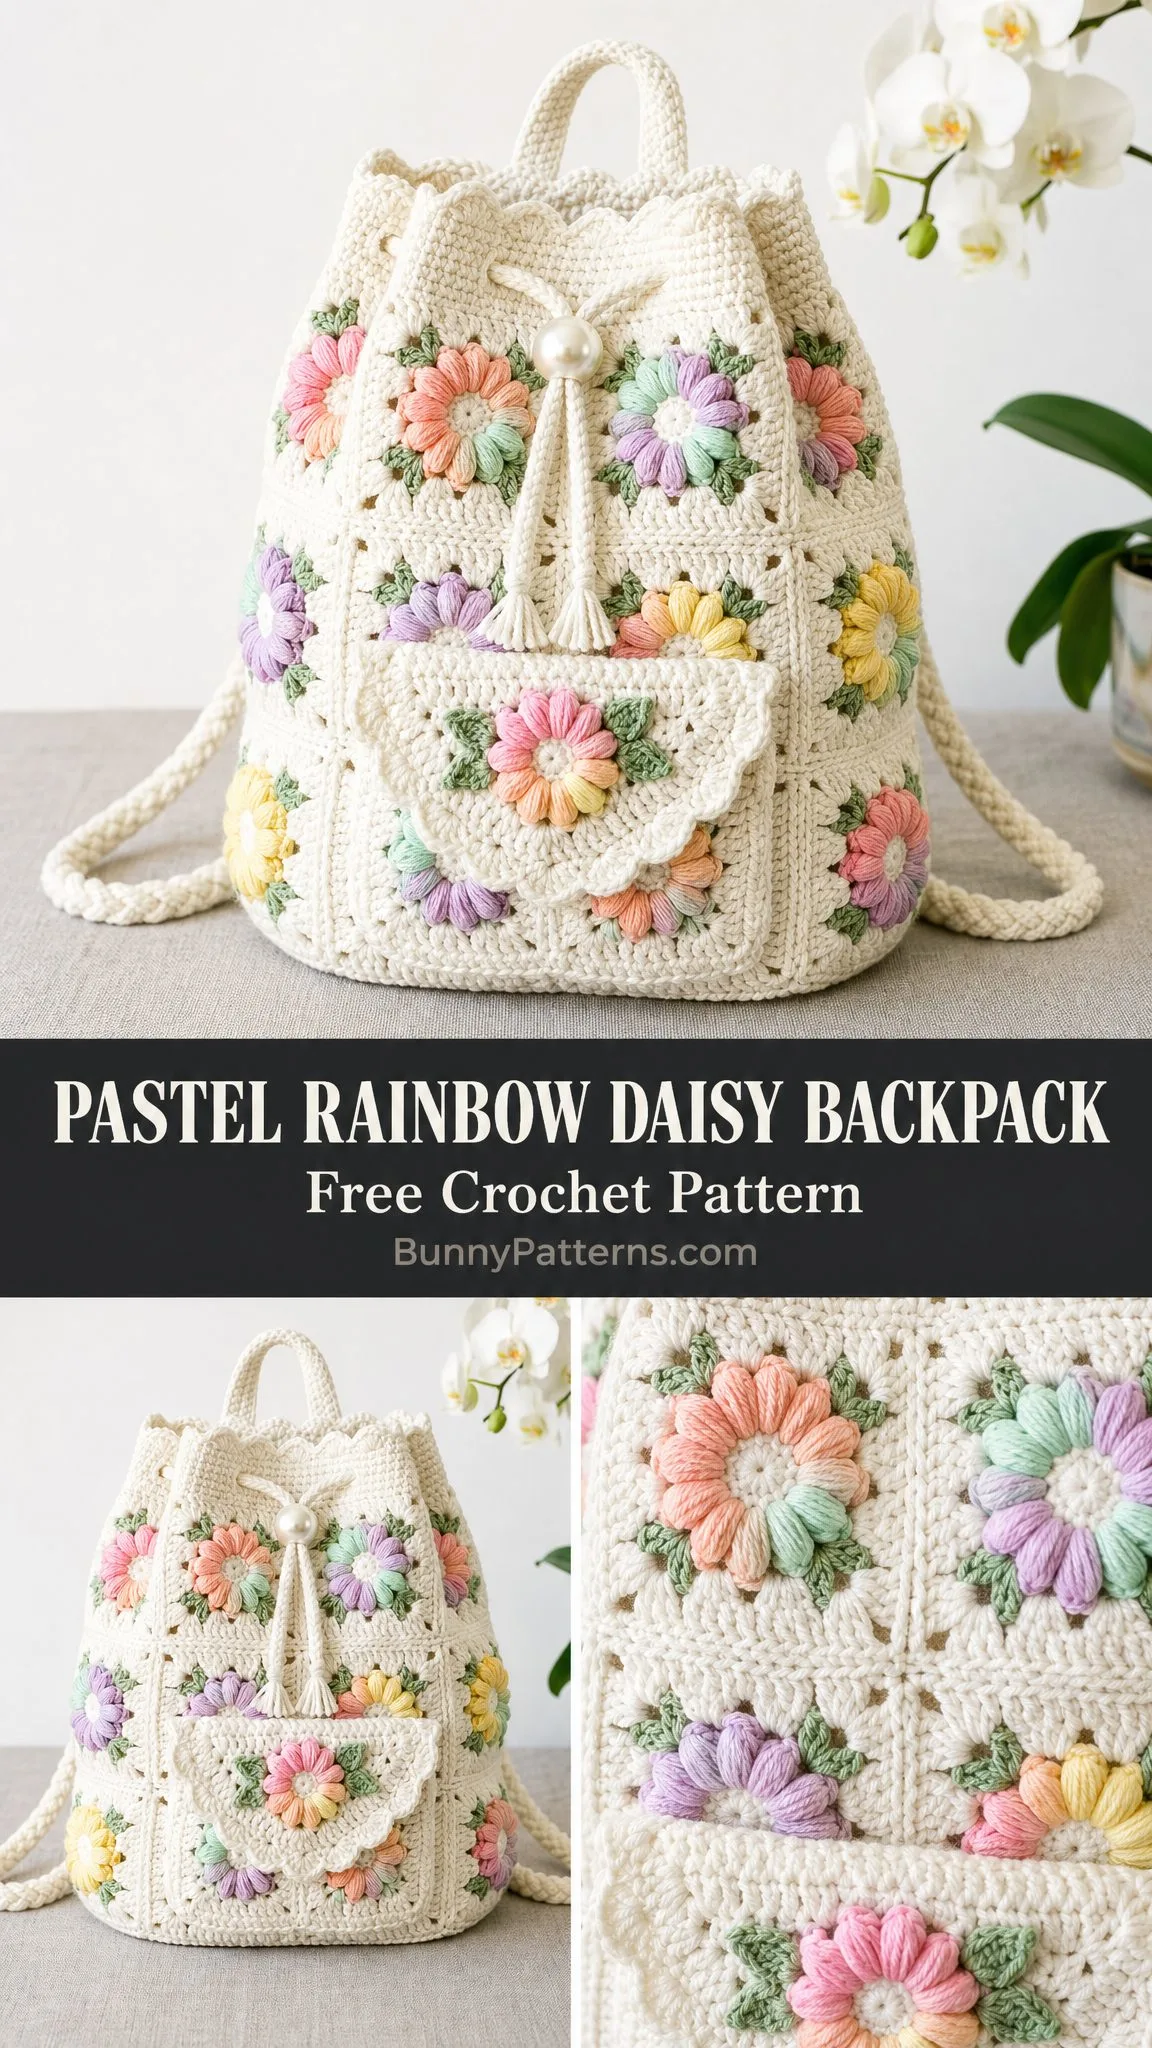
I am SO excited to share this pattern with you because it hits all my favorite notes. You get the meditative rhythm of making granny squares, the creative fun of arranging pastel colors, and the satisfaction of assembling something you will actually use every single day. Plus, those dimensional daisies? Chef’s kiss.
Whether you are making this for yourself, a daughter, a niece, or a friend who loves all things floral and feminine, this backpack is guaranteed to get compliments everywhere it goes. Let’s dive into everything you need to know to create your very own pastel rainbow daisy backpack from start to finish!
What You Will Make
This pattern creates a soft bucket-style mini backpack constructed from daisy granny squares. The finished piece measures approximately 9 inches wide x 11 inches tall x 8.5 inches deep (23 x 28 x 21.5 cm). It features a firm circular base, a drawstring top closure, a front pocket with an adorable scalloped flap, two shoulder straps, and a small top handle for grabbing on the go.
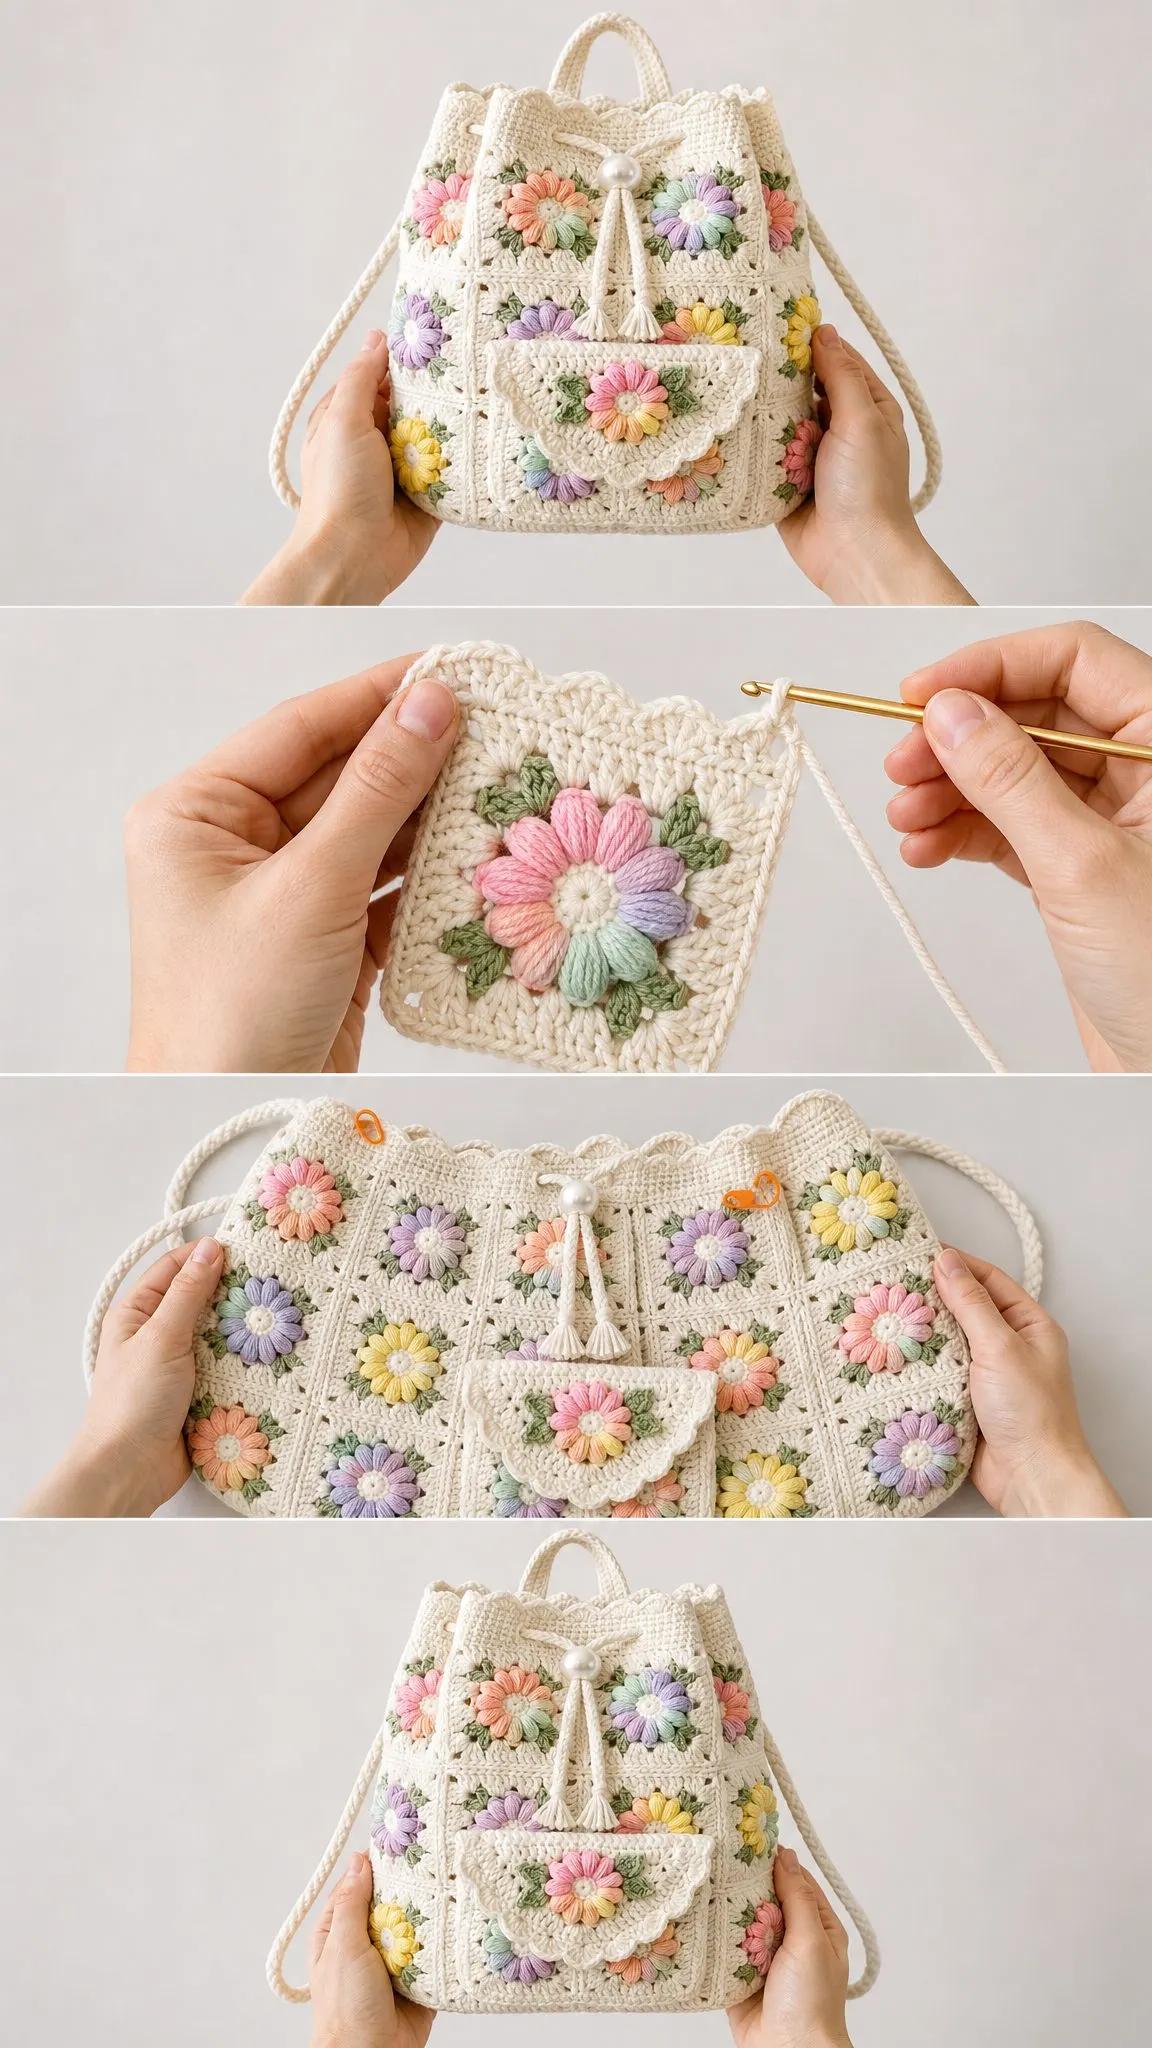
The body uses 24 square motifs arranged 8 around by 3 high, creating that cheerful pastel rainbow look you see in the photos. Each square gets its own daisy applique with two small leaves, and you will arrange the flower colors so no two identical shades sit directly side by side.
Skill Level
This pattern is rated as confident intermediate. You should be comfortable with motif joining, basic shaping, making cords, preparing optional lining, and neat finishing techniques. If you have made granny squares before and joined them into a project, you have the foundation you need. The individual techniques are not difficult, but bringing them all together requires attention to detail and patience.
Materials and Tools
Here is everything you will need to gather before starting:
| Item | Amount / Detail |
|---|---|
| Main yarn | Worsted weight cotton or cotton blend: cream, 520 yd / 475 m |
| Flower colors | Pastel pink, peach, mint, lavender, yellow: 35-45 yd / 32-41 m each |
| Leaf green | Approx. 70 yd / 64 m |
| Hooks | G/4.0 mm for motifs and body; F/3.75 mm for cords if needed |
| Notions | Tapestry needle, locking markers, pins, 1 large pearl-style bead, optional fabric lining |
Yarn Recommendations
Some excellent yarn choices include Lion Brand 24/7 Cotton, Paintbox Yarns Cotton Aran, or WeCrochet Dishie. You want a smooth worsted cotton that gives firm fabric and clear stitch definition. When selecting your pastels, choose colors with similar value so the flowers read as a soft, cohesive rainbow rather than a jarring mix.
Gauge
Getting your gauge right is essential for this project since everything needs to fit together perfectly.
Motif gauge: One finished square after Round 4 and edging should measure 3.5 x 3.5 inches / 9 x 9 cm.
Single crochet gauge for base: 16 sc and 18 rounds equals 4 inches / 10 cm after light blocking.
Match the motif size first, then use whatever hook gives you a firm but flexible square. If your squares are too small or too large, adjust your hook size and reblock to hit that 3.5 inch measurement.
Important Checkpoints
Keep these numbers in mind as you work:
Abbreviations and Special Stitches
This pattern uses US crochet terminology throughout. Here are all the abbreviations you will encounter:
UK crocheters note: US sc equals UK dc, and US dc equals UK tr.
Special Stitches Explained
Granny cluster: Work 3 double crochets into the same chain space. This creates those classic granny square clusters.
Corner: Work (3 dc, ch 2, 3 dc) all in the same corner space. This creates the corner increase that shapes your square.
Picot petal: Chain 5, single crochet in 2nd chain from hook, half double crochet in next chain, double crochet in next chain, half double crochet in last chain, slip stitch in the same center stitch. This creates one dimensional daisy petal.
Invisible join: Cut yarn, pull tail through final stitch, thread needle under both loops of first stitch, then back into top of final stitch to mimic a stitch. This creates a seamless round.
Romanian cord: Chain 2, single crochet in 2nd chain from hook, rotate work clockwise, insert hook under side loop, yarn over and pull through, yarn over and pull through both loops. Continue rotating and working one single crochet into the side loop until cord reaches the needed length. This creates a sturdy, rounded cord perfect for straps and drawstrings.
Construction Order Overview
Before diving into the detailed instructions, here is the order you will follow:
1. Crochet 24 cream granny squares and 24 daisies
2. Sew one daisy to the center of each square
3. Join squares into three strips of 8, then join strips into a tube
4. Crochet the circular base and join it to the lower edge
5. Work the top rim, eyelets, scallop edge, cords, pocket, handle, and straps
6. Block lightly, weave ends, and add optional lining
Daisy Granny Square Pattern
Make 24 squares total. Work each square in cream, then sew on one daisy with two small leaves.
| Step | Instructions | Count |
|---|---|---|
| R1 | MR, ch 3 (counts as dc), 2 dc in ring, ch 2, [3 dc in ring, ch 2] 3 times, join. | 12 dc, 4 corner sps |
| R2 | Sl st to corner. Ch 3, 2 dc, ch 2, 3 dc in same corner. Work corner in each remaining corner sp, join. | 24 dc, 4 corner sps |
| R3 | Sl st to corner. Work corner in corner sp, granny cluster in each side sp; rep around, join. | 36 dc, 4 corner sps |
| R4 | Sl st to corner. Work corner in corner sp, granny cluster in each side sp; rep around, join. | 48 dc, 4 corner sps |
| Edging | Ch 1. Work 14 sc evenly along each side, placing 1 marked corner sc at each corner; join invisibly. | 56 sc |
Daisy Applique (Make 24)
Center: With cream or yellow, make a magic ring, work 12 single crochets in ring, join. (12 sc)
Petals: Join your pastel color. In each center stitch, work one picot petal. Repeat 12 times. Fasten off. (12 petals)
Leaves: With green, chain 6, single crochet in 2nd chain from hook, half double crochet, double crochet, half double crochet, single crochet, fasten off. Make 2 leaves per flower. Sew leaves first, then flower centered on square.
Color Layout Tips
Arrange the 24 flowers in a mixed pastel order: pink, peach, mint, lavender, yellow, then repeat with small changes so no two identical colors sit directly side by side. Lay out all your completed squares before assembly to check that the color distribution looks balanced and pleasing.
Body Assembly
Joining the Square Body
Make three strips of 8 squares each. With right sides facing up, whipstitch or slip stitch through inner loops only to join squares side by side. Join strip ends to form rings, then join the three rings vertically. Keep 14 edge stitches per square side throughout.
Your top edge should equal 8 x 14 = 112 stitches. Your bottom edge should also equal 112 stitches.
Circular Base Pattern
Work in continuous rounds with cream yarn. Place a marker in the first stitch of each round and move it up as you go.
| Rnd | Instructions | Count |
|---|---|---|
| R1 | MR, 8 sc in ring. | 8 sc |
| R2 | 2 sc in each st around. | 16 sc |
| R3 | [Sc in next st, 2 sc in next st] 8 times. | 24 sc |
| R4 | [Sc in next 2 sts, 2 sc in next st] 8 times. | 32 sc |
| R5 | [Sc in next 3 sts, 2 sc in next st] 8 times. | 40 sc |
| R6 | [Sc in next 4 sts, 2 sc in next st] 8 times. | 48 sc |
| R7 | [Sc in next 5 sts, 2 sc in next st] 8 times. | 56 sc |
| R8 | [Sc in next 6 sts, 2 sc in next st] 8 times. | 64 sc |
| R9 | [Sc in next 7 sts, 2 sc in next st] 8 times. | 72 sc |
| R10 | [Sc in next 8 sts, 2 sc in next st] 8 times. | 80 sc |
| R11 | [Sc in next 9 sts, 2 sc in next st] 8 times. | 88 sc |
| R12 | [Sc in next 10 sts, 2 sc in next st] 8 times. | 96 sc |
| R13 | [Sc in next 11 sts, 2 sc in next st] 8 times. | 104 sc |
| R14 | [Sc in next 12 sts, 2 sc in next st] 8 times. | 112 sc |
Joining Base to Body
With wrong side of base against wrong side of body, pin the 112 base stitches to the 112 lower edge stitches. Slip stitch or whipstitch each stitch to each stitch around. The base should lie flat and the body should stand upright without puckering.
Top Rim Pattern
| Rnd | Instructions | Count |
|---|---|---|
| R1 | Join cream at top edge. Sc in each st around. | 112 sc |
| R2 | Ch 3 (counts as dc), ch 1, sk next st, [dc next st, ch 1, sk next st] around, join. | 56 dc + 56 ch-sps |
| R3 | Ch 1, sc in each dc and ch-sp around, join. | 112 sc |
| R4 | [Sl st next st, sk next st, 5 dc next st, sk next st] 28 times, join. | 28 scallops |
The chain spaces in R2 create your eyelets for the drawstring cord.
Front Pocket Pattern
| Step | Instructions | Count |
|---|---|---|
| Panel R1 | Ch 29, sc in 2nd ch from hook and each ch across, turn. | 28 sc |
| R2-R16 | Ch 1, sc across, turn. | 28 sc |
| Edging | Sc evenly around, working 3 sc in each corner; join. | 88 sc approx. |
| Flap R1 | Join to top edge of pocket; sc across 28 top sts, turn. | 28 sc |
| R2-R6 | Ch 1, sc across, turn. | 28 sc |
| R7 | [Sl st next st, sk next st, 5 dc next st, sk next st] 7 times. | 7 scallops |
Attaching the Pocket
Center the pocket over the lower front two squares. Sew sides and bottom only, leaving the top open. Sew one daisy to the flap center and one pearl-style bead above the flap as a decorative button.
Cords, Straps, and Handle
Drawstring Cord
Make one Romanian cord 36 inches / 91 cm long. Weave through the R2 eyelets, entering and exiting at the front center. Add tassels to both ends. Tie in a bow beneath the pearl bead.
Shoulder Straps
Make two Romanian cords, each 44 inches / 112 cm long. For a thicker braided look, make three 44 inch cords for each strap and braid them together. Sew each strap to the upper back on either side of the handle and to the lower back base corners. Reinforce each attachment point with several passes of yarn.
Top Handle
Make one cord 10 inches / 25.5 cm long. Fold ends under to create a finished handle span of approximately 7 inches / 18 cm. Sew firmly to the back/top rim.
Blocking and Finishing
Pin the body gently so the squares align in straight columns. Steam lightly from above without pressing the flowers flat. Let dry fully before moving.
For a sturdier backpack, consider adding a fabric lining. Sew a simple bucket-shaped lining to the inside just below the eyelet round after blocking and before final strap attachment.
Care Instructions
Spot cleaning is preferred. For full washing, remove heavy contents, hand wash in cool water, roll in a towel to remove excess moisture, reshape, and dry flat. Do not hang wet by the straps as this can stretch them out.
Troubleshooting Common Issues
Squares too small or large: Change hook size and reblock to 3.5 inches / 9 cm.
Body edge does not equal 112 stitches: Recount each square side. Each side needs exactly 14 edge single crochets.
Base ruffles: Use a smaller hook or fewer steam passes when blocking.
Base cups: Loosen tension or add one extra plain round before joining, but only if your base still matches the lower edge stitch count.
Size Customization Options
You can adjust this backpack to fit your needs. Make it wider by adding square columns in multiples of 1 column around. Each added column adds 14 top edge stitches and approximately 3.5 inches / 9 cm circumference.
Make it taller by adding another ring of 8 squares. Just remember to adjust the base so its final round has the same stitch count as the lower body edge. Lengthen or shorten straps before sewing them on to customize the fit.
Tips for Left-Handed Crocheters
Work the same stitch counts and rounds as written. Your squares and body will spiral in the opposite visual direction, which is perfectly normal. When joining, lay the squares right side up in the same color order and seam from right to left if that feels more natural to you.
Quick Reference Counts
Keep these numbers handy as you work:
Final Thoughts on This Crochet Backpack Pattern
I hope you are as excited to make this pastel rainbow daisy backpack as I was to put together this pattern! It is truly one of those projects where the individual pieces are simple, but the finished result looks like something you would find in a boutique. The dimensional daisies, the scalloped edges, and the functional design all come together to create something really special.
Thank you so much for choosing this pattern for your next project! I would absolutely love to see your finished backpack, so please share your photos on Instagram or Facebook and tag me. Seeing your creations truly makes my day.
If you found this pattern helpful, I would really appreciate it if you saved it to your Pinterest boards for later. That way you can find it easily when you are ready to start, and it helps other crocheters discover it too! And please drop a comment below if you make this backpack. I love hearing about your color choices and any modifications you try. Happy crocheting!
Want a Quick & Easy Printable Version?
Get a clean, beautifully formatted PDF of this pattern — easy to follow step by step, ready to print or save on any device. No scrolling, no distractions, just the pattern.
Get the Printable PDF →You Might Also Like
- Pink Variegated Monstera Crochet Plant Free Pattern
- Sage Green Romantic Peplum Crochet Top Free Pattern
- Coral Sunset Crochet Summer Boots Free Pattern
- Lavender Dream Tiered Baby Dress Free Crochet Pattern