
I don’t know about you, but I’ve been on the hunt for the perfect market tote for ages. Something sturdy enough to handle a haul of farmers market produce, but pretty enough that I actually want to carry it everywhere.
Get the Ad-Free PDF Pattern
You can find the free pattern below, or you can purchase the ad-free printable PDF from my shop.
Get the Printable PDF →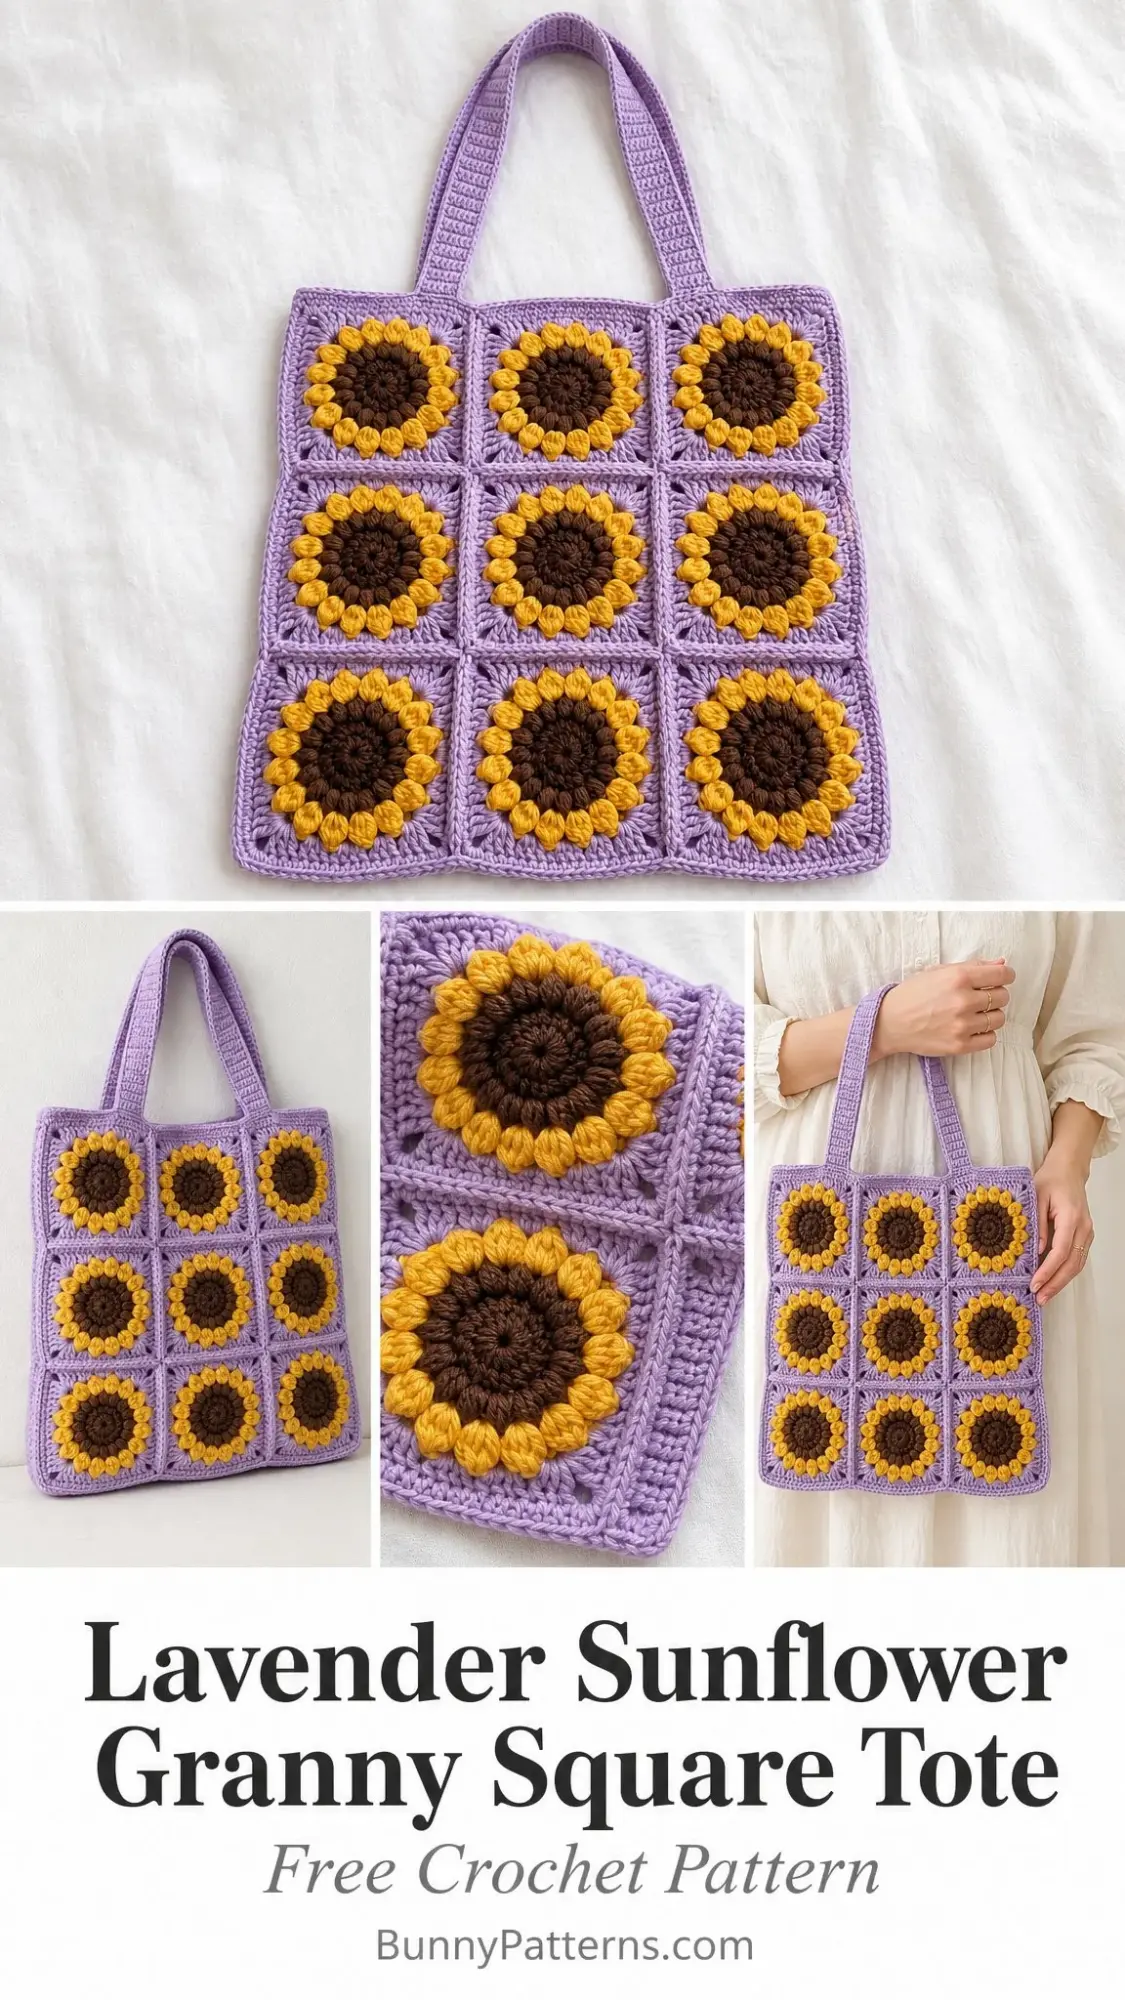
Well, this Lavender Sunflower Granny Square Tote checks every single box. The cheerful sunflower motifs feel like carrying a little bit of sunshine, and that soft lavender background? Absolute perfection.
The best part is that this tote comes together with techniques you probably already know. If you can work a double crochet (dc) and aren’t afraid of a little texture, you’re going to love how this project unfolds.
Why This Sunflower Tote Pattern Works So Well
This crochet tote bag pattern combines classic granny square construction with dimensional sunflower centers that really pop. Each square features a raised brown bobble center surrounded by golden puff stitch petals, all framed by a clean lavender border.
The construction is straightforward once you understand the flow. You’ll make 24 individual sunflower granny squares, join them into a tube shape, add a solid bottom panel, work a simple top edging, and finish with two sturdy crocheted handles. The boxed shape gives this bag real structure, making it perfect for everyday use.
What I love most is that this pattern uses worsted weight cotton yarn, which creates a firm fabric that holds its shape beautifully. No floppy, saggy tote here. This one stands up on its own and gets better with every use.
Materials You’ll Need
Before you start, gather these supplies. Having everything ready makes the whole process so much smoother.
Yarn (Worsted Weight Cotton, Category 4):
Suggested Yarn Brands:
Tools:
You can substitute with any worsted weight yarn that gives you a firm fabric and a square close to the stated measurements. Cotton creates the most tote-like structure, so I highly recommend sticking with cotton or a cotton blend for this project.
Gauge Information
Getting your gauge right matters here because all 24 squares need to match up perfectly when you join them.
One blocked square: 3.75 inches / 9.5 cm across
Solid single crochet gauge: 13 sc x 14 rows = 4 inches / 10 cm with the larger hook
Handle gauge: 8 sc wide = approximately 1.25 inches / 3 cm with the smaller hook
If your test square comes out larger, try going down a hook size. If it’s smaller, go up a hook size. This small adjustment makes a huge difference in your finished tote dimensions.
Finished Dimensions
Your completed tote will measure approximately:
This gives you a generous sized bag that’s perfect for groceries, library books, craft supplies, or beach day essentials.
Abbreviations and Special Stitches
Let me walk you through every stitch you’ll need. Even if some of these look unfamiliar, I promise they’re easier than they sound.
Standard Abbreviations:
UK Crocheters Note: US sc = UK dc, and US dc = UK tr
Bobble Center Stitch
This creates the textured bumpy center of your sunflower. Here’s how it works:
Yarn over, insert hook in the indicated stitch, yarn over and pull up a loop, yarn over and pull through 2 loops. Repeat from the beginning 4 more times in the same stitch until you have 6 loops on your hook. Yarn over and pull through all loops. Chain 1 to close if directed.
Think of it as making 5 incomplete double crochets all stacked in the same stitch, then pulling them all together at the top. The stitch puffs out toward you, creating that lovely dimensional texture.
Puff Petal Stitch
This makes those gorgeous rounded sunflower petals:
Yarn over, insert hook in the indicated stitch or space, yarn over and pull up a tall loop. Repeat 3 more times in the same place until you have 9 loops on your hook. Yarn over and pull through all loops, then chain 1 to lock the puff.
The key here is pulling up tall loops. Don’t be shy about it. The taller your loops, the puffier and more defined your petals will be.
Invisible Join
This technique gives you a seamless finish at the end of rounds:
Cut your yarn and pull the tail through the last stitch. Thread your tapestry needle, insert it under both top loops of the first stitch of the round, then bring it back down through the center of the last stitch. Pull gently to mimic a regular stitch.
This eliminates that obvious jog you sometimes see where rounds begin and end.
Important Maker Notes
A few tips before you dive in:
Sunflower Granny Square Pattern
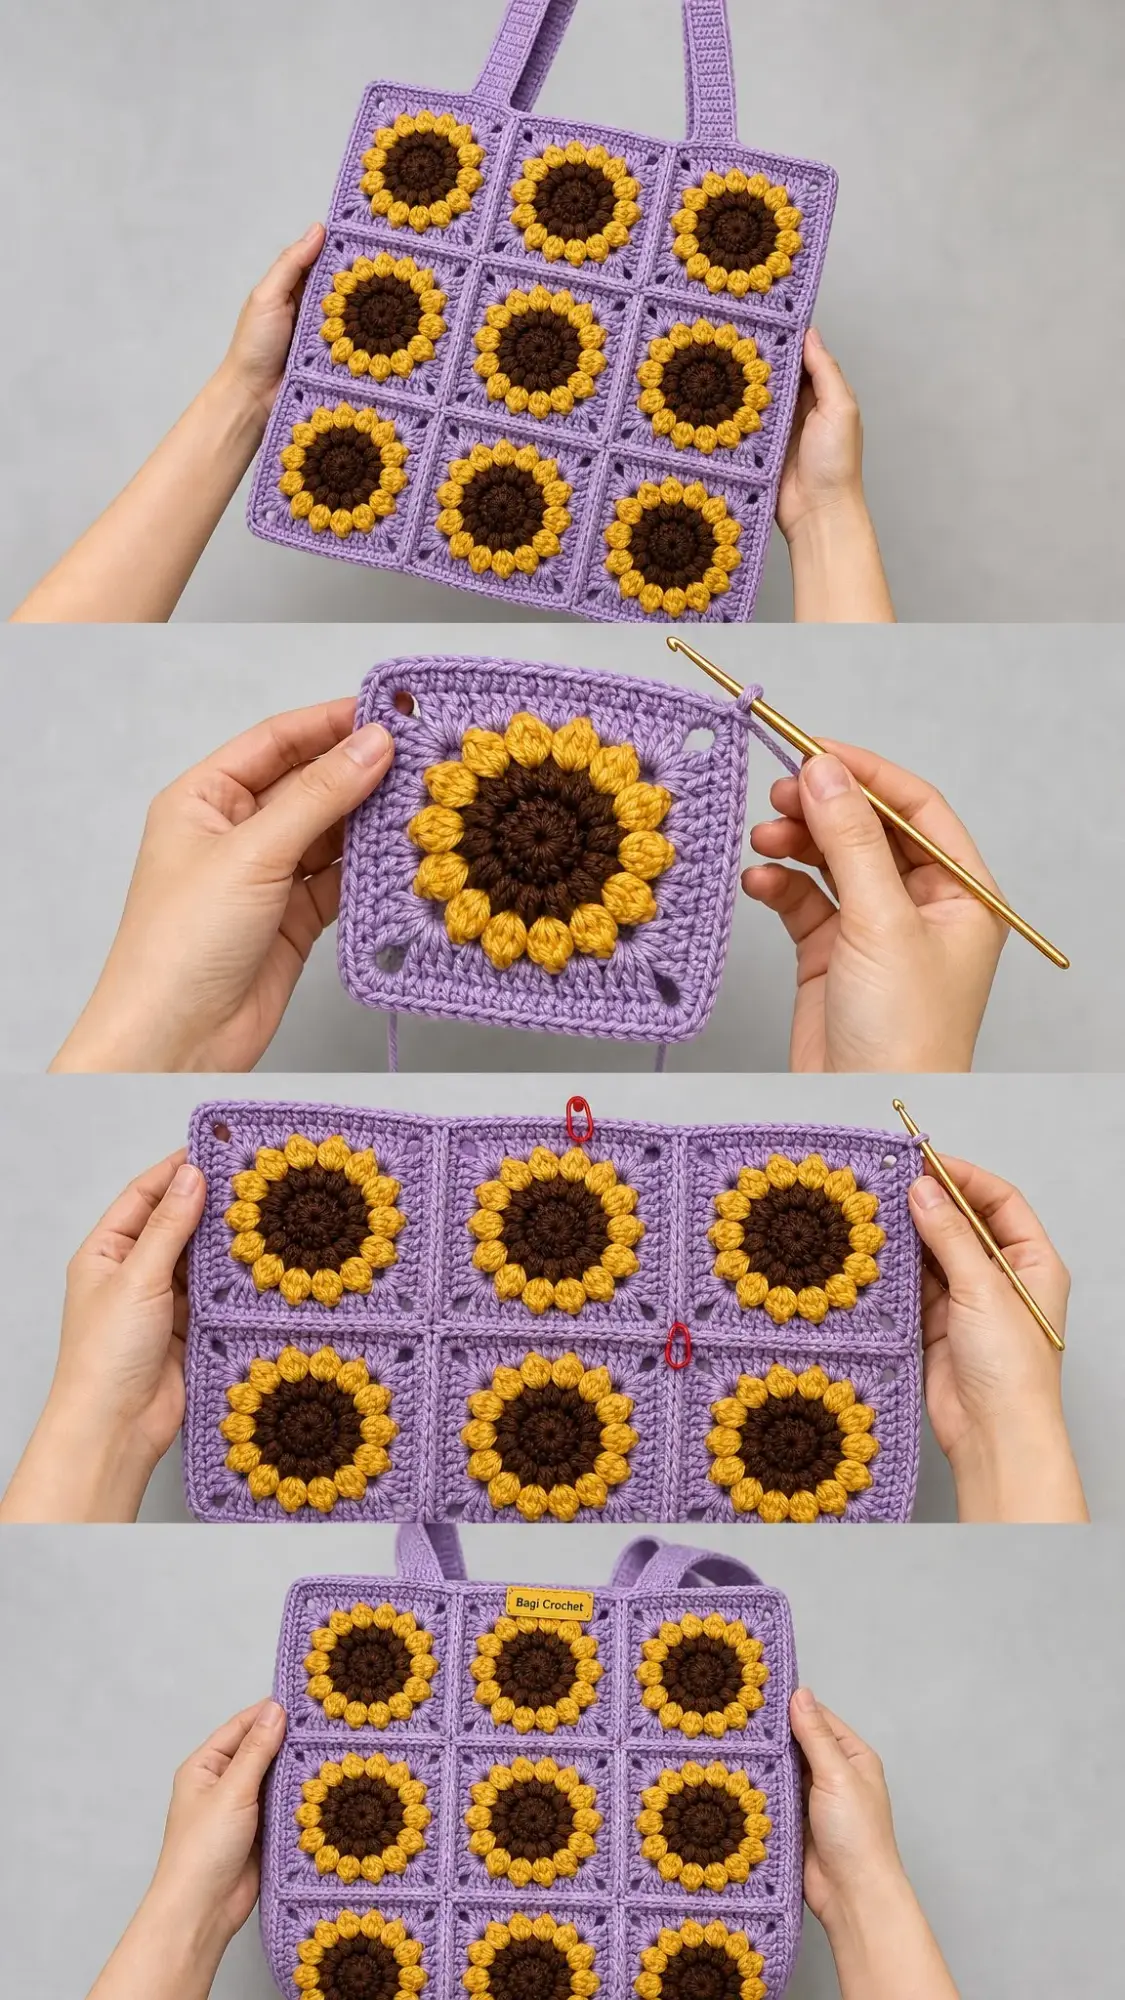
Make 24 squares total. Each square features a raised brown center, 16 golden puff petals, and a lavender granny frame.
Rounds
With warm brown yarn, make a magic ring.
Round 1: Ch 2, work 16 dc in ring. Sl st to first dc. (16 dc)
Round 2: Ch 1, bobble in each dc around. Sl st to first bobble. Fasten off. (16 bobbles)
Round 3: Join golden yellow in any bobble. Ch 2, puff petal in same st, ch 1. Puff petal in next bobble, ch 1; rep from around. Sl st to first petal. Fasten off. (16 petals, 16 ch-1 sps)
Round 4: Join lavender in any ch-1 sp. Ch 2. (3 dc, ch 2, 3 dc) in next ch-1 sp for corner, ch 1, 3 dc in each of next 3 ch-1 sps with ch 1 between clusters, ch 1; rep from 3 more times. Sl st to first dc. (60 dc, 16 ch-1 sps, 4 ch-2 corners)
Round 5: Ch 1. Sc in each dc and each ch-1 sp around, working (sc, ch 2, sc) in each corner ch-2 sp. Invisible join. (84 sc, 4 ch-2 corners; 21 sc per side including corner sc at each end)
Square Checkpoint
After blocking, each square should measure approximately 3.75 inches / 9.5 cm. If your square is larger, go down a hook size. If it’s smaller, go up a hook size. Getting this right now saves you headaches during assembly.
Layout and Joining Instructions
Arrange your 24 squares as a continuous tote wall: 8 columns around by 3 rows high. The front uses columns 1 through 3, the right side uses column 4, the back uses columns 5 through 7, and the left side uses column 8.
Join the Squares
1. Block all squares first. I really can’t stress this enough.
2. Lay out 8 columns by 3 rows with all flowers facing up.
3. Using lavender yarn and either a whipstitch or flat slip-stitch seam, join squares side to side into rows.
4. Join the 3 rows together.
5. Join column 8 to column 1 to form a tube.
6. Keep seams neat and even. Remember that one square side contributes 21 sc to the top-edge count.
Body Checkpoint
The joined wall should measure approximately 30 inches / 76 cm around before seaming to the bottom panel. That breaks down to: front 11.25 inches, back 11.25 inches, plus two side depths of 3.75 inches each. Height should be approximately 11.25 inches / 28.5 cm.
Solid Bottom Panel
With lavender yarn and the larger hook, ch 37.
Row 1: Sc in 2nd ch from hook and in each ch across, turn. (36 sc)
Rows 2-13: Ch 1, sc in each st across, turn. Fasten off after Row 13. (36 sc)
The panel should measure approximately 11.25 x 3.75 inches / 28.5 x 9.5 cm. Add or remove rows if needed to match the side-square depth.
Attach the Bottom Panel
1. Pin the bottom panel to the lower edge of the tube with RS facing out.
2. Match the long panel edges to the front and back 3-square sections.
3. Match the short panel edges to the left and right side columns.
4. Whipstitch or slip-stitch evenly around.
Top Edging
Join lavender at a back corner with the smaller hook.
Round 1: Ch 1, sc evenly around the top edge, working 21 sc across each square side. Sl st to first sc. (168 sc)
Round 2: Ch 1, hdc in each sc around. Sl st to first hdc. (168 hdc)
Round 3: Ch 1, sc in each hdc around. Invisible join. (168 sc)
Crocheted Handles
Make 2 sturdy lavender handles. Use the smaller hook for a firm fabric that won’t stretch out over time.
Handle Strip
Ch 9.
Row 1: Sc in 2nd ch from hook and in each ch across, turn. (8 sc)
Rows 2-72: Ch 1, working through back loops only, sc in each st across, turn. (8 sc)
Border: Ch 1, rotate. Sc in each of 8 sts across the short end, work 1 sc in the end of each of 72 rows down the long side, sc in each of 8 foundation ch across the lower short end, and work 1 sc in the end of each of 72 rows up the second long side. Add 2 extra sc at each corner as you pass it. Join and fasten off. (168 sc)
Attach Handles
1. Place one handle on the front and one on the back.
2. Set each handle end approximately 2.25 inches / 5.5 cm in from the side edge.
3. Overlap each handle end 1.25 inches / 3 cm inside the bag.
4. Sew a rectangle with an X through each handle end using lavender yarn or strong thread.
5. Repeat for all 4 handle ends.
Handle Checkpoint
Finished handle length should be approximately 22 inches / 56 cm before attaching, creating about a 9.5 inch / 24 cm drop.
Finishing Your Sunflower Tote
You’re almost there! These final steps make all the difference.
Care Instructions
Customization Ideas
Want to make this pattern your own? Here are some easy modifications:
Troubleshooting Common Issues
If something looks off, don’t panic. Here are the most common problems and their fixes:
Square cups: Loosen your flower rounds or block more firmly. Avoid pulling your puff petals too tight.
Square ruffles: Use a smaller hook for the lavender rounds or tighten your corner chains.
Top edge flares: Work the edging with the smaller hook and stick to exactly 21 stitches per square side.
Bag stretches with use: Add a fabric lining and sew the handle ends through both the lining and the crochet fabric for extra security.
Time Estimate and Skill Level
This sunflower granny square tote crochet pattern is rated for adventurous beginners to intermediate crocheters. If you’re comfortable with basic stitches and ready to try some texture techniques, you’ll do great.
Plan for approximately 10 to 14 relaxed hours to complete the entire project. That breaks down nicely into making squares while watching your favorite shows, then an assembly session or two.
You Did It!
Thank you so much for choosing this Lavender Sunflower Granny Square Tote pattern! I genuinely hope you love making it as much as I loved designing it. There’s something so satisfying about watching those sunny flowers come together into a useful, beautiful bag you’ll reach for again and again.
If you make this tote, I would absolutely love to see it! Tag me on Instagram or share a photo in my Facebook group. Seeing your finished projects truly makes my day.
Don’t forget to save this sunflower tote crochet pattern to your Pinterest boards so you can find it whenever you’re ready to start. And if you have any questions or just want to share your progress, drop a comment below. I’m always happy to help!
Want a Quick & Easy Printable Version?
Get a clean, beautifully formatted PDF of this pattern — easy to follow step by step, ready to print or save on any device. No scrolling, no distractions, just the pattern.
Get the Printable PDF →You Might Also Like
- Mint Daisy Spring Barrel Handbag Free Crochet Pattern
- Lavender Dreams Book Sleeve Free Crochet Pattern
- Charcoal Gray Modern Lace Maxi Skirt Free Crochet Pattern
- Pastel Rainbow Unicorn Granny Square Blanket Free Pattern