
Last summer, I found myself standing in front of my closet, frustrated. I had nothing to wear to a garden party that felt like me. Everything was either too casual or trying too hard. What I really wanted was something feminine but understated. Something with texture and movement. Something I could make myself.
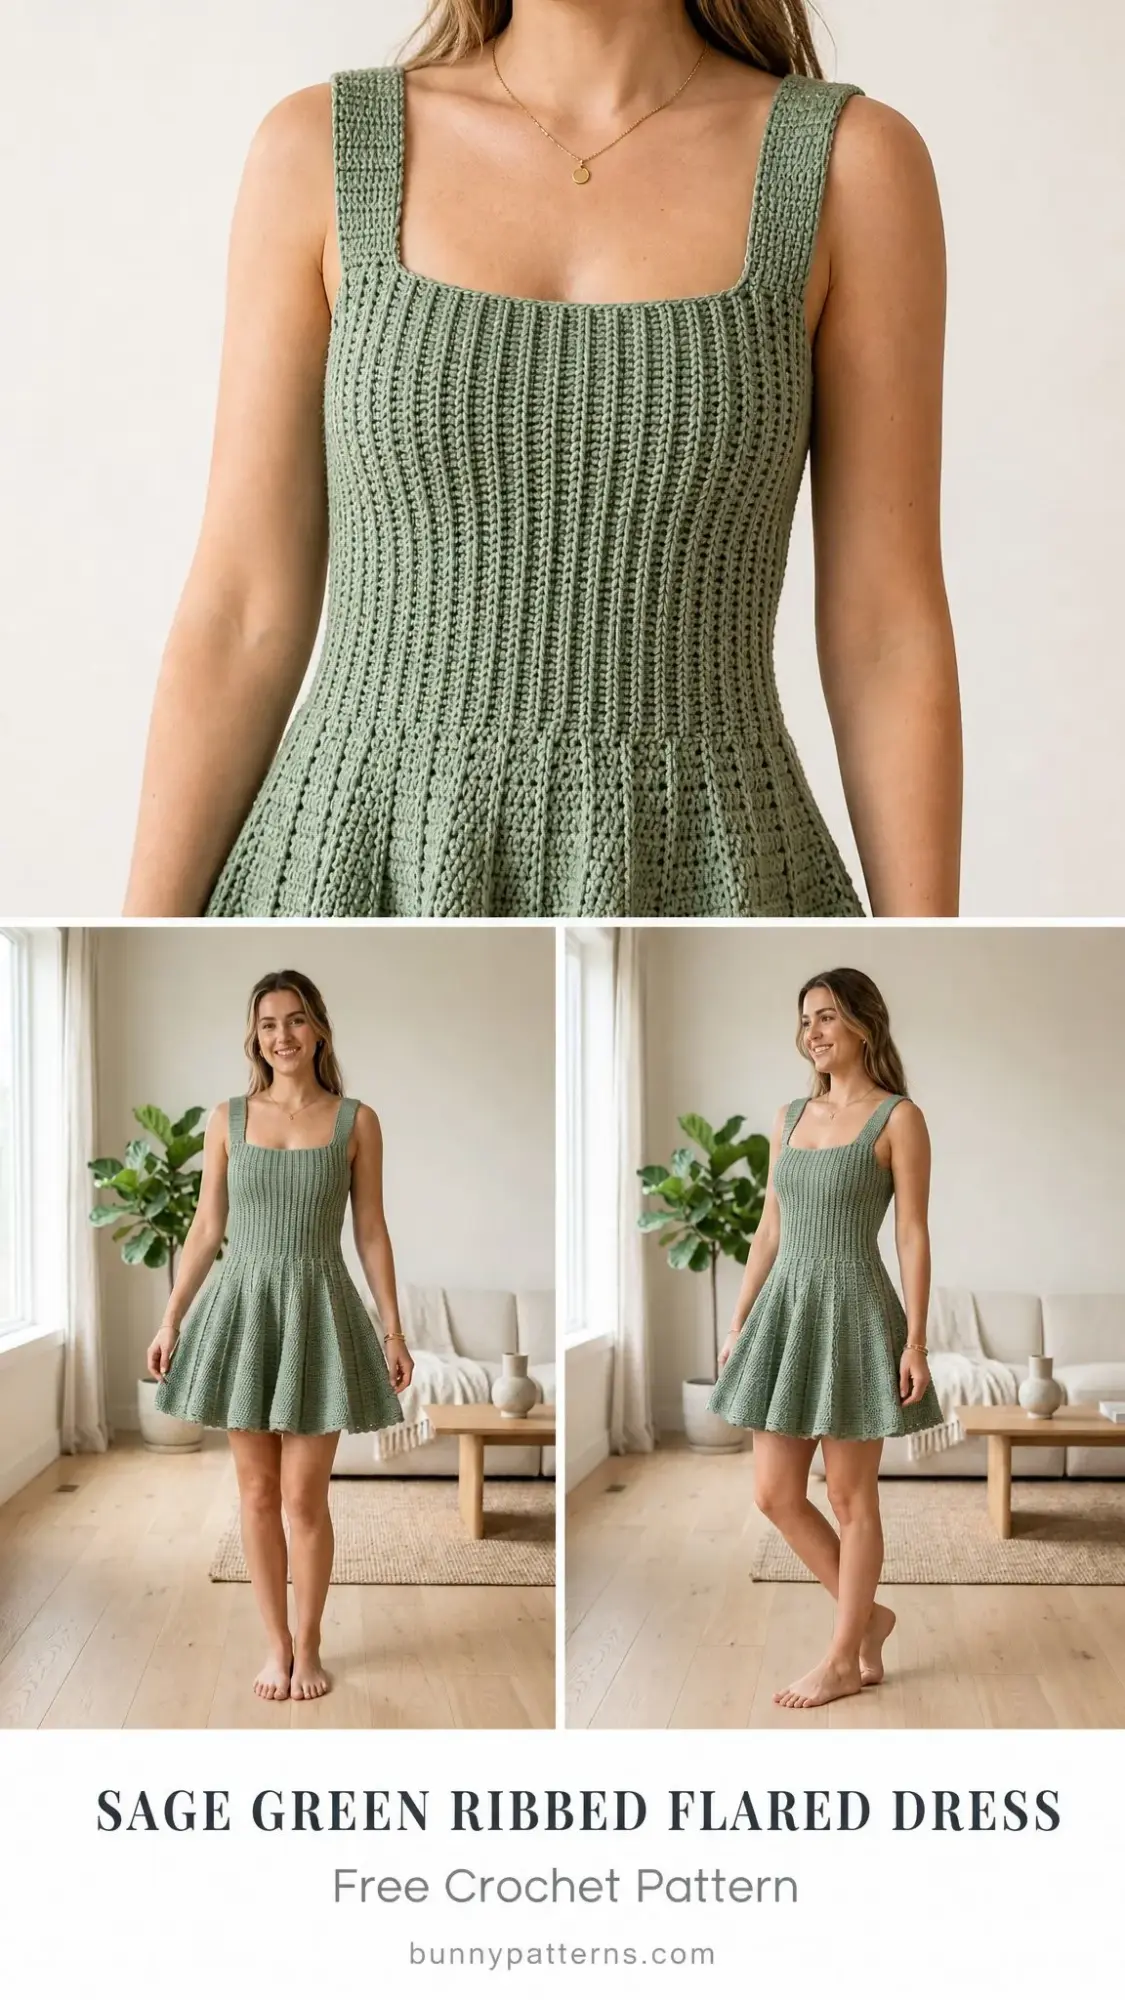
So I grabbed my hooks and got to work. This sage green ribbed flared dress became my answer to that closet crisis. The fitted bodice hugs in all the right places thanks to post stitch ribbing, while the skirt releases into this gorgeous, twirly A-line shape that moves beautifully when you walk.
I will not pretend this is a weekend project. It took me about 40 hours spread over a few weeks. But every single hour was worth it. If you have been craving a handmade garment that looks like it came from a boutique, this is your sign to start.
Pattern Overview
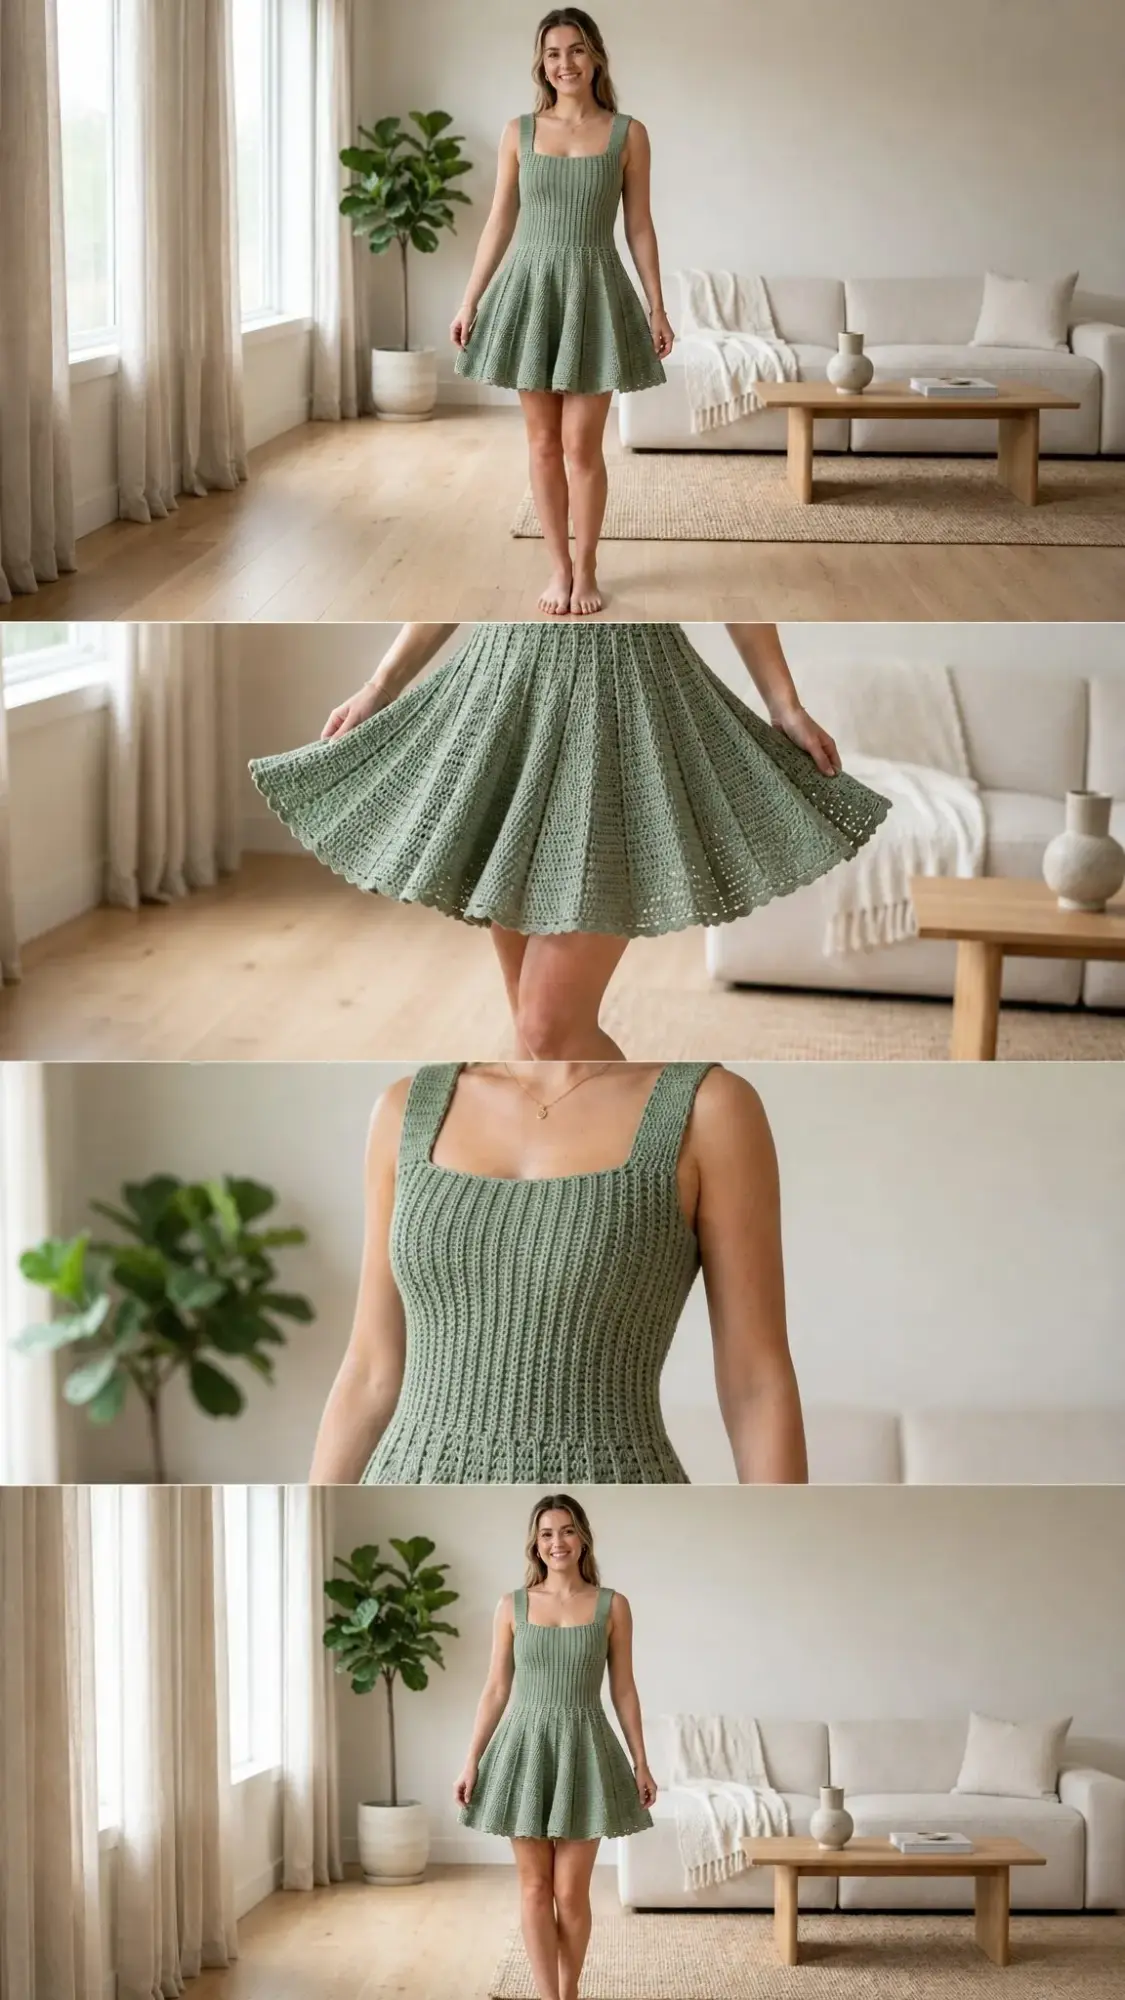
This crochet dress features a structured bodice worked in a one by one rib pattern using front post and back post double crochet stitches. The vertical ribbing creates that compressive, figure-flattering texture you see running from the straps to the waist. At the waistline, the stitches release into an open mesh skirt that fans out dramatically into a full silhouette. A scalloped shell border finishes the hem with a delicate, feminine edge.
The entire dress is worked seamlessly from the top down. No zipper or buttons needed because the ribbed bodice has built-in stretch. The color is a beautiful muted sage green throughout with no color changes required.
Important note: The open-weave skirt means you will want to wear a slip dress or camisole underneath. Plan for that when choosing your undergarments.
Skill Level
This pattern is rated intermediate to advanced.
You will need to be comfortable working in the round continuously, executing front post and back post double crochet stitches consistently across many rounds, managing waist shaping through targeted increases, and reading stitch counts carefully across more than 60 rounds. If you have made garments before and understand how gauge affects fit, you will do great here.
If you are newer to crochet, I would recommend practicing post stitches on a swatch first. Once you get the rhythm, they become second nature.
Time Estimate
Plan for approximately 35 to 55 hours depending on your working speed. The ribbed bodice is the most time-intensive section because each round requires attention to post stitch alignment. Put on a good podcast or audiobook series and settle in for the long haul.
Finished Measurements
This pattern is written for size Small/Medium with customization notes included.
Fit note: The ribbed fabric has significant horizontal stretch. The bodice is designed with 2 to 3 inches of negative ease at the bust, which the rib accommodates snugly. Measure yourself before starting and check the size customization section.
Materials Needed
Yarn: 100 percent cotton DK weight (light weight, CYC 3), approximately 1400 to 1600 yards / 1280 to 1463 meters total in sage green
Recommended yarn options:
Hooks:
Notions:
Gauge (Do Not Skip This)
Bodice ribbing with E-4 / 3.5 mm hook in post stitch rib, unstretched:
20 stitches x 14 rounds = 4 inches / 10 cm
Skirt mesh with F-5 / 3.75 mm hook:
16 stitches x 10 rows = 4 inches / 10 cm
Gauge is mandatory for this crochet pattern. This is a fitted garment. An incorrect gauge will produce a bodice that does not fit. Work a 6-inch swatch in rib, wash and dry it as you plan to care for the finished dress, then measure before beginning.
Abbreviations
Special Stitches Explained
Front Post Double Crochet (FPDC)
This stitch creates the raised vertical columns in the ribbing. Yarn over. Insert your hook from front to back to front around the post (the vertical bar) of the stitch in the row below. You are going around the outside of the post, not through the top loops. Yarn over and pull up a loop so you have 3 loops on hook. Yarn over and draw through 2 loops. Yarn over and draw through the remaining 2 loops. One FPDC complete.
Back Post Double Crochet (BPDC)
This creates the recessed columns between the raised ones. Yarn over. Insert your hook from back to front to back around the post of the stitch below. Complete as a regular double crochet. The combination of FPDC and BPDC creates that beautiful stretchy rib texture.
1×1 Rib in the Round
Alternate 1 FPDC, 1 BPDC around every round. Each round, work FPDC over the previous FPDC columns and BPDC over the previous BPDC columns. This keeps your vertical ribs aligned.
Shell Stitch
Work 5 dc into the same stitch or space. This forms one decorative shell for the hem edging.
Pattern Instructions
Section 1: Front Strap (Make 2)
Each strap is approximately 3 inches wide and 5 inches long. Work both straps identically.
Using E-4 / 3.5 mm hook, ch 17.
Row 1 (foundation): Dc in 4th ch from hook and in each ch across. Turn. (15 dc)
Row 2 (RS, begins rib): Ch 2 (does not count as st). FPDC around post of next dc, BPDC around post of next dc. Rep (FPDC, BPDC) across to last st, FPDC around post of last dc. Turn. (15 sts: 8 FPDC, 7 BPDC)
Row 3 (WS): Ch 2. BPDC around post of next FPDC, FPDC around post of next BPDC. Rep (BPDC, FPDC) across to last st, BPDC around post of last FPDC. Turn. (15 sts)
Rows 4 through 17: Alternate Rows 2 and 3, maintaining rib alignment. (15 sts each row)
After Row 17, strap measures approximately 5 inches. Fasten off each strap and set aside.
Section 2: Bodice Foundation and Joining
Using E-4 / 3.5 mm hook, ch 121. Being careful not to twist, sl st into first ch to form a ring. (120 ch)
Round 1 (Bodice Setup Round): Ch 3 (counts as first dc). Dc in each ch around. Sl st to top of beg ch-3 to join. (120 dc)
Round 2 (Begin Rib): Ch 2 (does not count as st throughout bodice). FPDC around post of next dc, BPDC around post of next dc. Rep (FPDC, BPDC) around. Sl st to first FPDC to join. (120 sts: 60 FPDC, 60 BPDC)
Rounds 3 through 45: Rep Round 2, working FPDC over FPDC and BPDC over BPDC of previous round. Place stitch markers at positions 1 and 61 to mark side seam points. (120 sts each round)
After Round 45, bodice measures approximately 13 inches tall. This is your waist.
Attaching Straps to Bodice
Lay the bodice flat. The front panel is 60 stitches wide, the back is 60 stitches wide.
Front placement: Stitches 1 through 15 = right front strap zone. Stitches 16 through 44 = center front neckline (remains open for square neck). Stitches 45 through 60 = left front strap zone.
Back placement: Stitches 61 through 75 = right back strap zone. Stitches 76 through 104 = center back neckline (open). Stitches 105 through 120 = left back strap zone.
Using a tapestry needle and matching yarn, whip stitch the cast-on edge of each strap to the corresponding 15 stitches at the top edge of the bodice. Attach straps at all four positions: right front, left front, right back, left back.
Checkpoint 1: The bodice should measure approximately 18 inches from strap top to bodice bottom. Circumference unstretched should measure approximately 24 inches.
Section 3: Waist Transition
Switch to F-5 / 3.75 mm hook.
Round 46 (Waist Increase Round): Ch 1 (does not count as st). Work 2 sc into each st around. Sl st to first sc to join. (240 sc)
Round 47 (Transition Mesh Round): Ch 3 (counts as first dc). Sk next sc. Dc in next sc. Ch 1. Sk next sc. Rep (dc, ch 1, sk 1) around. Sl st to top of beg ch-3 to join. (120 dc, 120 ch-1 sp)
Round 48: Ch 3 (counts as first dc). Dc in ch-1 sp. Dc in next dc. Rep (dc in ch-sp, dc in dc) around. Sl st to top of beg ch-3. (240 dc)
Section 4: Skirt Body
Round 49: Ch 2 (counts as first hdc). Hdc in each st around. Sl st to top of beg ch-2 to join. (240 hdc)
Round 50: Ch 2. Hdc in next hdc. Ch 1. Sk 1 hdc. Rep (hdc in next hdc, ch 1, sk 1 hdc) around. Sl st to top of beg ch-2 to join. (120 hdc, 120 ch-1 sp)
Round 51: Ch 2. (Hdc in ch-1 sp, ch 1) around, working into each ch-1 sp and skipping over the hdc sts. Sl st to top of beg ch-2. (120 hdc, 120 ch-1 sp)
Rounds 52 through 55: Alternate Rounds 50 and 51, maintaining the traveling mesh pattern. (240 positions each round)
Round 56 (Second Skirt Increase Round): Ch 1. (2 sc in next hdc, sc in ch-1 sp) around. Sl st to first sc. (360 sc)
Rounds 57 through 59: Ch 1. Sc in each sc around. Sl st to first sc. (360 sc each round)
Checkpoint 2: Skirt should measure approximately 10 inches from waist increase point. Hem circumference approximately 88 to 92 inches. Total dress length approximately 28 inches.
Section 5: Hem Scallop Edging
Round 60 (Scallop Edging): Ch 1. Sl st in first sc. (Sk 2 sc, 5 dc shell in next sc, sk 2 sc, sl st in next sc) around. (60 shells)
Fasten off. Weave in end securely.
Section 6: Strap Edging (Optional)
Using E-4 / 3.5 mm hook, join yarn at top edge of one strap.
Round 1: Ch 1. Sc evenly around entire top perimeter of strap. Work approximately 15 sc along top edge, 17 sc down each long side. Sl st to first sc. Fasten off.
Repeat for second strap.
Size Customization Tips
Adjusting bust size:
Adjusting length:
Finishing and Blocking
Weave in all ends through at least 1 inch of stitches in two directions for security.
For wet blocking, submerge the dress in cool water with gentle detergent. Press gently without wringing. Lay flat on blocking mat, pin bodice to 24 inches circumference (12 inches wide laid flat), and smooth skirt into full circle. Pin hem evenly, stretching scallop edging open gently. Allow to dry completely for 24 to 48 hours.
Final Thoughts on This Crochet Dress Pattern
Making your own dress from scratch is one of the most rewarding things you can do as a crocheter. Yes, this sage green ribbed flared dress takes time and attention. But when you slip it on and see how beautifully it fits, how the skirt swishes when you walk, how the ribbing flatters your figure, you will understand why handmade garments are worth every stitch.
Take your time with this one. Check your gauge. Trust the process. And when you finish, wear it proudly knowing you created something truly special with your own two hands.
If this pattern is calling your name, go ahead and save it to your Pinterest boards so you can find it when you are ready to start. And if you make this dress, I would absolutely love to see it. Drop a comment below or tag me on Instagram with your finished piece. Happy crocheting, friend!
You Might Also Like
- Ocean Breeze Granny Square Tote Free Crochet Pattern
- Sage Green Boho Crochet Backpack Free Pattern
- Sunshine Daisy Book Cover Free Crochet Pattern
- Lavender Dream Kitty Tote Bag Free Crochet Pattern