
Last summer, I found myself standing in front of my closet with absolutely nothing to wear to my best friend’s garden party. Everything felt too casual or too formal, too boring or too fussy. I wanted something that would turn heads but still feel like me. That frustration sent me straight to my yarn stash, and honestly, it was the best decision I made all season.
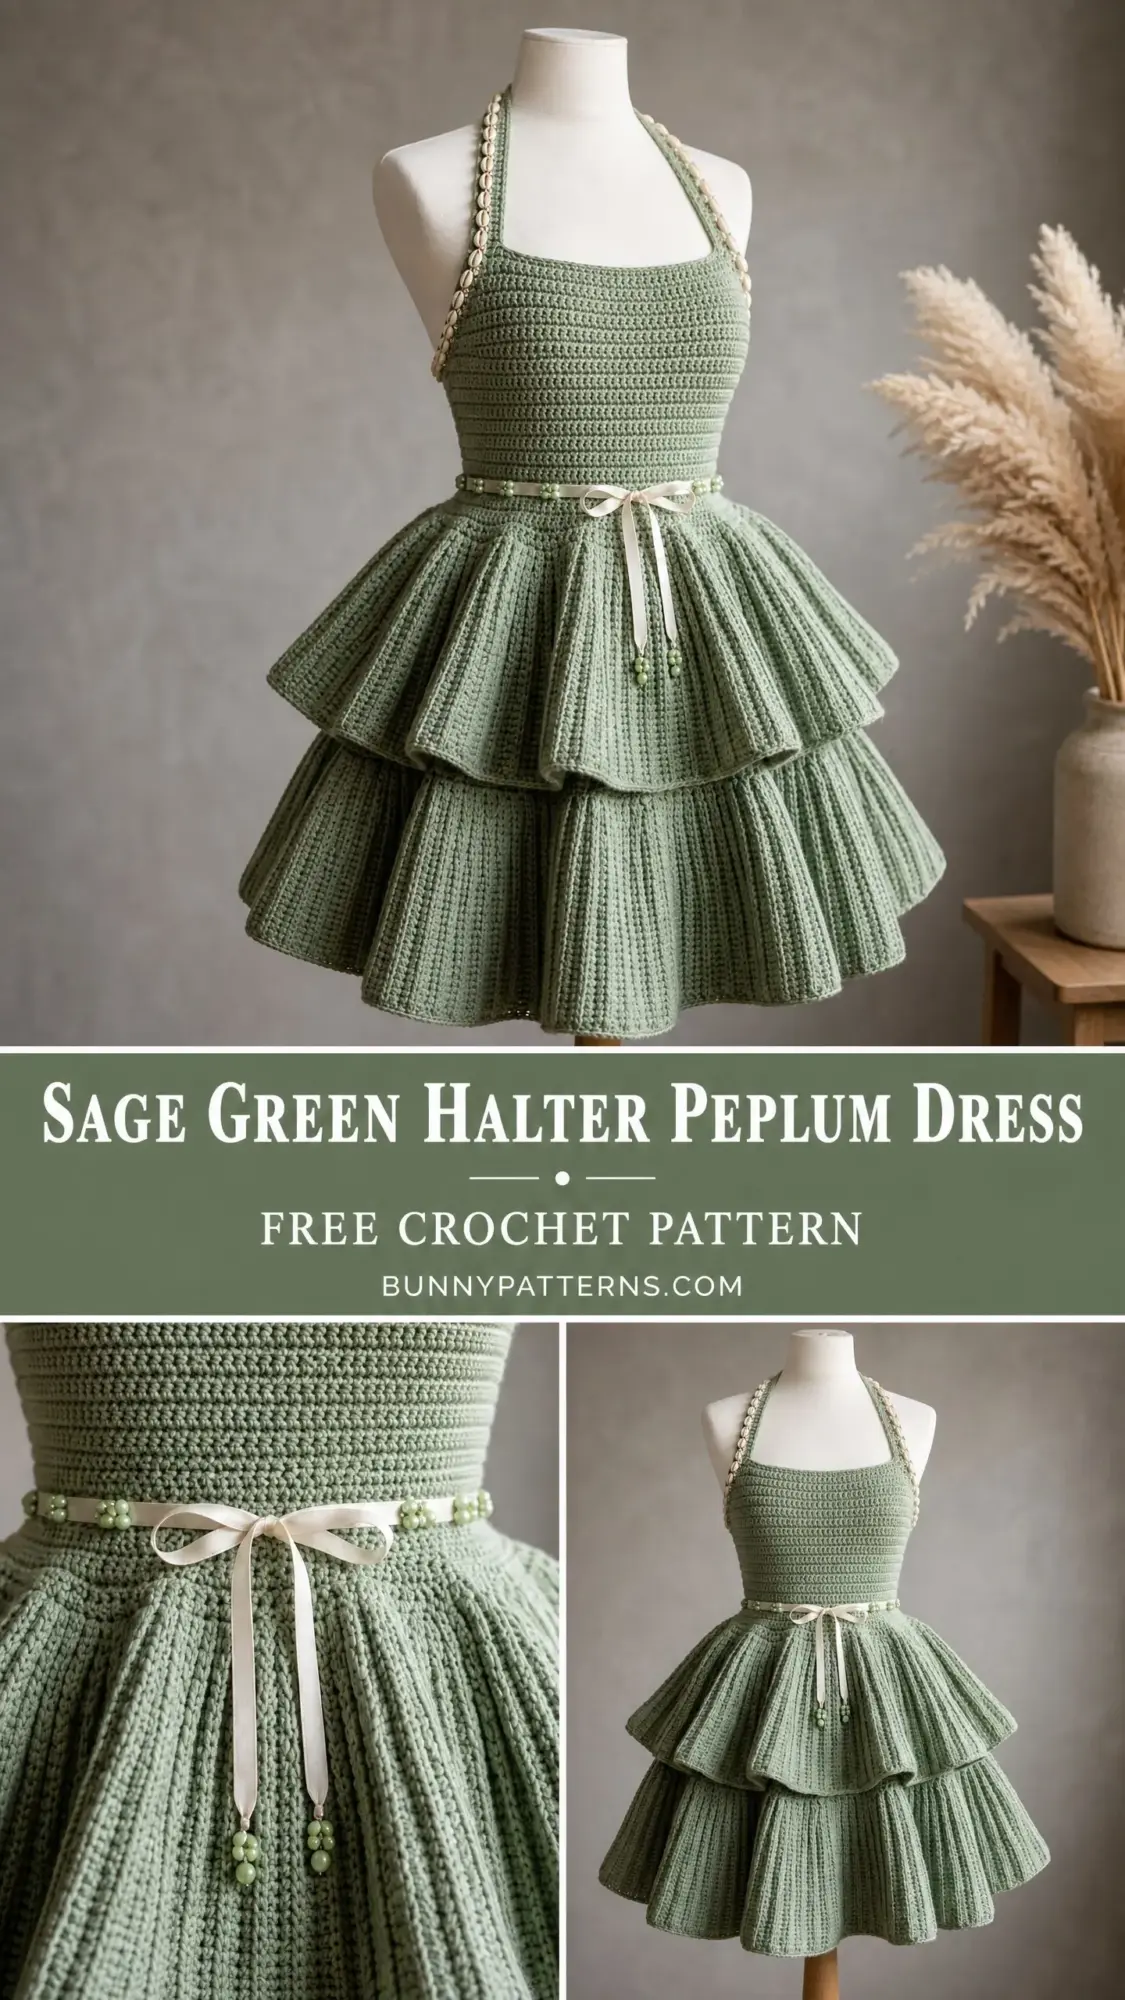
This sage green halter peplum dress came together over two weeks of evening crochet sessions on my porch. I kept thinking about how I wanted a dress that looked expensive and boutique-worthy but was actually something I could make with my own two hands. The double-tiered ruffle skirt, the elegant open back, the delicate shell and bead embellishments on the straps. It all came together better than I imagined.
If you have been dreaming of creating your own statement piece for warm weather events, this is your sign. This dress is absolutely worth the time investment, and I am walking you through every single stitch to get you there.
Why This Halter Peplum Dress Pattern Works
This crochet dress combines a fitted bodice with a dramatically ruffled two-tier skirt. The silhouette is universally flattering. The structured bodice hugs your waist and bust while the generous ruffles add movement and volume below. Think cocktail party meets bohemian beach wedding.
The sage green color photographs beautifully and works across seasons. Pair it with sandals and statement earrings for summer, or layer it over a turtleneck with boots when temperatures drop.
What makes this design special is the ribbed slip-stitch texture on the skirt tiers. This creates vertical ridges that mimic soft rib knit fabric and give the ruffles gorgeous drape and body. Combined with the dense single crochet (sc) bodice, you get structure where you need it and flow where you want it.
Skill Level and Time Commitment
This pattern is rated intermediate. You should feel comfortable working flat rows of single crochet with shaping, working in the round for the skirt, and handling finishing techniques like seaming and embellishment attachment.
No advanced stitch techniques are required. The main skills you will use are basic increases and decreases, back loop only stitches, and counting carefully through the bodice shaping.
Estimated time: 25 to 35 hours for an experienced intermediate crocheter. I recommend breaking this into sessions. Work the bodice one week, then tackle each skirt tier separately. The dress is constructed in pieces, so you can easily set it aside and pick it back up.
Finished Measurements
This pattern is written for size Small to Medium with the following finished dimensions:
I have included size customization tips at the end of this pattern if you need to go larger or smaller.
Materials You Will Need
Yarn
DK weight (CYCA 3) cotton or cotton-blend yarn in sage green. You will need approximately 900 to 1100 yards (823 to 1006 meters) total.
Here are my top yarn recommendations:
Lion Brand 24/7 Cotton in Eucalyptus or Fern is my first choice. This 100% mercerized cotton gives excellent stitch definition and holds structure beautifully for the dense bodice. It is widely available and machine washable.
Paintbox Yarns Cotton DK in Spearmint or Pistachio Green is a budget-friendly option with consistent twist and lovely drape for the ruffle tiers.
Cascade Yarns Ultra Pima in Fern is notably soft against skin, which matters for a halter design with bare skin at the back and neckline.
Choose any smooth DK weight cotton that achieves gauge. Avoid fuzzy, hairy, or highly elastic yarns. The stitch definition depends on a smooth, inelastic fiber.
Hook
US size E-4 / 3.5 mm crochet hook
Use this size throughout unless your gauge swatch demands adjustment.
Notions
Gauge
22 sc x 24 rows = 4 inches x 4 inches (10 cm x 10 cm), worked flat in single crochet using US size E-4 / 3.5 mm hook, after blocking.
For skirt tiers: 20 sts x 22 rounds = 4 inches x 4 inches (10 cm x 10 cm) using the ribbed texture stitch.
Gauge is mandatory for a fitted garment. Please swatch before starting. Going up one hook size will give a larger, drapier fabric. Going down will give a tighter, more structured fabric.
Abbreviations and Stitch Definitions
Let me walk you through every stitch abbreviation you will encounter:
Special Stitches
Ribbed Single Crochet (Rsc)
This creates the beautiful textured fabric of the skirt tiers. Insert your hook into the back loop only of the next stitch. Yarn over and pull up a loop. Yarn over and draw through both loops on hook.
When you work every stitch in a round through the back loop only, you get a deeply textured, vertically ridged fabric that mimics soft rib knit. This is the secret to the skirt’s gorgeous drape.
Extended Single Crochet (esc)
Insert hook into the next stitch. Yarn over and pull up a loop (2 loops on hook). Yarn over and draw through the first loop only (2 loops remain). Yarn over and draw through both remaining loops.
This stitch is slightly taller than a standard single crochet and creates smooth, even increases without visible holes.
Waist Channel Row
This creates eyelets for threading the ribbon belt: ch 2, skip 1 st, sc in next st across the round, sl st to first sc to close.
Pattern Notes Before You Begin
1. The bodice is worked flat in rows, then seamed into a tube. The back remains open above the halfway point for the halter silhouette.
2. The skirt is worked in the round, attached to the lower edge of the bodice.
3. The halter straps measure approximately 18 to 22 inches (46 to 56 cm) from front bust edge to back tie point.
4. Stitch counts in parentheses at the end of each row or round reflect total working stitches, not including turning chains.
5. The turning chain does NOT count as a stitch. Always chain 1 to turn and work the first sc into the first stitch at the base of the turning chain.
6. The skirt tier increases are intentionally dramatic. The fabric will bunch during increase rounds but relaxes beautifully with blocking.
7. Wet block the finished dress. Cotton benefits greatly from wet blocking.
Section 1: Bodice Instructions
The bodice is worked flat from the waist upward to the underarm. You will begin with the full circumference laid flat, shape for the waist, then increase for the bust.
Foundation
Foundation chain: Chain 156.
Row 1 (WS): Starting in the 2nd chain from hook, sc in each chain across. Turn. (154 sc)
Row 2 (RS): Ch 1, sc in each st across. Turn. (154 sc)
Rows 3 through 6: Repeat Row 2. (154 sc at end of each row)
Waist Section
Rows 7 through 14: Ch 1, sc in each st across. Turn. (154 sc at end of each row)
Bust Shaping
After Row 14, you will increase from 154 stitches to 188 stitches over the next several rows to accommodate the bust measurement.
Row 15 (increase row): Ch 1, sc in first 9 sts, inc in next st, [sc in next 18 sts, inc in next st] 8 times, sc in rem sts to end. Turn. (162 sc)
Row 16: Ch 1, sc in each st across. Turn. (162 sc)
Row 17 (increase row): Ch 1, sc in first 9 sts, inc in next st, [sc in next 19 sts, inc in next st] 7 times, sc in rem sts. Turn. (170 sc)
Row 18: Ch 1, sc in each st across. Turn. (170 sc)
Row 19 (increase row): Ch 1, sc in first 10 sts, inc in next st, [sc in next 20 sts, inc in next st] 7 times, sc in rem sts. Turn. (178 sc)
Row 20: Ch 1, sc in each st across. Turn. (178 sc)
Row 21 (increase row): Ch 1, sc in first 10 sts, inc in next st, [sc in next 21 sts, inc in next st] 7 times, sc in rem sts. Turn. (186 sc)
Row 22: Ch 1, sc in each st across. Turn. (186 sc)
Row 23 (final bust increase): Ch 1, sc in first 92 sts, inc in next st, sc in rem 93 sts. Turn. (188 sc)
Rows 24 through 28: Ch 1, sc in each st across. Turn. (188 sc at end of each row)
Checkpoint 1
After Row 28, your flat bodice piece should measure approximately 6 inches (15 cm) tall and approximately 34 inches (86 cm) wide unstretched. The lower edge (Row 1) is the waist at approximately 28 inches (71 cm).
Row 29 (edging): Ch 1, sc in each st across. Fasten off, leaving a long tail for seaming. (188 sc)
Section 2: Seaming the Bodice
Fold the bodice so the two short side edges align. The bodice will form a tube.
Using your yarn tail and a yarn needle, seam the lower half of the side edges together. Join from Row 1 upward through approximately Row 14 using mattress stitch or slip stitch seam. This is about halfway up the bodice height.
Leave Rows 15 through 29 unseamed on both sides. This creates the open back design. The halter straps will hold the front in place.
Turn right side out after seaming.
Section 3: Halter Straps
Each strap begins from one upper corner of the front bodice.
Step 1: Attach yarn to the right upper front corner of the bodice (Row 29, rightmost stitch).
Step 2: Work a slip stitch cord: [insert hook into the chain below the hook, pull up a loop, draw through both loops] repeat until the strap measures approximately 20 inches (51 cm). Alternatively, work a foundation chain of 110 chains, then work a row of sl st back along the chain.
Step 3: Fasten off.
Repeat for the left strap, attaching to the left upper front corner.
Strap Embellishment
Before or after attaching, thread cowrie shells and green beads onto each strap. Space cowrie shells approximately every 3/4 inch (2 cm) along the length from the front bodice edge toward the nape.
Attach a small cluster of green beads at the nape tie point using a short ch 8 loop knotted with beads threaded on.
Checkpoint 2
Both straps should be attached and measure approximately 20 inches (51 cm) each. The bodice should sit flat with the front and lower sides seamed into a tube and the upper back open.
Section 4: Skirt Tier 1
The skirt attaches directly to the lower edge of the bodice at the waist. You will work in the round using the Ribbed Single Crochet (Rsc) stitch.
Joining Round: With RS of bodice facing, attach yarn at the side seam. Ch 1, sc in each foundation chain stitch around the lower edge of the bodice. Sl st to first sc to join. (154 sc)
Rnd 1 (Waist Channel): Ch 2, skip 1 st, [sc in next st, ch 2, skip 1 st] around. Sl st to first sc. (77 ch-2 sps, 77 sc)
This creates the eyelets for your ribbon belt.
Rnd 2 (close channel): Ch 1, [sc in next sc, sc in ch-2 sp] around. Sl st to first sc. (154 sc)
Rnd 3 (Tier 1 ruffle increase): Ch 1, [inc in each st] around (work 2 sc in every single stitch). Sl st to first sc. (308 sc)
This dramatic doubling creates your first gorgeous ruffle tier.
Rnd 4: Ch 1, [Rsc in each st] around (blo sc in every st). Sl st to first sc. (308 Rsc)
Rnds 5 through 8: Repeat Rnd 4. Work Rsc in each st around each round, joining with sl st. (308 Rsc each round)
Rnd 9 (gentle expansion): Ch 1, Rsc in first 19 sts, inc in next st, [Rsc in next 19 sts, inc in next st] 14 times, Rsc in rem 3 sts. Sl st to first sc. (323 sc)
Rnds 10 through 14: Ch 1, Rsc in each st around. Sl st to first sc. (323 Rsc each round)
Rnd 15 (hem expansion): Ch 1, [Rsc in next 22 sts, inc in next st] 14 times, Rsc in rem 1 st. Sl st. (337 sc)
Rnds 16 through 18: Ch 1, Rsc in each st around. Sl st to first sc. (337 Rsc each round)
Rnd 19 (final Tier 1 row): Ch 1, sc in each st around (working in both loops for a firm tier-separation edge). Sl st to first sc. (337 sc)
Do not fasten off. Continue to Tier 2.
Checkpoint 3
Tier 1 should measure approximately 5 inches (13 cm) deep from the waist. The circumference at the lower edge confirms a full, gathered ruffle appearance.
Section 5: Skirt Tier 2
Rnd 20 (Tier 2 ruffle increase): Ch 1, [inc in each st] around. Sl st to first sc. (674 sc)
This creates your dramatic second-tier ruffle.
Rnd 21: Ch 1, Rsc in each st around. Sl st to first sc. (674 Rsc)
Rnds 22 through 26: Ch 1, Rsc in each st around. Sl st to first sc. (674 Rsc each round)
Rnd 27 (expansion): Ch 1, [Rsc in next 32 sts, inc in next st] 20 times, Rsc in rem 14 sts. Sl st. (694 sc)
Rnds 28 through 34: Ch 1, Rsc in each st around. Sl st to first sc. (694 Rsc each round)
Rnd 35 (lower expansion): Ch 1, [Rsc in next 33 sts, inc in next st] 20 times, Rsc in rem 14 sts. Sl st. (714 sc)
Rnds 36 through 38: Ch 1, Rsc in each st around. Sl st to first sc. (714 Rsc each round)
Rnd 39 (hem round): Ch 1, sc in each st around (both loops for firm hem edge). Sl st to first sc. (714 sc)
Rnd 40 (optional decorative hem): Ch 1, [sl st in next st, ch 3, sk 1 st] around until sts are depleted. Sl st to close. Fasten off.
For a clean hem, work Rnd 40 as sl st in each st around instead. Fasten off.
Checkpoint 4
Tier 2 is complete. Total skirt length from waist is approximately 12 inches (30 cm). Total dress length from waist to hem is approximately 18 inches (46 cm). The extremely full hem creates the layered ruffle silhouette.
Section 6: Waist Belt Assembly
Thread your satin ribbon through the waist channel eyelets created in Rnds 1 and 2. The ribbon passes through every other eyelet around the full circumference. Begin and end at the center front.
Allow the ribbon ends to hang as ties at the center front. The total ribbon length should be approximately 40 inches (102 cm) to create a decorative bow with hanging ends.
Thread small green beads onto the two hanging ribbon ends. Use a beading needle with clear thread. Fold the ribbon end back on itself and stitch a green bead at the very tip of each ribbon tail. Add 3 to 5 green beads in a small cluster at each tail, secured with knots between each bead.
Using cream sewing thread, tack the bow in place at center front with 3 small stitches through the center of the bow knot. Leave the ribbon tails hanging freely.
Finishing Your Dress
Weave in all ends securely. Pay special attention to the Tier 1 and Tier 2 increase rounds where multiple strands may be present from yarn joins.
Wet block by filling a basin with cool water and a small amount of wool wash. Submerge the entire dress and soak for 20 minutes. Gently press out water without wringing. Roll in a clean towel to remove excess moisture.
Place the dress on a flat surface or fit over a dress form. Pin the bodice to finished measurements. Spread the skirt tiers out evenly so they fan open. Allow to dry completely away from direct sunlight.
After blocking, check all cowrie shell and bead attachments. Re-secure any that have loosened. Inspect the side seam and re-stitch any gaps before wearing.
Size Customization Tips
To make a larger size: Add stitches to the foundation chain in multiples of 2. Every 2 added stitches adds approximately 0.36 inches (0.9 cm) to the bodice circumference. For one full size up (adding approximately 2 inches/5 cm), add 12 stitches to the foundation chain (chain 168 for medium-large). Increase all subsequent stitch counts proportionally.
To lengthen the skirt: Add additional even rounds between expansion rounds in each tier. Each round at gauge adds approximately 0.18 inches (0.46 cm).
To shorten the bodice: Work fewer even rows between the last increase row and Row 29.
For a more modest neckline: Work the bodice 2 to 4 rows taller.
Care Instructions
Hand wash in cool water with mild detergent. Lay flat to dry. Do not put in the dryer. Cotton yarn can be lightly steamed with an iron on a low cotton setting, holding the iron 1 inch (2.5 cm) above the fabric surface. Never press directly onto the crochet fabric.
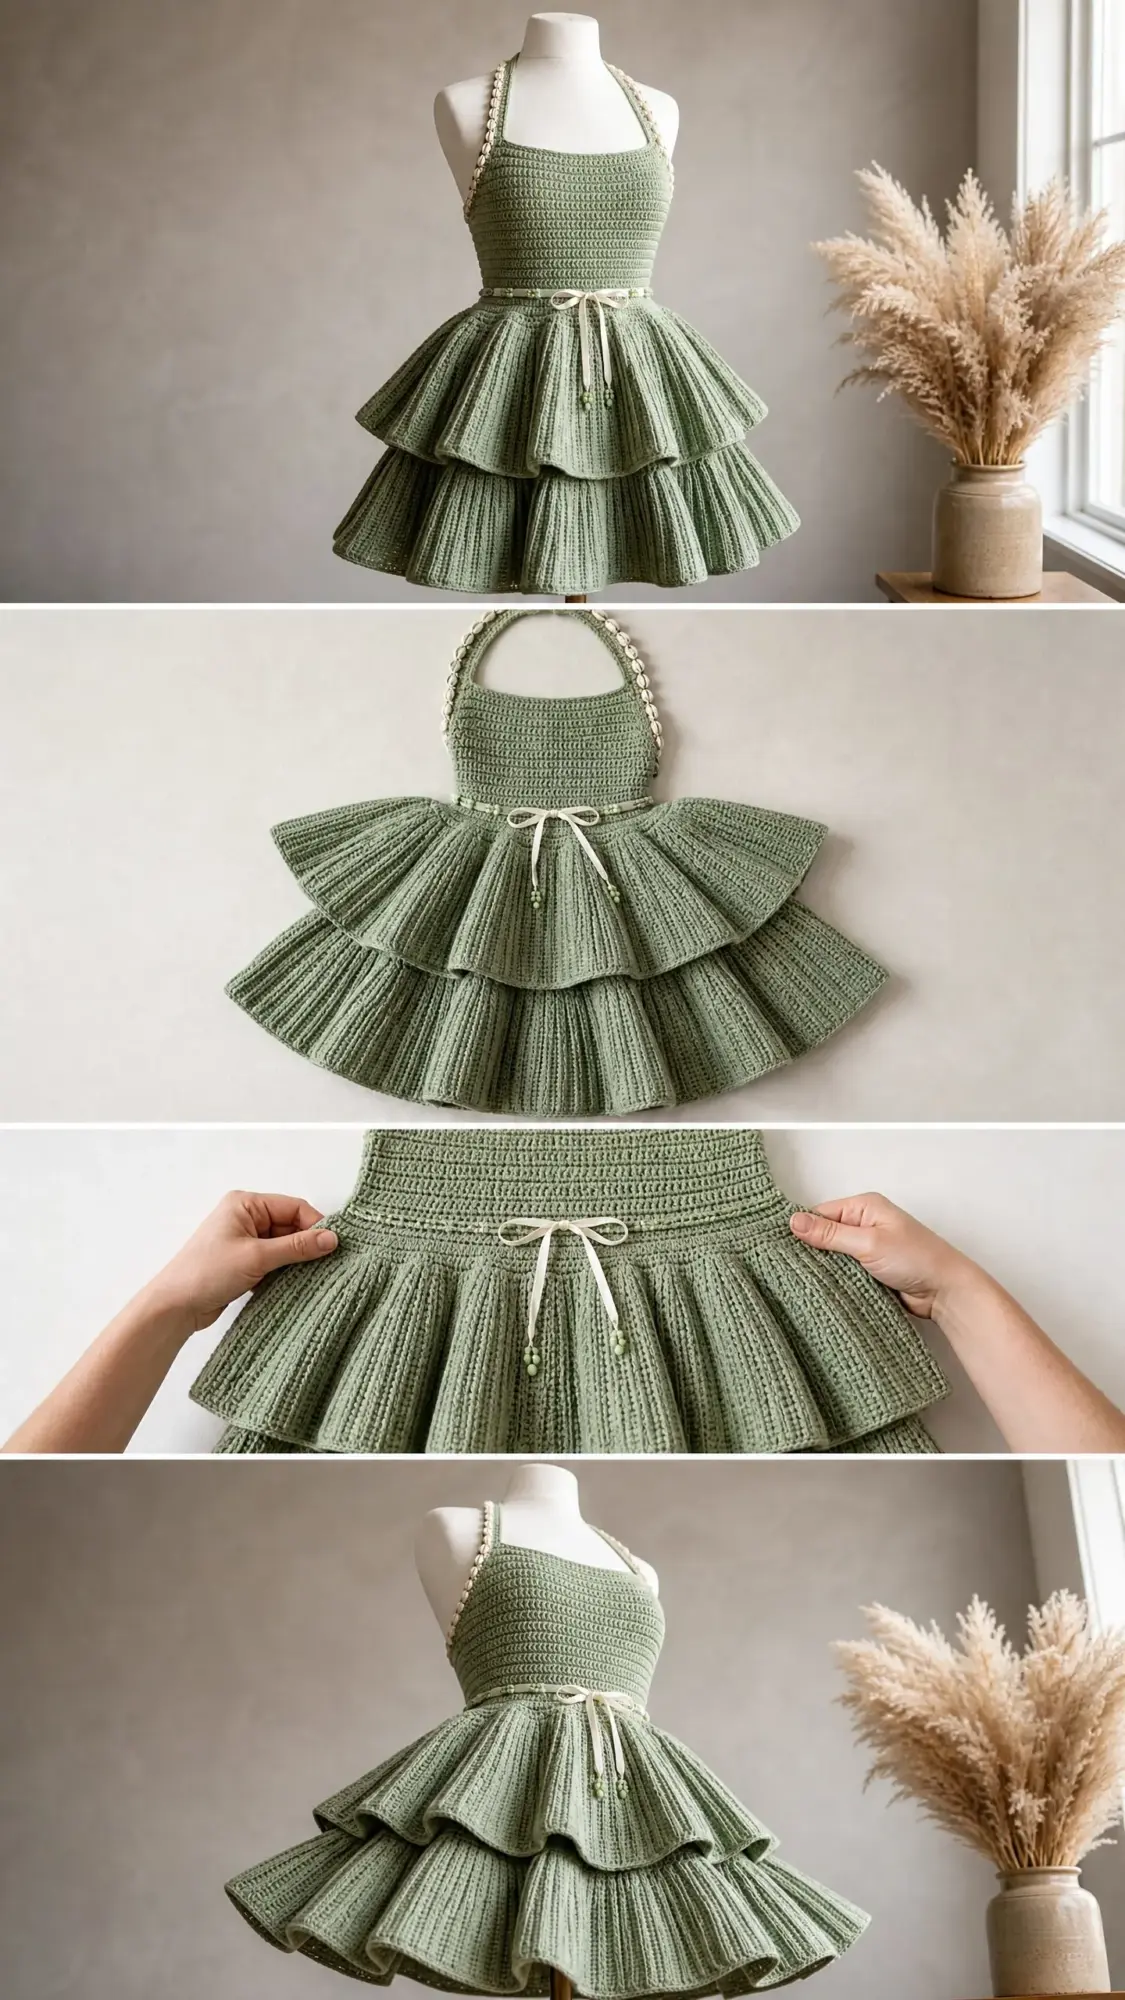
You Did It!
Thank you so much for choosing this pattern for your next crochet project. I genuinely hope you love making this dress as much as I loved designing it. When you finish, I would absolutely love to see your creation. Tag me on Instagram or share in our Facebook group. Seeing your makes is honestly the best part of my day.
If this pattern has you excited to get started, go ahead and pin it to your favorite Pinterest board so you can find it when you are ready. And please drop a comment below once you have made yours. I cannot wait to hear which color you chose and how it turned out for you!
You Might Also Like
- Dusty Rose Openwork Draped Poncho Free Crochet Pattern
- Lavender Dream Kitty Tote Bag Free Crochet Pattern
- Lavender Rose Granny Square Tote Free Crochet Pattern
- Sage Green Textured Clutch Bag Free Crochet Pattern