
I’ve been looking for the perfect baby dress pattern for months now, and this one stopped me in my tracks. The combination of that creamy mesh bodice with the minty fan stitch skirt is exactly what I want to see on a little one at a spring gathering or summer photo session.
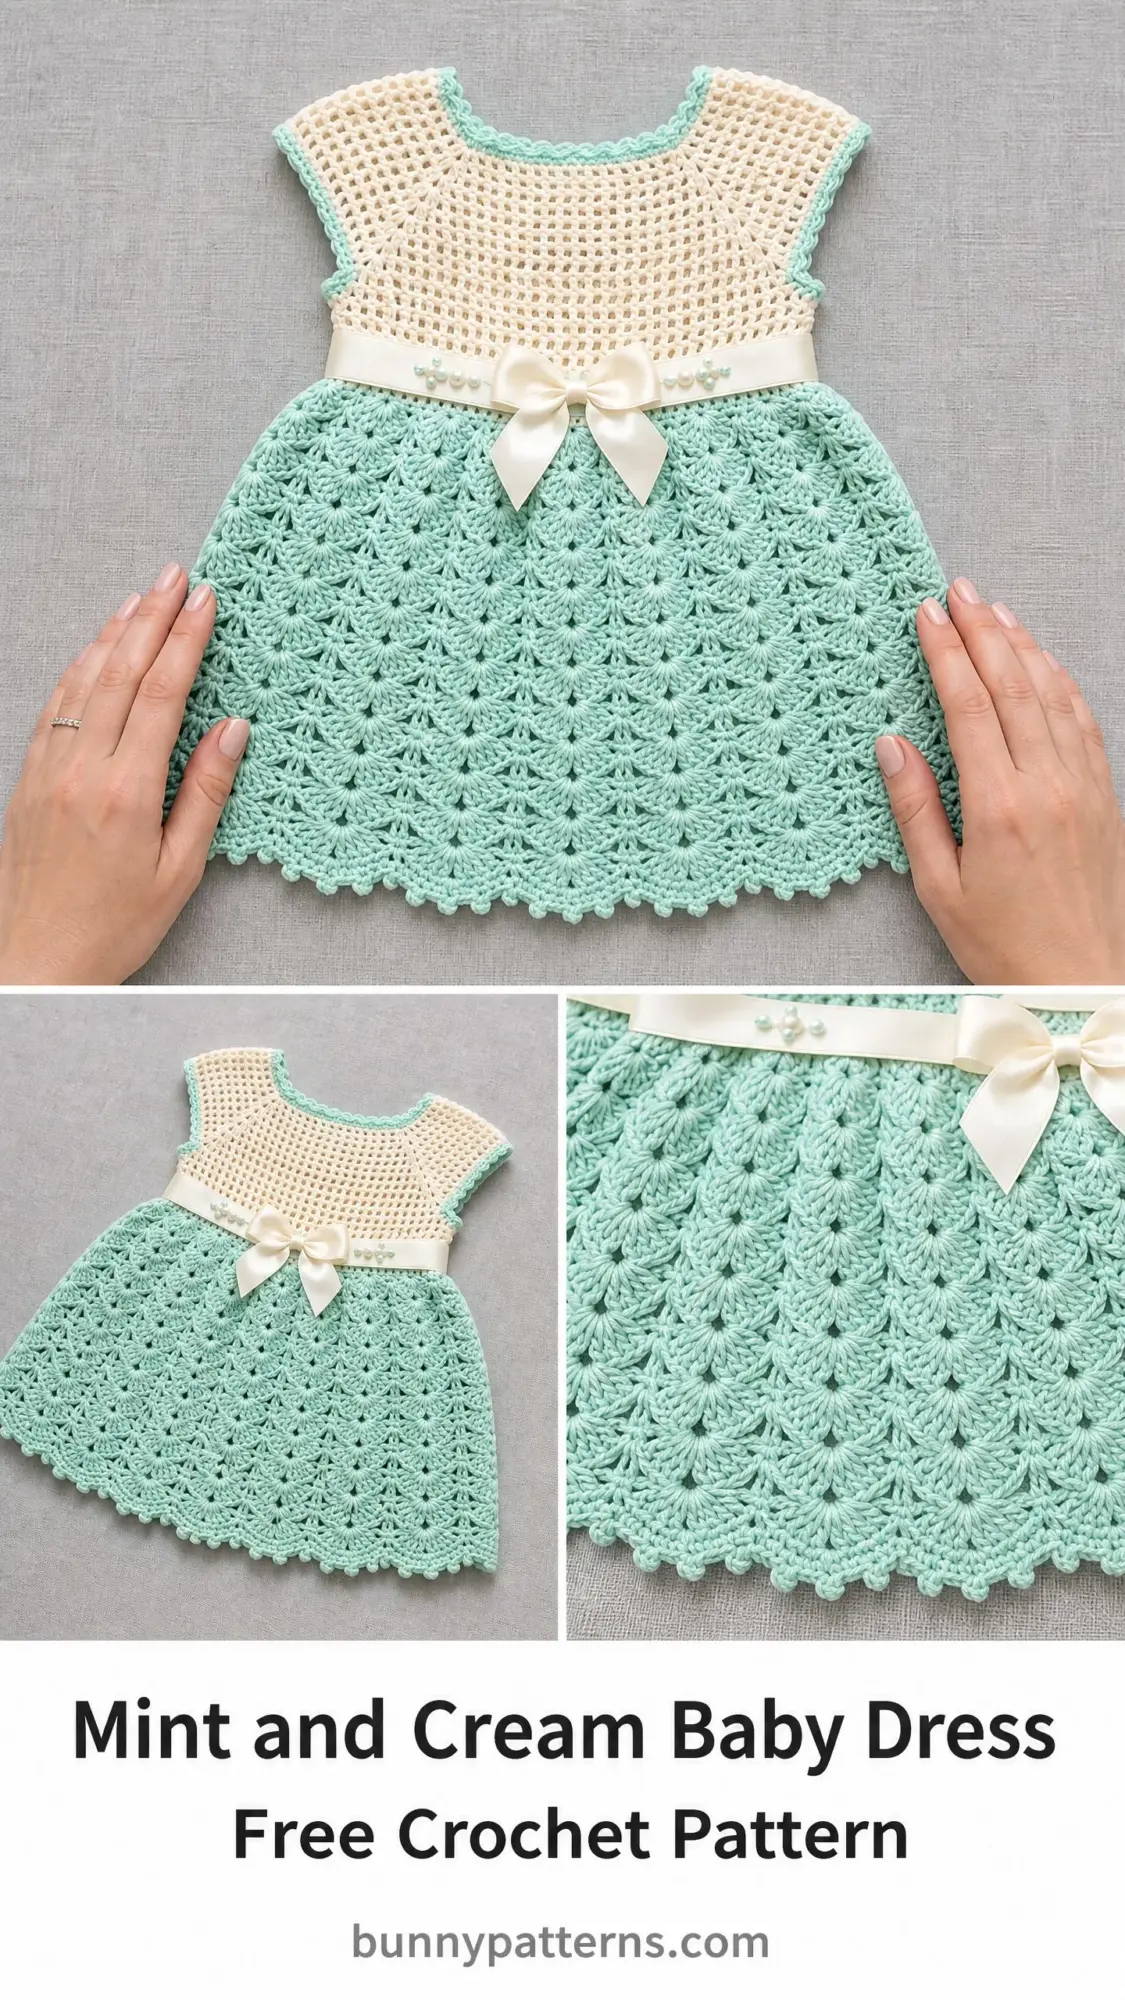
This is my favourite kind of project. It looks intricate and impressive, but the construction is actually straightforward once you understand the rhythm. You work from the top down in seamless rounds, the cap sleeves form naturally from the yoke shaping, and that gorgeous scalloped hem comes together almost like magic.
Whether you’re making this for a baby shower gift, a grandchild, or your own little one, I think you’ll love how this dress works up. Let me walk you through everything you need to know.
Why This Baby Dress Pattern Works So Well
The genius of this design is in the construction method. You start at the neckline and work your way down, which means no seaming and no guesswork about fit. The bodice uses a simple raglan increase system that shapes the chest while creating those sweet little cap sleeves without any extra work on your part.
The skirt is where things get really pretty. That fan shell stitch creates the scalloped, textured look you see in the finished piece. Each shell is just five double crochets worked into a single stitch, fanned out between single crochets. Once you complete one round, the pattern clicks and your hands take over.
The satin ribbon at the waist adds a polished touch that elevates the whole piece. It threads through the natural gap where the bodice meets the skirt, so you’re not crocheting any complicated channels or eyelets.
Skill Level and Time Commitment
This pattern sits at an intermediate level. If you’ve completed one or two projects and feel comfortable working in the round, you can absolutely handle this dress. The bodice uses basic single crochet with increases, and the skirt uses a repeating fan pattern that becomes second nature after the first few rounds.
Plan for 8 to 12 hours if you’re an experienced crocheter. If you’re newer to shell stitches or working from the top down, give yourself 12 to 16 hours. There’s no rush here. Take your time with the yoke shaping and the fan stitch will reward you with beautiful results.
Finished Sizes
This pattern covers three sizes to fit babies from 3 months through 18 months.
Size 3 to 6 months: Chest 16 inches (40.5 cm), total length 11 inches (28 cm)
Size 6 to 12 months: Chest 17.5 inches (44.5 cm), total length 12 inches (30.5 cm)
Size 12 to 18 months: Chest 19 inches (48 cm), total length 13 inches (33 cm)
Throughout the instructions, I’ll write for the smallest size first with the larger sizes in parentheses like this: small (medium, large).
Materials You’ll Need
Yarn A (Cream/Off-White): 130 (150, 170) yards of DK weight yarn (CYCA 3)
Yarn B (Mint Green): 200 (230, 265) yards of DK weight yarn (CYCA 3)
Hook: US size E-4 / 3.5 mm
Notions:
Yarn Suggestions
Paintbox Yarns Simply DK works beautifully for this project. It’s 100% premium acrylic, machine washable, and gives excellent stitch definition. Try Paper White for the bodice and Spearmint for the skirt.
Lion Brand Pound of Love is a budget-friendly option that washes well and is baby-safe. Pastel shades work perfectly here.
Drops Safran is a lovely choice if you prefer cotton. It gives a slightly crisper drape and works well for warmer weather or sensitive skin. You may need to adjust your hook size since cotton has less stretch than acrylic.
Whatever yarn you choose, look for something labeled baby-safe and machine washable. Avoid fuzzy or textured yarns because they’ll hide all that pretty stitch detail.
Gauge
18 single crochet stitches by 22 rows equals 4 inches (10 cm) using Yarn A and a 3.5 mm hook, blocked.
One fan shell repeat (7 stitches wide) by 4 rows measures approximately 1.5 inches wide and 1 inch tall with Yarn B.
I know swatching isn’t the fun part, but please don’t skip it here. On a small baby garment, even one stitch per inch difference will significantly change your finished measurements. Swatch, measure, and adjust your hook size if needed.
Abbreviations and Stitch Definitions
Let me break down every stitch and term you’ll encounter:
ch (chain): Yarn over, pull through the loop on your hook. This creates the foundation and adds height at the start of rows.
sc (single crochet): Insert hook into stitch, yarn over and pull up a loop (2 loops on hook), yarn over and pull through both loops.
dc (double crochet): Yarn over, insert hook into stitch, yarn over and pull up a loop (3 loops on hook), yarn over and pull through 2 loops, yarn over and pull through remaining 2 loops.
sl st (slip stitch): Insert hook into stitch, yarn over and pull through both the stitch and the loop on your hook in one motion. Used for joining rounds.
st/sts: stitch or stitches
sk: skip
sp: space
ch-sp: chain space (the gap created by a chain in the previous round)
pm: place marker
sm: slip marker (move your marker up to the current round)
rnd: round
RS: right side (the side that faces out when worn)
WS: wrong side
beg: beginning
rem: remaining
rep: repeat
Special Stitches
Fan Shell Stitch: This creates the beautiful textured skirt. Work 1 single crochet, skip 2 stitches, work 5 double crochets all into the next stitch (this is your fan), skip 2 stitches, work 1 single crochet. That sequence uses 7 stitches and creates one complete fan repeat.
Mesh Stitch: For the bodice texture, work 1 single crochet, chain 1, skip 1 stitch, and repeat across. On the next round, work single crochets into each single crochet and each chain-1 space.
Step by Step Instructions
Section 1: The Bodice
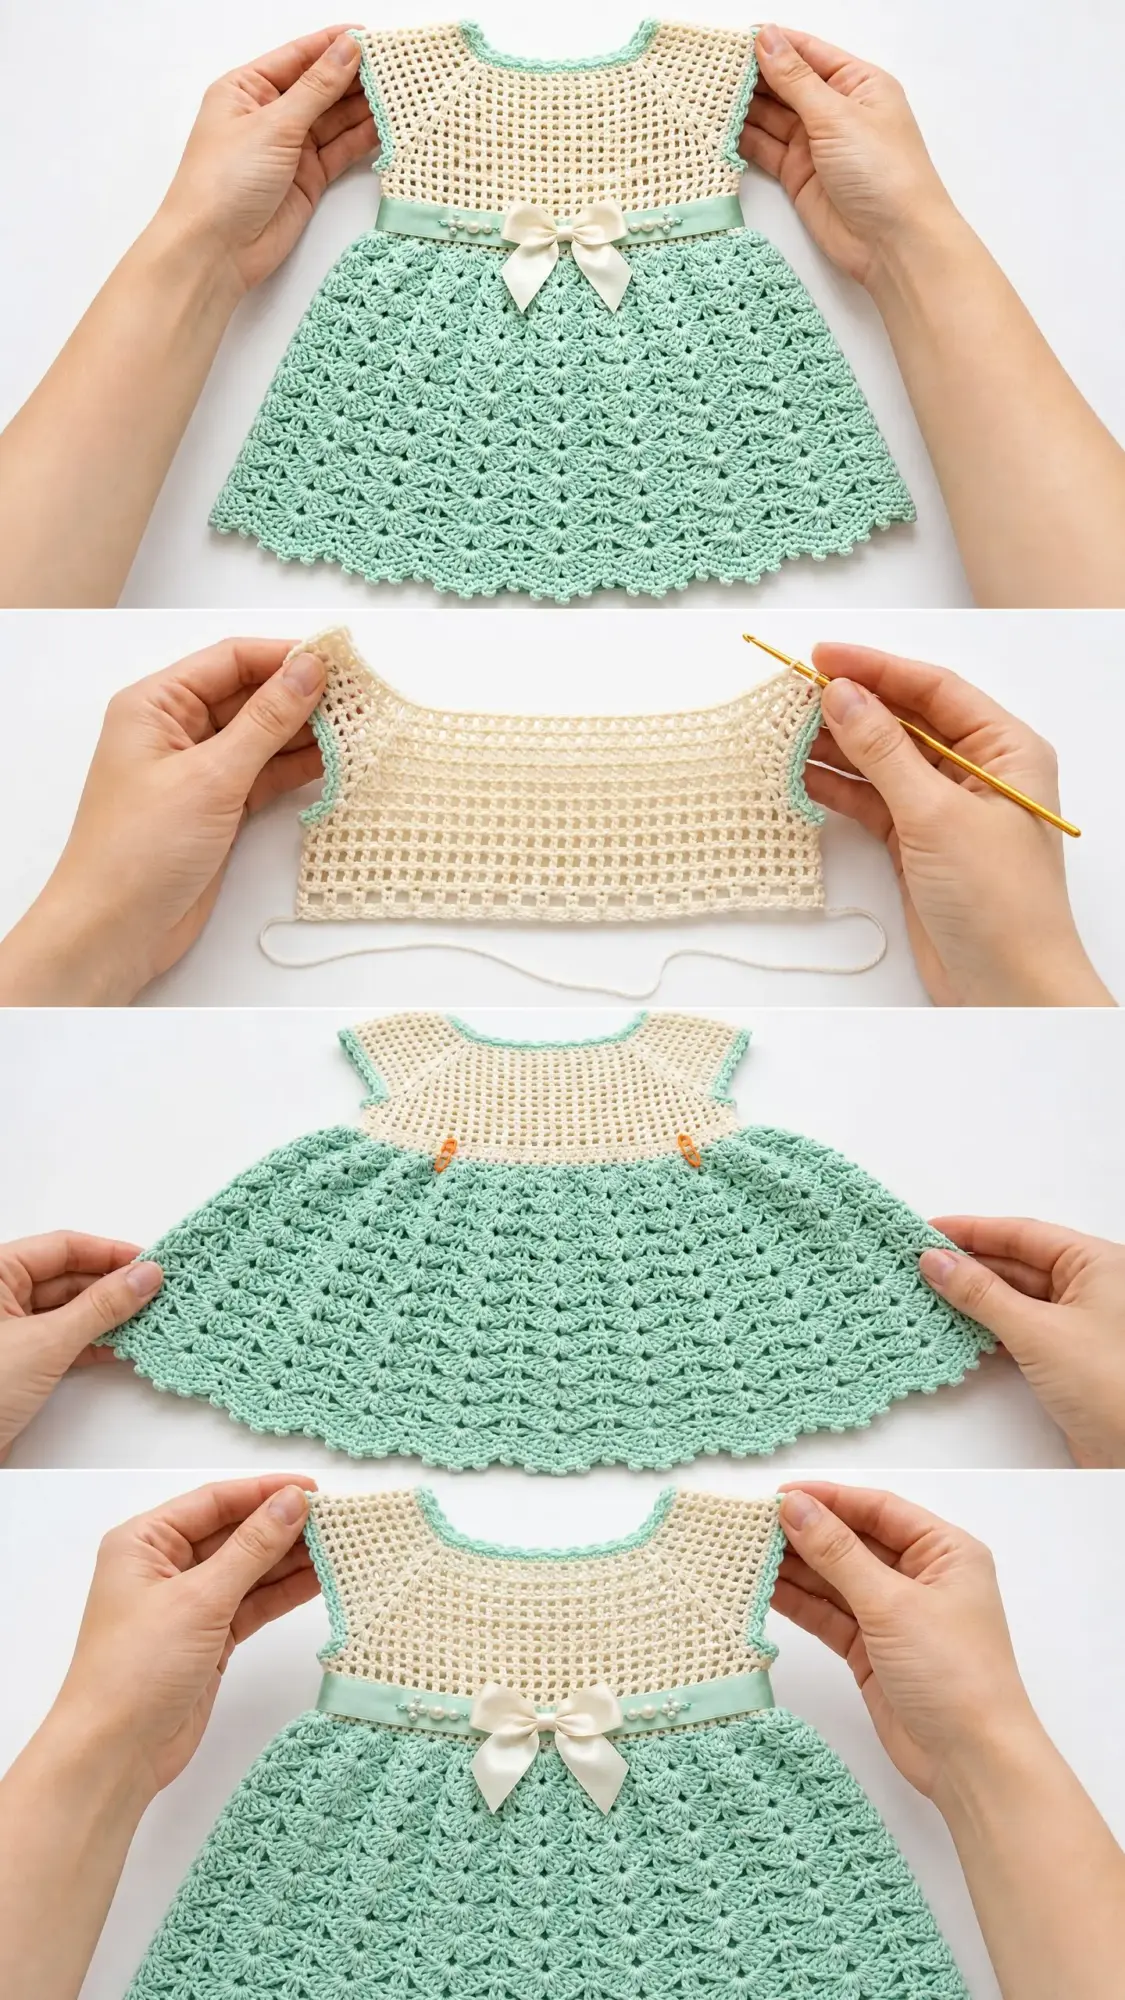
The bodice is worked as a seamless top-down raglan yoke. You’ll start with a couple of flat rows to shape the back neck, then join to work in the round. Four raglan increase points shape the bodice and create the cap sleeves naturally.
Foundation: With Yarn A and your 3.5 mm hook, chain 44 (48, 52).
Foundation Row (WS): Single crochet in second chain from hook and in each chain across. Turn. (43, 47, 51 sc)
Row 1 (RS): Chain 1, single crochet in first 6 (7, 8) stitches, place marker in next stitch (this is raglan point 1), single crochet in next stitch, place marker in next stitch (raglan point 2), single crochet in next 7 stitches, place marker in next stitch (raglan point 3), single crochet in next stitch, place marker in next stitch (raglan point 4), single crochet in next 7 stitches, place marker in next stitch (raglan point 5), single crochet in next stitch, place marker in next stitch (raglan point 6), single crochet in remaining 6 (7, 8) stitches. Slip markers. Turn. (43, 47, 51 sc)
Quick note on raglan points: You have 4 increase zones. On increase rows, you’ll work 3 single crochets into each marked stitch, adding 2 stitches at each of the 4 points for 8 total increases per increase round.
Row 2 (WS): Chain 1, single crochet in each stitch across. Turn. (43, 47, 51 sc)
Row 3 – Increase Row (RS): Chain 1, single crochet to 1 stitch before first marker, work 3 single crochets in marked stitch, (single crochet to 1 stitch before next marker, work 3 single crochets in marked stitch) 3 times, single crochet to end. Turn. (51, 55, 59 sc)
Row 4: Chain 1, single crochet in each stitch across. Turn. (51, 55, 59 sc)
Joining Round: Chain 1, single crochet in first 8 (9, 10) stitches (left back), join end of row to beginning of row with slip stitch to form a round. Be careful not to twist. Place a marker for beginning of round. Continue working in rounds from this point. (51, 55, 59 sc in round)
From here on, all rounds are worked with the right side facing. Your 4 raglan markers stay in place.
Round 5 – Increase Round: Single crochet to 1 stitch before first marker, work 3 single crochets in marked stitch, (single crochet to 1 stitch before next marker, work 3 single crochets in marked stitch) 3 times, single crochet to end of round. (59, 63, 67 sc)
Round 6: Single crochet in each stitch around. (59, 63, 67 sc)
Round 7 – Increase Round: Single crochet to 1 stitch before first marker, work 3 single crochets in marked stitch, (single crochet to 1 stitch before next marker, work 3 single crochets in marked stitch) 3 times, single crochet to end of round. (67, 71, 75 sc)
Round 8: Single crochet in each stitch around. (67, 71, 75 sc)
Round 9 – Increase Round: Single crochet to 1 stitch before first marker, work 3 single crochets in marked stitch, (single crochet to 1 stitch before next marker, work 3 single crochets in marked stitch) 3 times, single crochet to end of round. (75, 79, 83 sc)
Round 10: Single crochet in each stitch around. (75, 79, 83 sc)
Round 11 – Increase Round: Single crochet to 1 stitch before first marker, work 3 single crochets in marked stitch, (single crochet to 1 stitch before next marker, work 3 single crochets in marked stitch) 3 times, single crochet to end of round. (83, 87, 91 sc)
Round 12: Single crochet in each stitch around. (83, 87, 91 sc)
For sizes 6-12 months and 12-18 months only:
Round 13 – Increase Round: Work increase round as established. (skip for size small / 95, 99 sc)
Round 14: Single crochet in each stitch around. (skip for size small / 95, 99 sc)
For size 12-18 months only:
Round 15 – Increase Round: Work increase round as established. (skip for sizes small and medium / 107 sc)
Round 16: Single crochet in each stitch around. (skip for sizes small and medium / 107 sc)
All sizes: After completing the increase rounds, your stitch counts are: 83 (95, 107) sc.
Underarm Separation Round: Single crochet in first 20 (23, 26) stitches (right back), chain 4, skip next 21 (23, 25) stitches (right sleeve), single crochet in next 21 (25, 29) stitches (front), chain 4, skip next 21 (23, 25) stitches (left sleeve). Single crochet to end of round.
After joining chains: 72 (80, 88) sc plus 8 chain stitches equals 80 (88, 96) stitches in body round.
Underarm Close Round: Single crochet in each stitch around, working 1 single crochet into each chain of the underarm chains. (80, 88, 96 sc)
Waist Adjustment Round: Single crochet around, decreasing 3 (4, 5) stitches evenly spaced. Space the decrease stitches approximately every 26 (22, 19) stitches. (77, 84, 91 sc)
Optional Bodice Mesh Section: If you want the more open mesh texture shown in the reference image, work 4 rounds of mesh stitch before the waist adjustment. Work: Chain 2 (counts as 1 single crochet and chain 1), skip 1 stitch, (single crochet in next stitch, chain 1, skip 1 stitch) around, slip stitch to first chain of beginning chain-2 to join. Repeat for 4 rounds, then work 1 plain single crochet round with the waist adjustments.
Checkpoint: Your piece should measure approximately 4 inches (3-6 months), 4.5 inches (6-12 months), or 5 inches (12-18 months) from the center back neckline to the waist.
Section 2: Neckline and Sleeve Edging
With right side facing and Yarn B, join yarn at center back neckline.
Neckline Edging Round: Slip stitch evenly around the neckline, working 1 slip stitch per stitch and 1 slip stitch per row end on the flat back neck rows. Join with slip stitch. Fasten off Yarn B.
Cap Sleeve Edging: With right side facing and Yarn B, join yarn at underarm chain on one sleeve opening. Slip stitch evenly around sleeve opening, working into each skipped sleeve stitch and each row end. Join with slip stitch. Fasten off Yarn B. Repeat for second sleeve opening.
These edgings create the neat mint trim at the neckline and sleeve edges.
Section 3: The Skirt
The skirt is worked in continuous rounds from the waist down in Yarn B using the fan shell stitch. Your waist count of 77 (84, 91) accommodates exactly 11 (12, 13) fan repeats.
With Yarn B, join yarn to any stitch at the waist with a slip stitch.
Round 1 (Setup): Chain 1, single crochet in first stitch, (chain 2, skip 2 stitches, 5 double crochets in next stitch, chain 2, skip 2 stitches, single crochet in next stitch) around, omitting final single crochet and joining with slip stitch to first single crochet. (11, 12, 13 fan repeats)
Round 2: Chain 3 (counts as 1 double crochet), 2 double crochets in same stitch as join (half shell at join), chain 2, single crochet in center double crochet of next fan, chain 2, (5 double crochets in next single crochet, chain 2, single crochet in center double crochet of next fan, chain 2) around, ending with 2 double crochets in same stitch as initial chain-3 (completing the first half shell into a full shell), slip stitch to top of chain-3 to join. (11, 12, 13 complete fans)
Round 3: Chain 1, single crochet in same stitch as join (this single crochet sits above a fan center), chain 2, skip to next single crochet of previous round, 5 double crochets in single crochet, chain 2, (single crochet in center double crochet of fan, chain 2, 5 double crochets in next single crochet, chain 2) around, slip stitch to first single crochet to join. (11, 12, 13 fans)
Repeat Rounds 2 and 3 alternately until skirt measures 5.5 inches (6 inches, 6.5 inches) from waist, ending after a Round 3 repeat. This will require approximately 11 (12, 13) rounds of fan pattern.
Skirt Flare Tip: On Round 7 of the fan pattern, switch from chain 2 between the single crochet and the shell to chain 3. This adds a slight widening that enhances the A-line shape. Continue with chain 3 gaps for all remaining fan rounds.
Section 4: Hem Edging
Hem Round 1: Chain 1, single crochet around the bottom of the skirt, working 1 single crochet into each single crochet and 1 single crochet into each double crochet of the final fan round, and 2 single crochets into each chain-2 or chain-3 space. Join with slip stitch. (approximately 88, 96, 104 sc)
Adjust this count to 90 (96, 102) stitches if needed by adding or removing 1 to 3 stitches evenly. The scallop round requires a multiple of 6.
Hem Round 2 – Scallop: Chain 1, single crochet in first stitch, skip 2 stitches, 5 double crochets in next stitch, skip 2 stitches, (single crochet in next stitch, skip 2 stitches, 5 double crochets in next stitch, skip 2 stitches) around, slip stitch to first single crochet. Fasten off Yarn B. Weave in ends.
Section 5: Waist Ribbon
Thread your satin ribbon through the natural horizontal gap between the final bodice round and the first skirt round. Use a yarn needle to weave the ribbon in and out through every other stitch around the full waist. Pull both ribbon ends to the center front of the dress.
String 2 or 3 pearl beads onto each ribbon end and secure each bead with a small knot about 1 inch from the ribbon end. Tie the two ribbon ends into a bow at center front. If you want extra durability, tack the center of the bow down with a few hand stitches.
Finishing and Blocking
Weave in all yarn ends securely, burying each tail at least 1 inch through the fabric before trimming.
Wet block your finished dress by soaking it in cool water for 15 minutes. Gently squeeze out excess water without wringing, then roll in a clean towel. Lay the dress flat on a blocking mat, gently stretch the skirt to open the fan stitches, and allow to dry completely.
Add the ribbon after blocking since blocking may shift the weave position.
Care Instructions
Machine wash on gentle cycle in a mesh laundry bag with cool water if using acrylic yarn. Lay flat to dry. Do not tumble dry.
For cotton yarn, hand wash in cool water with gentle soap and lay flat to dry.
Remove the ribbon before washing to prevent dye transfer or shrinkage. Retie after the dress is dry.
Important safety note: The pearl bead embellishments are decorative items intended for special occasions and supervised wear only. Remove and store beads when the garment is not in use.
Size Customization Tips
For a newborn size, reduce the foundation chain by 4 stitches and work 2 fewer increase rounds in the bodice.
For an 18 to 24 month size, add 4 stitches to the foundation chain and work 2 additional increase rounds before the underarm separation.
Always verify that your final waist stitch count is a multiple of 7. If not, add or subtract 1 to 3 stitches evenly in the waist adjustment round.
For a longer dress, work more fan stitch rounds before the hem edging. Each two-round fan repeat adds approximately 0.75 inches to the skirt length. For a shorter tunic style, reduce to 6 total fan rounds.
I really hope you enjoy making this sweet little dress as much as I enjoyed putting this pattern together for you. Thank you so much for being here and trusting me with your yarn time.
If you make this baby dress, I would absolutely love to see it! Share your photos on Instagram or Facebook and tag me so I can cheer you on. Seeing your finished projects is honestly the best part of this whole thing.
Don’t forget to save this pattern to your Pinterest boards so you can find it easily when you’re ready to start. And if you have any questions or just want to share how yours turned out, drop a comment below. I always love hearing from you!
You Might Also Like
- Pastel Rainbow Granny Square Bucket Bag Free Crochet Pattern
- Ocean Breeze Granny Square Tote Free Crochet Pattern
- Lavender Peony Bloom Crochet Dress Free Crochet Pattern
- Berry Blossom Lace Cardigan Free Crochet Pattern