
I’ve been looking for the perfect heirloom-quality baby dress pattern for months, and this one stopped me in my tracks. The combination of that fitted bodice, those cascading tiered ruffles, and the delicate shell lace edging creates something truly special. This is my favourite kind of project: challenging enough to keep you engaged, but absolutely worth every stitch.
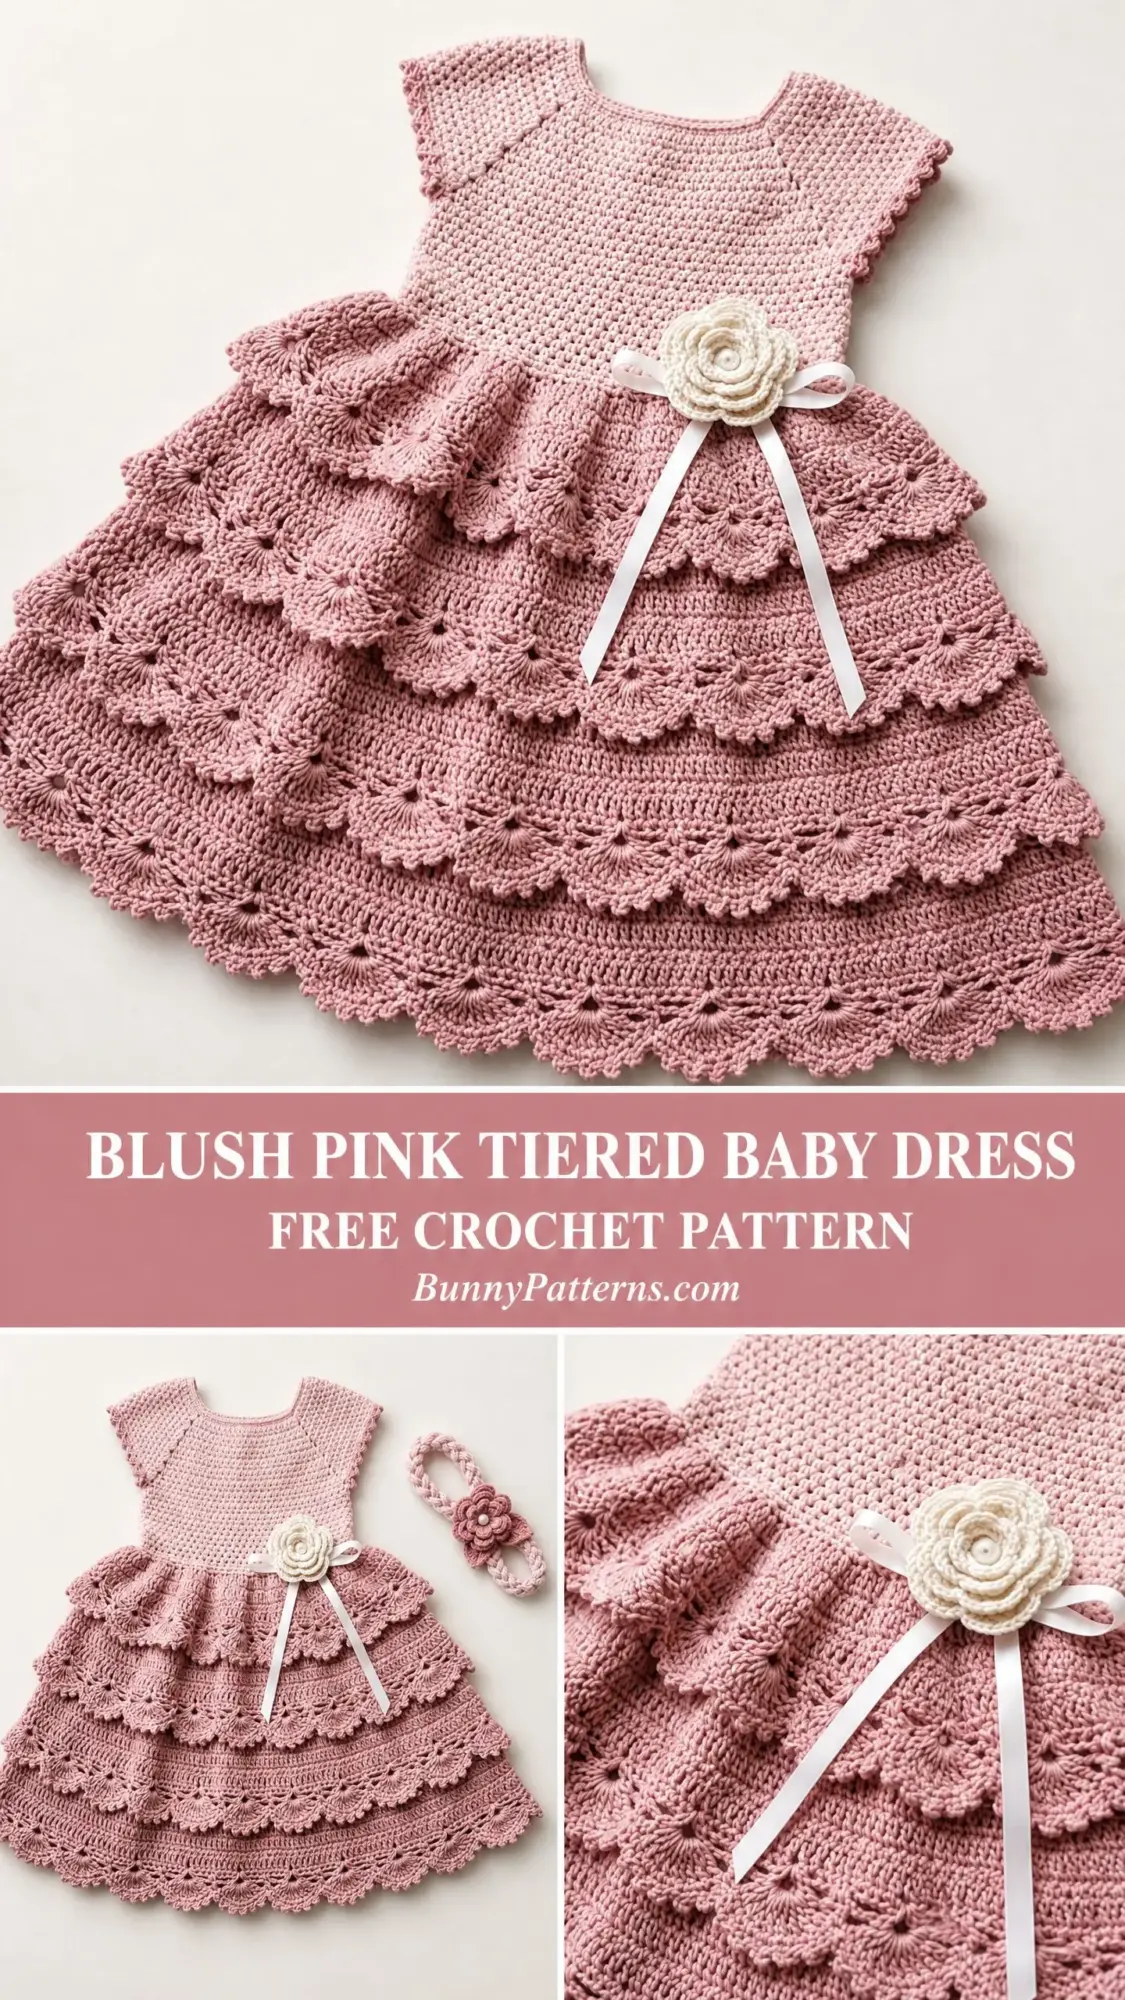
If you’ve ever wanted to create a showstopper gift for a baby shower, christening, or first birthday, this is the pattern to reach for. The construction is clever and methodical, working from the top down so you can try it on as you go.
Fair warning: this isn’t a weekend project. But the techniques are approachable for anyone who has completed a few garments, and I’ll walk you through every single step.
Why This Baby Dress Pattern Stands Out
This tiered baby dress crochet pattern combines several techniques that work together beautifully. The bodice uses a raglan-style yoke, which means you’ll create those sweet cap sleeves naturally as you shape the garment. No separate sleeve pieces to sew on later.
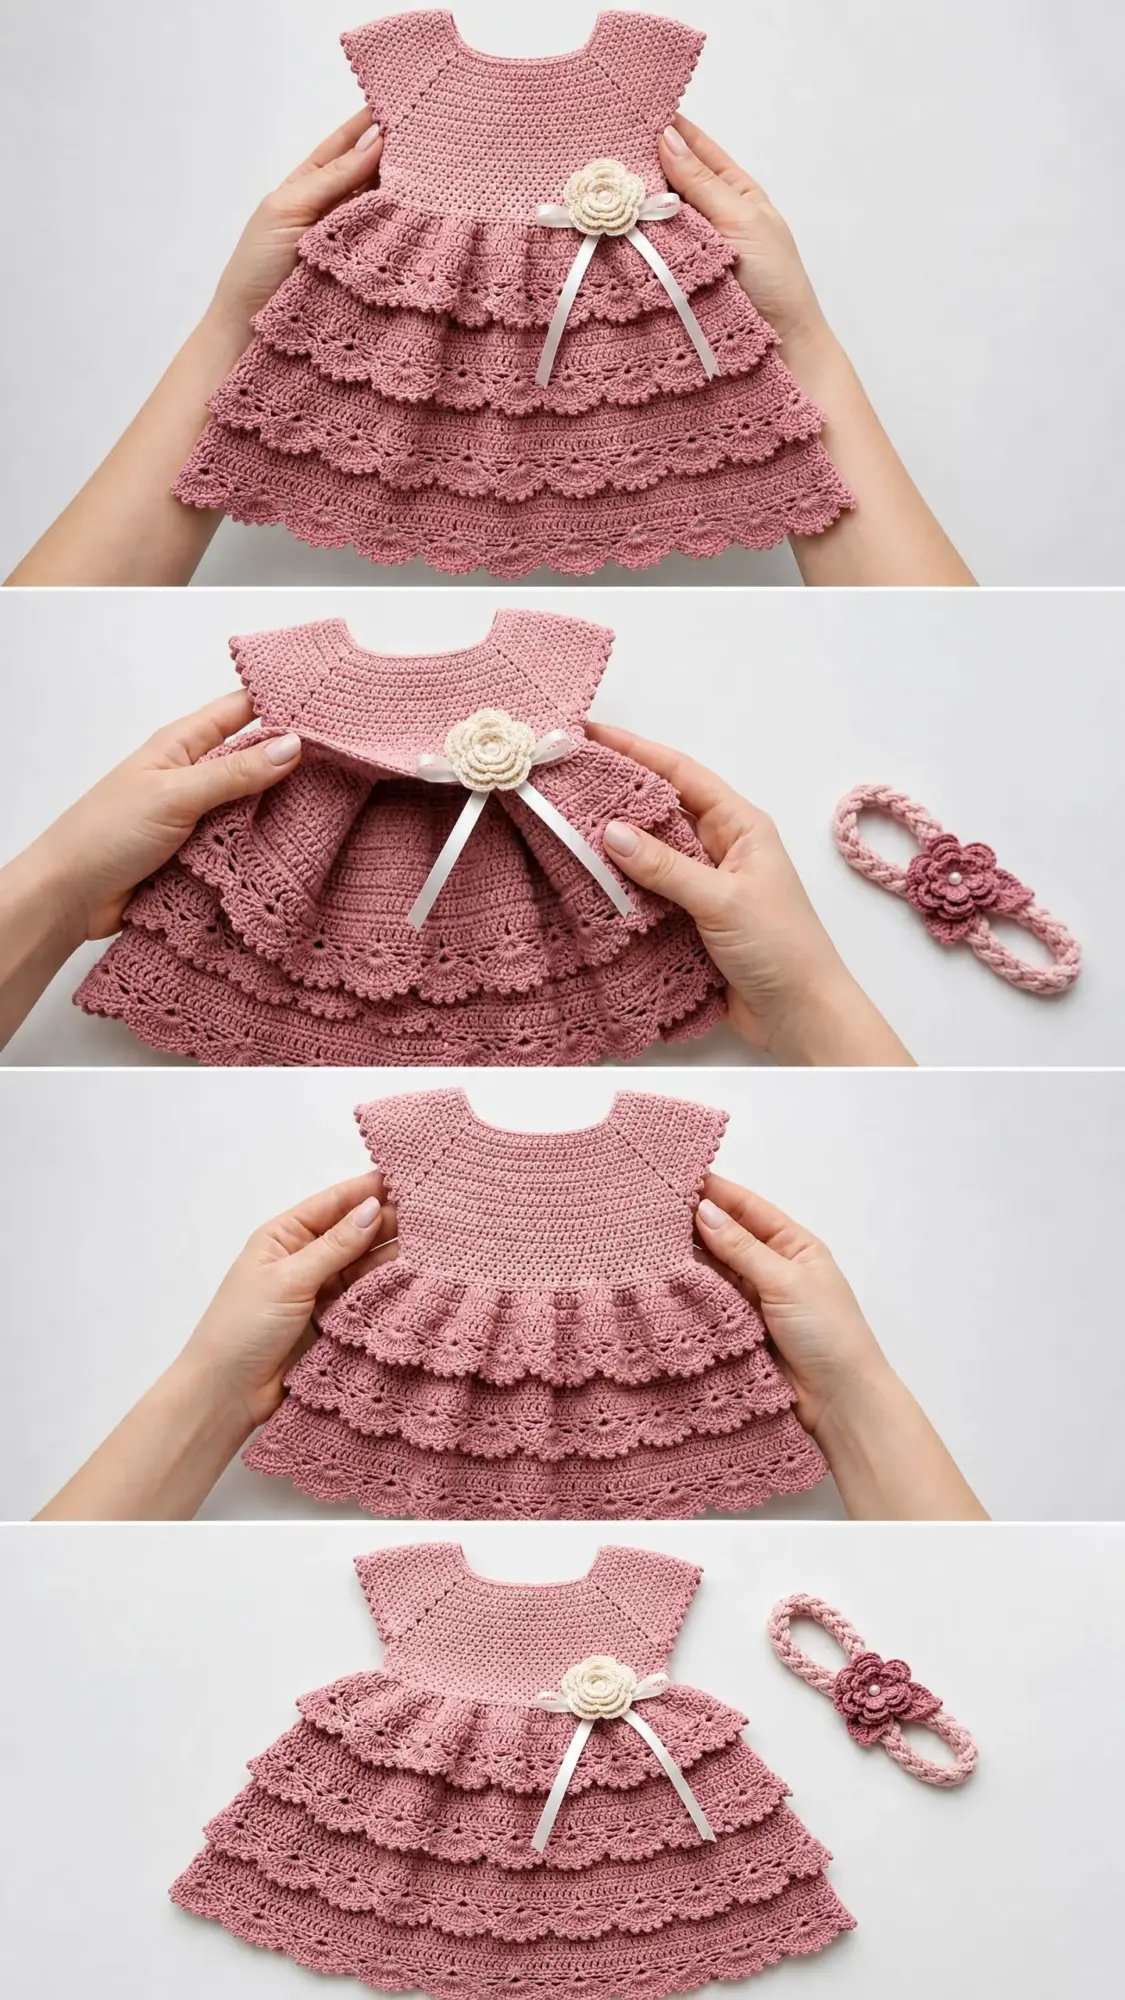
The real magic happens in the skirt. Three distinct ruffle tiers cascade down from the waist, each one fuller than the last. Every tier features shell stitch lace with scalloped fan edgings that catch the light. The effect is dramatic but not fussy.
The pattern also includes a matching braided headband with a crocheted flower accent. Together, these pieces make a complete outfit that’s perfect for special occasions or professional baby photography sessions.
Skill Level and Time Investment
I want to be honest with you about this one. This crochet tutorial falls into the intermediate to advanced intermediate range. You should feel comfortable with:
If you’re a confident beginner who has made a cardigan or two, you can absolutely tackle this with patience. Just take it section by section and don’t rush.
Time estimate: Plan for approximately 20 to 30 hours of work. This isn’t the pattern to start three days before the baby shower. Give yourself breathing room.
Finished Measurements
This step by step pattern is written for size 6 to 12 months. Here are your finished dimensions after blocking:
I’ll include size customization tips at the end for newborn through 2T/3T.
Materials You’ll Need
Yarn
Main color (MC): Dusty rose or antique pink, approximately 450 yards (412 meters) of DK weight (light worsted) yarn
Accent color (AC): Cream or ivory, approximately 30 yards (27 meters) of the same weight for the flower embellishment
Recommended Yarn Options
Option 1: Lion Brand Pound of Love in Blossom (or Antique White for AC). This DK-weight acrylic blend is machine washable, soft against baby skin, and widely available.
Option 2: Paintbox Yarns Simply DK in Blush Pink (MC) and Champagne White (AC). A 100% acrylic DK weight with excellent stitch definition, ideal for the lace tiers, and easy-care for garments.
Option 3: Drops Safran in Old Rose (MC) and Off White (AC). A 100% cotton DK that gives the dress beautiful drape and is gentle for sensitive baby skin. Note that cotton has less stretch, so swatch carefully.
Substitution note: Choose any DK weight yarn (approximately 100 to 130 yards per 50 gram skein) that is labeled as baby-safe, machine washable, and has good stitch definition. Avoid fuzzy or textured yarns as they obscure the lace pattern in the tiers.
Hook
US size E-4 / 3.5 mm crochet hook (adjust as needed to meet gauge)
Notions
Gauge
19 sc x 22 rows = 4 inches (10 cm) in single crochet, worked in the round, blocked.
One shell repeat (5 dc) in the Tier Lace pattern = approximately 1 inch (2.5 cm) wide.
Gauge is critical for this garment. Make a 5-inch swatch in single crochet, block it, and measure before beginning. Adjust hook size up or down as necessary. I know swatching isn’t the fun part, but with a fitted bodice like this, it really matters.
Abbreviations
Let me walk you through every abbreviation you’ll encounter. I’ll give you the full name, the shorthand, and a plain-English explanation.
Special Stitches
These techniques appear throughout the pattern. Read through them before you start so nothing catches you off guard.
Shell Stitch
Used in Tier 2 and Tier 3 lace sections.
Work 5 dc all into the same stitch or space. This creates one shell. One shell counts as 5 stitches. The shells fan out naturally and create that beautiful scalloped texture.
Fan Edging
Used at the bottom edge of each tier.
Step 1: Skip 2 sts.
Step 2: Work 5 dc into the next st.
Step 3: Skip 2 sts.
Step 4: Sl st into the next st.
This 6-stitch repeat forms one fan scallop. The fan edging is decorative and does not add to working stitch counts for the next section.
Large Crochet Flower (Waist Embellishment)
Using AC, make a magic ring. Ch 1, work 6 sc into ring, sl st to join. (6 sc)
Round 2: Ch 1, work 2 sc into each st around, sl st to join. (12 sc)
Round 3: (Ch 3, dc, ch 3, sl st into same st, sl st into next st) 6 times. You will have 6 petals. Fasten off, leaving a tail for sewing. Gently shape petals outward. Sew a pearl to the center.
Small Crochet Flower (Headband)
Using MC, make a magic ring. Ch 1, work 5 sc into ring, sl st to join. (5 sc)
Round 2: (Ch 2, dc, ch 2, sl st into same st, sl st into next st) 5 times. You will have 5 petals. Fasten off.
Braided Headband
Cut 6 strands of MC, each measuring 30 inches (76 cm). Divide into 3 groups of 2 strands each. Braid evenly for approximately 14 inches (35.5 cm), or measure baby’s head circumference and add 1 inch for overlap. Join ends with a sl st or tie securely. Trim ends, weave or knot to secure.
Pattern Notes Before You Begin
Read these carefully. They’ll save you confusion later.
1. The dress is worked entirely top-down in continuous rounds unless otherwise noted. The yoke is shaped using raglan increase points.
2. The bodice is worked in MC in single crochet. The skirt tiers are worked in MC in shell/lace patterns.
3. At the end of every round, sl st to the first st of that round and ch 1 to begin the next round. This ch 1 does not count as a st. Work into both loops unless instructed otherwise.
4. Place stitch markers at the 4 raglan increase points at the start of the yoke. Move markers up each round.
5. The ribbon is threaded through a chain-space row at the waist and tied in a bow at the front.
6. The flower is sewn to the ribbon bow after finishing.
7. Read through each tier section completely before beginning, as the tier foundation is picked up from a previous round’s front loops.
8. Right side is always facing you when working in the round.
9. Stitch counts in parentheses at the end of each round reflect total working stitches, not including any ch-sps or decorative elements unless noted.
The Pattern Instructions
Section 1: Neckline and Yoke
The yoke is worked in the round from the top down. The neckline foundation chain creates the neck opening.
Foundation: Using MC, ch 56. Sl st to first ch to form a ring, being careful not to twist. (56 ch)
Round 1 (Yoke Setup Round): Ch 1 (does not count as st throughout). Sc into each ch around. Sl st to first sc. (56 sc)
Now place raglan markers as follows to divide the yoke into sections:
Round 2 (Increase Round): Ch 1. Work sc across to 1 st before marker A, 3 sc into marked st (increase), sc to 1 st before marker B, 3 sc into marked st (increase), sc to 1 st before marker C, 3 sc into marked st (increase), sc to 1 st before marker D, 3 sc into marked st (increase), sc to end of round. Sl st to first sc. (64 sc)
Round 3: Ch 1. Sc around, working 3 sc into each of the 4 raglan marked sts. Sl st to first sc. (72 sc)
Round 4: Ch 1. Sc around, working 3 sc into each of the 4 raglan marked sts. Sl st to first sc. (80 sc)
Round 5: Ch 1. Sc around, working 3 sc into each of the 4 raglan marked sts. Sl st to first sc. (88 sc)
Round 6: Ch 1. Sc around, working 3 sc into each of the 4 raglan marked sts. Sl st to first sc. (96 sc)
Round 7: Ch 1. Sc around, working 3 sc into each of the 4 raglan marked sts. Sl st to first sc. (104 sc)
Round 8: Ch 1. Sc around, working 3 sc into each of the 4 raglan marked sts. Sl st to first sc. (112 sc)
After Round 8, your yoke section distribution should be approximately:
CHECKPOINT: The yoke should measure approximately 2.25 inches (5.7 cm) from the neckline edge. The cap sleeve silhouette is visible at the shoulder.
Section 2: Sleeve Separation
Round 9 (Separation Round): Ch 1. Sc across right front (22 sc), ch 4 (underarm bridge), skip right sleeve sts (22 sts), sc across back (22 sc), ch 4 (underarm bridge), skip left sleeve sts (22 sts), sc across left front (22 sc). Sl st to first sc. (66 sc + 8 ch = 74 sts in new round)
Work into the ch-4 bridges as sc sts on the next round.
Round 10: Ch 1. Sc around, working sc into each ch of the underarm bridges. Sl st to first sc. (74 sc)
Round 11: Ch 1. Sc around. Sl st. (74 sc)
Round 12: Ch 1. Sc around. Sl st. (74 sc)
Round 13: Ch 1. Sc around. Sl st. (74 sc)
Round 14: Ch 1. Sc around. Sl st. (74 sc)
CHECKPOINT: After Round 14, the bodice should measure approximately 4 inches (10 cm) from the neckline edge. The piece should lay flat at the underarms and chest.
Section 3: Bodice Waist Shaping
Round 15: Ch 1. (Sc 16, sc2tog) 4 times, sc to end. Sl st. (70 sc)
Round 16: Ch 1. Sc around. Sl st. (70 sc)
Round 17: Ch 1. (Sc 15, sc2tog) 4 times, sc to end. Sl st. (66 sc)
Round 18: Ch 1. Sc around. Sl st. (66 sc)
Round 19: Ch 1. Sc around. Sl st. (66 sc)
Round 20 (Ribbon Eyelet Round): Ch 1. (Sc 2, ch 1, sk 1) across, adjusting end of round to complete evenly. Sl st. (44 sc + 22 ch-1 sps = 66 sts total)
Note: The ch-1 sps count as 1 st each in the stitch count. Total loop count remains 66.
Round 21: Ch 1. Sc into each st and each ch-1 sp around. Sl st. (66 sc)
CHECKPOINT: After Round 21, the bodice should measure approximately 5.5 inches (14 cm) total length from neckline. The waist circumference is approximately 13.75 inches (35 cm), which will ease to the body.
Section 4: Sleeve Cap Finishing
Return to held sleeve sts. With RS facing, join MC to the first skipped sleeve st.
Round 1 of Sleeve: Ch 1. Sc into each of the 22 held sleeve sts, then sc into each of the 4 ch of the underarm bridge. Sl st to first sc. (26 sc)
Round 2: Ch 1. (Sc 11, sc2tog) twice, sc 0. Sl st. (24 sc)
Round 3: Ch 1. Sc around. Sl st. (24 sc)
Edging Round: Ch 1. (Sk 1, 3 dc into next st, sk 1, sl st into next st) across, adjusting as needed to complete round. Sl st. Fasten off.
Repeat for second sleeve.
Section 5: Tier 1 Ruffle
The first ruffle tier is worked from the front loops of Round 21 (the waist round). The back loops of Round 21 remain intact and form the base for the continuing skirt below.
With RS facing, join MC into the front loop of any st in Round 21.
Round 1 of Tier 1: Ch 1. Working into front loops of Round 21 only, 2 sc into each st around. Sl st. (132 sc)
Round 2: Ch 1. Sc around. Sl st. (132 sc)
Round 3: Ch 1. Sc around. Sl st. (132 sc)
Round 4 (Shell Row): Ch 3 (counts as dc). (Skip 2, 5 dc into next st, skip 2, sc into next st) 22 times. Sl st to beg st. (22 shells + 22 sc = 132 sts)
Round 5 (Scallop Edging): Ch 1. (Sc into sc st, sk 2 dc, 5 dc into center dc of shell, sk 2 dc) around. Sl st. (22 shells)
Fasten off Tier 1. Tier 1 ruffle total depth approximately 2.5 inches (6.5 cm).
Section 6: Tier 2 Skirt
Now work from the back loops of Round 21 to begin the main skirt body beneath the Tier 1 ruffle.
With RS facing, join MC into the back loop of any st in Round 21.
Round 1 of Tier 2 Base: Ch 1. Working into back loops of Round 21 only, work 2 sc into each st around. Sl st. (132 sc)
Round 2: Ch 1. Sc around. Sl st. (132 sc)
Round 3: Ch 1. Sc around. Sl st. (132 sc)
Round 4: Ch 1. Sc around. Sl st. (132 sc)
Round 5: Ch 1. (Sc 10, 2 sc into next st) 12 times. Sl st. (144 sc)
Round 6: Ch 1. Sc around. Sl st. (144 sc)
Round 7 (Tier 2 Shell Lace): Ch 3 (counts as dc). (Skip 2, 5 dc into next st, skip 2, sc into next st) 24 times. Sl st. (24 shells, 144 sts total)
Round 8: Ch 1. (Sc into sc, skip 2 dc, 5 dc into center dc of shell, skip 2 dc) 24 times. Sl st. (24 shells)
Round 9: Ch 1. (Sc into sc, skip 2 dc, 5 dc into center dc of shell, skip 2 dc) 24 times. Sl st. (24 shells)
Round 10: Ch 1. (2 sc into sc st between shells, sc into each of the 5 dc of shell) 24 times. Sl st. (168 sc)
Round 11: Ch 1. (Skip 2, 5 dc into next st, skip 2, sc into next st) 24 times. Sl st. (24 shells)
Round 12 (Scallop edge outer row): Ch 1. (Sc into sc, skip 2, 5 dc into center dc, skip 2) 24 times. Sl st. Fasten off Tier 2.
CHECKPOINT: After Tier 2, the skirt measures approximately 8.5 inches (21.5 cm) from the neckline. The piece should have two visible ruffle tiers with scallop edges. The circumference at the lower edge of Tier 2 is approximately 28 inches (71 cm).
Section 7: Tier 3 (Bottom Skirt Tier)
This tier is worked from the round immediately below the Tier 2 ruffle attachment, at the base sc rounds of Section 6 before the lace began. Specifically, pick up from Round 6 of Tier 2 Base (the 144 sc round) using the front loops.
With RS facing, join MC into the front loop of any st in Round 6 of Section 6 (the 144 sc plain round).
Round 1 of Tier 3: Ch 1. Working into fl only, work 2 sc into each st around. Sl st. (288 sc)
Round 2: Ch 1. Sc around. Sl st. (288 sc)
Round 3 (Tier 3 Shell Lace): Ch 3 (counts as dc). (Skip 2, 5 dc into next st, skip 2, sc into next st) 48 times. Sl st. (48 shells, 288 sts)
Round 4: Ch 1. (Sc into sc, skip 2 dc, 5 dc into center dc of shell, skip 2 dc) 48 times. Sl st. (48 shells)
Round 5: Ch 1. (Sc into sc, skip 2 dc, 5 dc into center dc of shell, skip 2 dc) 48 times. Sl st. (48 shells)
Round 6: Ch 1. (Sc into sc, skip 2 dc, 5 dc into center dc of shell, skip 2 dc) 48 times. Sl st. (48 shells)
Round 7 (Final Scallop Edging): Ch 1. (Sc into sc, skip 2 dc, 7 dc into center dc of shell, skip 2 dc) 48 times. Sl st. (48 large fans)
The 7-dc fan on the outer edge creates the pronounced scallop visible in the finished dress.
Fasten off and weave in ends.
CHECKPOINT: The completed dress should measure approximately 14.5 inches (37 cm) from shoulder to bottom scallop hem. The bottom tier has a full, dramatic sweep of lace fans. The circumference at the hem is approximately 48 inches (122 cm).
Section 8: Neckline Edging
With RS facing, join MC at the back neckline.
Round 1: Ch 1. Sc evenly around neckline opening, working approximately 1 sc per ch along the foundation chain. Sl st. (56 sc)
Round 2: Ch 1. (Sc, ch 1, skip 1) around. Sl st. (28 sc + 28 ch-1 sps)
Round 3: Sl st into each st and ch-sp around. Fasten off.
Section 9: Waist Ribbon
Cut satin ribbon to approximately 24 inches (61 cm). Thread ribbon through the ch-1 eyelet spaces of Round 20 (Ribbon Eyelet Round) of the bodice, beginning and ending at the center front. Tie in a bow. Trim ribbon ends at a diagonal to prevent fraying. If desired, apply a small amount of clear-drying fabric glue to ribbon ends.
Section 10: Waist Flower Embellishment
Make the large flower using AC as described in Special Stitches. After sewing on the pearl center, attach the flower to the center of the bow using a few sts of AC yarn or matching sewing thread. The flower sits directly over the ribbon knot.
Section 11: Headband
Make the braided headband as described in Special Stitches. Make the small flower in MC and attach to one side of the headband using the yarn tail. Sew a small pearl to the flower center. The headband overlap should be joined invisibly at the back.
Size Customization Tips
To size up to 12-24 months: Add 8 sts to the foundation chain (ch 64 instead of 56) and work 2 additional raglan increase rounds (Rounds 9 and 10 in the yoke) before the sleeve separation. This adds approximately 1 inch to the chest circumference. Add 2 additional plain sc rounds to the bodice before the waist shaping. Lengthen each tier by 1 additional shell lace round.
To size up to 2T-3T: Add 16 sts to the foundation chain (ch 72), work 4 additional raglan increase rounds, and add 4 plain rounds to the bodice. Add 2 shell lace rounds to each tier.
To size down for newborn: Subtract 8 sts from the foundation chain (ch 48), work 1 fewer raglan increase round, and reduce the bodice by 2 plain rounds. Reduce each tier by 1 shell lace round.
General rule: Every 4 sts added to the foundation chain equals approximately 0.75 inch (2 cm) added to the chest circumference. Every additional raglan increase round adds approximately 8 sts and 0.5 inch to the chest.
Finishing and Blocking
1. Weave in all yarn ends securely using a yarn needle, working ends through several sts in different directions to prevent unraveling.
2. Soak the finished dress in cool water with a small amount of gentle wool wash or baby-safe detergent for 15 minutes. Do not wring.
3. Roll the dress in a clean dry towel and press gently to remove excess water.
4. Lay flat on a blocking mat or clean dry surface. Pin the scallop edges of each tier out gently to open the fan pattern. Use rust-proof blocking pins.
5. Allow to dry completely before removing pins. This may take 24 to 48 hours depending on humidity.
6. Block the headband flat as well, shaping the flower petals open.
7. Attach the ribbon and flowers after blocking and drying are complete.
Care Instructions
Hand wash in cool water with a gentle baby-safe detergent. Do not wring or twist. Lay flat to dry away from direct sunlight or heat sources. Do not tumble dry. Do not iron directly. If pressing is needed, place a damp cloth between the iron and the fabric and use a low steam setting. Store folded gently, not hung, to prevent the skirt tiers from stretching.
You Did It!
Congratulations on completing this beautiful tiered baby dress crochet pattern. This is genuinely one of those projects that gets gasps when you show it off. Whether you made it for your own little one, a grandchild, or a friend’s baby shower, you’ve created something that will be treasured and photographed for years.
Thank you so much for trusting me with your time and yarn. I know this was a significant project, and I hope the instructions got you through smoothly.
If you make this dress, I would absolutely love to see it! Tag me on Instagram or share a photo in my Facebook group. Seeing your finished projects is honestly the best part of my week.
Go ahead and save this pattern to your Pinterest boards so you can find it again when the next baby arrives. And if you have any questions or want to share your progress, drop a comment below. I read every single one.
You Might Also Like
- Blush Pink Cherry Blossom Granny Bag Free Pattern
- Dusty Rose Bloom Capelet Free Crochet Pattern
- Lavender Sunflower Granny Square Tote Free Crochet Pattern
- Spring Garden Granny Square Bag Free Crochet Pattern