
THIS is the baby dress pattern you have been waiting for. I am talking GORGEOUS results, a project that looks like it belongs in a boutique window, and a construction method that is way more approachable than you might think. This mint and peach beauty works up in about 8 to 14 hours depending on your pace, and the finished piece makes an absolutely stunning gift for baby showers, birthdays, or that special little one in your life.
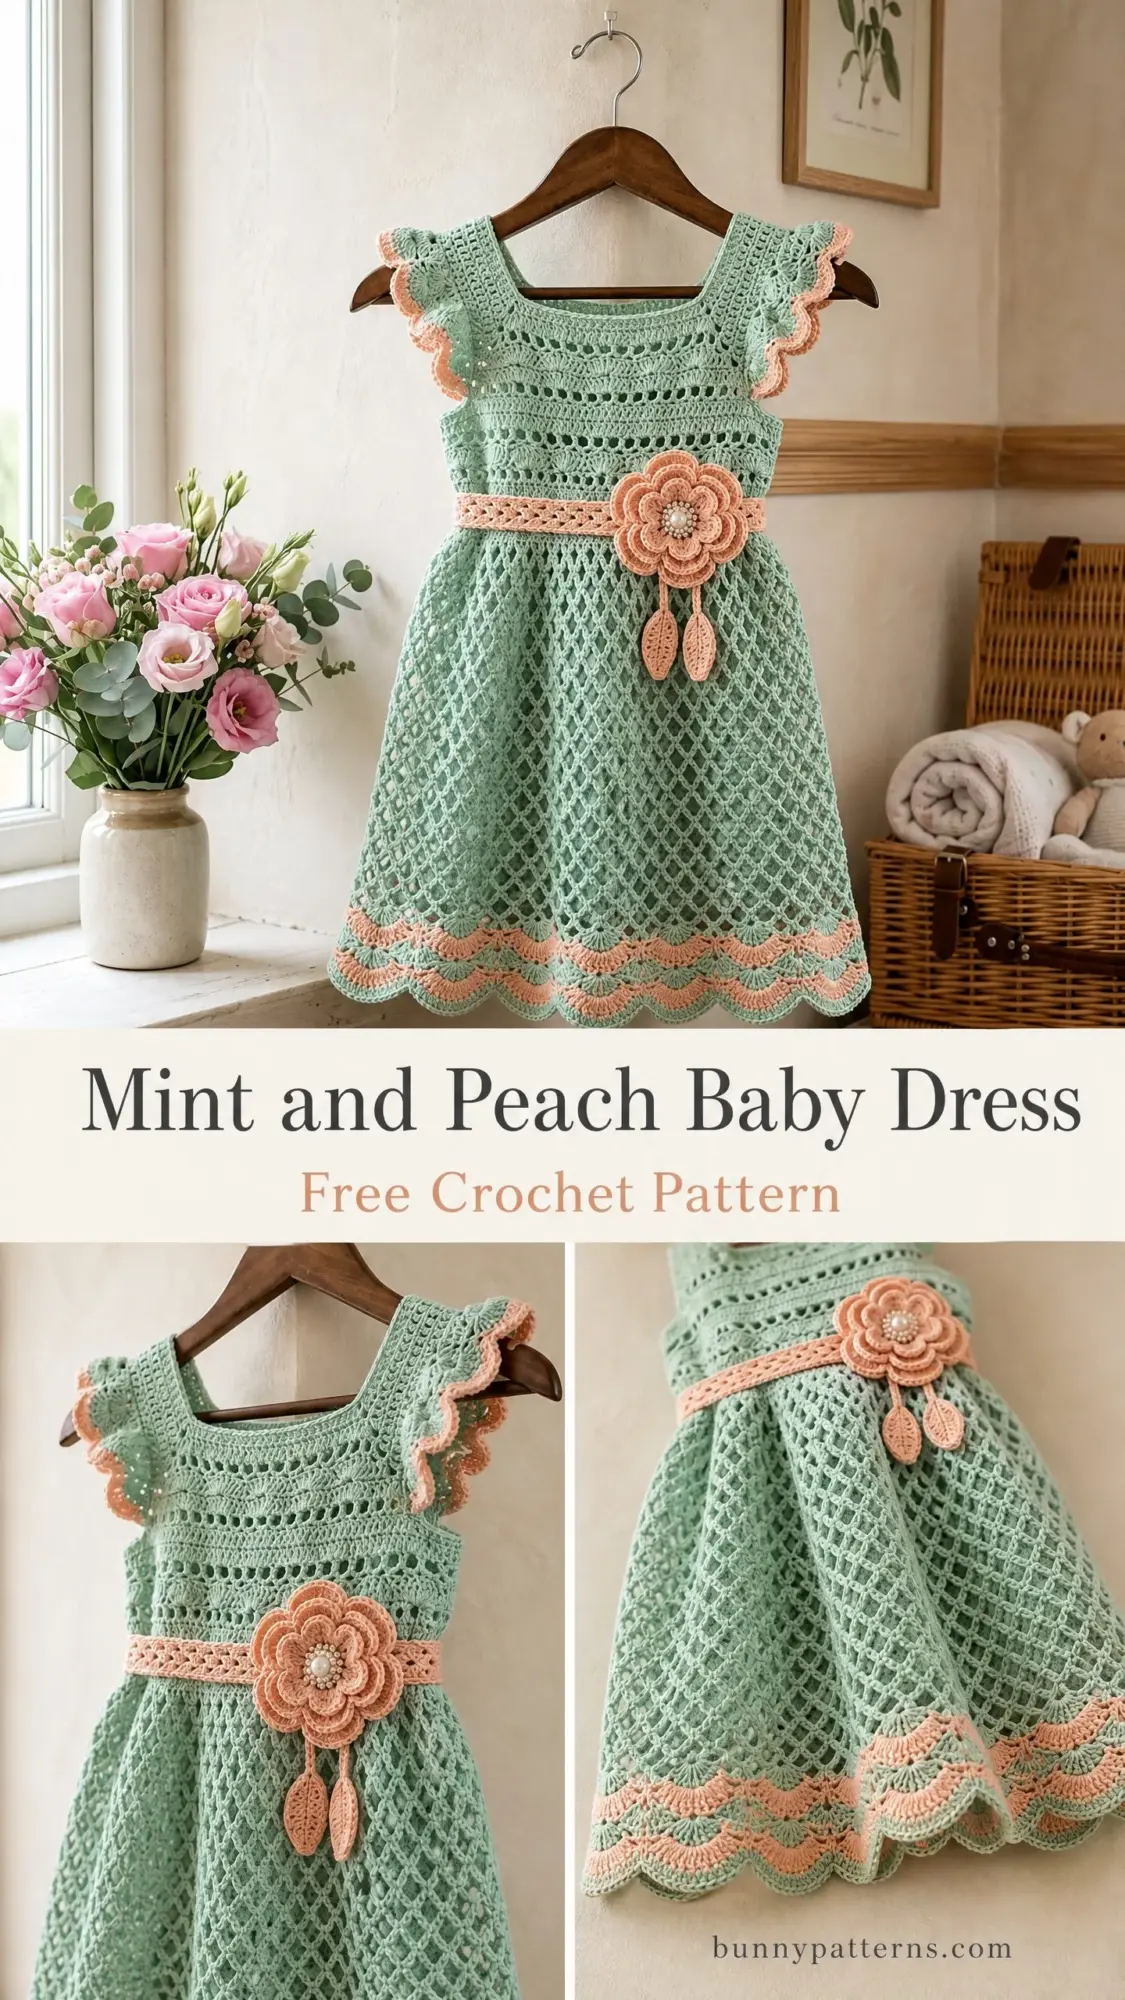
The diamond mesh skirt gives you that dreamy, airy drape while the structured bodice keeps everything polished and wearable. And that crocheted flower with the pearl center? Total showstopper. Trust me when I say this dress photographs beautifully and will have everyone asking where you bought it.
If you have been looking for a project that feels impressive but does not require a PhD in crochet, this is it. Let me walk you through every single step.
About This Mint and Peach Baby Dress Crochet Pattern
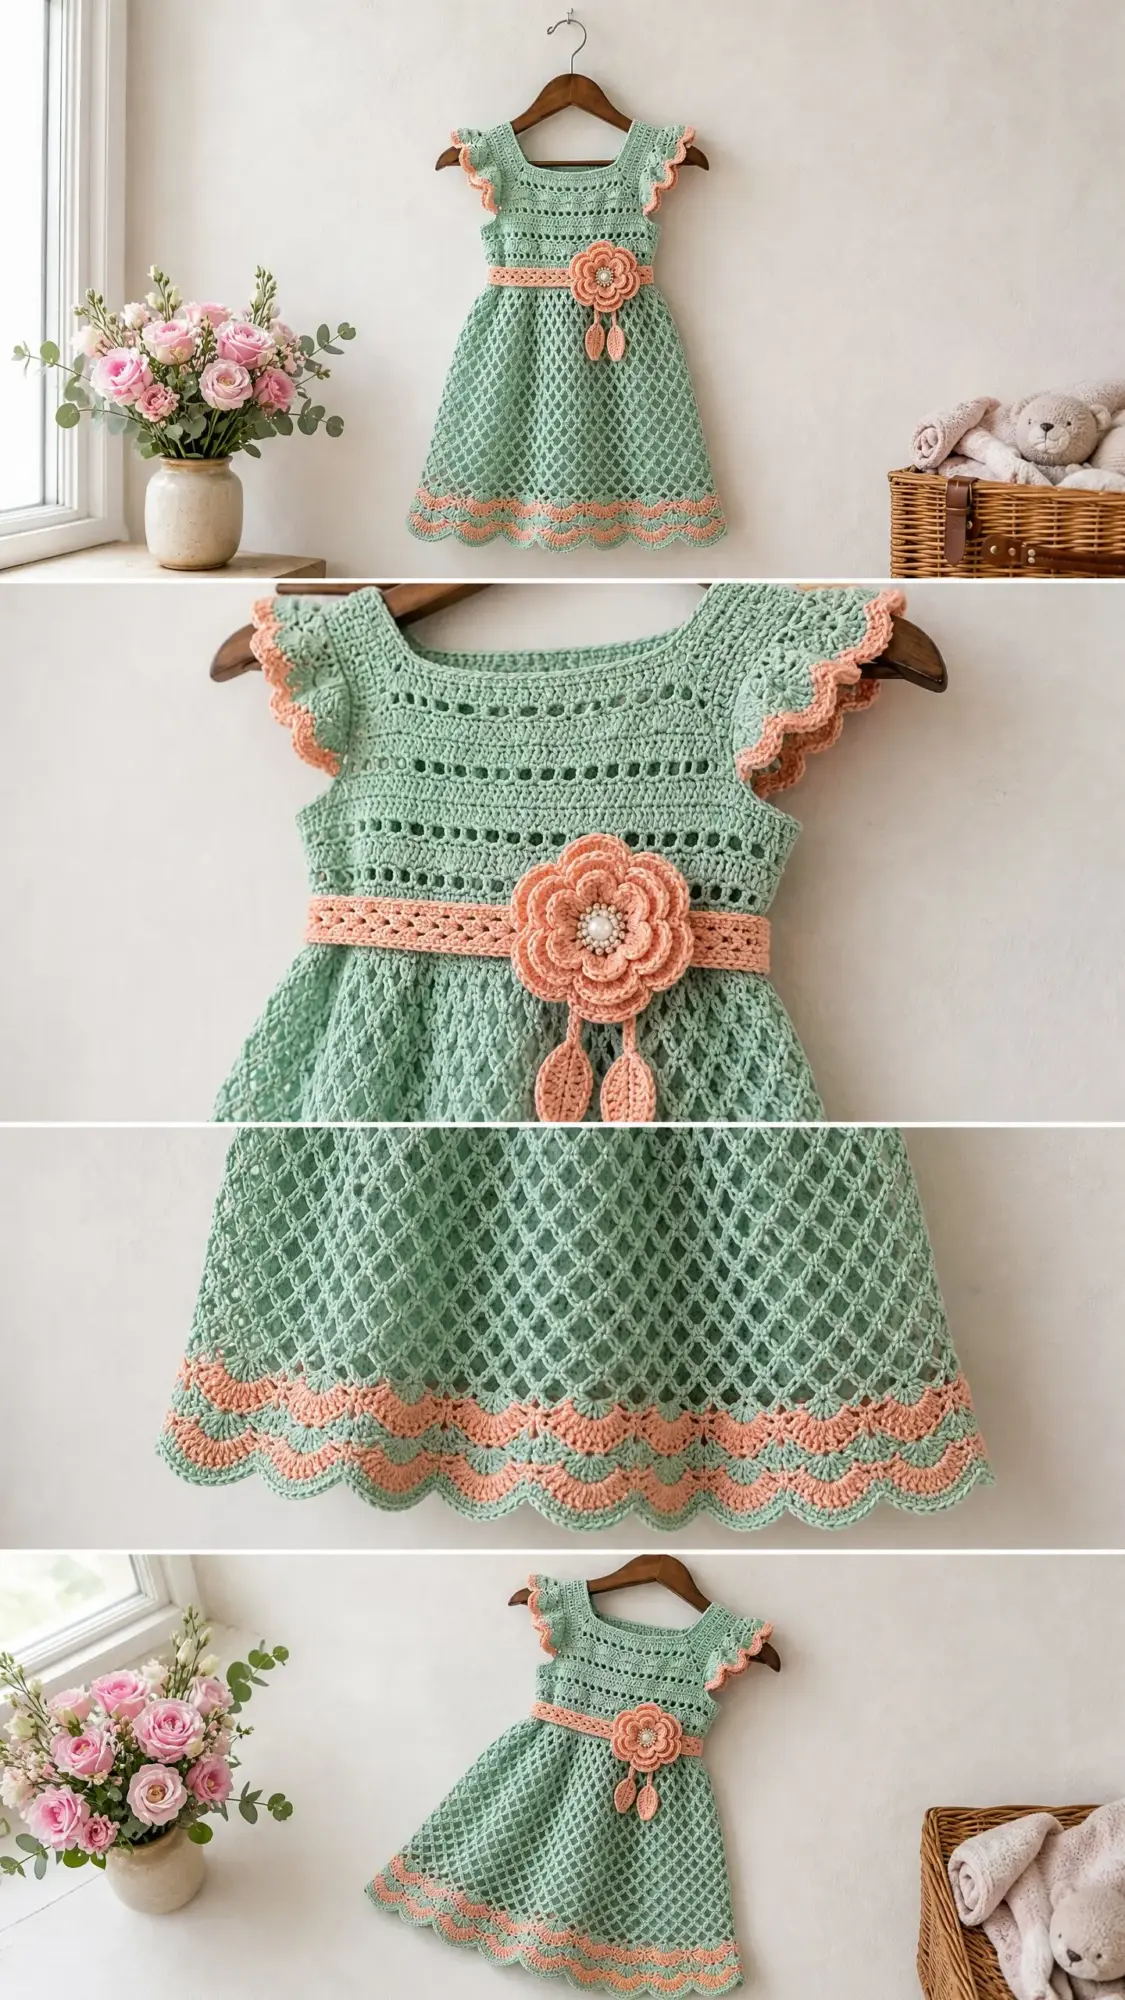
This charming dress features a square neckline bodice worked in solid and lace rows, flutter sleeves with scalloped peach edging, a flared A-line skirt in an open diamond mesh stitch, and a sweet waistband belt topped with a handmade crochet flower. The construction is top-down, which means you start at the shoulders and work your way to the hem. The back has a small opening for easy dressing, closed with buttons or a ribbon tie.
The color combination of mint green and peach creates that fresh, vintage-inspired look that works beautifully for spring and summer occasions. The mint serves as your main color while the peach adds those delicate accent touches at the sleeves, waistband, and hem.
Skill Level: Advanced Beginner to Intermediate
You will need comfort with working in the round, basic lace stitches involving chain spaces and double crochets, simple shaping, and creating a decorative flower applique. If those sound intimidating, do not worry. Every special stitch is written out fully below, and I will guide you through each technique.
Finished Measurements
Size: 2T (approximately 2 years old)
I have included customization tips at the end of the pattern for sizing up or down.
Materials Needed
Yarn:
Recommended Yarn Options:
1. Lion Brand Comfy Cotton Blend (DK weight, 255 yards per 100g skein): Soft against baby skin and holds stitch definition well for the lace sections. You will need 2 skeins in MC and 1 skein in CC.
2. Paintbox Yarns Simply DK (DK weight, 137 yards per 50g skein): Excellent stitch definition with a wide color range at an affordable price. You will need 3 skeins in MC and 2 skeins in CC.
3. Cascade 220 Superwash Sport (worked at a slightly relaxed tension to achieve DK gauge): Machine washable merino with beautiful drape for the skirt. You will need 2 skeins in MC and 1 skein in CC.
Important Substitution Note: Choose any smooth DK weight yarn with good stitch definition. Avoid fuzzy or textured yarns because they will obscure the beautiful diamond mesh pattern in the skirt.
Hook:
Notions:
Gauge
20 single crochet stitches x 24 rows = 4 inches / 10 cm in single crochet, blocked
14 dc-ch1 mesh units x 8 rows = 4 inches / 10 cm in diamond mesh stitch, blocked
Gauge is critical for fit on garments like this dress. Please swatch both gauges before starting and adjust your hook size as needed.
Abbreviations
Here is every abbreviation used in this crochet pattern with definitions:
Special Stitches
Shell Stitch (Shell)
Work 5 dc all into the same stitch or space. This creates a fan-shaped cluster used in all the edgings throughout this pattern.
Scallop Edging
Step 1: Join CC with sl st to first st.
Step 2: Ch 1, sc in same st.
Step 3: Skip 1 st, work 5 dc (Shell) into the next st.
Step 4: Skip 1 st, sc into the next st.
Step 5: Repeat steps 3 and 4 across or around.
Step 6: Join with sl st to first sc. Fasten off.
Note: This edging requires a stitch count divisible by 4. Adjust if needed by adding or removing 1 sc at the join point of any round before working the edging.
Diamond Mesh Stitch (worked in rows, multiple of 4 plus 1)
Row 1 (RS): Ch 5 (counts as dc plus ch 2), sk 2 sts, dc in next st, (ch 2, sk 2 sts, dc in next st) across. Turn.
Row 2 (WS): Ch 5 (counts as dc plus ch 2), dc in first ch-2 sp, (ch 2, dc in next ch-2 sp) across, ending dc in 3rd ch of beg ch-5. Turn.
Row 3 (RS): Repeat Row 2.
Note for working in the round (for the skirt): Every round is worked on the RS. Replace turning ch-5 with ch 5 at the beginning of the round and join to the 3rd ch of beg ch-5 at the end of the round. Count mesh units rather than individual stitches when verifying your work.
Flutter Sleeve Scallop
Worked in CC after the bodice is complete, around each armhole opening.
Step 1: Join CC with sl st to underarm stitch.
Step 2: Ch 1, sc evenly around the armhole opening, placing approximately 1 sc per stitch and 1 sc per 2 row-ends. Join with sl st. Note your stitch count.
Step 3: If stitch count is not divisible by 4, increase or decrease 1 to 3 sc evenly on this round to achieve divisibility by 4.
Step 4: Work Scallop Edging around. Fasten off CC.
Crochet Flower
Worked in CC.
Center Ring: Ch 5, join with sl st to form ring.
Round 1: Ch 1, work 10 sc into ring. Join with sl st to first sc. (10 sc)
Round 2: (Ch 4, tr in same st, ch 4, sl st in next st, sl st in next st) 5 times. (5 petals)
Round 3: Working behind petals of Round 2, (sl st around the post of any sc from Round 1 between petals, ch 5, sl st around post of next sc between petals) 5 times. (5 ch-5 loops)
Round 4: Into each ch-5 loop work (sc, hdc, 2 dc, hdc, sc). (5 larger petals)
Fasten off, leaving a long tail for sewing. Sew 3 decorative beads to center if desired.
Leaf (make 2)
Worked in CC.
Ch 9.
Row 1: Sc in 2nd ch from hook, hdc in next, dc in next 3, hdc in next, sc in next, sl st in last ch. Do not turn. Working along opposite side of foundation ch: sl st in first ch, sc in next, hdc in next, dc in next 3, hdc in next, sc in next, sl st in last.
Fasten off, leaving a tail for sewing. This creates an oval leaf shape.
Pattern Notes Before You Begin
1. The dress is constructed top-down. The bodice is worked flat in rows, then joined to work the skirt in the round.
2. The back of the bodice has a center back opening for a button or ribbon closure.
3. The waistband is a separate crocheted strip worked in CC and sewn around the waist join point.
4. Stitch counts are given at the end of every row and round in parentheses.
5. When changing from MC to CC for edgings, join CC with a sl st to the designated stitch with MC still on hook, then drop MC and pull CC through to complete the sl st join.
6. The flutter sleeves are formed by the natural opening created where the bodice front and back are worked separately and joined.
7. Block the finished dress before attaching the flower embellishment for best results.
8. Chain-5 at the beginning of mesh rows or rounds counts as 1 dc plus ch-2 throughout.
9. All rounds are joined rounds unless otherwise specified.
Step by Step Instructions
Bodice Front
With MC and E-4 (3.50 mm) hook (or hook size needed to achieve gauge), ch 57.
Foundation Row (WS): Sc in 2nd ch from hook and in each ch across. Turn. (56 sc)
Row 1 (RS): Ch 1, sc in each sc across. Turn. (56 sc)
Row 2 (WS): Ch 1, sc in each sc across. Turn. (56 sc)
Row 3 (RS): Ch 3 (counts as dc here and throughout), dc in next 2 sts, (ch 1, sk 1, dc in next 3 sts) across. Turn. (14 groups of 3 dc with ch-1 sps between, plus ch-3 beg)
This row creates a lovely lace band across the bodice.
Row 4 (WS): Ch 1, sc in first dc, sc in next 2 dc, (sc in ch-1 sp, sc in next 3 dc) across. Turn. (56 sc)
Row 5 (RS): Ch 1, sc in each sc across. Turn. (56 sc)
Row 6 (WS): Ch 1, sc in each sc across. Turn. (56 sc)
Row 7 (RS): Ch 1, sc in each sc across. Turn. (56 sc)
Row 8 (WS): Ch 1, sc in each sc across. Turn. (56 sc)
Checkpoint: After Row 8, the bodice front panel should measure approximately 3 inches / 7.5 cm tall and 11 inches / 28 cm wide. Fasten off MC. Set front aside.
Bodice Back (make 2 panels)
Right Back Panel:
With MC, ch 29.
Foundation Row (WS): Sc in 2nd ch from hook and in each ch across. Turn. (28 sc)
Rows 1 through 8: Work same as Bodice Front Rows 1 through 8, keeping all 28 sc each row. (28 sc each row)
Left Back Panel:
Work same as Right Back Panel. Fasten off both panels.
When assembled, the two back panels together equal 56 sc, matching the front width. The center back opening between the two panels is your button or ribbon closure gap.
Joining the Bodice
Arrange pieces as follows: Left Back Panel, then Bodice Front, then Right Back Panel.
Shoulder Join (worked flat):
Lay Right Back Panel with RS facing. Align its right (outer) 8 stitches with the right 8 stitches of the Bodice Front (right shoulder area). With MC, sl st through both layers across 8 stitches to join the right shoulder seam. Fasten off.
Repeat for Left Back Panel and the left 8 stitches of the Bodice Front to join the left shoulder seam.
After joining shoulders, you have the following along the bottom edge of the bodice (the waistline):
Armhole openings are created naturally between the front and each back panel.
Flutter Sleeve Edging
Work Flutter Sleeve Scallop (see Special Stitches) into each armhole opening.
For each armhole: Join CC with sl st at underarm point. Sc evenly around the armhole edge. Work approximately 1 sc per st along the bottom bodice edge portion, and approximately 1 sc per 2 row-ends along the vertical bodice edges.
Armhole stitch count target: 24 sc (adjust by 1 to 2 if needed, always ending on a multiple of 4).
Work Scallop Edging around the 24 sc. (6 scallops per armhole)
Fasten off CC.
Neckline Edging
With CC, join with sl st to top right back corner. Ch 1. Sc evenly across the top of the Right Back Panel (approximately 14 sc across top), sc across the front neckline (approximately 24 sc across), sc across the top of the Left Back Panel (approximately 14 sc across top). Turn. (52 sc)
Row 2 of Neckline Edging: Ch 1, sc in each sc across. Fasten off CC.
The neckline edging does not use the scallop pattern. It is a neat flat border in CC giving the square neckline a clean finish.
Waistline Transition Round
With RS facing, join MC with sl st to any stitch along the bottom of the joined bodice (the 112-stitch waistline).
Round 1: Ch 1, sc in each st around the full waistline, working through all three panels along the bottom edge. Join with sl st to first sc. (112 sc)
Round 2: Ch 1, sc in each sc around. Join with sl st. (112 sc)
Checkpoint: The bodice plus waistline rounds should measure approximately 4 inches / 10 cm from the shoulder join to the current working round.
Skirt (worked in the round in diamond mesh stitch)
Adjustment Round: Ch 1, sc in each of first 56 sc, 2 sc in next sc, sc in each of next 55 sc, 2 sc in last sc. Join with sl st. (114 sc)
This adjustment ensures your stitch count divides evenly into mesh units. 114 ÷ 3 = 38 mesh units.
Skirt Round 1 (Mesh Row 1, RS): Ch 5 (counts as dc plus ch 2), sk 2 sts, (dc in next st, ch 2, sk 2 sts) 37 times, join with sl st to 3rd ch of beg ch-5. (38 mesh units)
Skirt Round 2: Ch 5, (dc in next ch-2 sp, ch 2) 37 times, join with sl st to 3rd ch of beg ch-5. (38 mesh units)
Skirt Round 3: Repeat Round 2. (38 mesh units)
Skirt Round 4: Repeat Round 2. (38 mesh units)
Increase Round 5: Ch 1, sc in joining st, sc in each ch-2 sp and each dc around. Each mesh unit converts back to 3 sc (1 dc becomes 1 sc, ch-2 sp becomes 2 sc). Total: 38 units x 3 = 114 sc. Then work 2 sc in every 6th sc to increase. Number of increases: 19. New count: 114 + 19 = 133 sc. Adjust to 132 sc by working sc2tog once. Join with sl st. (132 sc)
Skirt Round 6 (Mesh restart): Ch 5, sk 2, (dc in next st, ch 2, sk 2) 43 times, join with sl st to 3rd ch of beg ch-5. (44 mesh units)
Skirt Round 7: Ch 5, (dc in next ch-2 sp, ch 2) 43 times, join with sl st. (44 mesh units)
Skirt Round 8: Repeat Round 7. (44 mesh units)
Skirt Round 9: Repeat Round 7. (44 mesh units)
Increase Round 10: Ch 1, sc in joining st, sc in each ch-2 sp and dc around. 44 x 3 = 132 sc. Work 2 sc in every 6th sc: 22 increases. New total: 154 sc. Adjust to 153 by working sc2tog once. Join. (153 sc)
Skirt Round 11 (Mesh restart): Ch 5, sk 2, (dc in next st, ch 2, sk 2) 50 times, join with sl st to 3rd ch of beg ch-5. (51 mesh units)
Skirt Round 12: Ch 5, (dc in next ch-2 sp, ch 2) 50 times, join with sl st. (51 mesh units)
Skirt Round 13: Repeat Round 12. (51 mesh units)
Skirt Round 14: Repeat Round 12. (51 mesh units)
Skirt Round 15: Repeat Round 12. (51 mesh units)
Checkpoint: After Skirt Round 15, the skirt from waistline should measure approximately 7.5 inches / 19 cm deep.
Increase Round 16: Ch 1, sc in joining st, sc in each ch-2 sp and dc around. 51 x 3 = 153 sc. Work 2 sc in every 6th sc for 25 times. New total: 178 sc. Adjust to 177 by working sc2tog once. Join. (177 sc)
Skirt Round 17 (Mesh restart): Ch 5, sk 2, (dc in next st, ch 2, sk 2) 58 times, join with sl st to 3rd ch of beg ch-5. (59 mesh units)
Skirt Round 18: Ch 5, (dc in next ch-2 sp, ch 2) 58 times, join with sl st. (59 mesh units)
Skirt Round 19: Repeat Round 18. (59 mesh units)
Skirt Round 20: Repeat Round 18. (59 mesh units)
Skirt Round 21: Repeat Round 18. (59 mesh units)
Hem Preparation and Peach Hem Band
Convert Mesh to Sc for Hem: Ch 1, sc in joining st, sc in each ch-2 sp and dc around. 59 x 3 = 177 sc. Adjust to 176 by working sc2tog once. Join with sl st. (176 sc)
Hem Band Round 1 (CC): Join CC with sl st. Ch 1, sc in each sc around. Join with sl st. (176 sc)
Hem Band Round 2 (CC): Ch 1, sc in each sc around. Join with sl st. (176 sc)
Scallop Hem Edging (CC): Work Scallop Edging (see Special Stitches) around all 176 sc. (44 scallops)
Fasten off CC.
Waistband Belt
With CC, ch 5.
Row 1: Sc in 2nd ch from hook and each ch across. Turn. (4 sc)
Repeat Row 1 until the belt strip measures approximately 20 inches / 51 cm (or the full circumference of the waistline plus 2 inches / 5 cm for overlap).
Fasten off, leaving a long tail for sewing.
Waistband Edging: With CC, work 1 rnd of sl st along both long edges of the belt to neaten. Fasten off.
Sewing: Center the belt over the waistline transition rounds (between the bodice and skirt). Using the long tail, whipstitch the belt to the dress along the top and bottom edges.
Decorative Flower and Leaves
Work Crochet Flower as described in Special Stitches. (5 large petals with pearl bead center)
Work 2 Leaves as described in Special Stitches.
Attach the two leaves to the underside of the flower by their tails, pointing downward. Sew the assembled flower with leaves to the center front of the belt, positioning it slightly left of center for visual interest.
Back Closure
Sew one small button to the upper right back panel edge, approximately 0.5 inches / 1.5 cm from the top. On the upper left back panel, work a ch-5 button loop at the corresponding position by joining MC, ch 5, sl st back to the same point to form a loop, fasten off.
Alternatively, thread a 12-inch / 30 cm length of ribbon through the back panels and tie in a bow.
Size Customization Tips
To size up: Add 4 sts to each bodice section (Front: 60 sts, each Back Panel: 30 sts, total waistline: 120 sts) for size 3T. Add 8 sts per section (Front: 64, each Back: 32, total waistline: 128 sts) for size 4T.
To size down: Subtract 4 sts per section for size 18 months (Front: 52, each Back: 26, total waistline: 104 sts).
To lengthen: Add additional mesh rounds between increase rounds. Each full mesh round group of 4 to 5 rounds adds approximately 1.5 to 2 inches of length.
To shorten: Remove one increase tier and corresponding mesh rounds.
Always convert the final waistline count to the nearest multiple of 3 for mesh by working 1 adjustment sc2tog if needed before the first skirt mesh round. Also verify that the hem stitch count is divisible by 4 for the scallop edging.
Finishing and Blocking
Weave in all ends securely using a yarn needle, burying tails through the backs of several stitches.
Wet blocking is strongly recommended. Fill a basin with lukewarm water and a small amount of wool wash or gentle soap. Submerge the dress and gently squeeze without wringing. Remove from water and press gently in a clean towel to remove excess water.
Lay flat on a blocking mat. Pin the scalloped hem evenly, stretching each scallop point gently to open the lace. Pin the mesh skirt open to the full circumference. Allow to dry completely, approximately 24 hours.
Once dry, sew on the flower and leaves, and attach the belt.
Care Instructions
Hand wash in cool water with a gentle detergent. Lay flat to dry. Do not tumble dry, iron, or bleach. If using a superwash wool DK yarn, machine washing on a gentle cycle in a mesh bag at cool temperature is acceptable. Store folded, not on a hanger, to prevent stretching.
Thank you so much for choosing this mint and peach baby dress crochet pattern for your next project! I would absolutely love to see your finished dresses, so please tag me on Instagram or share your photos in our Facebook group. Seeing your creations brings me so much joy.
If this pattern caught your eye, go ahead and pin it to your favorite Pinterest board so you can find it easily when you are ready to start. And if you make this sweet little dress, please drop a comment below. I read every single one and cannot wait to hear how yours turns out!
You Might Also Like
- Sage Green Botanical Lace Maxi Skirt Free Crochet Pattern
- Lavender Rose Granny Square Tote Free Crochet Pattern
- Sage Green Granny Square Hobo Bag Free Crochet Pattern
- Sage Green Daisy Crochet Dress Free Crochet Pattern