
I don’t know about you, but I have a soft spot for baby dresses that look like tiny heirlooms. The kind you fold carefully into tissue paper and tuck away for the next generation. The kind that makes grandmothers tear up a little.
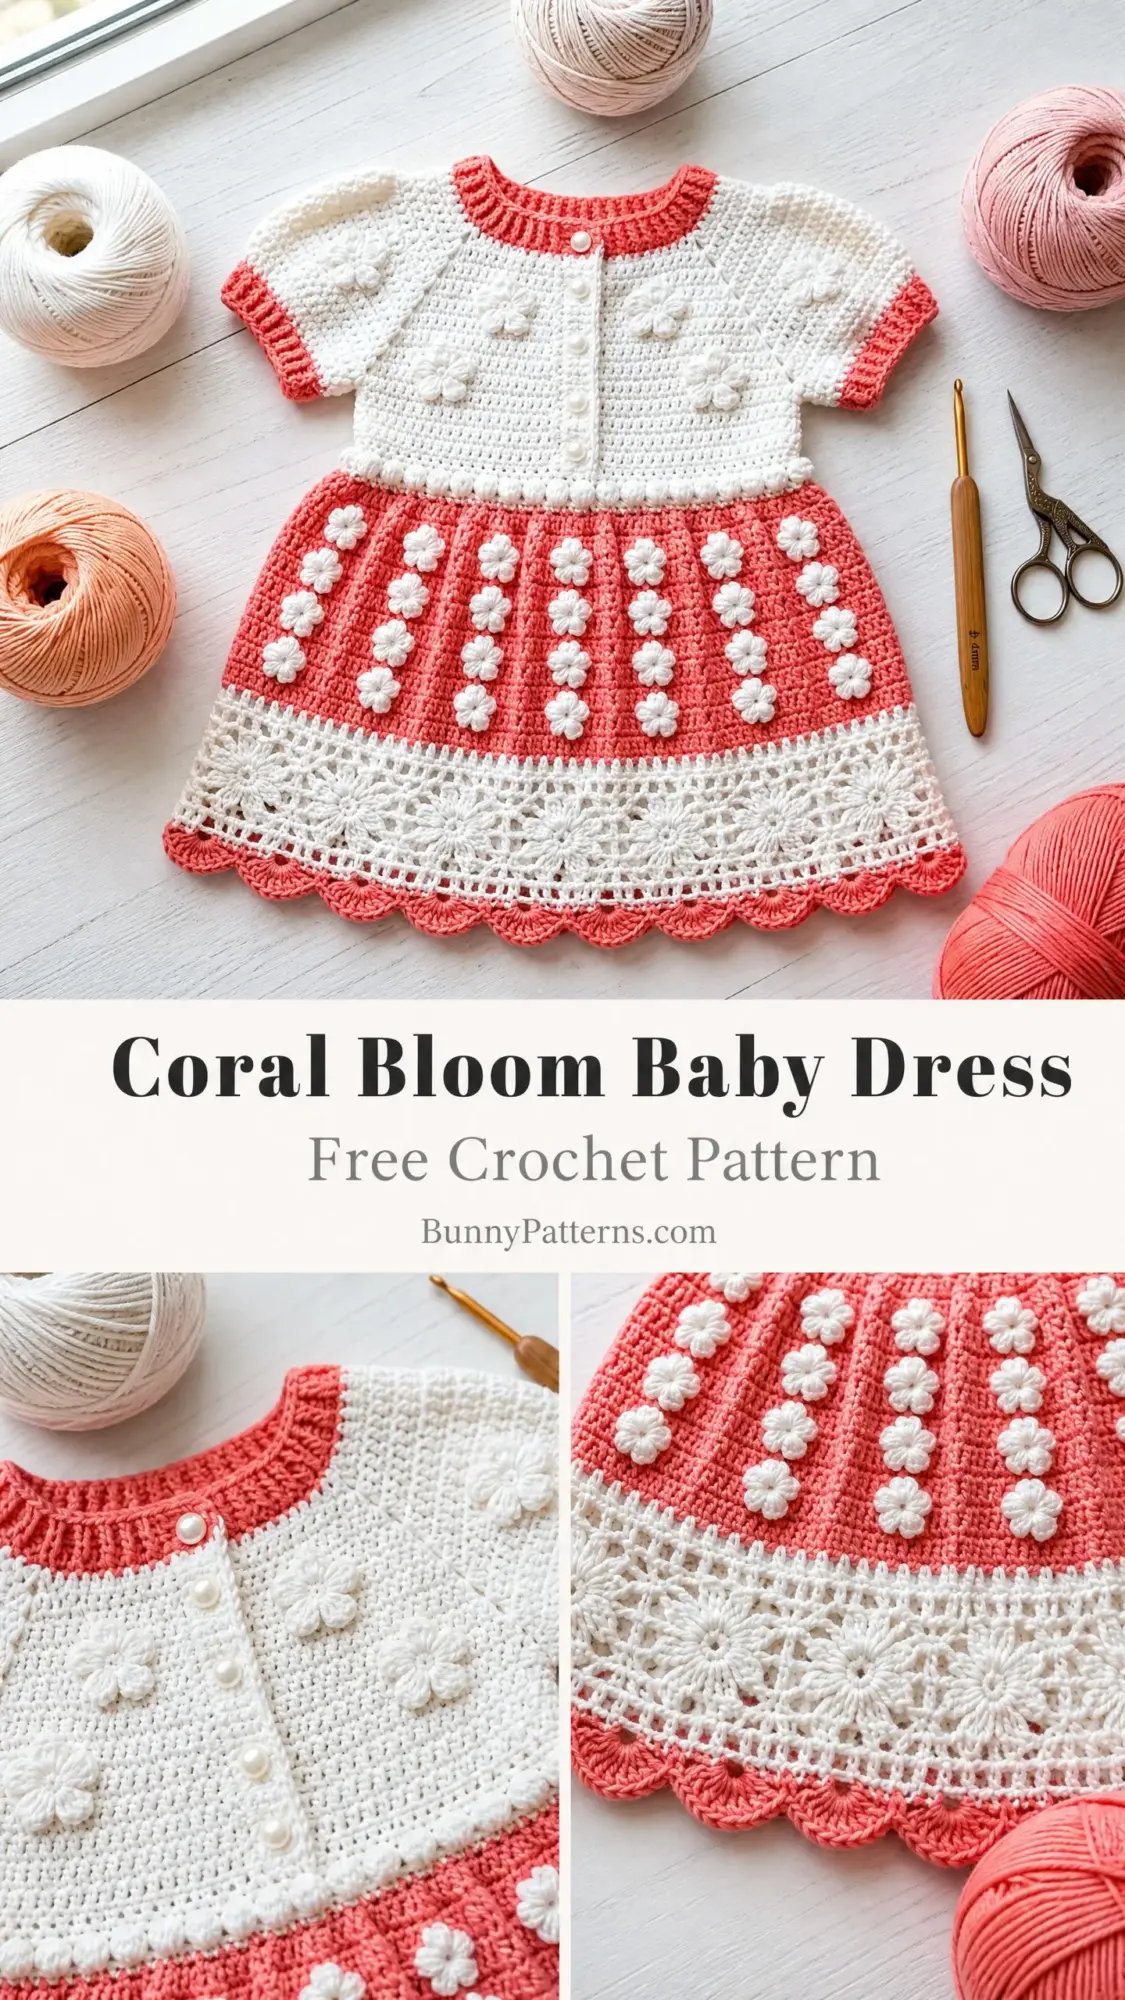
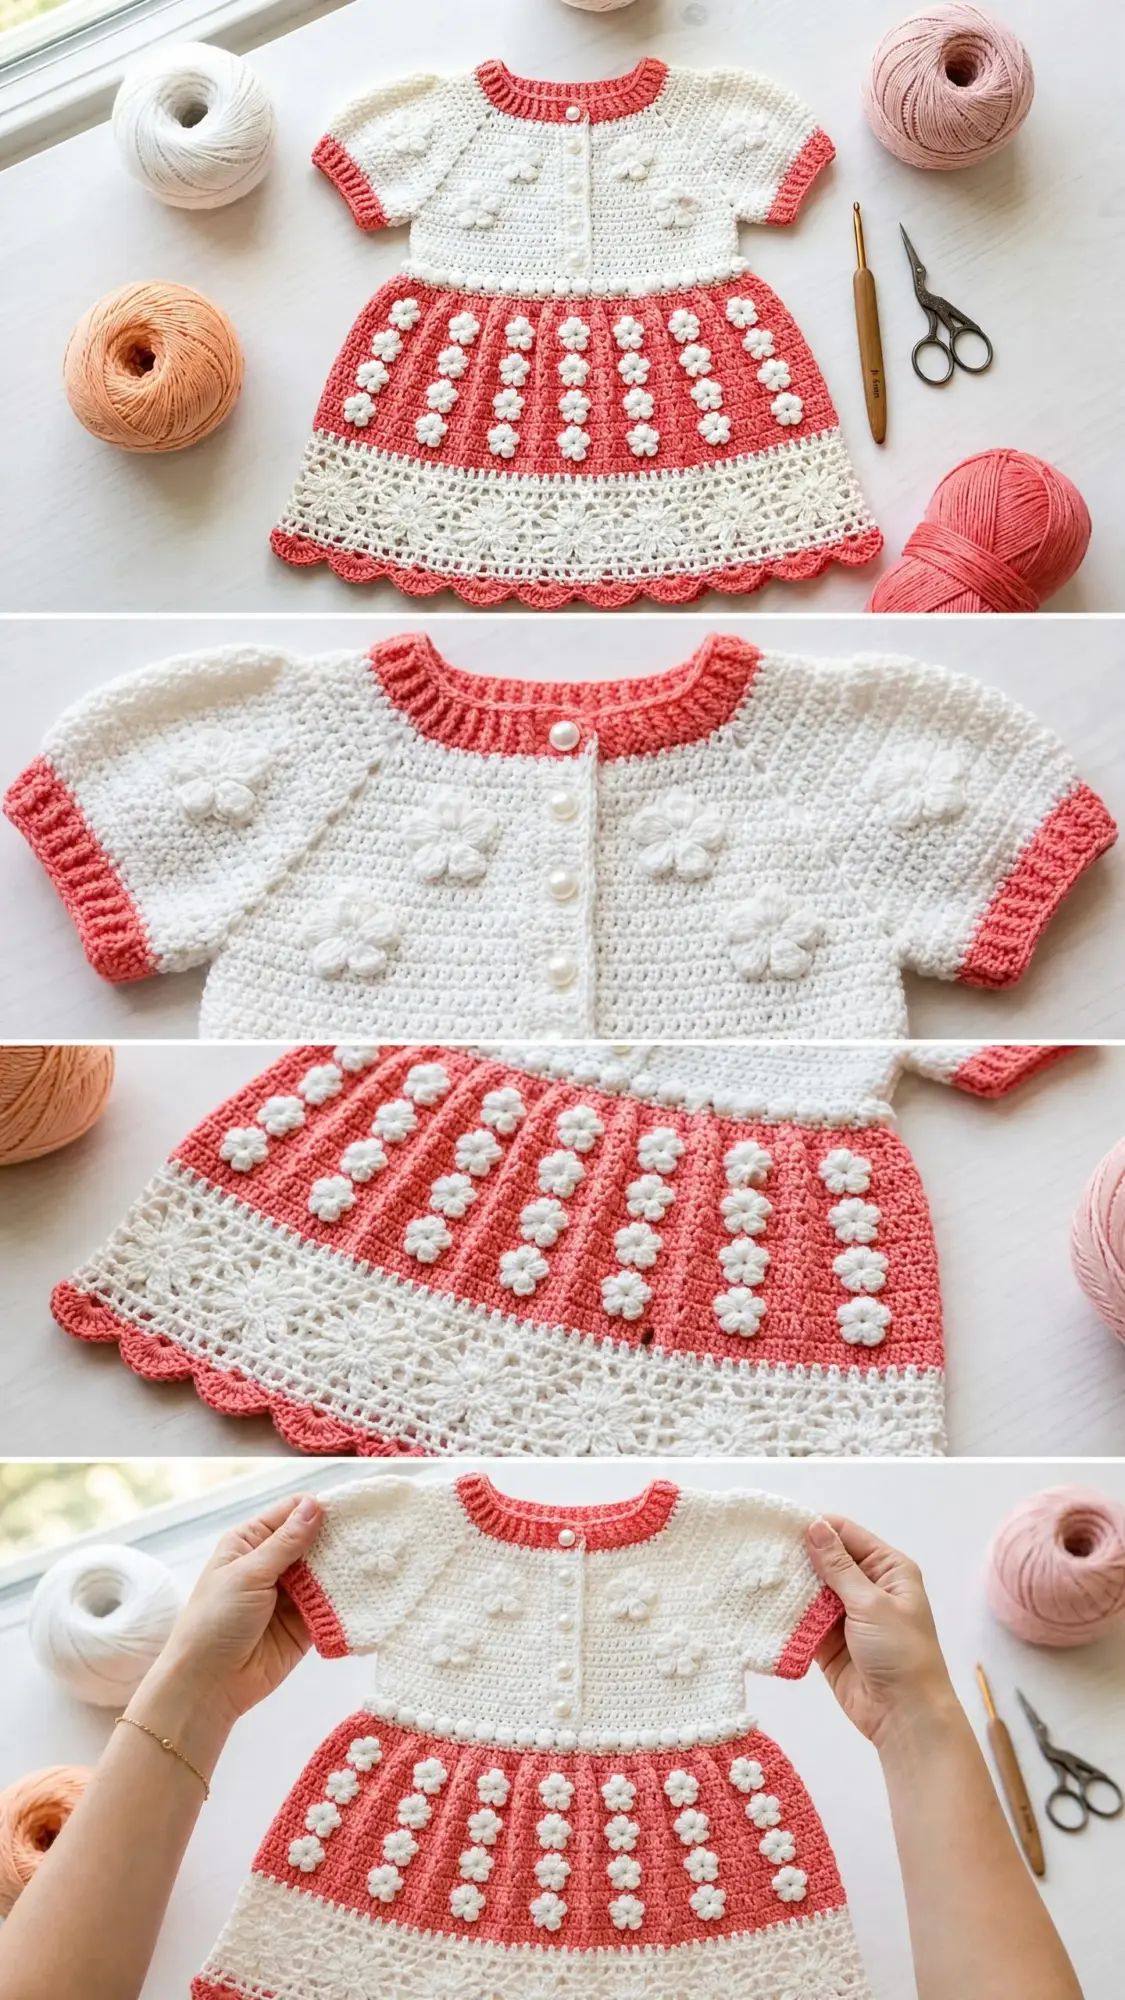
This Coral Bloom Baby Dress is exactly that sort of project. It combines a fitted cream yoke covered in raised popcorn flowers with a flared coral skirt dotted with three-dimensional daisy appliques. The whole thing finishes with a delicate lace border and scalloped hem that honestly takes my breath away every time I look at it.
If you have been searching for a special occasion dress that feels both vintage and fresh, this crochet pattern delivers. Yes, it takes patience. Yes, those 30 little daisies require dedication. But the finished piece? Worth every single stitch.
About This Baby Dress Crochet Pattern
This dress is designed for an 18-month-old baby with a chest measurement of approximately 20 inches. The finished garment has a chest circumference of 22 inches with comfortable ease, and measures about 15 inches from shoulder to hem.
The construction flows from the top down. You will work a flat yoke with raglan shaping and a button opening at the back, then join to work the skirt in the round. The sleeves are short and sweet, finished with coral cuffs. After the main body is complete, you will add a gorgeous lace border at the hem and sew on those charming daisy appliques.
Skill level: Intermediate to Advanced. This crochet tutorial assumes you are comfortable working both flat and in the round, reading stitch counts across color changes, and creating three-dimensional flower motifs.
Time estimate: Plan for 18 to 25 hours total, depending on your experience level. The daisy appliques alone will take a few evenings, so put on a good podcast and settle in.
Materials You Will Need
Yarn:
Recommended yarn options:
Hooks:
Notions:
Gauge
Getting gauge right matters here. This is a fitted garment, and even one stitch per inch off will change how the dress fits.
With US D/3 hook and Yarn A in single crochet (sc):
22 stitches x 26 rows = 4 inches x 4 inches (10 cm x 10 cm)
With US D/3 hook in half double crochet (hdc) for skirt:
20 stitches x 16 rows = 4 inches x 4 inches (10 cm x 10 cm)
Always swatch before starting. Adjust your hook size up or down until you match gauge.
Abbreviations and Stitch Definitions
Let me walk you through every abbreviation you will see in this pattern. If you are newer to garment construction, bookmark this section.
Special Stitches
Popcorn Stitch (pc)
This creates those raised flower bumps on the yoke. Work 5 double crochets into the same stitch. Remove your hook from the working loop. Insert your hook from front to back into the top of the first dc of the group. Pick up the working loop and draw it through. Pull snugly to close. The popcorn pops toward the right side of your work.
Three-Dimensional Daisy Applique
You will make 30 of these little flowers. Each one measures about 0.75 inches across.
With US C/2 hook and Yarn A, make a magic ring.
Round 1: Ch 1, work 6 sc into ring, join with sl st to first sc. (6 sc)
Round 2 (petals): (Ch 4, sl st into 2nd ch from hook, sc in next ch, hdc in next ch, sl st into next sc of Round 1) 6 times. (6 petals formed)
Fasten off leaving a 10-inch tail for sewing.
Shell Stitch
Work 5 dc into the same stitch or space. This forms one shell.
Scallop Edging
Sl st into next st, (sc, 3 dc, sc) into next st, sl st into next st. That creates one scallop. Repeat across.
Step by Step Instructions
Section 1: Neckline Ribbing
The neckline starts as a horizontal strip worked in Yarn B (coral), then seamed into a ring.
With Yarn B and D/3 hook, ch 9.
Row 1 (RS): Sc in 2nd ch from hook and in each ch across. Turn. (8 sc)
Row 2 (WS): Ch 1, sc in BLO of each st across. Turn. (8 sc)
Row 3 (RS): Ch 1, sc in BLO of each st across. Turn. (8 sc)
Repeat Rows 2 and 3 until piece measures 13 inches long, approximately 54 rows total.
Do not fasten off. Fold the strip with short ends together and sl st the two short edges together to form a ring. You now have a ribbing ring with 54 ridges around.
Section 2: Yoke Pickup Row
With RS facing, using Yarn A and D/3 hook, join Yarn A to any seam point on the top edge of the neckline ribbing.
Pickup Round (RS): Ch 1, work 1 sc evenly into each row end around the neckline ribbing. Pick up 108 sc total. Join with sl st to first sc. Do not turn. (108 sc)
Place markers to divide for yoke sections:
Check your math: 17 + 12 + 50 + 12 + 17 = 108. Perfect.
Section 3: Yoke (Worked Flat)
The yoke is worked flat to allow for the button opening at center back. Turn your work so the WS faces you.
Row 1 (WS): Ch 1, sc across all 108 sts. Turn. (108 sc)
Row 2 (RS, increase row): Ch 1, sc to 1 st before first raglan marker, 2 sc in next st, 2 sc in next st, sc across sleeve to 1 st before next marker, 2 sc in next st, 2 sc in next st, sc across back to 1 st before next marker, 2 sc in next st, 2 sc in next st, sc across sleeve to 1 st before last marker, 2 sc in next st, 2 sc in next st, sc to end. Turn. (116 sc)
Row 3 (WS): Ch 1, sc across. Turn. (116 sc)
Continue this pattern: increase on every RS row, plain sc on every WS row. Work a total of 14 raglan increase rows.
After Row 28, you will have 220 sts total.
Popcorn Placement Rows:
Row 14 (RS, increase + popcorn row): Work the increase row as established. On the right front section, work: sc 4, pc, sc 4, pc, sc to end of section. On the back section: sc 12, pc, sc 12, pc, sc 12, pc, sc to end. Mirror on left front. Complete sleeves with plain sc and increases. Turn. (164 sc)
Row 15 (WS): Ch 1, sc across all sts, working sc into top of each popcorn. Turn. (164 sc)
Continue through Row 29, placing popcorns on Rows 18 and 22 in offset and aligned positions as specified in the full pattern.
Row 30 (RS): Switch to Yarn B. Ch 1, sc across all 220 sts. Turn. (220 sc)
Row 31 (WS): Ch 1, sc across in Yarn B. Turn. (220 sc)
Fasten off Yarn B. This coral stripe marks your waistline.
Section 4: Divide for Sleeves and Join Body
With RS facing, join Yarn A to the right front section.
Separation Row (RS): Ch 1, sc across 31 right front sts, skip 40 sleeve sts (place on holder), ch 6 for underarm, sc across 78 back sts, skip 40 sleeve sts onto holder, ch 6 for underarm, sc across 31 left front sts. Join with sl st to first sc to form a ring. (152 sts)
Body Setup Round: Ch 2 (does not count as st), hdc in each st and each ch around. Join with sl st to first hdc. (152 hdc)
Section 5: Waist Bobble Divider
Round 1 (Yarn B): Join Yarn B. Ch 3 (counts as dc), dc in each st around. Join. (152 dc)
Round 2: Ch 3, dc in each st around. Join. (152 dc)
Round 3 (bobble divider): Ch 3, dc in next 2 sts, make a small bobble, (dc 3, bobble) around. Join. (152 sts)
Section 6: Skirt Body
The skirt uses hdc with evenly spaced increases to create that beautiful A-line flare.
Skirt Round 1 (increase): Ch 2, (hdc 10, 2 hdc in next) 13 times, hdc 9. Join. (165 hdc)
Skirt Rounds 2 and 3: Ch 2, hdc in each st around. Join. (165 hdc)
Skirt Round 4 (increase): (Hdc 10, 2 hdc in next) 15 times. Join. (180 hdc)
Skirt Rounds 5 through 7: Plain hdc. (180 hdc)
Continue the increase pattern every 4th round:
Skirt Rounds 21 through 24: Plain hdc. (240 hdc)
Fasten off Yarn B. Your skirt body should measure approximately 6 inches from the waist divider.
Section 7: Lace Border
Join Yarn A to any stitch.
Transition Round: Ch 1, sc in each hdc around. Join. (240 sc)
Lace Round 1: Ch 4 (counts as dc, ch 1), skip 1 st, (dc in next st, ch 1, skip 1 st) around. Join. (120 dc, 120 ch-1 sp)
Lace Round 2 (fan round): Sl st into first ch-1 sp. (Sc in sp, skip 1 sp, shell of 5 dc into next sp, skip 1 sp, sc in next sp, ch 3) around. Join. (30 shells)
Continue through Lace Rounds 3, 4, and 5 as specified, then finish with the scallop edging in Yarn B.
Section 8: Sleeves
Work both sleeves identically.
Remove sleeve sts from holder. With Yarn A and D/3 hook, join yarn to center of underarm chain.
Sleeve Setup Round: Ch 1, sc across 6 underarm chain sts, sc in each of 40 held sleeve sts. Join. PM. (46 sc)
Sleeve Rounds 1 and 2: Ch 2, hdc in each st around. Join. (46 hdc)
Sleeve Round 3 (decrease): Ch 2, hdc2tog, hdc to last 2 sts, hdc2tog. Join. (44 hdc)
Continue working the sleeve with decreases as needed, then finish with 2 rounds of BLO sc in Yarn B for the coral cuff.
Section 9: Finishing
Button band: Work a row of sc along each center back opening edge, adding 3 evenly spaced button loops (ch 3, skip 1) on one side.
Daisy placement: Sew your 30 daisy appliques onto the coral skirt in vertical columns, spacing them evenly. The image shows approximately 5 to 6 daisies per column.
Blocking: Wet block the finished dress, pinning the lace border open to show off those beautiful fans and scallops.
Sew on your 3 pearl buttons opposite the button loops.
Tips for Success
This baby dress crochet pattern rewards patience. Take your time with the yoke increases and count your stitches after every RS row. Mark your raglan points clearly.
When making the daisy appliques, work in batches. Make 10, take a break, make 10 more. Assembly line production keeps you from burning out.
The lace border looks complex but breaks down into simple repeated units. Trust the stitch counts and the pattern will guide you through.
Final Thoughts
The Coral Bloom Baby Dress is the kind of project that reminds me why I fell in love with crochet in the first place. It challenges you just enough to feel accomplished, and the finished piece is genuinely beautiful.
Thank you so much for choosing this pattern for your next project. I truly hope you enjoy every stitch, from that first ribbed chain to the last daisy sewn in place. If you make one, I would absolutely love to see it. Tag me on Instagram or share a photo on Facebook. Seeing your finished projects is honestly the best part of my day.
If this pattern caught your eye, go ahead and save it to your Pinterest boards so you can find it when you are ready to start. And please drop a comment below if you make this dress. I would love to hear how it turns out for you and whose lucky little one gets to wear it.
You Might Also Like
- Navy and Gold Heart Tote Bag Free Crochet Pattern
- Pink Strawberry Cow Print Crochet Pants Pattern
- Blush Pink Shell Stitch Halter Dress Free Crochet Pattern
- Ocean Blue Floral Lace Top Free Crochet Pattern