
When I sat down to design this dress, I had one goal in mind. I wanted to create something truly heirloom-worthy. Something a grandmother might tuck away in tissue paper for decades, pulling it out for christenings and first birthdays across generations.
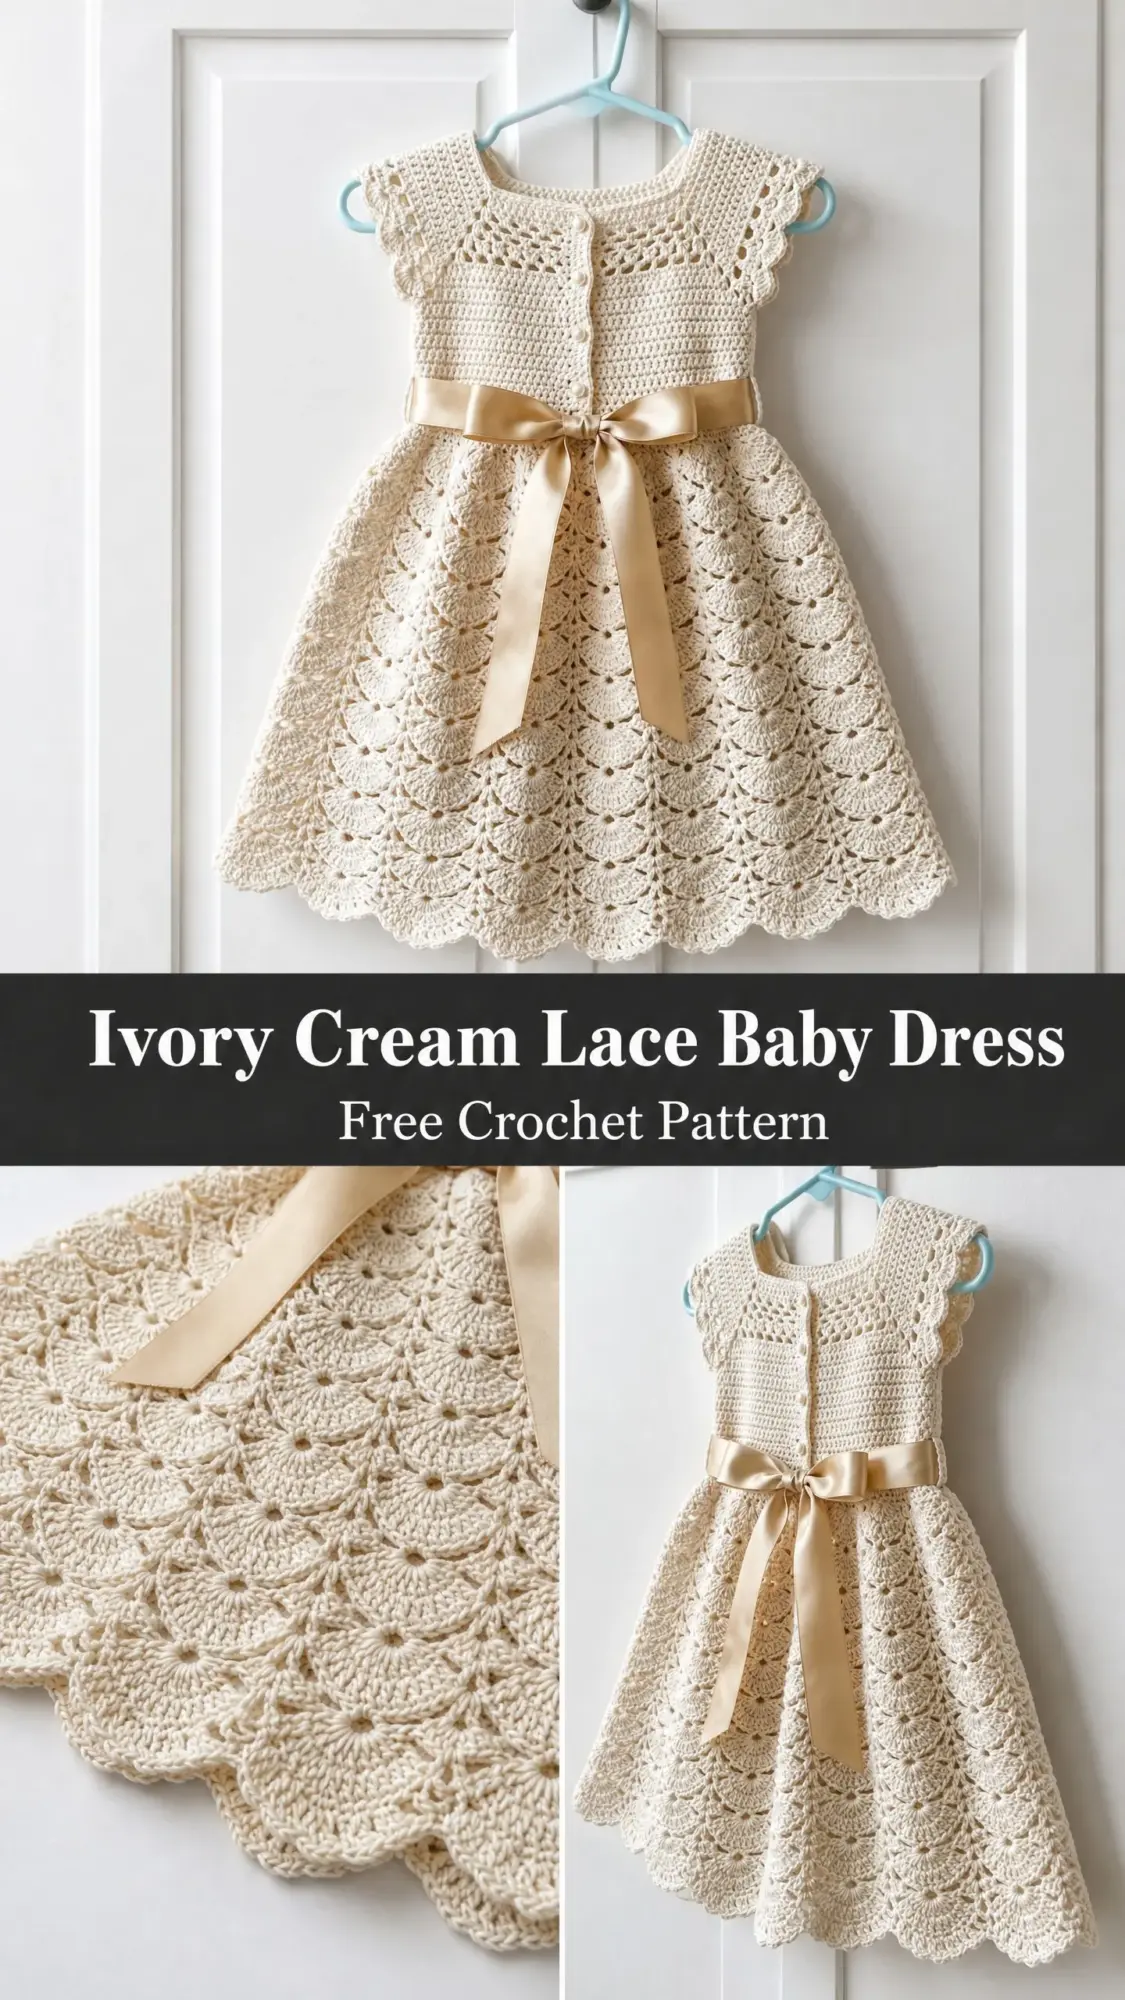
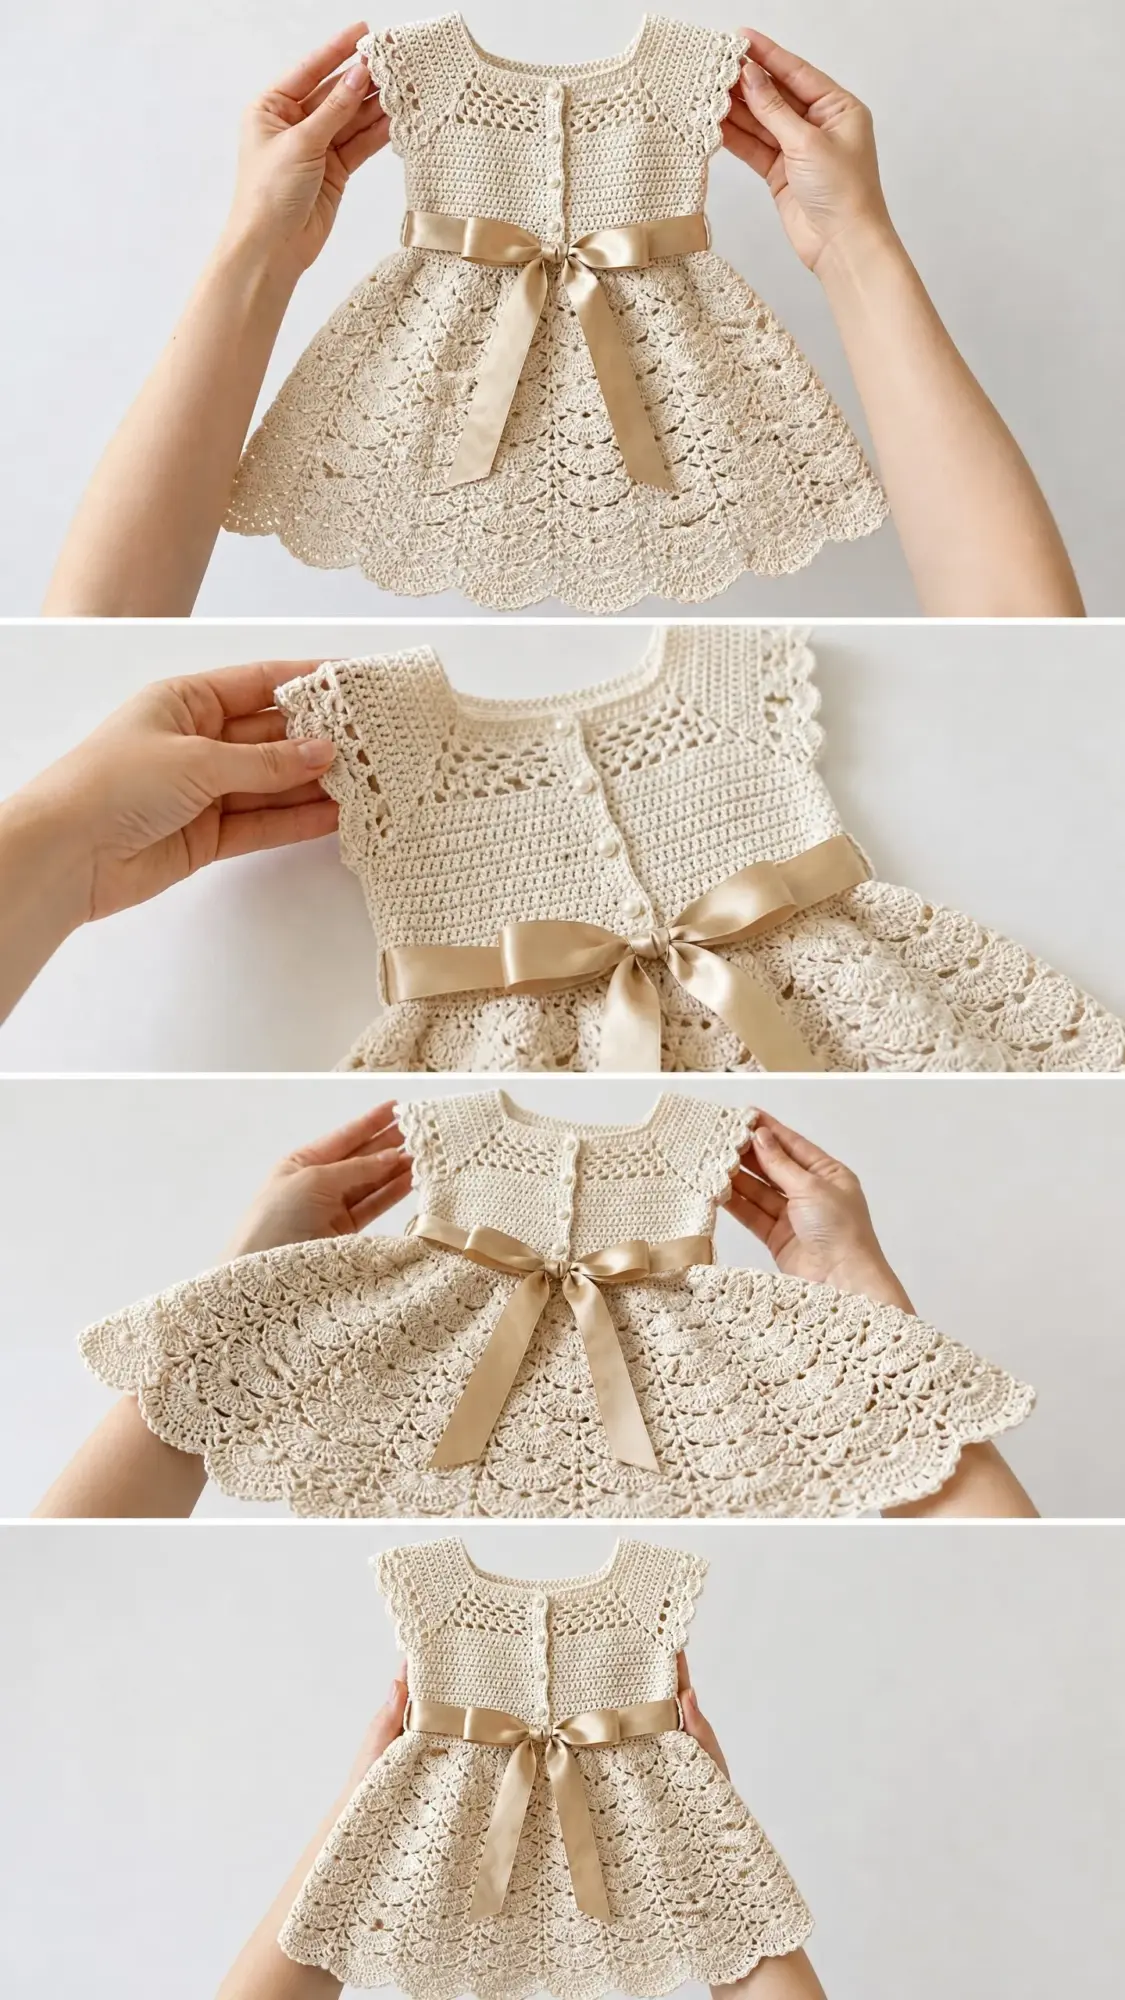
I made deliberate choices at every turn. The solid yoke gives the bodice structure and makes it comfortable against baby skin. The fan stitch skirt creates that gorgeous flowing lace without being too open or delicate for practical wear. And those scalloped edges on the sleeves and neckline? They tie the whole piece together beautifully.
I am SO pleased with how this turned out. The combination of sturdy construction up top and romantic lace below hits exactly the balance I was hoping for. If you have been wanting to create something truly special for a little one in your life, this is it.
About This Ivory Cream Lace Baby Dress Crochet Pattern
This baby dress works from the top down, starting at the neckline and flowing all the way to that beautiful scalloped hem. No seaming required except for attaching your ribbon bow. The construction uses a raglan-style yoke that shapes the armholes and cap sleeves simultaneously. Then the skirt blooms out in a repeating fan stitch lace pattern that creates natural flare.
The finished dress fits babies 6 to 12 months old. It measures 18 inches around the chest and 14 inches from shoulder to hem. The yoke portion is about 4.5 inches deep, with the lace skirt adding another 9.5 inches of flowing beauty.
Skill level: Intermediate. You should feel comfortable working flat versus in the round, tracking multiple increase points at once, and transitioning from solid fabric to lace. If you can handle basic increases and simple lace stitches, you will do great here.
Time estimate: Plan for 15 to 22 hours depending on your experience level. This is a labor of love, not a weekend project. But every stitch is worth it.
Materials You Will Need
Yarn: Approximately 450 to 500 yards of sport weight yarn (CYCA #2) in ivory or cream
Here are my top yarn recommendations for this project:
1. Paintbox Yarns Cotton DK used at a tighter gauge works beautifully. It is 100% cotton with crisp stitch definition and excellent drape for the lace skirt. Machine washable too. You will need approximately 4 balls.
2. Scheepjes Catona 4-ply is my personal favorite for heirloom garments. The mercerized cotton has a silky sheen that photographs gorgeously. Color 130 in Old Lace is an excellent match. Approximately 3 balls needed.
3. Drops Safran offers an affordable option that is soft against baby skin. Also 100% combed cotton. Approximately 3 balls required.
Important substitution note: Stick with cotton or cotton blends for this dress. Avoid stretchy fibers like superwash wool or acrylic alone. They will cause the lace skirt to grow unpredictably with wear. If using a wool blend, choose one with at least 50 percent cotton or linen content.
Crochet hooks:
Notions:
Gauge (Do Not Skip This)
With D/3 hook and sport weight yarn:
22 single crochet stitches by 24 rows equals 4 inches, blocked
With E/4 hook:
1 fan stitch repeat (11 stitches) equals 2 inches wide, blocked
4 rows of fan stitch pattern equals 2 inches tall, blocked
Gauge is mandatory for this baby garment. A difference of even one stitch per inch will result in a significantly different finished size. Swatch, block your swatch, then measure. I know it feels tedious, but babies grow fast and you want this to fit during that precious window.
Abbreviations and Stitch Definitions
Let me walk you through every stitch you will use in this crochet pattern. I will give you the full name, the abbreviation, and a plain-English explanation.
ch (chain): Yarn over, pull through the loop on your hook. This creates your foundation and is used throughout for turning and spacing.
sl st (slip stitch): Insert hook, yarn over, pull through both the stitch and the loop on your hook in one motion. Used for joining rounds.
sc (single crochet): Insert hook into stitch, yarn over and pull up a loop (2 loops on hook), yarn over and pull through both loops. The shortest and most dense of the basic stitches.
hdc (half double crochet): Yarn over, insert hook, yarn over and pull up a loop (3 loops on hook), yarn over and pull through all 3 loops.
dc (double crochet): Yarn over, insert hook, yarn over and pull up a loop (3 loops on hook), yarn over and pull through 2 loops (2 loops remain), yarn over and pull through remaining 2 loops. This is the main stitch in your fan pattern.
tr (treble crochet): Yarn over twice, insert hook, yarn over and pull up a loop (4 loops on hook), yarn over and pull through 2 loops three times.
sk (skip): Pass over the indicated stitch without working into it.
sp (space): The gap created by chain stitches, where you will often work stitches.
st/sts (stitch/stitches): A completed crochet stitch.
pm (place marker): Put a locking stitch marker in the indicated stitch to track your position.
RS/WS (right side/wrong side): The front and back of your work.
sc2tog (single crochet two together): A decrease that combines two stitches into one.
Special Stitches for This Pattern
Fan Stitch (also called Shell Stitch): Work 5 double crochet stitches into the same stitch or space. This creates the beautiful fan shape that forms the main lace motif of your skirt.
V-stitch: Work one double crochet, chain 1, then another double crochet all into the same stitch or space.
Scallop Edging: This creates the decorative edge on your neckline and sleeves. Work 1 single crochet, skip the next stitch, work 5 double crochet into the following stitch, skip the next stitch, work 1 single crochet. This 6-stitch repeat creates lovely waves.
Eyelet Row: This creates the holes for your ribbon. Work double crochet, chain 1, skip 1 stitch, double crochet across. Each chain-1 space becomes an eyelet.
Button Loop: At the position indicated, chain 4, then slip stitch back into the same stitch to form a small loop.
Step by Step Pattern Instructions
Section 1: Neckline Foundation Chain
With your D/3 hook, chain 72.
Row 1 (RS): Single crochet in the 2nd chain from hook, single crochet in each chain across. Turn. (71 sc)
This foundation row forms your neckline edge. Now you will establish the raglan separation points.
Row 2 (WS): Chain 1, sc in first 9 stitches (this is your left back), place marker in next stitch (raglan point 1), sc in next 2 stitches, place marker in next stitch (raglan point 2), sc in next 15 stitches (front right), place marker in next stitch (raglan point 3), sc in next 2 stitches, place marker in next stitch (raglan point 4), sc in next 15 stitches (front left), place marker in next stitch (raglan point 5), sc in next 2 stitches, place marker in next stitch (raglan point 6), sc in last 9 stitches (right back). Turn. (71 sc)
Your stitch distribution at this point:
Raglan Increase Rows
Each increase row adds 12 stitches total. At each marker point, work single crochet in the stitch before the marker, 2 single crochet in the marked stitch, then continue. Move your markers up into the new center stitch after each row.
Row 3 (RS Increase Row): Chain 1. Work across, increasing at each of the 6 marker points. Turn. (83 sc)
Row 4 (WS): Chain 1, sc in each stitch across. Turn. (83 sc)
Row 5 (RS Increase Row): Chain 1, work increases at all 6 markers. Turn. (95 sc)
Row 6 (WS): Chain 1, sc in each stitch across. Turn. (95 sc)
Row 7 (RS Increase Row): Work increases at all 6 markers. Turn. (107 sc)
Row 8 (WS): Chain 1, sc in each stitch across. Turn. (107 sc)
Row 9 (RS Increase Row): Work increases at all 6 markers. Turn. (119 sc)
Row 10 (WS): Chain 1, sc in each stitch across. Turn. (119 sc)
Row 11 (RS Increase Row): Work increases at all 6 markers. Turn. (131 sc)
Row 12 (WS): Chain 1, sc in each stitch across. Turn. (131 sc)
Row 13 (RS Increase Row): Work increases at all 6 markers. Turn. (143 sc)
Row 14 (WS): Chain 1, sc in each stitch across. Turn. (143 sc)
Row 15 (RS Increase Row): Work increases at all 6 markers. Turn. (155 sc)
Row 16 (WS): Chain 1, sc in each stitch across. Turn. (155 sc)
Checkpoint 1: After Row 16, the yoke should measure approximately 2.75 inches from the neckline edge measured straight down the center. Do not measure along the diagonal.
Section 2: Separating Sleeves from Body
Now you will separate the sleeve stitches from the body to create armhole openings.
Row 17 (RS): Chain 1. Sc across 17 left back stitches, chain 6 (underarm bridge), skip next 38 stitches (left sleeve), sc across 39 front stitches, chain 6 (underarm bridge), skip next 38 stitches (right sleeve), sc across 17 right back stitches. Turn.
Body stitch count: 17 + 39 + 17 = 73 sc plus 12 chain stitches = 85 total working stitches
Row 18 (WS): Chain 1, sc across 17 left back stitches, sc across 6 chains, sc across 39 front stitches, sc across 6 chains, sc across 17 right back stitches. Turn. (85 sc)
Rows 19 through 26: Chain 1, sc in each stitch across. Turn. (85 sc)
Checkpoint 2: After Row 26, the bodice from underarm down should measure approximately 1.5 inches. The full yoke from neckline to current row should measure approximately 4.5 inches.
Section 3: Eyelet Waist Row
This row creates the holes for threading your satin ribbon.
Row 27 (RS, Eyelet Row): Chain 3 (counts as dc), dc in next stitch, [ch 1, skip 1 stitch, dc in next 2 stitches] repeat across, ending dc in last 2 stitches. Turn. (27 eyelets created)
Row 28 (WS): Chain 1, sc in each dc and 1 sc in each ch-1 space across. Turn. (85 sc)
Do NOT fasten off. You will now work the button band before joining for the skirt.
Section 4: Center Back Button Band
Right Back Edge (Button Loop Side): With RS facing and D/3 hook, join yarn to bottom-right corner of center back opening. Work sc evenly up the right back edge, placing approximately 1 sc per row (about 28 sc). Place 3 button loops evenly spaced at the 5th, 14th, and 23rd sc from the bottom. For each loop, chain 4 and slip stitch back into the same stitch. Continue in sc. Fasten off.
Left Back Edge (Button Side): Join yarn at top-left corner of center back opening, work sc evenly down the left back edge (28 sc). Fasten off. Sew 3 buttons to correspond with button loops.
Section 5: Joining for Skirt in the Round
With RS facing, fold the dress so center back edges meet with the button band overlapping. Switch to your E/4 hook. Join yarn at the right side of Row 28 (waist) and prepare to work in the round.
Round 1 (Increase Setup Round): Chain 1, work increases evenly around to reach 108 stitches total. Work [sc in next 3 stitches, 2 sc in next stitch] around, adjusting as needed to reach exactly 108 sc. Join with slip stitch to first sc. (108 sc)
This count gives you 18 perfect 6-stitch fan repeats.
Section 6: Skirt Lace Pattern
The skirt uses a 2-round repeating fan stitch pattern. Each repeat is 6 stitches wide, giving you 18 repeats around.
Skirt Round 1 (Fan Round): Chain 1, [sc in next stitch, skip 2 stitches, 5 dc in next stitch, skip 2 stitches] 18 times. Join with slip stitch to first sc. (18 fans, 18 sc)
Skirt Round 2 (Chain Round): Chain 1, [sc in center (3rd) dc of next fan, chain 3, sc in next sc, chain 3] 18 times. Join with slip stitch to first sc. (36 sc, 36 ch-3 arches)
Skirt Round 3: Slip stitch into first ch-3 space, chain 1, sc in same space, [5 dc in next ch-3 space, sc in next ch-3 space] 18 times. Join with slip stitch to first sc. (18 fans, 18 sc)
Skirt Rounds 4 through 6: Repeat Rounds 2 and 3, then Round 2 again.
Skirt Round 7 (Increase Round): This round doubles your fan count for skirt flare. Chain 3, 2 dc in first ch-3 space, sc in next sc, [5 dc in next ch-3 space, sc in next sc] 35 times, 2 dc in same space as ch-3. Join with slip stitch to top of ch-3. (36 fans, 36 sc = 216 sts)
Skirt Rounds 8 through 11: Continue in the established fan pattern with your new stitch count. Work the chain arch round, then the fan round, alternating as established.
Continue in pattern until skirt measures 9.5 inches from waist or desired length.
Finishing
Scallop Hem Edging: On your final round, work the scallop edging pattern: [1 sc, skip 1 stitch, 5 dc in next stitch, skip 1 stitch] around. This creates the beautiful scalloped edge that mirrors your neckline and sleeve trim.
Cap Sleeve Edging: Join yarn at underarm of each sleeve opening. Work scallop edging around the armhole opening using the same pattern as the hem. Fasten off and weave in ends.
Neckline Edging: Join yarn at center back of neckline. Work scallop edging around the entire neckline. Fasten off and weave in ends.
Ribbon: Thread your satin ribbon through the eyelet row at the waist, starting from the center front. Bring both ends around to the front and tie in a bow.
Blocking: Wet block your finished dress by soaking in cool water, gently squeezing out excess moisture, and pinning to measurements. Allow to dry completely before wearing.
Tips for Success
Keep track of your markers. The raglan construction depends on accurate increase placement. Those 6 locking markers are doing heavy lifting in the yoke section.
Count after every increase row. With 12 stitches added per increase row, catching a mistake early saves major headaches later.
Block your swatch AND your finished piece. Cotton yarn especially benefits from blocking. Your lace will open up beautifully and the whole dress will drape better.
Practice the fan stitch first. If you have never worked this stitch, make a small swatch to get comfortable before starting the skirt.
Customizing the Size
For a smaller size (0 to 6 months), reduce the foundation chain by 8 to 10 stitches and work fewer raglan increase rows. For a larger size (12 to 18 months), add 8 to 10 stitches to the foundation chain and add additional increase rows. Always check your gauge and adjust accordingly.
I hope you love making this ivory cream lace baby dress crochet pattern as much as I loved designing it. There is something deeply satisfying about creating a garment that might be passed down through generations.
If this pattern is calling to you, go ahead and pin it to your Pinterest boards so you can find it when you are ready to start. And please, if you make this dress, I would absolutely love to see it. Drop a comment below with your experience or tag me on social media with your finished piece. Happy crocheting, friend!
You Might Also Like
- Terracotta Earth Tone Backpack Free Crochet Pattern
- Dusty Rose Peplum Baby Outfit Free Crochet Pattern
- Ocean Wave Granny Square Bamboo Tote Free Crochet Pattern
- Autumn Burnt Orange Maple Leaf Earrings Free Crochet Pattern