
This is THE project that will make everyone think you spent weeks perfecting your craft. Spoiler: you didn’t. Well, okay, maybe 16 to 22 hours total, but the result? A stunning two-piece lounge set that looks like it walked straight off a boutique rack.
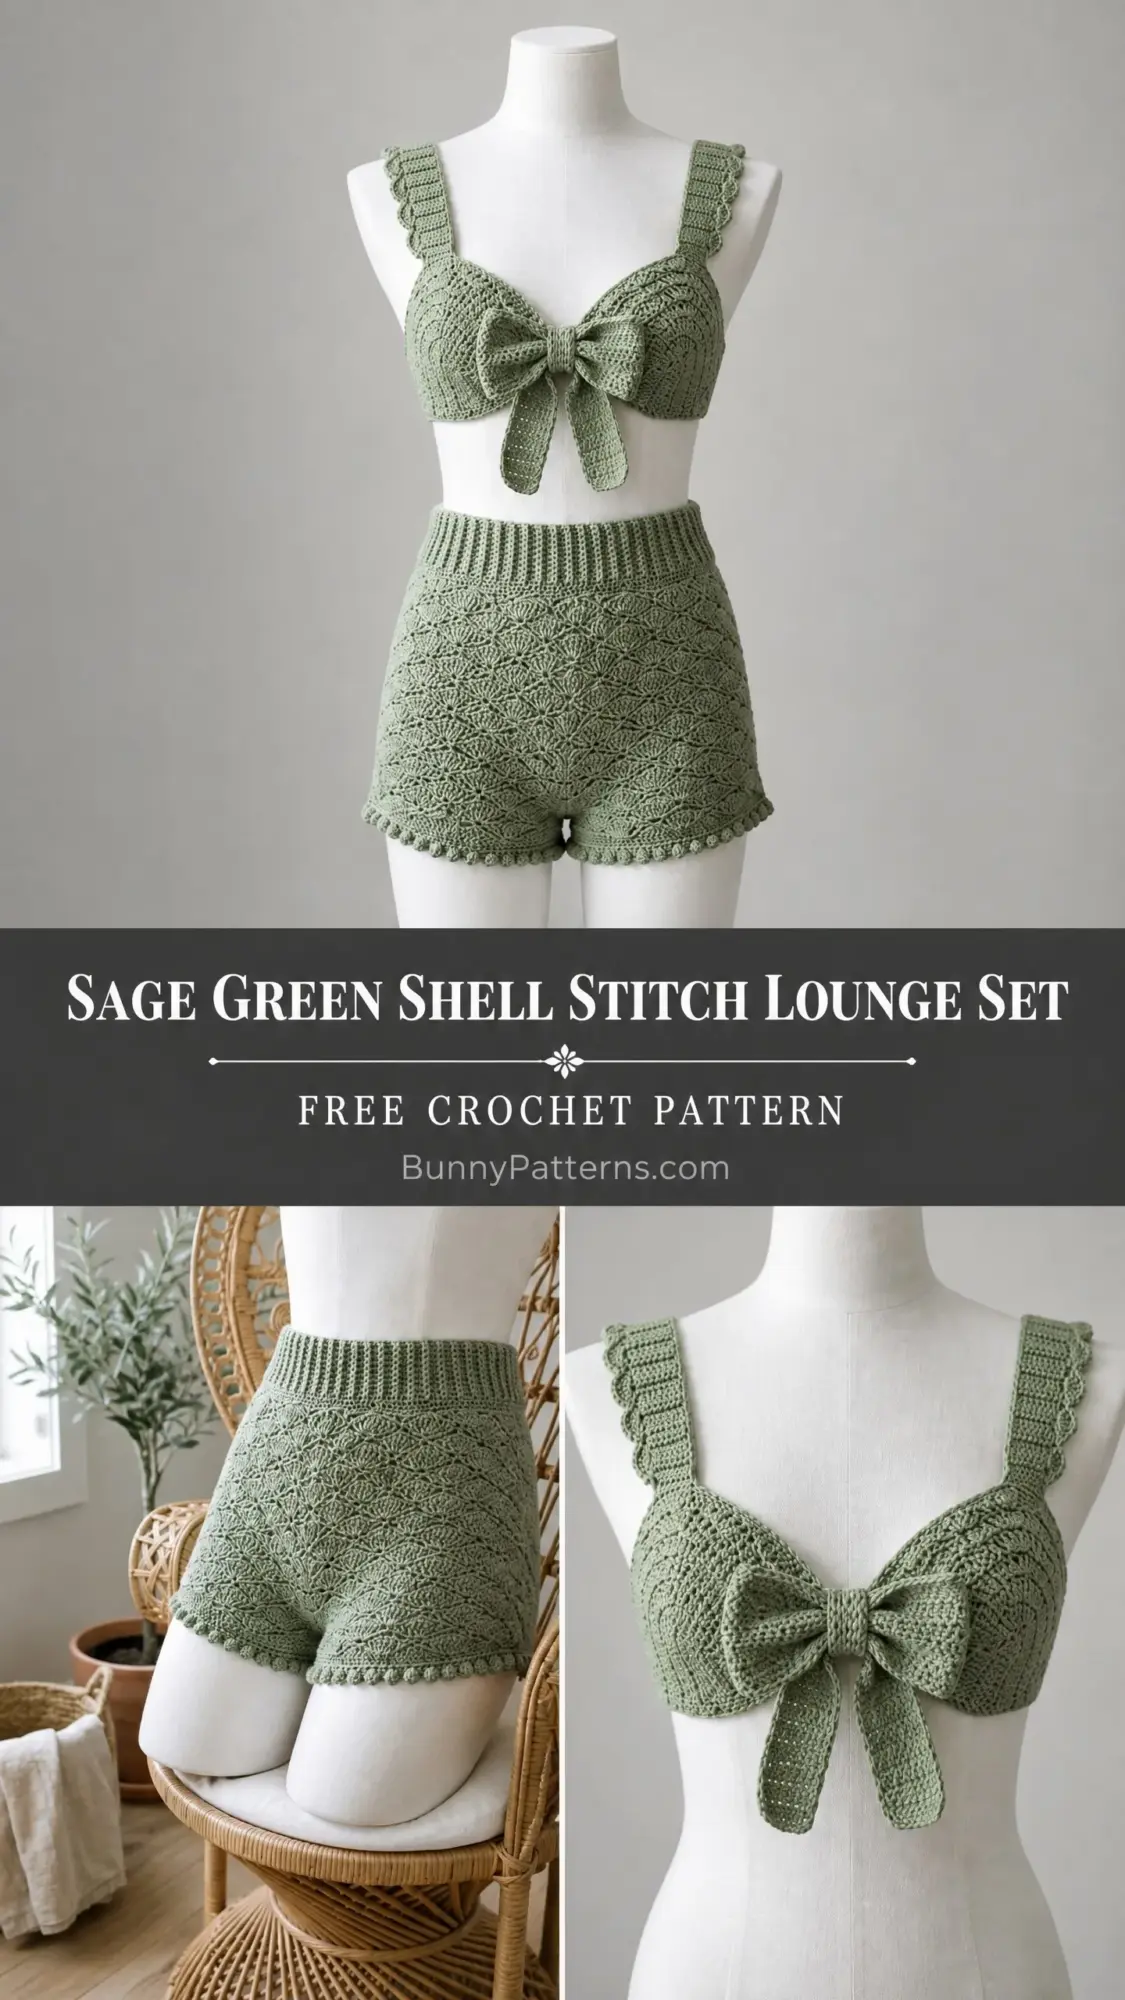
I am OBSESSED with how this sage green shell stitch lounge set turned out. The tie-front bralette paired with those high-waisted shorts creates the perfect boho-coastal vibe. Whether you’re lounging at home, heading to the beach, or just want to feel put-together on a lazy Sunday, this set delivers.
The best part? If you can single crochet and double crochet, you can absolutely make this. The shell and fan stitches sound fancy, but they’re just double crochets grouped together in a clever way. Let me walk you through everything you need to know.
Why You’ll Love This Crochet Pattern
This lounge set has that effortlessly cool aesthetic that’s hard to find in store-bought pieces. The sage green color is incredibly versatile, and the textured shell stitch pattern adds visual interest without overwhelming the eye. The bralette features a sweet front tie closure that creates an adjustable fit, while the shorts have a flattering high-waisted silhouette with a ribbed waistband that actually stays put.
The construction is satisfying too. You’ll work the bralette in sections (band, cups, straps) and seam them together. The shorts start with a ribbed waistband worked flat, then transition to working in the round for the gorgeous fan stitch body. It’s the kind of project that teaches you new skills while still being totally achievable.
Skill Level
This pattern is rated Advanced Beginner to Intermediate. You should be comfortable with basic stitches and have completed at least one garment before diving in. The shell and fan stitch repeats require attention to stitch placement, and the bralette cup shaping uses increases and decreases to create structure.
Don’t let that intimidate you though. Every stitch used here is one you probably already know. We’re talking single crochet, half double crochet, double crochet, and slip stitch. That’s it. The magic happens in how you combine them.
Materials You’ll Need
Yarn: 800 to 1000 yards (730 to 915 meters) of worsted weight (size 4) cotton or cotton-blend yarn in sage green. The bralette uses approximately 300 to 350 yards. The shorts use approximately 500 to 650 yards.
Recommended yarn options:
1. Lion Brand 24/7 Cotton in Sage (100% mercerized cotton, 186 yards per 3.5 oz ball). You’ll need 5 to 6 balls. This yarn gives excellent stitch definition for the shell pattern.
2. Paintbox Yarns Simply DK Cotton in Grass Green or Pistachio (100% cotton, 137 yards per 1.76 oz ball). You’ll need 7 to 8 balls. Note that this DK yarn runs slightly heavy, so swatch carefully.
3. Drops Safran (sport/DK, 100% cotton, 175 yards per 1.76 oz ball). This creates a slightly denser, more structured fabric that works beautifully for the shorts.
Hooks:
Notions:
Important: Choose a yarn with at least 70% cotton content. Cotton gives you the drape, breathability, and stitch definition this pattern needs. Avoid acrylic-heavy blends because they won’t produce the same beautiful drape in the fan stitch sections.
Gauge (Please Don’t Skip This)
I know, I know. Gauge swatches aren’t the fun part. But this is a garment, and fit matters. Take the time to check your gauge before starting.
Using G-6 / 4.0 mm hook:
Main stitch (shell/fan stitch pattern):
Single crochet ribbing (worked flat, turned):
Work a 6 in / 15 cm swatch in the fan stitch pattern. Wash it and block it before measuring. Cotton yarn can relax quite a bit after washing, so this step will save you from heartache later.
Finished Measurements (Size Medium)
Bralette:
Shorts:
Abbreviations and Stitch Definitions
Let me walk you through every abbreviation you’ll encounter. If you’re newer to crochet patterns, bookmark this section.
Special Stitches Explained
Shell Stitch (Bralette Cup Section)
Work 5 dc all into the same stitch or space. That’s it. When the pattern says "shell," you’re putting 5 double crochets into one spot. It creates a cute scalloped effect.
Fan Stitch (Shorts Body)
This is the gorgeous textured pattern covering the shorts. Here’s how it works:
1. Identify the center stitch (the anchor stitch)
2. Skip 2 stitches before the anchor
3. Work 5 dc into the anchor stitch
4. Skip 2 stitches after the anchor
5. Work 1 sc into the next stitch
That completes one fan unit. On alternating rows or rounds, the sc from the previous row becomes the anchor for the next fan. This creates that beautiful interlocking staggered texture you see in the photos.
Scallop Edging (Straps and Hems)
1. Join yarn to edge stitch
2. Work 1 sc
3. Skip 1 stitch
4. Work 5 dc into the next stitch
5. Skip 1 stitch
6. Work 1 sc
7. Repeat steps 3 through 6 across
Picot Ruffle Hem (Shorts Leg Openings)
1. Join yarn to hem stitch
2. Work 1 sc
3. Chain 3
4. Work 1 sl st into the first chain made (this forms the picot bump)
5. Work 1 sc into the next stitch
6. Repeat steps 3 through 5 around
7. Sl st to join and fasten off
Ribbing (Waistband and Bralette Band)
Worked flat in BLO sc (back loop only single crochet). Working in the back loop only creates those vertical ridges that give ribbing its stretch and texture.
Pattern Notes Before You Begin
1. This pattern uses US crochet terminology.
2. The bralette has three main sections: band (ribbed strip), two cups (worked flat with shaping), and two straps (worked flat). All sections are seamed together.
3. The shorts have two main sections: waistband (ribbed strip worked flat then seamed into a tube) and body (worked in joined rounds from the waistband down).
4. Fan stitch repeats for the shorts body are based on a multiple of 6 stitches.
5. The bralette back closure is a purchased clasp sewn to the back band edges.
6. Turning chains in sc ribbing sections count as 0 stitches.
7. Yarn is held single strand throughout.
8. Always join rounds with a sl st to the first stitch (not the turning chain) unless otherwise stated.
9. Block both pieces after seaming. Cotton yarn responds beautifully to wet blocking.
Bralette Instructions
Bralette Band
The band forms the underband and is worked as a ribbed strip in BLO sc.
Using G-6 / 4.0 mm hook, ch 17.
Row 1 (RS): sc in 2nd ch from hook and in each ch across. Turn. (16 sc)
Row 2: ch 1, sc in BLO of each st across. Turn. (16 sc)
Rows 3 through 64: Repeat Row 2. (16 sc per row)
Checkpoint: Your band strip should measure approximately 32 in / 81 cm long and 3.5 in / 9 cm tall. Adjust row count if needed before proceeding.
Seam: Fold the strip so the two short ends meet. Using yarn needle and yarn, whip stitch the short ends together along one side edge. This becomes the center back of the band. Leave 2 in / 5 cm unsewn at the back for the clasp attachment. Attach your purchased clasp to the two open back band edges.
Bralette Cups (Make 2)
Each cup is worked flat with shaping. The cups attach to the top edge of the band, one on each side of center front.
Using G-6 / 4.0 mm hook, ch 25.
Row 1 (RS): sc in 2nd ch from hook and in each ch across. Turn. (24 sc)
Row 2: ch 1, inc in first st, sc to last st, inc in last st. Turn. (26 sc)
Row 3: ch 1, sc across. Turn. (26 sc)
Row 4: ch 1, inc in first st, sc to last st, inc in last st. Turn. (28 sc)
Row 5: ch 1, sc across. Turn. (28 sc)
Row 6: ch 1, inc in first st, sc to last st, inc in last st. Turn. (30 sc)
Row 7: ch 1, sc across. Turn. (30 sc)
Row 8: ch 1, inc in first st, sc to last st, inc in last st. Turn. (32 sc)
Row 9: ch 1, sc across. Turn. (32 sc)
Row 10: ch 1, inc in first st, sc to last st, inc in last st. Turn. (34 sc)
Row 11: ch 1, sc across. Turn. (34 sc)
Row 12: ch 1, inc in first st, sc to last st, inc in last st. Turn. (36 sc)
Row 13: ch 1, sc across. Turn. (36 sc)
Row 14 (texture row): ch 2 (does not count as st), hdc in first st, [sk 1 st, 2 hdc in next st] 17 times, hdc in last st. Turn. (36 hdc)
Row 15: ch 1, sc across. Turn. (36 sc)
Row 16 (texture row): ch 2, hdc in first st, [sk 1 st, 2 hdc in next st] 17 times, hdc in last st. Turn. (36 hdc)
Row 17: ch 1, sc across. Turn. (36 sc)
Begin cup top shaping:
Row 18: ch 1, sc2tog, sc to last 2 sts, sc2tog. Turn. (34 sc)
Row 19: ch 1, sc across. Turn. (34 sc)
Row 20: ch 1, sc2tog, sc to last 2 sts, sc2tog. Turn. (32 sc)
Row 21: ch 1, sc across. Turn. (32 sc)
Row 22: ch 1, sc2tog, sc to last 2 sts, sc2tog. Turn. (30 sc)
Row 23: ch 1, sc across. Turn. (30 sc)
Fasten off, leaving a 12-inch tail for seaming.
Checkpoint: Each cup should measure approximately 7 in / 18 cm wide at the widest point and approximately 5 in / 12.5 cm tall.
Bralette Straps (Make 2)
Using E-4 / 3.5 mm hook, ch 9.
Row 1: sc in 2nd ch from hook and in each ch across. Turn. (8 sc)
Rows 2 through 44: ch 1, sc in each st across. Turn. (8 sc per row)
Each strap should measure approximately 12 in / 30.5 cm long and 1.5 in / 4 cm wide.
Scallop edge: With RS facing and E-4 hook, join yarn to one long edge of strap. Work scallop edging along the entire long edge. Fasten off. Repeat along the other long edge.
Bralette Center Front Ties (Make 2)
Using E-4 / 3.5 mm hook, ch 5.
Row 1: sc in 2nd ch from hook and in each ch across. Turn. (4 sc)
Rows 2 through 80: ch 1, sc in each st across. Turn. (4 sc)
Each tie should measure approximately 20 in / 51 cm long. This allows for a full bow with trailing ends.
Fasten off, leaving a 6-inch tail for attachment.
Bralette Assembly
Step 1: Lay the band flat with the seamed center back at one end. Find center front of band (opposite the seam).
Step 2: Pin each cup to the top edge of the band. The inner edges of the left and right cups should meet at center front.
Step 3: Using yarn needle and yarn, whip stitch the bottom edge of each cup (Row 1 chain edge) to the top edge of the band.
Step 4: Sew the top edge of each cup to one short end of each strap, centering the strap on the cup’s top edge.
Step 5: Try on for fit and determine strap placement on the back band. Sew strap ends securely to the inside top edge of the back band.
Step 6: At the center front lower corner of each cup, attach one tie strip with several firm stitches.
Step 7: With RS facing and E-4 hook, join yarn to the inner vertical edge of each cup at center front and work 1 row of sc evenly along this edge. This finishes the center front edges neatly.
Step 8: To wear, thread both tie strips through center front, cross them, and tie in a bow.
Shorts Instructions
Shorts Waistband
Using G-6 / 4.0 mm hook, ch 13.
Row 1: sc in 2nd ch from hook and in each ch across. Turn. (12 sc)
Row 2: ch 1, sc in BLO of each st across. Turn. (12 sc)
Rows 3 through 96: ch 1, sc in BLO of each st across. Turn. (12 sc per row)
Checkpoint: Before seaming, your waistband strip should measure approximately 20 in / 51 cm long and 2.5 in / 6.5 cm tall. This stretches to fit a 30 to 36-inch waist.
Seam: Sl st the two short ends together. The waistband is now a tube. Do not fasten off.
Shorts Body
The shorts body is worked in joined rounds from the top edge of the waistband tube.
Foundation Round (pick up round): With RS facing and G-6 hook, join yarn to the top edge of the waistband at the center back seam. Work 1 sc into each row-end stitch along the top edge all the way around.
You’ll pick up 96 sc (one per row-end edge). This number is divisible by 6, which is perfect for the fan stitch.
Sl st to join first sc. Do not turn. (96 sc)
Fan Stitch Body Rounds
Round 1 (fan setup): ch 1, sc in first st (same st as join), sk next 2 sts, 5 dc in next st, sk next 2 sts, [sc in next st, sk next 2 sts, 5 dc in next st, sk next 2 sts] 15 times. Sl st to join to first sc. (96 sts: 16 sc and 16 fans of 5 dc)
Round 2 (offset round): ch 1, sc in the 3rd dc of the nearest fan from Round 1 (the center dc), sk 2 sts, 5 dc in the sc from Round 1, sk 2 sts, [sc in center dc of next fan, sk 2 sts, 5 dc in next sc, sk 2 sts] 15 times. Sl st to join to first sc. (96 sts)
In Round 2, the 5-dc fans are worked into the sc positions from Round 1. The sc in Round 2 are worked into the center (3rd) dc of the Round 1 fans. This creates the interlocking staggered texture.
Round 3: Repeat Round 1. (96 sts)
Round 4: Repeat Round 2. (96 sts)
Round 5: Repeat Round 1. (96 sts)
Round 6: Repeat Round 2. (96 sts)
Round 7: Repeat Round 1. (96 sts)
Round 8: Repeat Round 2. (96 sts)
Round 9: Repeat Round 1. (96 sts)
Round 10: Repeat Round 2. (96 sts)
Round 11: Repeat Round 1. (96 sts)
Round 12: Repeat Round 2. (96 sts)
Round 13: Repeat Round 1. (96 sts)
Continue alternating Rounds 1 and 2 until the shorts body measures 8 in / 20.5 cm from the bottom of the waistband, or your desired length.
Shorts Leg Openings and Crotch
After completing the body rounds, you’ll divide for the leg openings and work the picot ruffle hem on each leg. The crotch gusset is seamed after the body is complete.
Work the Picot Ruffle Hem (see Special Stitches) around each leg opening to finish.
Finishing Both Pieces
Blocking: Wet block both pieces for best results. Soak in lukewarm water for 15 to 20 minutes, gently squeeze out excess water (don’t wring), and lay flat on blocking mats. Pin to measurements and let dry completely.
Weave in all ends securely. For garments that will be worn and washed, weave ends through at least 2 inches of fabric in multiple directions.
Tips for Success
If your ribbing looks loose: Try going down a hook size for the band and waistband sections only.
If the fan stitch feels confusing: Work a small swatch first to understand the rhythm. Once you get through two rounds, it clicks.
If you need a different size: Adjust the band/waistband row counts to change circumference. Each row adds approximately 0.5 in / 1.3 cm of length to the strip. For the shorts body, ensure your picked-up stitch count remains a multiple of 6.
For better bralette support: Add a row of sc along the inside bottom edge of each cup, and consider threading thin elastic through the band.
You Did It!
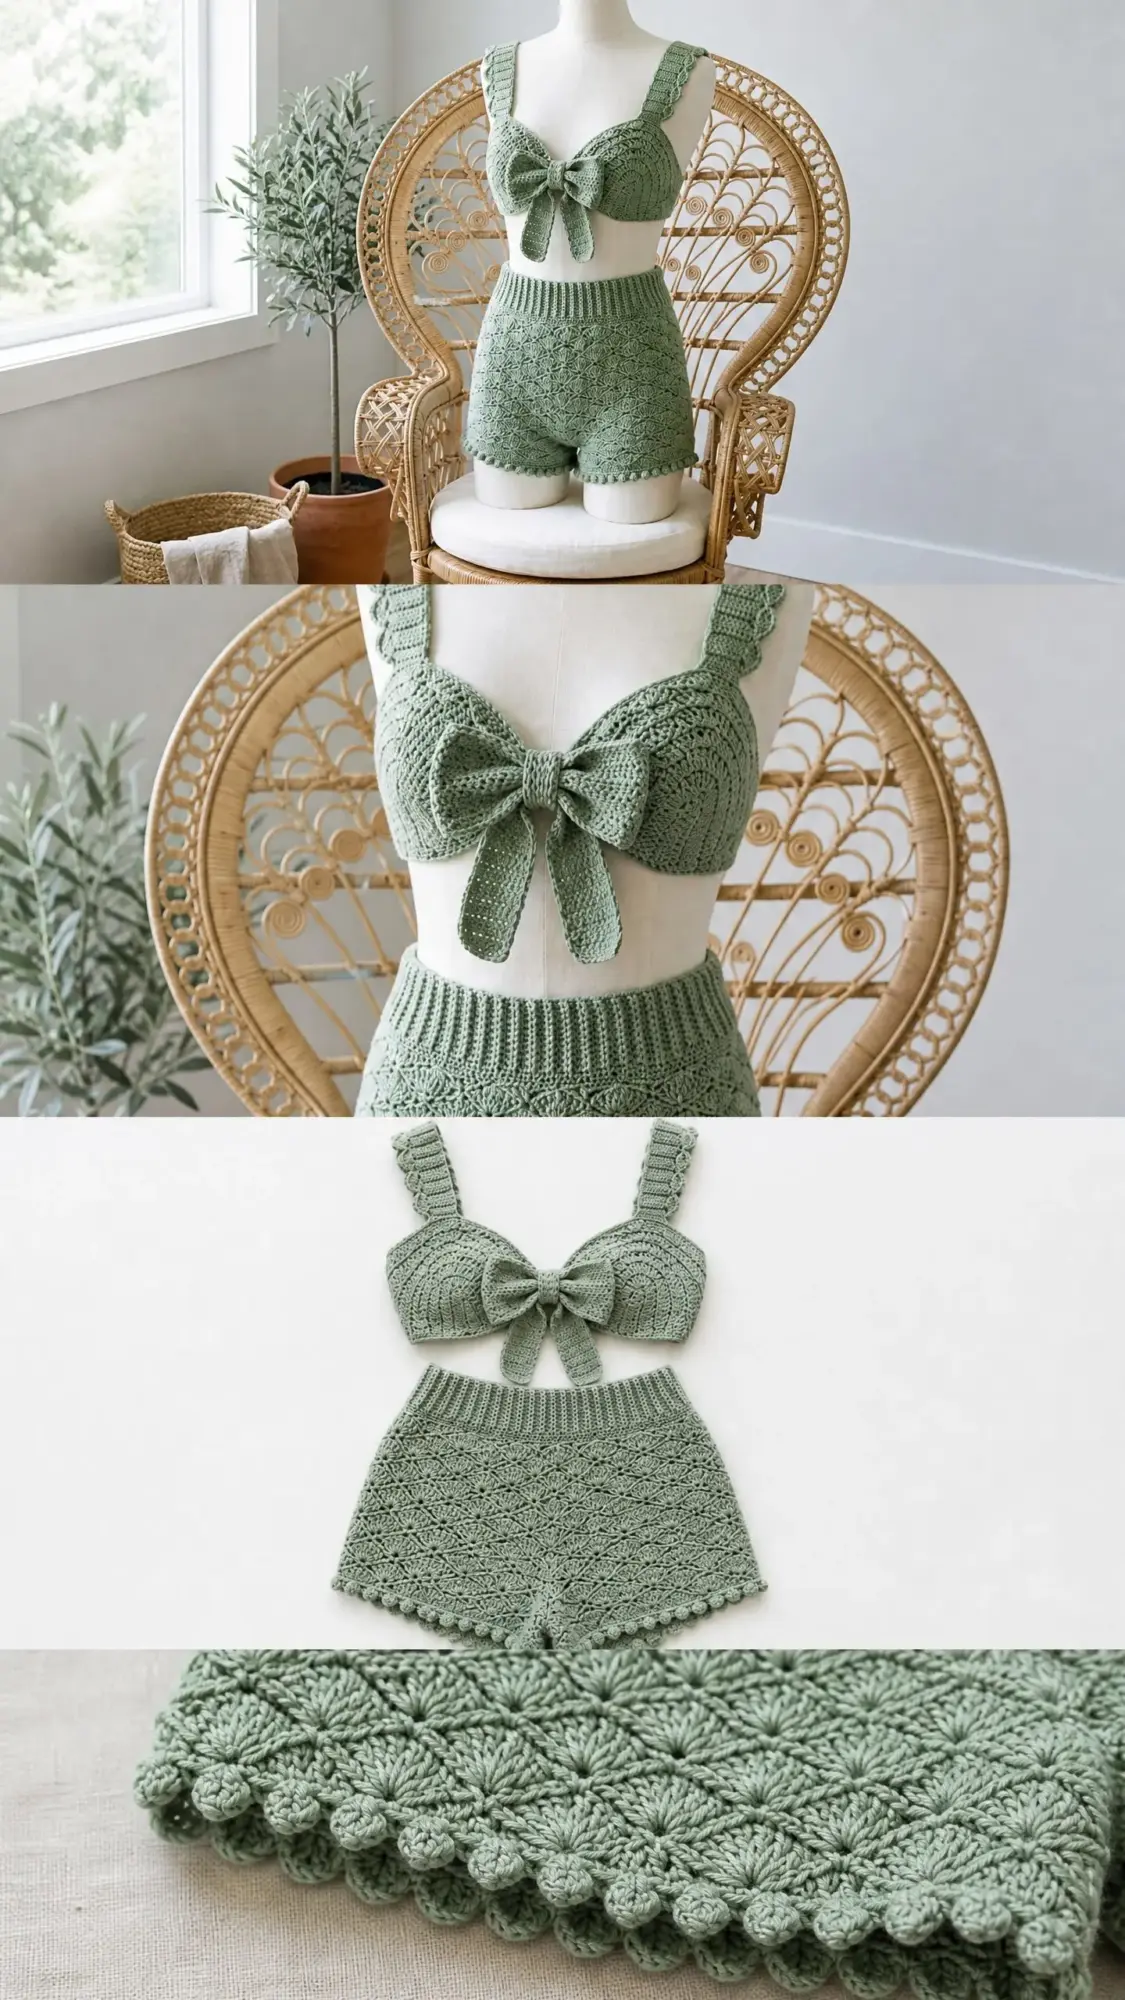
This sage green shell stitch lounge set is the kind of project that makes you feel like a crochet superstar. The combination of textures, the flattering silhouettes, and that gorgeous sage green color all come together to create something truly special. Wear it with confidence.
I hope you enjoyed making this crochet pattern as much as I enjoyed designing it. If you have any questions along the way, don’t hesitate to reach out. Happy hooking!
If you loved making this set, I’d be so grateful if you saved this pattern to your Pinterest boards so you can find it again later (and help other crocheters discover it too!). And please, drop a comment below if you make this lounge set. I absolutely love seeing your finished projects and hearing how the pattern worked up for you!
You Might Also Like
- Blush Pink Lace Baby Dress Free Crochet Pattern
- Tropical Octopus Baby Blanket Free Crochet Pattern
- Blush Pink Crochet Mini Backpack Free Pattern
- Pastel Rainbow Unicorn Granny Square Blanket Free Pattern