
I’ve been looking for the perfect lacy summer top pattern for ages. Something breezy, bohemian, and just dramatic enough to make a statement. This Coral Sunset Lacy Tank Top is my favourite find.
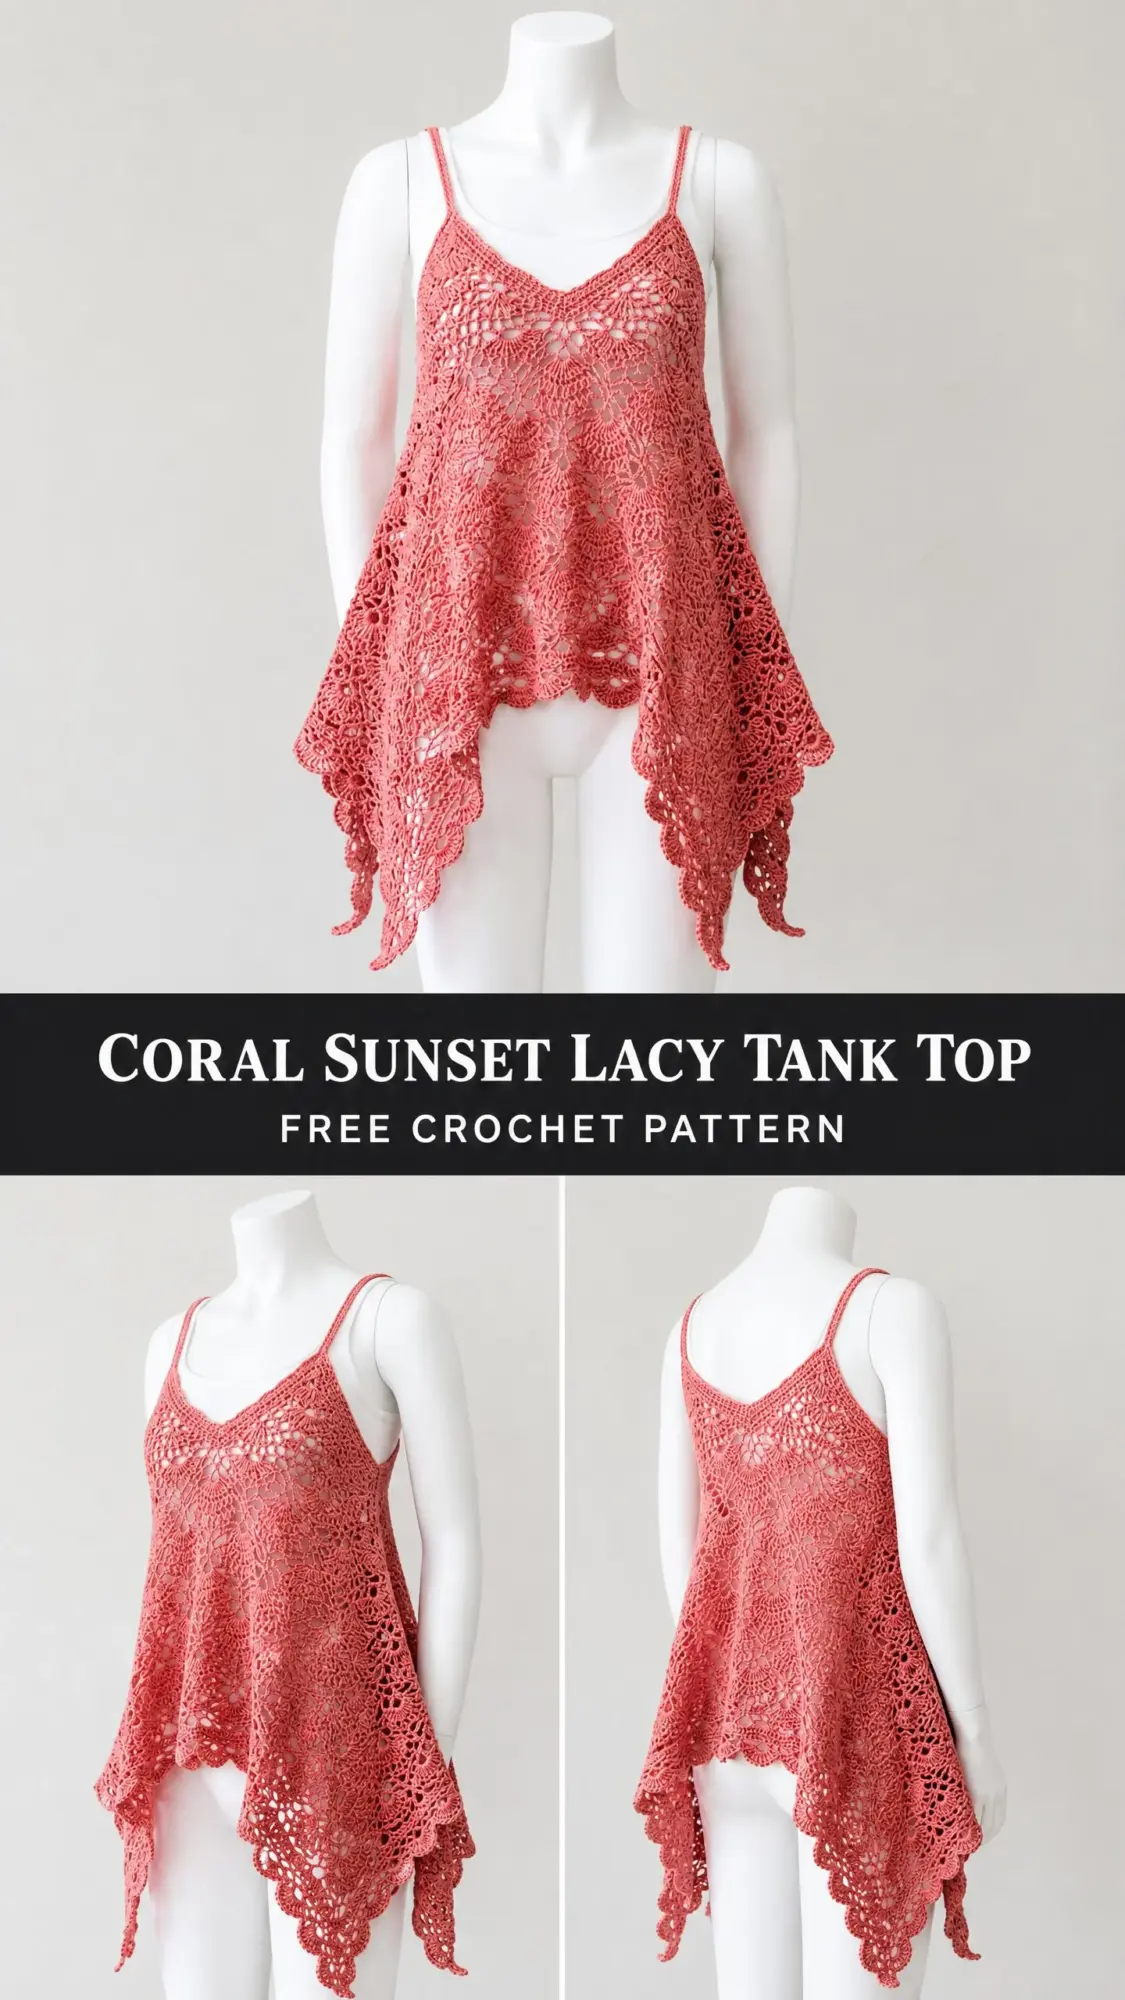
The handkerchief hem gives it that flowy, romantic vibe I love. The pineapple and fan lace stitch combination creates gorgeous texture without being impossibly complicated. And that warm coral colour? It practically glows against summer skin.
This crochet pattern is a true statement piece. You’ll wear it layered over a simple camisole or bralette, and those four pointed corners will catch every breeze. Let me walk you through everything you need to bring this beauty to life.
About This Lacy Tank Top Crochet Pattern
This tank top features a fitted V-neckline at the front, a shallow scoop at the back, delicate spaghetti straps, and a dramatically flared handkerchief hem. The body uses a repeating pineapple and fan lace stitch that creates an open, airy fabric perfect for warm weather.
The hemline dips into four pointed corners. Two points hang at the sides, one at center front, and one at center back. A delicate picot scallop edging finishes everything off beautifully.
Construction starts at the top of the front bodice and works downward. You’ll shape the V-neck and bust, then work the back bodice separately before joining at the sides. The straps are simple crocheted chains reinforced with single crochet stitches.
Skill Level: Intermediate to Advanced
You should be comfortable reading lace patterns mentally, working pineapple stitch clusters, maintaining consistent decreases over multiple rows, and managing the geometry of shaped hems. If you’ve only worked basic stitches, I’d recommend completing at least two lace scarves before tackling this project.
Time Estimate: Approximately 20 to 30 hours depending on your experience with lace work.
Finished Size
Size Small/Medium (US 4-10):
Size customization notes appear at the end of the instructions.
Materials Needed
Yarn: Approximately 500 to 600 yards (457 to 549 meters) of DK weight (CYCA 3) cotton or cotton-blend yarn in coral or dusty rose.
Recommended Yarn Options:
Option 1: Lion Brand 24/7 Cotton in Coral. 100 percent mercerized cotton, 186 yards per 3.5 oz skein, excellent stitch definition, machine washable. You will need 3 skeins.
Option 2: Paintbox Yarns Simply DK in Bubblegum Pink. 100 percent cotton, 137 yards per 50 g skein. You will need 4 to 5 skeins.
Option 3: WeCrochet Comfy DK (75 percent pima cotton, 25 percent acrylic) in Canyon. 230 yards per 50 g skein. You will need 3 skeins. This blend has a slight drape that suits the flowy silhouette.
Substitution note: Choose a yarn with good stitch definition and minimal halo. Avoid superwash wool blends that stretch aggressively, as the lace pattern needs to hold its open structure. Always match gauge, not yardage.
Hooks:
Notions:
Gauge
Using E/4 (3.5 mm) hook: 1 complete pineapple-fan repeat (18 stitches wide) = 3.5 inches (8.9 cm); 8 rows in pattern = 3 inches (7.6 cm).
Gauge is critical for fit. Make a swatch of at least 36 chain stitches and work 12 rows in the Pineapple Fan Stitch before measuring. Adjust hook size as needed.
Abbreviations and Stitch Definitions
ch = chain: yarn over, pull through loop on hook
sl st = slip stitch: insert hook, yarn over, pull through stitch and loop on hook in one motion
sc = single crochet: insert hook, yarn over, pull up loop (2 loops on hook), yarn over, pull through both loops
hdc = half double crochet: yarn over, insert hook, yarn over, pull up loop (3 loops), yarn over, pull through all 3 loops
dc = double crochet: yarn over, insert hook, yarn over, pull up loop (3 loops), yarn over, pull through 2 loops (2 loops remain), yarn over, pull through last 2 loops
tr = treble crochet: yarn over twice, insert hook, yarn over, pull up loop (4 loops), yarn over, pull through 2 loops three times
dtr = double treble crochet: yarn over three times, insert hook, yarn over, pull up loop, yarn over, pull through 2 loops four times
sp = space
ch-sp = chain space
sk = skip
st/sts = stitch/stitches
yo = yarn over
beg = beginning
rem = remaining
rep = repeat
RS = right side
WS = wrong side
t-ch = turning chain
tog = together
dc2tog = double crochet two together (decrease): yarn over, insert hook into first stitch, yarn over, pull up loop, yarn over, pull through 2 loops; yarn over, insert hook into next stitch, yarn over, pull up loop, yarn over, pull through 2 loops; yarn over, pull through all 3 loops on hook
dc3tog = double crochet three together (cluster): same as dc2tog but worked across 3 stitches, ending with yarn over through all 4 loops
5dc-cl = five double crochet cluster: yarn over, insert hook in stitch, yarn over, pull up loop, yarn over, pull through 2 loops; repeat 4 more times in same stitch; yarn over, pull through all 6 loops
picot = ch 3, sl st in 3rd ch from hook
Special Stitches for This Crochet Tutorial
Pineapple Fan Stitch Repeat (18-stitch repeat)
This stitch is the main body texture. Work over a multiple of 18 plus 3 turning chain. Each repeat contains one fan (5 dc worked into one stitch or space) and one pineapple (a diminishing group of tr worked into a ch-sp, decreasing by one stitch each row until only 1 tr remains, then replaced by a new fan).
Shell Stitch (used at hem edges)
Work 5 dc into the same stitch or space. This creates a curved fan shape.
Pineapple Cluster Rows (tr decrease rows)
Row 1 of pineapple: Work 7 tr into one ch-sp. (7-tr pineapple)
Each subsequent pineapple row: dc2tog over first and last tr of previous pineapple row, with ch-1 between each tr, decreasing by 1 tr each row (7 tr, then 6, then 5, then 4, then 3, then 2, then 1, then the pineapple closes and a new fan is born beneath it).
Point Increase Stitch (used at handkerchief hem points)
At a designated point stitch, work (dc, ch 2, dc) into the point stitch. This places 2 extra stitches and a ch-2 corner space at each point. On subsequent rows, work into the corner ch-2 sp the full fan or continuation stitch as called for, maintaining the point angle.
Picot Scallop Edging
Step 1: Attach yarn to any edge stitch, ch 1.
Step 2: Sc into same stitch.
Step 3: Skip 2 sts, work 5 dc into next st (shell made).
Step 4: Skip 2 sts, sc into next st.
Step 5: Work picot (ch 3, sl st in 3rd ch from hook) immediately after the sc.
Step 6: Repeat steps 3 through 5 across. Fasten off.
Pattern Notes Before You Begin
1. The front and back bodice panels are worked separately, each from the top edge (neckline/shoulder) downward to the hem.
2. The V-neck shaping on the front panel is achieved by working two halves of the bodice separately, decreasing 1 stitch at the inner V edge every RS row for the first 6 rows, then working even from there until the hem shaping begins.
3. The front panel is wider than the back panel (by 2 full stitch repeats) to account for the deeper V opening and the greater drape at center front.
4. The handkerchief hem points are worked by placing a stitch marker at the center-point stitch of each lower corner on both panels. Increases at these points on every row create the angled drape.
5. The side seams are joined using sc seaming on the WS for a flat join.
6. Straps are made as crocheted chains worked to length and then sc-reinforced, then sewn to the inside of the neckline edge.
7. The top is designed to be see-through as a layering piece. A camisole worn underneath is part of the intended design.
8. When working the pineapple pattern, each full pineapple cycle (7 rows for one complete pineapple) aligns vertically above the previous pineapple. Maintain careful row-counting.
9. Chain 3 at the beginning of rows counts as a dc throughout, unless otherwise stated.
10. Right side is the side you are looking at as you work the first row after the foundation chain.
Step by Step Instructions
Front Bodice Panel
The front neckline begins at the top of the V-neck. The two halves of the V are worked separately, then joined at center and worked as one piece downward to the bust line, continuing to the hem.
Right Front V Panel
Foundation: Using E/4 hook, ch 38.
Row 1 (RS): Dc in 4th ch from hook (counts as 2 dc), dc in each of next 2 ch, ch 2, sk 2 ch, dc in next ch, ch 2, sk 2 ch, work 7 tr in next ch (pineapple base), ch 2, sk 2 ch, dc in next ch, ch 2, sk 2 ch, 5 dc in next ch (fan), ch 2, sk 2 ch, dc in next ch, ch 2, sk 2 ch, 7 tr in next ch (pineapple base), ch 2, sk 2 ch, dc in last ch. Turn. (38 working sts plus chains)
Stitch note: The outer edge (the armhole edge) is the right edge as you look at the RS. The inner edge (the V-neck edge) is the left edge.
Row 2 (WS): Ch 3, turn. Dc in first dc (V-neck decrease: dc2tog over first 2 sts at inner edge), ch 2, dc in next dc, ch 2, work pineapple decrease (6 tr remain after this row), ch 2, dc in dc, ch 2, 5 dc in center dc of fan, ch 2, dc in dc, ch 2, (6 tr with ch 1 between from second pineapple), ch 2, dc in last dc, ch 3 (armhole edge, no decrease here). Turn. (V-neck edge decreased by 1 st)
Pineapple Decrease Row Pattern: Each pineapple loses 1 tr per RS row at each end. So a 7-tr pineapple becomes 6-tr, then 5-tr, then 4-tr, then 3-tr, then 2-tr, then 1-tr, then on the next RS row a new fan is worked into the space below that final tr.
Row 1 (RS): Ch 3, 3 dc at armhole edge, (ch 2, dc, ch 2, 7-tr pineapple, ch 2, dc, ch 2, 5-dc fan, ch 2, dc, ch 2, 7-tr pineapple, ch 2, dc) at inner edge. Turn. (36 sts plus chains)
Row 2 (WS): Ch 3, V-neck decrease at inner edge (dc2tog), pineapple row (6 tr each pineapple), fan (5 dc into ch-sp of fan from previous row), armhole edge ends with 3 dc. Turn. (35 sts plus chains)
Row 3 (RS): Ch 3, 3 dc at armhole edge, pineapple row (5 tr each), fan (5 dc), V-neck decrease at inner edge (dc2tog). Turn. (34 sts)
Row 4 (WS): Ch 3, V-neck decrease (dc2tog), pineapple row (4 tr each), fan (5 dc), 3 dc at armhole edge. Turn. (33 sts)
Row 5 (RS): Ch 3, 3 dc armhole edge, pineapple row (3 tr each), fan (5 dc), V-neck decrease (dc2tog). Turn. (32 sts)
Row 6 (WS): Ch 3, V-neck decrease (dc2tog), pineapple row (2 tr each), fan (5 dc), 3 dc at armhole edge. Turn. (31 sts)
Row 7 (RS): Ch 3, 3 dc armhole edge, pineapple closing (1 tr into top of last 2-tr group, this closes the pineapple), fan (5 dc into space below closed pineapple, new fan born here), V-neck no decrease (work dc into top of dc2tog from Row 6). Pineapple cycle completes; new pineapple of 7 tr is worked in the same space as the old fan base from Row 1. Turn. (31 sts, no V-neck decrease this row)
From Row 8 onward, V-neck edge is worked even (no more decreases). The pineapple-fan cycle continues in its natural rhythm: each pineapple takes 7 rows to complete.
Rows 8 through 20: Work in established pattern (pineapple-fan repeat, no shaping). (31 sts throughout)
At end of Row 20, fasten off. This completes the Right Front V Panel.
Left Front V Panel
Work same as Right Front V Panel but mirror the shaping: V-neck decrease is at the right (inner) edge, armhole edge is at the left. Work Rows 1 through 20. At end of Row 20, do not fasten off; use this working yarn to join the two halves.
Joining Row (RS): With working yarn from Left Panel, ch 3, work across Left Panel in pattern, then ch 4 (this forms the base of the V-neck center point), join to Right Panel with sl st, then ch 3 and work across Right Panel in pattern. Turn. The ch-4 bridge creates the bottom of the V opening.
Lower Front Bodice (Worked as One Piece)
Row 21 (WS): Ch 3, work in established pineapple-fan pattern across Right Panel, work (dc, ch 2, dc) into the ch-4 bridge (this is the center V point increase), work in pattern across Left Panel. Turn. (64 sts plus chains across entire front, with 2 ch-2 sps at center)
Row 22 (RS): Work in pattern across, treating ch-2 sp at center as a point: work (dc, ch 2, dc) into center ch-2 sp each time. (66 sts)
Row 23 (WS): Work in pattern. (66 sts)
Rows 24 through 34: Continue in pattern, working the pineapple-fan repeat. No additional shaping. (66 sts)
CHECKPOINT: After completing Row 34 of the front bodice, your piece should measure approximately 13 inches (33 cm) from the top of the shoulder edge to the bottom of Row 34, before hem point shaping.
Handkerchief Hem Shaping (Front)
The handkerchief hem is created by placing four increasing points at each lower corner of the front panel. Place stitch markers at stitch 1 (far left armhole edge), stitch 33 (left of center), stitch 34 (right of center), and stitch 66 (far right armhole edge).
Row 35 (RS): Work in pattern to marker at st 33, work Point Increase (dc, ch 2, dc) into marked st, work in pattern to marker at st 34, work Point Increase into marked st, work in pattern to end. (70 sts)
Row 36 (WS): Work in pattern, working into each ch-2 corner sp: (dc, ch 2, dc) into each ch-2 sp. (74 sts)
Rows 37 through 50: Continue in pattern, working (dc, ch 2, dc) into each of the two center point ch-2 sps every row. The two outer armhole edges are also worked with Point Increase every other row starting at Row 37 (armhole points increase on RS rows only).
Stitch counts for Rows 35 through 50:
Fasten off. This completes the front panel.
CHECKPOINT: The front panel handkerchief hem should now drape to roughly 26 inches (66 cm) at the two side points and 26 inches (66 cm) at the center front point when measured from the shoulder.
Back Bodice Panel
The back neckline is a shallow scoop, not a V. The back panel is narrower at the top than the front (fewer repeats) and widens to match the front at the bust and hem.
Foundation: Using E/4 hook, ch 75.
Row 1 (RS): Dc in 4th ch from hook, dc in each of next 2 ch, (ch 2, sk 2 ch, dc in next ch, ch 2, sk 2 ch, 7-tr pineapple in next ch, ch 2, sk 2 ch, dc in next ch, ch 2, sk 2 ch, 5-dc fan in next ch) 3 times, ch 2, sk 2 ch, dc in next ch, ch 2, sk 2 ch, 7-tr pineapple in next ch, ch 2, dc in last ch. Turn. (72 working sts plus chains)
The back panel is worked straight (no V-neck shaping) for Rows 1 through 20 in the pineapple-fan repeat.
Rows 2 through 20: Work in established pattern. (72 sts throughout)
CHECKPOINT: After Row 20 of the back bodice, your piece should measure approximately 7.5 inches (19 cm) tall from foundation chain to Row 20.
Rows 21 through 34: Continue in established pineapple-fan pattern. No shaping. (72 sts)
CHECKPOINT: After Row 34 of the back bodice, the piece should measure approximately 13 inches (33 cm) from the top neckline edge, matching the front panel height before hem shaping.
Handkerchief Hem Shaping (Back)
Place stitch markers at: stitch 1 (left armhole), stitch 36 (center back), stitch 72 (right armhole).
Row 35 (RS): Work in pattern to center marker (st 36), work Point Increase (dc, ch 2, dc) into marked st, work in pattern to end. (74 sts)
Row 36 (WS): Work in pattern, working (dc, ch 2, dc) into center ch-2 sp. Armhole-edge points begin this row: work (dc, ch 2, dc) into stitch 1 and into last stitch. (80 sts)
Rows 37 through 50: Work all three points every row: center back and both armhole-side points.
Stitch counts for Rows 35 through 50:
Note: The back panel ends up slightly wider at the hem than the front because of the third center-back point. This is intentional; both side seam edges align correctly and the extra width is absorbed into the center back point drape.
Fasten off. This completes the back panel.
Seaming
Hold front and back panels with wrong sides together. Using E/4 hook and a length of yarn, sc the two side seams together along the armhole edges from Row 1 down to Row 34 (the point at which hem shaping begins). The hem points hang free below the seam. Work sc seam through both layers, 1 sc per row end. (34 sc each side seam) Fasten off and weave in ends.
CHECKPOINT: After seaming, when laid flat, the side seams should measure approximately 13 inches (33 cm) from shoulder to hem start. The total bust circumference should measure approximately 36 inches (91 cm) when laid flat.
Straps
Using D/3 hook, ch 110 (approximately 17 inches or 43 cm, adjust as needed for your shoulder length).
Row 1: Sc in 2nd ch from hook, sc in each ch across. (109 sc)
Fasten off, leaving a 12-inch tail for sewing.
Make 2 straps.
Pin one strap to the front neckline (right side) and the corresponding position on the back neckline, trying on the garment over your camisole to determine exact placement and length before sewing. Adjust chain count if needed. Sew both ends securely using tapestry needle and yarn tail, passing through several stitches of the neckline edge. Weave in all ends.
Neckline Edging
Using D/3 hook, attach yarn to back neckline at left shoulder seam.
Round 1: Ch 1, sc evenly around entire neckline opening (back scoop and front V), placing 1 sc per stitch across the top of each panel and 1 sc per row end along the V-neck diagonal edges. At the bottom of the V point, work (sc, ch 1, sc) into the joining point. Join with sl st to first sc.
Approximate sc count: 72 sc across back neckline plus 24 sc down each side of V (left and right) plus sc, ch 1, sc at V point equals 122 sts total. Adjust slightly as needed to keep the edge flat.
Round 2: Ch 1, sc in each sc around, working (sc, ch 1, sc) into the ch-1 sp at V point. Join with sl st. (124 sts)
Fasten off and weave in ends.
Picot Scallop Hem Edging
Using D/3 hook, attach yarn to any hem stitch along the bottom edge of the joined garment. Work continuously around all hem edges including the handkerchief points.
Row 1: Ch 1, sc in same st, (sk 2 sts, 5 dc in next st, sk 2 sts, sc in next st, picot) across entire hem edge, adjusting sk count at points so that the 5-dc shell sits at each outer point of the handkerchief corners. Join with sl st if working in round, or fasten off and seam if working in rows.
Note: At each handkerchief point tip, work (3 dc, picot, 2 dc) into the single point stitch to accentuate the tip. This creates a slightly different picot-shell that keeps the corner sharp.
Fasten off and weave in all ends.
Size Customization Tips
To size up by approximately 2 inches (5 cm) in bust: Add one full 18-stitch pineapple-fan repeat to both the front and back foundation chains. This adds 3.5 inches (8.9 cm) to the flat width, which equals 7 inches (17.8 cm) in circumference when seamed. Remove repeats to size down.
To lengthen the body before hem shaping: Add rows between Row 20 and Row 34 in the lower bodice section. Each 2 rows adds approximately 0.75 inch (2 cm) of length.
To extend the handkerchief hem points further: Continue working hem rows 51 onward, maintaining all points with (dc, ch 2, dc) every row. Each additional pair of rows adds approximately 0.75 inch (2 cm) to point length.
To shorten straps or adjust for a longer torso: Chain fewer or more stitches for the straps in increments of 6, since the sc row has a slight draw-in of about 10 percent from the chain length.
Finishing and Blocking
Wet blocking is strongly recommended for cotton lace. Soak the finished top in cool water for 20 minutes. Gently squeeze out water (do not wring). Lay flat on blocking mats. Pin all handkerchief points outward to their full dimensions, using rust-proof pins. Pin the hem scallops into their natural curves. Ease the neckline to the correct measurement. Leave to dry completely. Allow 24 to 48 hours for cotton.
After blocking, the lace pattern will open up significantly and the true pineapple and fan shapes will become clearly visible. The garment grows approximately 1 inch (2.5 cm) in length after wet blocking.
Weave in all ends securely before blocking, as cotton yarn can work loose during soaking if ends are not properly woven in at least 3 to 4 inches in two directions.
Care Instructions
Machine wash on delicate cycle in a mesh laundry bag with cool water. Use a gentle detergent formulated for delicates or cotton. Do not tumble dry; lay flat to dry away from direct sunlight, which can fade coral tones. Do not iron directly; if pressing is needed, use a damp cloth and low steam. Store folded, not hung, to prevent the lace from stretching under its own weight.
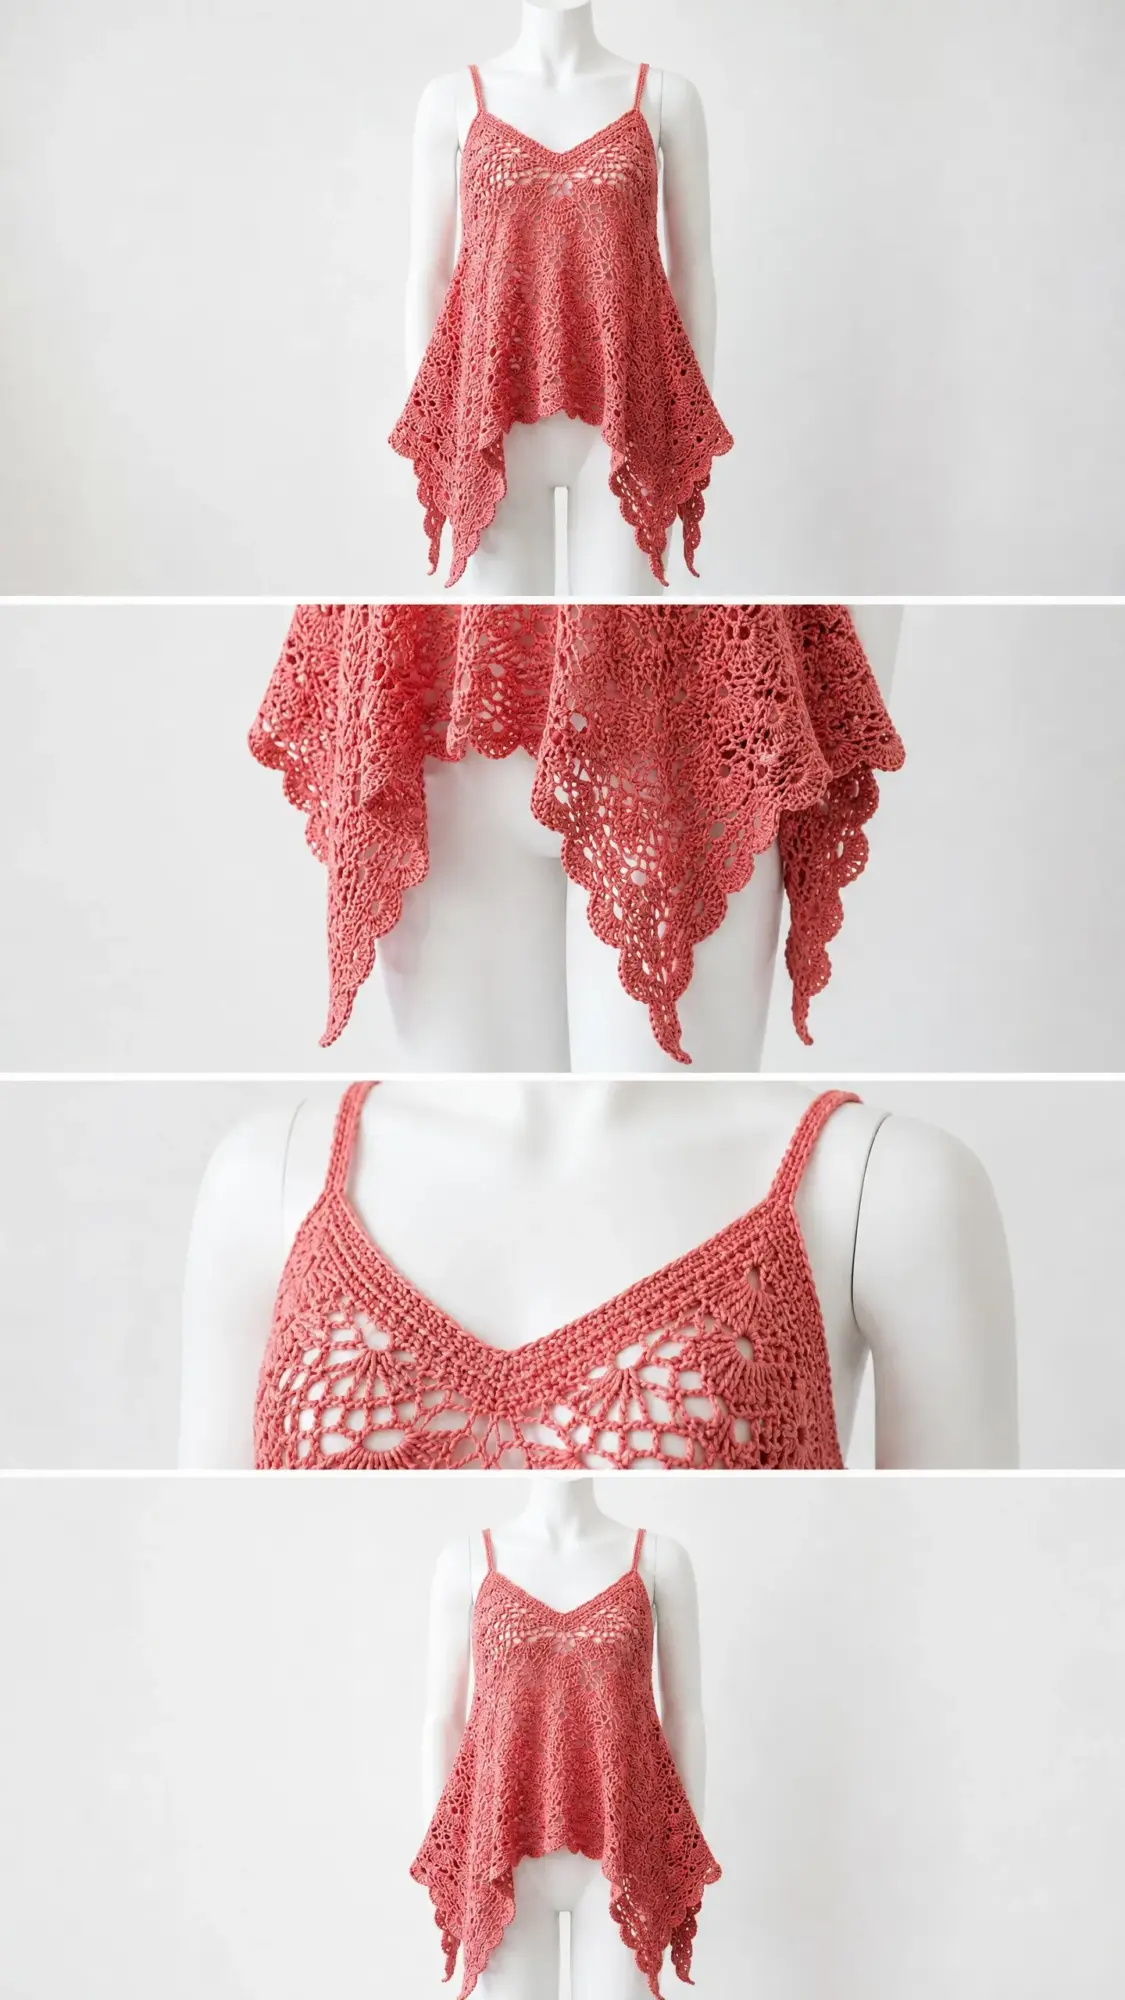
Final Thoughts on This Lacy Tank Top Crochet Pattern
Thank you so much for choosing this pattern for your next project. I really hope you love making it as much as I loved designing it. There’s something incredibly satisfying about watching those pineapple motifs take shape row by row.
This top makes a gorgeous gift for someone special, or treat yourself to a summer wardrobe piece you’ll reach for again and again. The coral shade works beautifully with white jeans, denim shorts, or layered over a maxi dress.
If you make this Coral Sunset Lacy Tank Top, I would absolutely love to see it. Tag me on Instagram or share your finished piece in our Facebook group. Seeing your creations truly makes my day.
Go ahead and save this pattern to your Pinterest boards so you can find it whenever you’re ready to start. And please drop a comment below if you make one. I’d love to hear how it turned out for you!
You Might Also Like
- Dusty Rose Cable Cuff Slipper Boots Free Crochet Pattern
- Boho Monstera Crochet Plant for Bedroom Shelf Decor
- Lavender Crochet Sandals in Modern Bedroom Free Pattern
- Dusty Rose Mesh Crochet Sneaker Boots Free Pattern