
This is a structured granny square tote bag worked from the bottom up. It uses basic stitches like single crochet, double crochet clusters, and bobble shells. The finished bag measures approximately 14 inches wide by 13 inches tall.
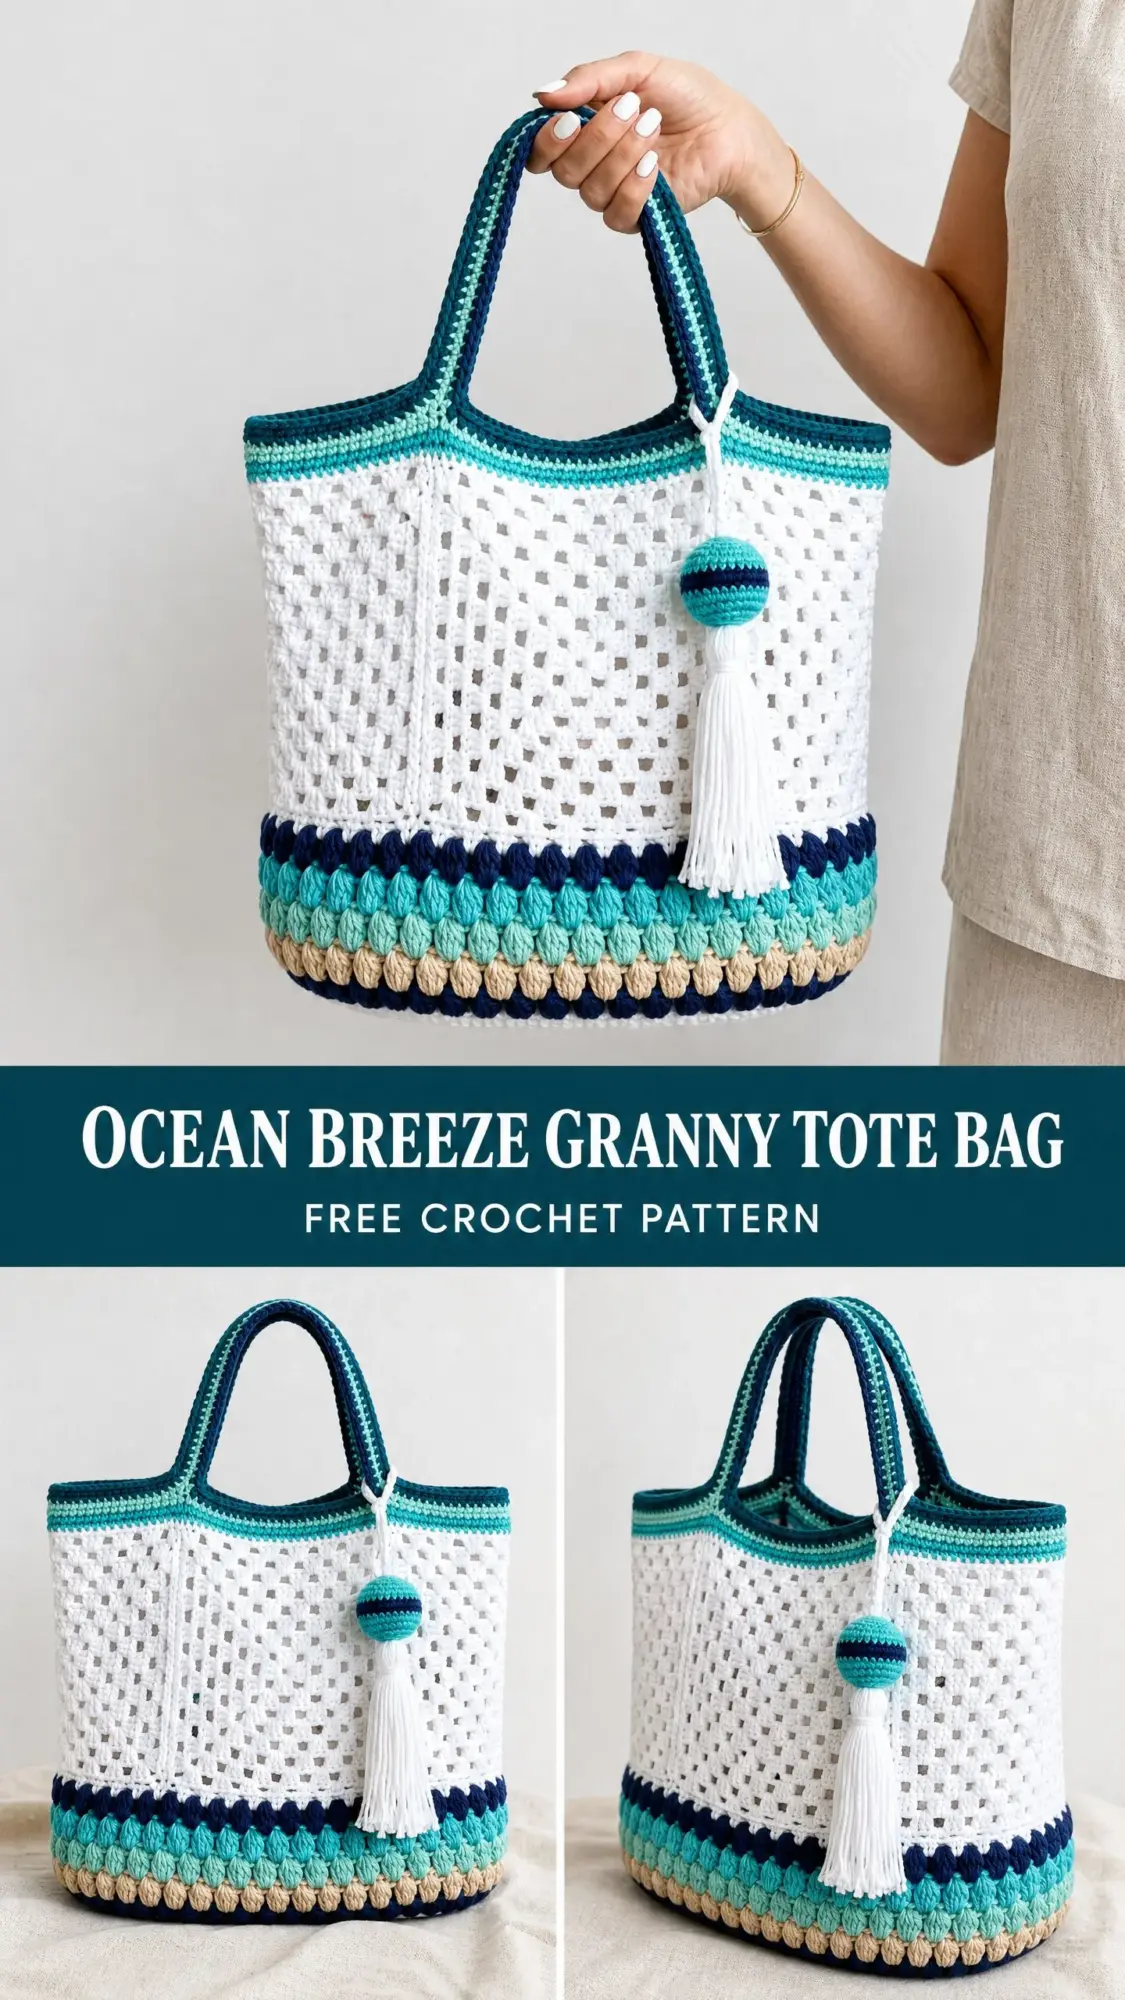
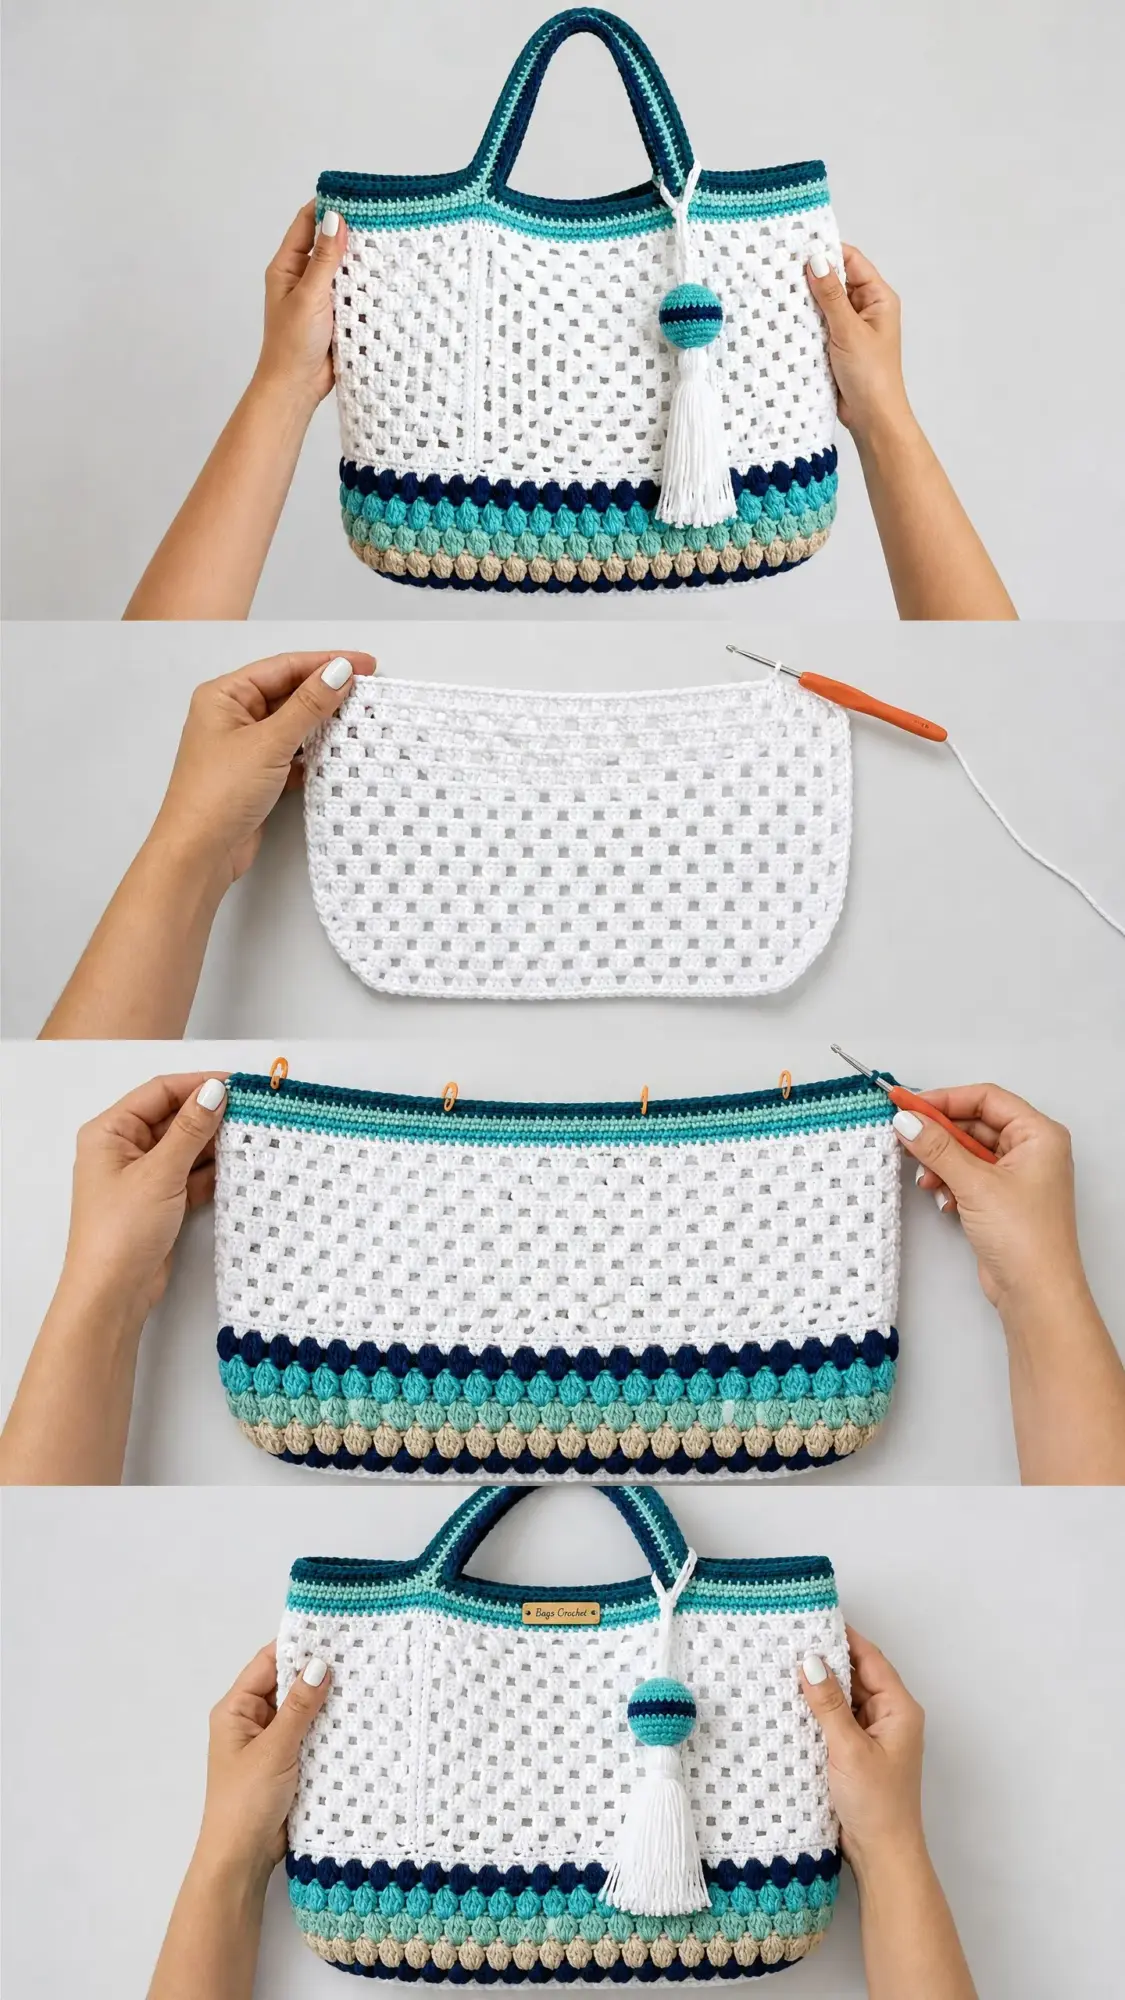
The construction is straightforward once you understand the sequence. You start with a flat rectangular base, add a textured bobble border in three colors, build up the airy mesh body, then finish with a striped rim and handles. A sweet tassel with a crocheted bead completes the look.
If you can work in the round and you are comfortable with double crochet, you can absolutely make this bag. I will walk you through every step, explain each special stitch, and give you checkpoints along the way so you know you are on track.
Why You Will Love This Crochet Tote Bag Pattern
This Ocean Breeze Granny Tote Bag hits that perfect balance between impressive and achievable. The open granny mesh gives it a beautiful lattice appearance that looks intricate but is actually just clusters and chain spaces repeated around and around. The bobble shell border at the bottom adds visual weight and texture without complicated colorwork techniques.
The color palette is coastal and fresh. Think navy, teal, mint, aqua, sand, and crisp white. But you can easily swap in any colors that speak to you. Warm autumn tones, bright rainbow stripes, or a sophisticated neutral palette would all work beautifully with this construction.
This bag is genuinely useful too. The flat bottom means it stands up on its own. The mesh body is sturdy enough to carry farmers market finds or library books. And because it is 100% cotton, you can toss it in the wash when it needs freshening up.
Skill Level
This pattern is rated intermediate. You should be comfortable with:
If you are a confident beginner ready to level up, this is a great project to stretch your skills. I have included detailed explanations for every special stitch, so nothing should catch you off guard.
Finished Dimensions
Materials Needed
Yarn
You will need worsted weight 100% cotton yarn in six colors:
| Color | Name | Yardage Needed |
|---|---|---|
| A | White | 550 yards (503 m) |
| B | Teal (dark) | 80 yards (73 m) |
| C | Mint (light aqua) | 60 yards (55 m) |
| D | Navy | 40 yards (37 m) |
| E | Aqua/Turquoise (medium) | 40 yards (37 m) |
| F | Sand/Cream | 40 yards (37 m) |
Yarn recommendations: Lion Brand 24/7 Cotton is ideal for this project. It is smooth, holds stitch definition beautifully, and comes in all the colors you need. Paintbox Yarns Simply DK Cotton held double, or WeCrochet Comfy Cotton Blend are also excellent choices.
Important: Avoid acrylic yarn for this project. Cotton holds its structure under the weight of items in the bag, while acrylic tends to stretch and lose shape over time.
Hook
US Size J/10 (6.0 mm) crochet hook
Notions
Gauge
16 single crochet (sc) and 18 rows = 4 inches (10 cm) in single crochet with Color A, blocked.
One granny mesh repeat (1 double crochet cluster plus chain 2 space) measures approximately 1.25 inches (3.2 cm) wide and 0.75 inch (1.9 cm) tall.
Please take time to check your gauge. The finished bag dimensions depend on accurate gauge, especially for the base. If your gauge is off, try going up or down a hook size.
Abbreviations
Here are all the abbreviations used in this pattern, with plain English definitions:
Special Stitches for This Crochet Tote Pattern
Granny Cluster
This is the building block of the mesh body. It is three double crochets worked into the same spot, then joined at the top.
How to work it:
1. Yarn over, insert hook into indicated stitch or space
2. Yarn over and pull up a loop, yarn over and pull through 2 loops (first leg complete)
3. Yarn over, insert hook into same spot
4. Yarn over and pull up a loop, yarn over and pull through 2 loops (second leg complete)
5. Yarn over, insert hook into same spot
6. Yarn over and pull up a loop, yarn over and pull through 2 loops (third leg complete)
7. Yarn over and pull through all 4 loops on your hook
You now have one cluster. It counts as one unit in your stitch counts.
Bobble Shell
This creates the textured scalloped border at the bottom of the bag.
How to work it:
1. Work 5 double crochets into the same stitch or space
2. Yarn over and pull through all 6 loops on your hook
One bobble shell made. It poofs outward and creates that lovely bumpy texture.
Crocheted Bead (for tassel topper)
This is worked in a spiral using Color B (Teal) and Color D (Navy), alternating every 2 rounds for stripes.
Rnd 1: Using a magic circle, work 6 sc into the ring. Pull ring closed. (6 sc)
Rnd 2: 2 sc in each st around. (12 sc)
Rnd 3: (sc in next st, 2 sc in next st) around. (18 sc)
Rnd 4: sc in each st around. (18 sc)
Rnd 5: (sc in next st, sc2tog) around. (12 sc)
Stuff firmly with polyfill or scrap yarn.
Rnd 6: sc2tog around. (6 sc)
Fasten off, leaving a long tail. Thread tail through remaining stitches and pull tight to close.
Pattern Notes Before You Begin
1. The bag is worked in the round throughout the body. The base is worked flat, then you join to work in the round.
2. On all body rounds, do not turn your work. Keep the right side facing you at all times.
3. The granny mesh body is worked into chain spaces, not into individual double crochet stitches. Read each instruction carefully.
4. For color changes, join the new color with a slip stitch at the beginning of the round. You can carry unused colors loosely up the inside of the bag if the color change is within 3 rounds.
5. The beginning chain 3 in mesh rounds DOES count as the first double crochet of the first cluster.
6. Place stitch markers at all four corners of the base to help you track where you are.
Step by Step Instructions
Base
With Color A and your 6.0 mm hook, chain 57.
Row 1 (RS): sc in 2nd ch from hook and in each ch across. Turn. (56 sc)
Row 2: ch 1, sc in each st across. Turn. (56 sc)
Repeat Row 2 until your base measures 5 inches (13 cm) from the foundation edge. This should be approximately 22 rows total.
Do not fasten off. You will now work around all four edges of this rectangle to begin working in the round.
Checkpoint: Your base rectangle should measure approximately 14 inches wide by 5 inches tall. If it is off, adjust your hook size before continuing.
Base Edging and Transition to Round
Rnd 1 (joining round): With RS facing, ch 1. Work sc evenly around all four edges as follows:
Join with sl st to first sc. (164 sc total)
Place markers at each of the 4 center corner stitches (the middle stitch of each 3 sc corner group).
Bobble Shell Border
This textured border sits at the lower portion of the bag body. You will work three color bands: navy, aqua, then sand.
Bobble Border Rnd 1 (Color D, Navy):
Join Color D to any st of the 164 sc edging round.
Ch 1. Sc in first st. Ch 2. Sk 2 sts. (Sc in next st, ch 2, sk 2 sts) around, adjusting at corners as needed.
Join with sl st to first sc. (58 ch-2 sps)
Bobble Border Rnd 2 (Color D, Navy):
Ch 1. Sc in first sc. (Work bobble shell into next ch-2 sp, sc in next sc) around, ending with a bobble shell into last ch-2 sp.
Join with sl st to first sc. (58 bobble shells, 58 sc)
Join Color E (Aqua) for next round.
Bobble Border Rnd 3 (Color E, Aqua):
Ch 1. Sc in first sc. Ch 2. Sk bobble shell. (Sc in next sc, ch 2, sk bobble shell) around.
Join with sl st. (58 ch-2 sps)
Bobble Border Rnd 4 (Color E, Aqua):
Repeat Bobble Border Rnd 2 using Color E. (58 bobble shells, 58 sc)
Join Color F (Sand) for next round.
Bobble Border Rnd 5 (Color F, Sand):
Repeat Bobble Border Rnd 3 using Color F. (58 ch-2 sps)
Bobble Border Rnd 6 (Color F, Sand):
Repeat Bobble Border Rnd 2 using Color F. (58 bobble shells, 58 sc)
Fasten off Color F.
Checkpoint: You now have 3 rows of bobble shells in navy, aqua, and sand ascending from the base. The total added height should be approximately 3 to 3.5 inches.
Transition Round into Mesh
With Color A, join with standing sc to any sc above a bobble shell.
Transition Rnd: Ch 1. Sc in each sc and work 2 sc into each ch-2 sp around to create an even foundation for the mesh.
Adjust your stitch count to reach 171 sc (this is divisible by 3 for clean mesh repeats). Make minor adjustments within the ch-2 sp sections as needed.
Join with sl st. (171 sc)
Granny Mesh Body
Mesh Setup Round: With Color A, ch 3 (counts as first dc of cluster). Work 2 more dc into same st to complete first cluster. Ch 2. Sk 2 sts. (Work 3 dc cluster into next st, ch 2, sk 2 sts) around.
Join with sl st to top of beg ch-3. (57 cluster-ch2 units)
Mesh Rnd 1: Sl st into first ch-2 sp. Ch 3 (counts as first dc). Work 2 dc into same sp. Ch 2. (Work 3 dc cluster into next ch-2 sp, ch 2) around.
Join with sl st to top of beg ch-3. (57 cluster-ch2 units)
Mesh Rnds 2 through 9: Repeat Mesh Rnd 1. Work Color A throughout. (57 cluster-ch2 units each round)
After 10 total mesh rounds (setup plus 9 repeating), the mesh section measures approximately 7.5 inches tall.
Checkpoint: The mesh body above the bobble border should measure approximately 7.5 inches. Combined with the bobble border, your total bag body height from base edging to current working round is approximately 10.5 to 11 inches.
Rim
The rim closes up the mesh spaces and adds the striped teal and mint bands at the top.
Rim Transition Rnd: With Color B (Teal dark), join with standing sc into any ch-2 sp. Work 2 sc into each ch-2 sp and 1 sc into the top of each cluster around.
Join with sl st. (171 sc)
Rim Rnd 1: Ch 1. Sc in each st around. Join with sl st. (171 sc)
Rim Rnd 2: Ch 1. Sc in each st around. Join with sl st. (171 sc)
Switch to Color C (Mint).
Rim Rnd 3: Ch 1. Sc in each st around. Join with sl st. (171 sc)
Rim Rnd 4: Ch 1. Sc in each st around. Join with sl st. (171 sc)
Switch to Color B (Teal dark).
Rim Rnd 5: Ch 1. Sc in each st around. Join with sl st. (171 sc)
Fasten off Color B. Weave in all ends.
The rim adds approximately 1.5 inches of height.
Handles (Make 2)
Each handle is a long flat strip worked in rows.
With Color B, chain 7.
Row 1: sc in 2nd ch from hook and each ch across. Turn. (6 sc)
Row 2: ch 1, sc in each st. Turn. (6 sc)
Continue in sc for 60 rows total, switching colors as follows:
After 60 rows, work 1 row of sc edging along each long edge of the handle (1 sc in each row end stitch).
Optional: For a firmer, rounder handle, fold the handle in half lengthwise and slip stitch the two long edges together.
The finished handle is approximately 1 inch wide and 13.5 inches long.
Make 2 handles.
Handle Attachment
On the front panel of the bag (one of the two long sides), mark two attachment points. Each point should be centered 3.5 inches from each side edge. The two handle bases will be spaced approximately 7 inches apart.
Using a yarn needle and Color B, sew the last 6 rows of each handle end flat against the interior of the bag rim. The handle end should overlap the rim by approximately 1 to 1.5 inches.
Stitch around the perimeter of the attachment rectangle, then cross stitch through the center for reinforcement.
Repeat on the back panel with the second handle, aligning the attachment points with the front.
Crocheted Bead and Tassel
Make the crocheted bead as described in the Special Stitches section, alternating Color B (Teal) and Color D (Navy) every 2 rounds.
To make the tassel:
1. Cut 30 strands of Color A, each 12 inches long
2. Gather the strands and fold them in half
3. Thread the fold through the base of the crocheted bead
4. Loop a separate strand around the tassel approximately 0.5 inch below the bead and tie tightly
5. Trim the tassel ends to a uniform 4 inch length
Attach a 6 inch strand of Color A through the top of the crocheted bead. Sew this strand to the center front of the bag at the rim, approximately 0.5 inch below the top edge.
Size Customization Tips
To make the bag wider: Add stitches to the foundation chain in multiples of 3. Each 3 stitches adds approximately 0.75 inch of width.
To make the bag taller: Add additional mesh rounds. Each mesh round adds approximately 0.75 inch of height.
To make the bag deeper: Add sc to the short side rows of the base. Each 3 sc adds approximately 0.75 inch of depth.
To make the handles longer: Add more rows to the handle strip. Each 4 additional rows adds approximately 0.5 inch of handle length.
Finishing and Blocking
Weave in all yarn ends securely, especially at color change points in the bobble border.
To wet block: Submerge the completed bag in cool water until fully saturated. Gently squeeze out excess water without wringing. Stuff the bag with plastic bags or a box to hold its shape. Pin the base flat and pin the rim open and level. Allow to dry completely, which may take 24 to 48 hours.
Blocking opens the granny mesh beautifully and sets the bobble shells into neat, even rows. Please do not skip this step.
Care Instructions
Machine wash on a gentle cycle in cool water. Use a mesh laundry bag to protect the tassel and handles. Lay flat to dry. Do not tumble dry, as heat will distort the mesh and shrink cotton yarn. Do not iron. If the bag loses shape over time, re wet block as needed.
Final Thoughts on This Ocean Breeze Granny Tote Bag Crochet Pattern
I hope you love making this bag as much as I loved designing it. The combination of open mesh, textured bobbles, and coastal colors creates something that looks far more complex than it actually is. Once you get into the rhythm of the mesh rounds, it practically works itself.
This tote makes a wonderful gift for someone who loves the beach, farmers markets, or just needs a pretty bag for everyday errands. And because you are using cotton, it will hold up beautifully to real life use.
Thank you so much for choosing this pattern. I would absolutely love to see your finished Ocean Breeze Granny Tote! Tag me on Instagram or share your photos in my Facebook group.
If this pattern is calling your name, go ahead and save it to your Pinterest boards so you can find it when you are ready to cast on. And if you make one, please drop a comment below. I love seeing what colors you choose and hearing how the project went for you!
You Might Also Like
- Blush Pink Lace Baby Dress Free Crochet Pattern
- Sage Green Meadow Crochet Robe Free Pattern
- Blush Pink Shell Clutch with Pearl Accents Free Crochet Pattern
- Lavender Dream Tiered Baby Dress Free Crochet Pattern