
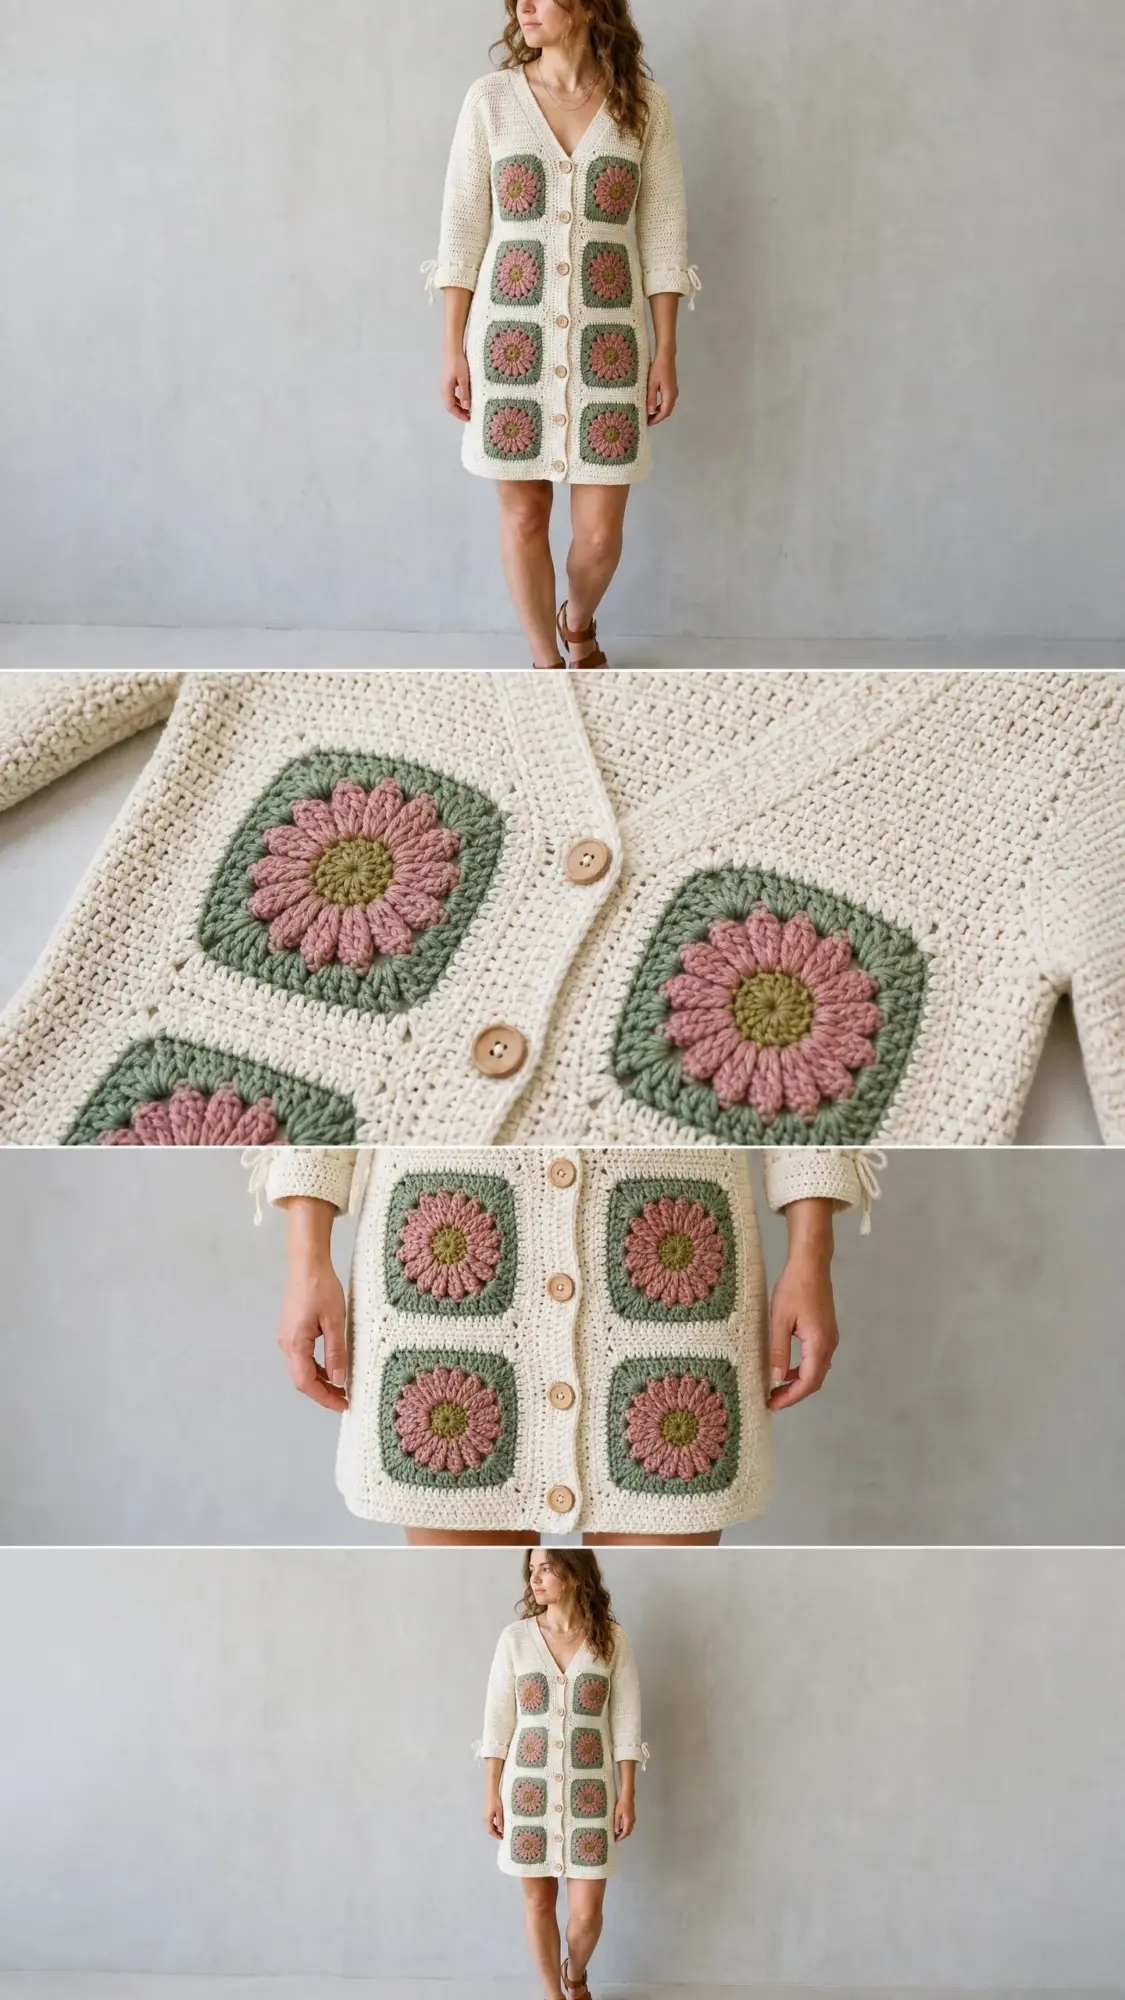
If you have been searching for a statement piece that keeps you looking stylish while feeling completely comfortable, this is the pattern for you. This boho granny square dress combines simple double crochet (dc) fabric with stunning floral granny squares in dusty rose and sage green. The fitted silhouette flatters, the wooden buttons add charm, and the whole piece works up beautifully for spring weddings, summer gatherings, or any time you want to feel put together.
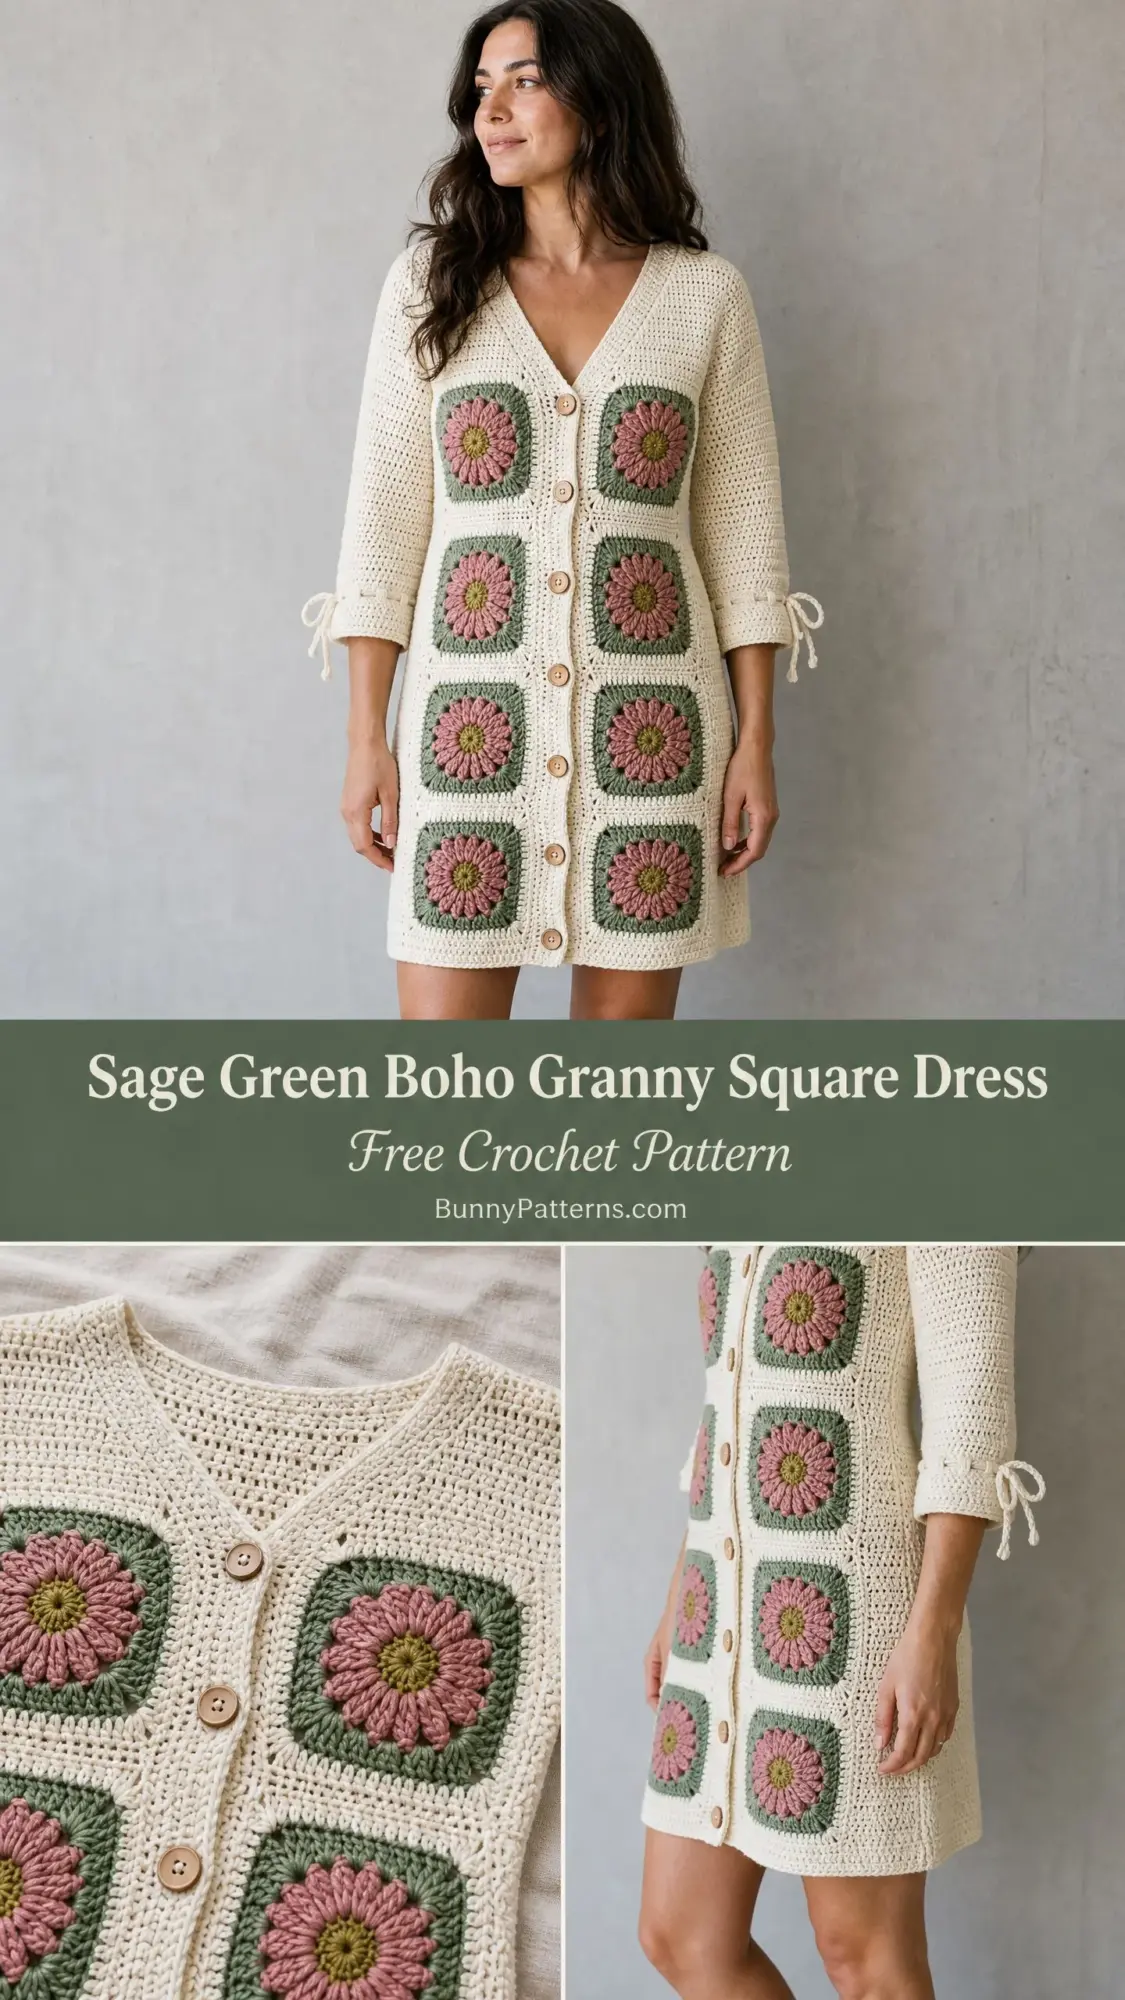
The construction uses beginner-friendly stitches throughout. You will work basic double crochet panels for the body and sleeves, then create twelve gorgeous floral granny squares separately. Everything comes together during assembly. If you can crochet a granny square and work rows of double crochet, you can absolutely make this dress.
It makes an incredible gift for someone special or a treat for yourself. The finished dress hits mid-thigh, features a flattering V-neckline, and includes sweet bow ties at the three-quarter length sleeve cuffs. Plan for approximately 40 to 60 hours of relaxing crochet time, and you will have a handmade garment you will treasure for years.
Why You Will Love This Crochet Pattern
This sage green boho granny square dress crochet pattern hits all the right notes. The cream background keeps things fresh and wearable. The dusty rose flower centers pop beautifully against the sage green borders. And the olive centers add just enough contrast to make the whole design sing.
The dress is worked in pieces, which means you can take it with you anywhere. Work on granny squares during your commute. Crochet the back panel while watching your favorite show. The modular construction makes this a perfect project for busy schedules.
The fitted button-front silhouette looks polished enough for special occasions but feels relaxed enough for everyday wear. Nine wooden buttons run down the center front, adding a natural, earthy touch that complements the boho aesthetic perfectly.
Skill Level
This pattern is rated Advanced Beginner to Intermediate. The individual techniques are all accessible. You will use double crochet fabric, traditional granny squares, basic seaming, and simple button band pickup. Nothing here is truly difficult on its own.
The challenge comes from assembling a fitted garment with accurate shaping and integrating the motifs into a structured body. Take your time, trust your stitch counts, and you will succeed. Anyone comfortable with granny squares and basic garment shaping can complete this project.
Finished Measurements
This pattern is written for size Small/Medium with notes for adjusting.
Bust: 34 to 36 inches (86 to 91 cm) with approximately 2 inches of ease
Waist: 28 to 30 inches (71 to 76 cm)
Hip: 36 to 38 inches (91 to 97 cm)
Total Length (shoulder to hem): 32 inches (81 cm)
Sleeve Length (shoulder to cuff): 14 inches (35.5 cm)
Sleeve Circumference at Upper Arm: 13 inches (33 cm)
Granny Square Finished Size: 5.5 inches (14 cm) square
Materials Needed
Yarn
You will need worsted weight yarn in four colors:
Color A (Cream/Off-White): approximately 1,400 yards (1,280 meters)
Color B (Dusty Rose/Mauve): approximately 280 yards (256 meters)
Color C (Sage Green): approximately 280 yards (256 meters)
Color D (Olive/Chartreuse): approximately 60 yards (55 meters), used only for granny square centers
Recommended Yarn Options
Option 1: Lion Brand Wool-Ease (80% acrylic, 20% wool), worsted weight, 197 yards per 3 oz skein. This yarn offers warmth without full wool care requirements. It drapes well in garment construction, and the matte finish suits the boho aesthetic perfectly.
Option 2: Paintbox Yarns Simply DK held double. The huge color range makes matching the cream, dusty rose, sage green, and olive very easy. This option is budget-friendly.
Option 3: Cascade 220 Superwash (100% superwash merino wool), worsted weight, 220 yards per 3.5 oz skein. This is the premium option. It blocks beautifully, holds its shape, and is machine washable on gentle. The softness next to skin is superior.
Hooks
US size J (6.0 mm) for main body
US size I (5.5 mm) for granny squares to achieve a tighter, denser square
Notions
Gauge
Getting gauge right is critical for a fitted garment. Please swatch before beginning.
Main body gauge (Color A, J hook, double crochet): 14 dc x 8 rows = 4 inches (10 cm) square
Granny square gauge (I hook, completed square): One finished granny square = 5.5 x 5.5 inches (14 x 14 cm)
Swatch, block the swatch, and adjust hook size as needed before cutting any yarn.
Abbreviations
ch – chain
ch-sp – chain space
dc – double crochet (yarn over, insert hook, yarn over and pull up a loop, yarn over and pull through two loops, yarn over and pull through remaining two loops)
dc2tog – double crochet two together, a decrease stitch
hdc – half double crochet
sc – single crochet
sk – skip
sl st – slip stitch
sp – space
st(s) – stitch(es)
RS – right side
WS – wrong side
BLO – back loop only
rep – repeat
rem – remaining
Special Stitches
Dc2tog (Double Crochet Two Together)
This is your decrease stitch. Yarn over, insert hook into next stitch, yarn over and pull up a loop, yarn over and pull through two loops. You now have two loops on your hook. Yarn over, insert hook into the following stitch, yarn over and pull up a loop, yarn over and pull through two loops. You now have three loops on your hook. Yarn over and pull through all three loops. One stitch decreased.
Joining Slip Stitch Seam
Hold two pieces with wrong sides together so right sides face outward. Insert hook through both corresponding stitches simultaneously. Yarn over, pull up a loop, and pull it through the loop already on the hook. Continue across. This creates a visible ridge on the right side which adds a decorative seam detail consistent with the garment’s handmade aesthetic.
Pattern Notes Before You Begin
1. The garment is worked in pieces: Back Body, Left Front Body, Right Front Body, two Sleeves, and twelve Granny Squares. All pieces are seamed together at the end.
2. The back and front body panels are worked flat from the top (shoulder) downward.
3. The V-neckline is shaped on the front panels by working each front as a separate piece from the beginning.
4. Always chain 3 to begin a row of double crochet. This turning chain counts as the first dc throughout.
5. Stitch counts in parentheses at the end of each row reflect the total working stitches in that row, not including turning chains.
6. Block all pieces before assembly. This is especially important for granny squares to ensure uniform sizing.
7. When changing colors in granny squares, finish the last yarn over of the last stitch with the new color. Fasten off and weave in ends as you go.
Granny Square Instructions
Make 12 total. Each square uses all four colors.
Round 1 (Color D)
Make a magic ring or ch 4 and join with sl st to form a ring.
Ch 3 (counts as first dc), work 11 dc into ring, join with sl st to top of beginning ch-3. (12 dc)
Fasten off Color D.
Round 2 (Color B)
Join Color B with sl st to any stitch from Round 1.
Ch 1, sc in same stitch. Ch 3, skip next stitch, sc in following stitch. Repeat from to around until you have 6 sc and 6 ch-3 loops. Join with sl st to first sc. (6 sc, 6 ch-3 spaces)
Do not fasten off. Continue with Color B.
Round 2B (Petal Round, Color B)
Sl st into first ch-3 space. Into each ch-3 space work: (1 sc, 1 hdc, 5 dc, 1 hdc, 1 sc). Repeat in each of the 6 ch-3 spaces. Join with sl st to first sc of first petal. (6 petals, 48 stitches total)
Fasten off Color B.
Round 3 (Color C)
Join Color C to any stitch at the back, working behind petals.
Ch 3, 2 dc in same st (corner group), ch 2, (3 dc, ch 2) in each of the next 5 positions evenly around. Join with sl st to top of ch-3. (6 groups of 3 dc, 6 ch-2 spaces)
Fasten off Color C.
Round 4 (Color C)
Join Color C to any ch-2 space.
Ch 3, 2 dc in same sp, ch 2, 3 dc in same sp (first corner made).
3 dc in next ch-2 sp, ch 1 (side), 3 dc in following ch-2 sp, ch 2 (corner), 3 dc in same sp.
Repeat from to around for remaining corners. Join with sl st to top of ch-3. (4 corner ch-2 spaces, 4 side ch-1 spaces, twelve groups of 3 dc)
Fasten off Color C.
Round 5 (Color A)
Join Color A to any corner ch-2 space.
Ch 3, 2 dc in same sp, ch 2, 3 dc in same sp (corner).
Ch 1, 3 dc in next ch-1 sp (side), ch 1.
(3 dc, ch 2, 3 dc) in corner ch-2 sp. Ch 1, 3 dc in next ch-1 sp, ch 1.
Repeat from to for remaining two corners. Join with sl st to top of ch-3. (4 corners, 4 sides with one group of 3dc each)
Fasten off Color A. Weave in all ends. Block each square to 5.5 x 5.5 inches (14 x 14 cm).
Checkpoint 1
After completing and blocking all 12 granny squares, each should measure exactly 5.5 x 5.5 inches. If squares are too small, go up a hook size. If too large, go down a hook size. All 12 must match before proceeding.
Back Body
The back is worked flat in one piece from the top down in Color A.
Foundation Chain
Ch 58.
Row 1 (WS): Dc in 4th ch from hook (the skipped ch-3 counts as first dc), dc in each ch across. Turn. (56 dc)
Rows 2 through 10: Ch 3, dc in each st across. Turn. (56 dc)
Waist Shaping (Back)
Row 11: Ch 3, dc2tog over next 2 sts, dc across until 3 sts remain, dc2tog, dc in last st. Turn. (54 dc)
Row 12: Ch 3, dc in each st across. Turn. (54 dc)
Row 13: Ch 3, dc2tog over next 2 sts, dc across until 3 sts remain, dc2tog, dc in last st. Turn. (52 dc)
Rows 14 and 15: Ch 3, dc in each st across. Turn. (52 dc)
Hip Expansion (Back)
Row 16: Ch 3, 2 dc in next st, dc across until 2 sts remain, 2 dc in next st, dc in last st. Turn. (54 dc)
Row 17: Ch 3, dc in each st across. Turn. (54 dc)
Row 18: Ch 3, 2 dc in next st, dc across until 2 sts remain, 2 dc in next st, dc in last st. Turn. (56 dc)
Row 19: Ch 3, dc in each st across. Turn. (56 dc)
Row 20: Ch 3, 2 dc in next st, dc across until 2 sts remain, 2 dc in next st, dc in last st. Turn. (58 dc)
Row 21: Ch 3, dc in each st across. Turn. (58 dc)
Row 22: Ch 3, 2 dc in next st, dc across until 2 sts remain, 2 dc in next st, dc in last st. Turn. (60 dc)
Rows 23 through 40: Ch 3, dc in each st across. Turn. (60 dc throughout)
Fasten off.
Checkpoint 2
The back should measure approximately 16 inches wide at shoulders, 14.8 inches wide at the narrowest waist point, and 17.1 inches wide at the hip. Total height should be approximately 20 inches.
Left Front Body
Foundation Chain
Ch 26.
Row 1 (WS): Dc in 4th ch from hook, dc in each ch across. Turn. (24 dc)
V-Neckline Shaping
Row 2 (RS): Ch 3, dc in each st across to last 3 sts, dc2tog, dc in last st. Turn. (23 dc)
Row 3: Ch 3, dc in each st across. Turn. (23 dc)
Row 4: Ch 3, dc in each st across to last 3 sts, dc2tog, dc in last st. Turn. (22 dc)
Row 5: Ch 3, dc in each st across. Turn. (22 dc)
Row 6: Ch 3, dc in each st across to last 3 sts, dc2tog, dc in last st. Turn. (21 dc)
Row 7: Ch 3, dc in each st across. Turn. (21 dc)
Row 8: Ch 3, dc in each st across to last 3 sts, dc2tog, dc in last st. Turn. (20 dc)
Row 9: Ch 3, dc in each st across. Turn. (20 dc)
Row 10: Ch 3, dc in each st across to last 3 sts, dc2tog, dc in last st. Turn. (19 dc)
Row 11 (Underarm level): Ch 3, dc in each st across. Turn. (19 dc)
Waist Shaping (Left Front)
Row 12: Ch 3, dc in each st across to last 3 sts, dc2tog, dc in last st. Turn. (18 dc)
Row 13: Ch 3, dc in each st across. Turn. (18 dc)
Row 14: Ch 3, dc in each st across to last 3 sts, dc2tog, dc in last st. Turn. (17 dc)
Rows 15 and 16: Ch 3, dc in each st across. Turn. (17 dc)
Hip Expansion (Left Front)
Row 17: Ch 3, 2 dc in next st, dc across. Turn. (18 dc)
Row 18: Ch 3, dc in each st across. Turn. (18 dc)
Row 19: Ch 3, 2 dc in next st, dc across. Turn. (19 dc)
Row 20: Ch 3, dc in each st across. Turn. (19 dc)
Row 21: Ch 3, 2 dc in next st, dc across. Turn. (20 dc)
Row 22: Ch 3, dc in each st across. Turn. (20 dc)
Row 23: Ch 3, 2 dc in next st, dc across. Turn. (21 dc)
Rows 24 through 40: Ch 3, dc in each st across. Turn. (21 dc throughout)
Fasten off.
Right Front Body
The right front mirrors the left front. The V-neck decrease occurs at the beginning of RS rows.
Foundation Chain
Ch 26.
Row 1 (WS): Dc in 4th ch from hook, dc in each ch across. Turn. (24 dc)
V-Neckline Shaping
Row 2 (RS): Ch 3, dc2tog over next 2 sts, dc in each st across. Turn. (23 dc)
Row 3: Ch 3, dc in each st across. Turn. (23 dc)
Row 4: Ch 3, dc2tog over next 2 sts, dc in each st across. Turn. (22 dc)
Row 5: Ch 3, dc in each st across. Turn. (22 dc)
Row 6: Ch 3, dc2tog over next 2 sts, dc in each st across. Turn. (21 dc)
Row 7: Ch 3, dc in each st across. Turn. (21 dc)
Row 8: Ch 3, dc2tog over next 2 sts, dc in each st across. Turn. (20 dc)
Row 9: Ch 3, dc in each st across. Turn. (20 dc)
Row 10: Ch 3, dc2tog over next 2 sts, dc in each st across. Turn. (19 dc)
Row 11: Ch 3, dc in each st across. Turn. (19 dc)
Waist Shaping (Right Front)
Row 12: Ch 3, dc2tog over next 2 sts, dc in each st across. Turn. (18 dc)
Row 13: Ch 3, dc in each st across. Turn. (18 dc)
Row 14: Ch 3, dc2tog over next 2 sts, dc in each st across. Turn. (17 dc)
Rows 15 and 16: Ch 3, dc in each st across. Turn. (17 dc)
Hip Expansion (Right Front)
Row 17: Ch 3, dc across to last 2 sts, 2 dc in next st, dc in last st. Turn. (18 dc)
Row 18: Ch 3, dc in each st across. Turn. (18 dc)
Row 19: Ch 3, dc across to last 2 sts, 2 dc in next st, dc in last st. Turn. (19 dc)
Row 20: Ch 3, dc in each st across. Turn. (19 dc)
Row 21: Ch 3, dc across to last 2 sts, 2 dc in next st, dc in last st. Turn. (20 dc)
Row 22: Ch 3, dc in each st across. Turn. (20 dc)
Row 23: Ch 3, dc across to last 2 sts, 2 dc in next st, dc in last st. Turn. (21 dc)
Rows 24 through 40: Ch 3, dc in each st across. Turn. (21 dc throughout)
Fasten off.
Checkpoint 3
Both front panels should be identical lengths at 20 inches. Each front at its narrowest should be approximately 4.9 inches wide. Each front at the hem should be approximately 6 inches wide.
Sleeves (Make 2)
Each sleeve is worked flat from the top down.
Foundation Chain
Ch 48.
Row 1 (WS): Dc in 4th ch from hook, dc in each ch across. Turn. (46 dc)
Rows 2 through 4: Ch 3, dc in each st across. Turn. (46 dc)
Row 5 (Decrease row): Ch 3, dc2tog over next 2 sts, dc across to last 3 sts, dc2tog, dc in last st. Turn. (44 dc)
Row 6: Ch 3, dc in each st across. Turn. (44 dc)
Row 7: Ch 3, dc2tog over next 2 sts, dc across to last 3 sts, dc2tog, dc in last st. Turn. (42 dc)
Row 8: Ch 3, dc in each st across. Turn. (42 dc)
Row 9: Ch 3, dc2tog over next 2 sts, dc across to last 3 sts, dc2tog, dc in last st. Turn. (40 dc)
Row 10: Ch 3, dc in each st across. Turn. (40 dc)
Row 11: Ch 3, dc2tog over next 2 sts, dc across to last 3 sts, dc2tog, dc in last st. Turn. (38 dc)
Row 12: Ch 3, dc in each st across. Turn. (38 dc)
Row 13: Ch 3, dc2tog over next 2 sts, dc across to last 3 sts, dc2tog, dc in last st. Turn. (36 dc)
Rows 14 through 26: Ch 3, dc in each st across. Turn. (36 dc)
Row 27 (Last decrease row): Ch 3, dc2tog over next 2 sts, dc across to last 3 sts, dc2tog, dc in last st. Turn. (34 dc)
Row 28: Ch 3, dc in each st across. Turn. (34 dc)
Cuff Bow Ties
Do not fasten off after Row 28. Work 1 row of sc across the cuff edge. Cut two 20-inch lengths of Color A yarn, fold each in half, and attach with a lark’s head knot to the edge of the cuff at approximately 1.5 inches from each end. Tie each pair in a small bow. Trim ends to 2 inches.
Fasten off. Make a second sleeve to match.
Checkpoint 4
Each finished sleeve should measure approximately 13 inches wide at the top and taper to approximately 9.7 inches at the cuff. Length should be approximately 14 inches.
Assembly
Step 1: Block all pieces before assembly.
Step 2: Seam the shoulder edges. With RS facing out and WS together, align the shoulder edge of the left front to the back left shoulder. Using the joining slip stitch method, seam across 24 stitches. Repeat for right shoulder.
Step 3: Seam the side seams. Align the left front side edge to the back left side. Using joining slip stitch, seam from underarm to hem. Leave a gap of 11 rows (5.5 inches) starting 2 rows above the waist shaping to accommodate the side granny square. Repeat for right side.
Step 4: Set in the sleeves. Fold each sleeve in half lengthwise and mark the center top edge. Align this center point with the shoulder seam. Pin the sleeve evenly into the armhole opening. Seam with joining slip stitch all around the armhole.
Step 5: Seam the sleeve underarm seam from cuff to underarm using joining slip stitch.
Step 6: Place the four granny squares for each front panel. Position and pin the granny squares two columns wide, flanking the button band. Stack four squares vertically along each column. Whip stitch each square to the front panel along all four edges using Color A.
Step 7: Attach the two side granny squares. One square on each side seam, positioned in the gap left in Step 3. Whip stitch in place.
Step 8: Attach the two sleeve accent squares. Position one square on the outer lower sleeve of each sleeve, centered, approximately 3 rows above the cuff. Whip stitch in place.
Button Band (Left Front)
With RS facing, join Color A at the bottom left front edge.
Row 1: Work sc evenly up the entire left center front edge from hem to the beginning of the V-neck shaping. Work approximately 1 sc per row for a clean, flat band. Turn.
Rows 2 through 4: Ch 1, sc in each sc across. Turn.
Fasten off. Sew 9 buttons evenly spaced along this band. Place the first button 0.5 inch from the bottom and the last button 0.5 inch below the start of the V-neck, with the remaining 7 buttons evenly spaced between.
Buttonhole Band (Right Front)
With RS facing, join Color A at the top right front edge (at the V-neck).
Row 1: Work sc evenly down the entire right center front edge from V-neck to hem. Turn.
Row 2: Ch 1, sc in each sc across. Turn.
Row 3 (Buttonhole row): Ch 1, sc across, working buttonholes to correspond with button placement. For each buttonhole, ch 2 and skip 2 sc. Continue sc across. Turn.
Row 4: Ch 1, sc in each st and ch-sp across. Turn.
Fasten off. Weave in all ends.
Blocking and Finishing
Wet block or steam block the entire finished garment. Lay flat on blocking mats and pin to measurements. Allow to dry completely before wearing.
Weave in any remaining ends. Attach buttons securely with sewing needle and thread.
Tips for Success with This Crochet Tutorial
Take your time with the granny squares. These are the star of the show. Block each one carefully to ensure they are all exactly the same size before attaching them to the body.
Check your gauge often. A fitted garment requires accurate measurements throughout. If your piece starts to look off, stop and measure.
Use stitch markers generously. Mark the beginning of your rounds, mark decrease points, and mark where granny squares will be placed.
Try it on as you go. If possible, hold the pieces up to yourself or the intended wearer during construction to check the fit.
Final Thoughts
Thank you so much for choosing this sage green boho granny square dress crochet pattern for your next project. I truly hope you love making it as much as I loved designing it. The combination of simple double crochet fabric with those gorgeous floral granny squares creates something really special.
If you make this dress, I would absolutely love to see it. Tag me on Instagram or share a photo in my Facebook group. Seeing your finished projects is the best part of sharing patterns.
Go ahead and save this pattern to your Pinterest boards so you can find it easily when you are ready to start. And if you have any questions along the way, drop a comment below. I am always happy to help. Happy crocheting!
You Might Also Like
- Pastel Rainbow Flower Granny Square Tote Free Crochet Pattern
- Pastel Rainbow Daisy Backpack Free Crochet Pattern
- Mint and Cream Baby Dress Free Crochet Pattern
- Lavender Garden Ear Cuff Free Crochet Pattern