
Granny stitch bags look intimidating. I hear it all the time. The color changes, the cluster counts, the whole "working in the round" thing. But here is the truth: if you can make three double crochets and count to 66, you can absolutely make this bag.
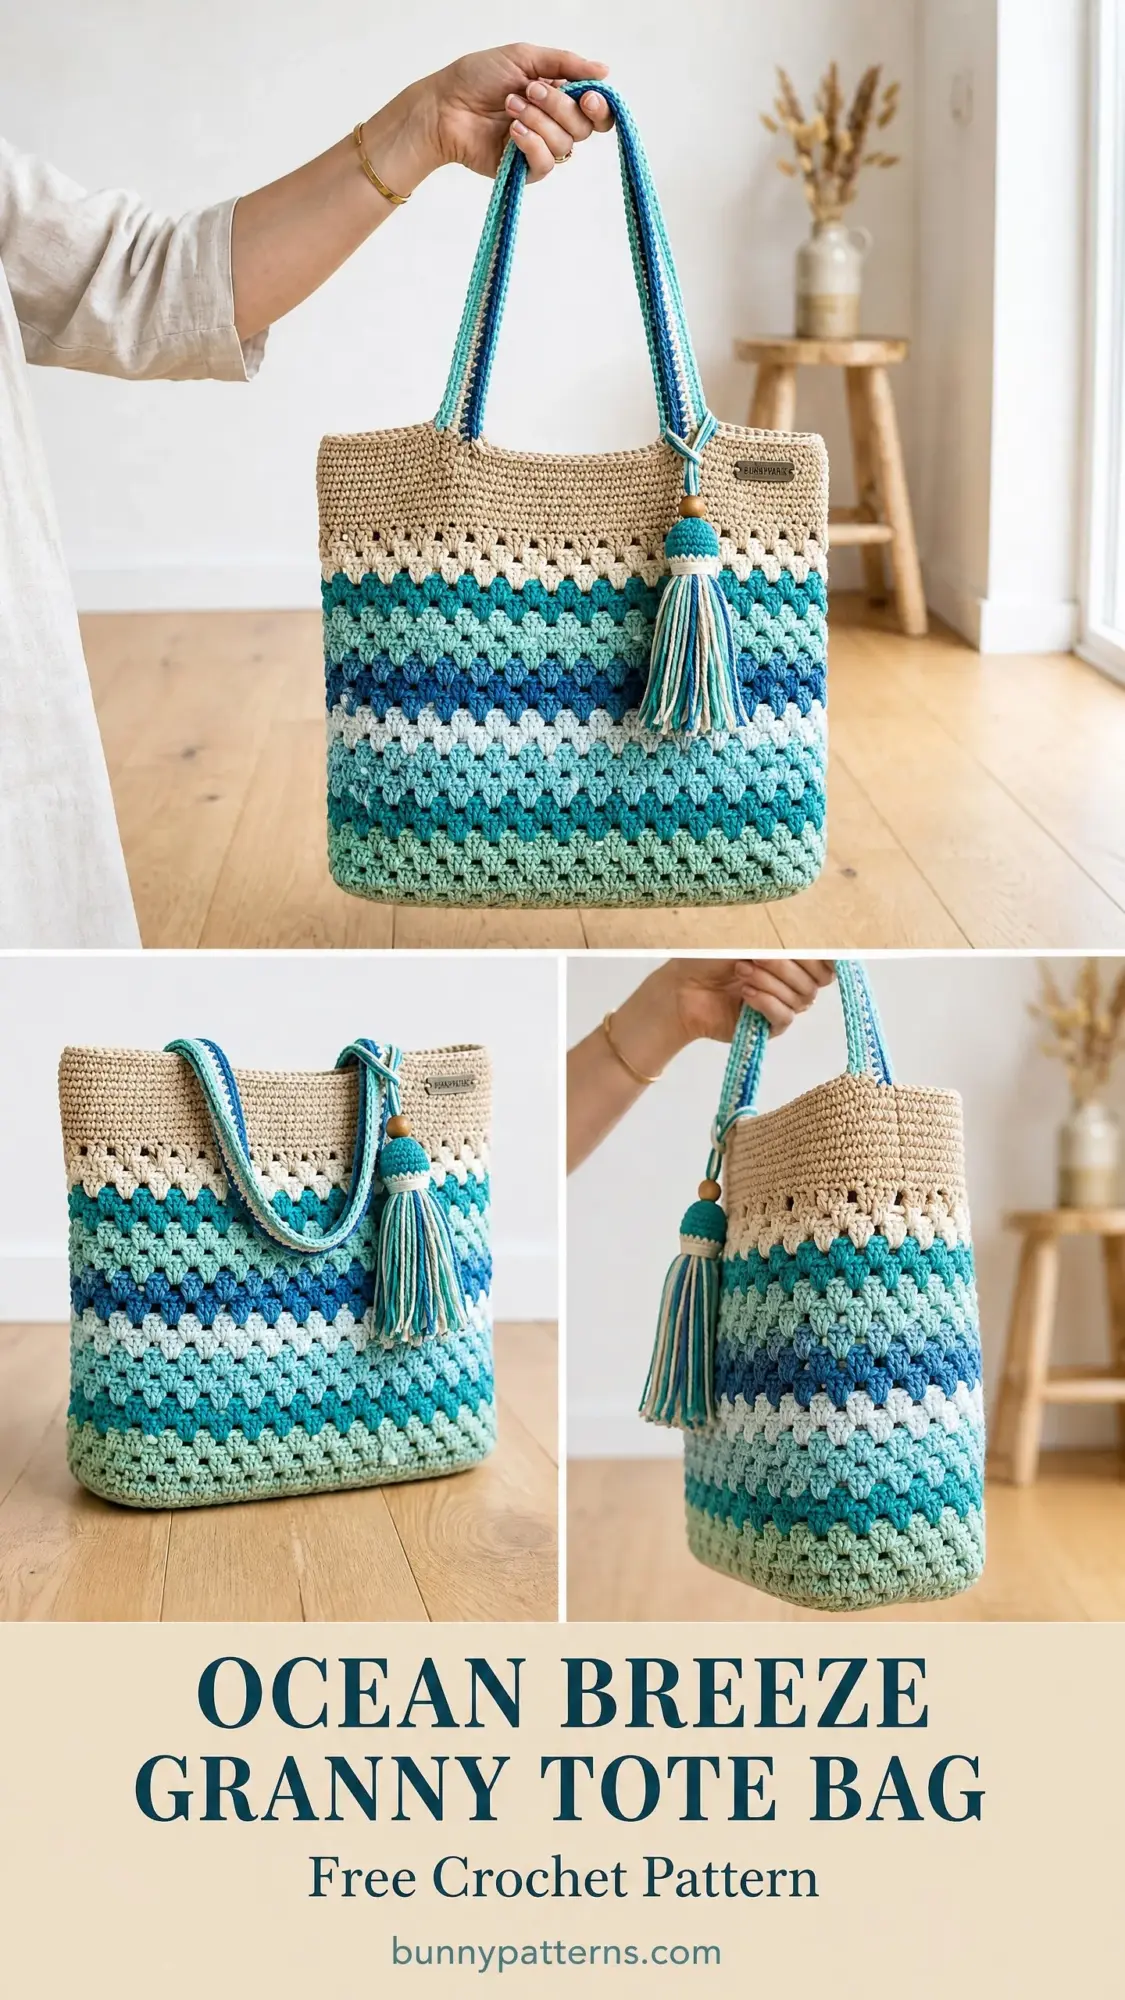
The Ocean Breeze Granny Tote breaks down into simple, repeatable steps. You start with a basic rectangle of single crochet for the base. Then you build upward with the same cluster pattern over and over, just swapping colors as you go. The gradient happens naturally when you follow the color sequence. No complicated math, no guesswork.
Whether you are a confident beginner ready for your first big project or an experienced crocheter looking for a satisfying weekend make, this tote delivers. The finished bag is sturdy enough for farmers market runs, pretty enough to show off, and roomy enough to hold everything you need.
Why This Crochet Tote Bag Pattern Works
This structured shoulder bag uses a modified granny cluster stitch worked in continuous rounds. The technique creates that beautiful textured stripe effect you see in the finished piece. The rectangular base gives the bag a flat bottom that actually stands up on its own.
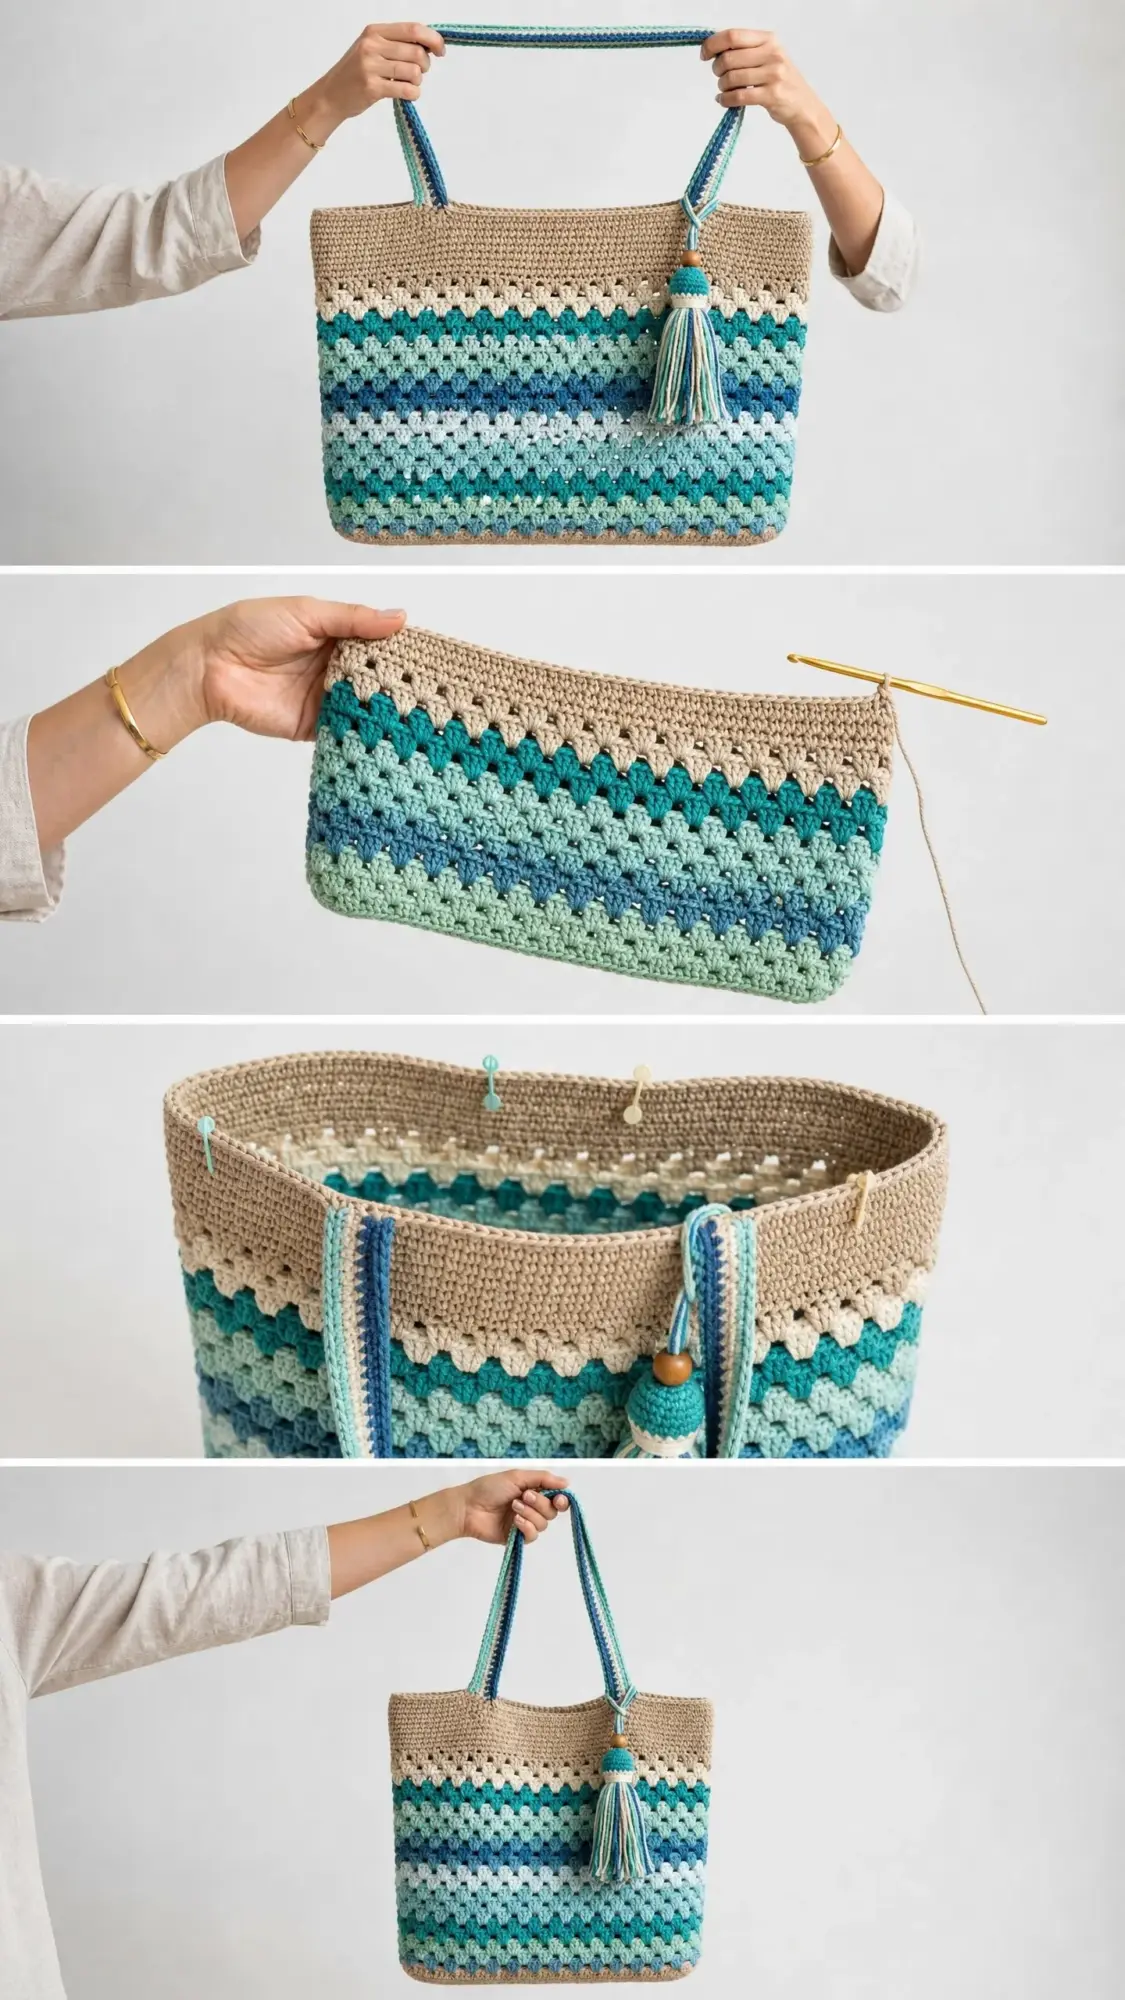
The color gradient moves through shades of seafoam, teal, aqua, blue, and white in the lower section. Then it transitions to a solid natural sand color at the top with a decorative eyelet band as a visual break. Long striped straps and a handmade tassel complete the look.
Construction is straightforward: base first, sides upward in the round, straps worked separately and attached, tassel assembled last.
Skill Level
This is an intermediate level crochet pattern. You should feel comfortable working in continuous rounds, managing multiple yarn colors, and maintaining consistent tension throughout a larger project.
No advanced shaping required. The main skills you will practice are clean color changes and even stitch work.
How Long Does This Take to Crochet?
Plan for approximately 15 to 22 hours of total work time:
This makes a great project to work on over a few weekends or during evening crafting sessions.
Finished Measurements
Materials Needed
Yarn
You will need worsted weight cotton or cotton-blend yarn (Category 4), approximately 1,400 yards (1,280 meters) total.
Here is how the yardage breaks down by color:
Recommended Yarn Brands
Lion Brand 24/7 Cotton works beautifully for this project. The mercerized cotton gives excellent stitch definition and holds its shape well.
Paintbox Yarns Simply DK used doubled, or Paintbox Yarns Simply Chunky at a looser gauge, offers an extensive color palette perfect for building your custom gradient.
Scheepjes Cahlista is a premium option that produces heirloom quality results with exceptional color range.
Avoid fuzzy or textured yarns. They will obscure the granny cluster pattern.
Tools
Gauge
Getting gauge right matters here. Cotton has almost no stretch, so your measurements need to be accurate.
In single crochet: 14 stitches and 16 rows = 4 inches (10 cm)
In granny cluster pattern: 3 cluster groups = approximately 4 inches (10 cm) wide; 4 rounds = approximately 3 inches (7.5 cm) tall
To check your gauge: Chain 20, work single crochet for 20 rows, block lightly, measure the center 14 stitches across 16 rows. Adjust hook size if needed.
Abbreviations and Stitch Definitions
Here are all the terms used in this crochet tutorial:
Special Stitches Explained
Granny Cluster (GC)
This is the core texture stitch for the entire bag body.
In the designated stitch or space: yarn over, insert hook, pull up a loop, yarn over, pull through 2 loops. Without removing the hook, yarn over, insert hook into the same spot, pull up a loop, yarn over, pull through 2 loops. One more time: yarn over, insert hook into same spot, pull up a loop, yarn over, pull through 2 loops. Now yarn over and pull through all 4 loops on hook.
That is one completed granny cluster. Think of it as 3 double crochets worked into the same spot and joined at the top.
Granny Cluster Group (GCG)
Work 1 granny cluster into the designated space, then chain 1. This chain creates the small gap between clusters. One GCG = 1 granny cluster plus 1 chain.
Standing Double Crochet (StDC)
This lets you join a new color without a starting chain. Make a slip knot on your hook. Yarn over, insert hook into the designated spot, pull up a loop, yarn over, pull through 2 loops, yarn over, pull through remaining 2 loops.
Pattern Notes Before You Begin
Read these tips before starting. They will save you confusion later.
The bag base is worked flat in rows, then joined. The body is worked in continuous rounds from the base upward. Use a stitch marker to track the beginning of each round.
When working the granny cluster pattern, you work into the chain-1 spaces of the previous round, not into the tops of the clusters.
For color changes: switch to the new color in the last yarn-over of the final stitch of the previous round. Cut yarn and weave ends unless the color returns within 3 rounds.
The stitch count tracks cluster groups per round rather than individual stitches. Each round has 66 GCG.
Step by Step Instructions
Section 1: Bag Base
The base creates a firm rectangle using single crochet.
With Color A (Natural/Sand) and J hook, chain 51.
Row 1 (RS): Sc in second ch from hook and in each ch across. Turn. (50 sc)
Row 2: Ch 1, sc in each st across. Turn. (50 sc)
Rows 3 through 16: Repeat Row 2. Turn after each row. (50 sc per row)
After 16 rows, do NOT fasten off. Your base should measure approximately 14 inches wide by 4 inches tall.
Section 2: Base Perimeter Setup
Now you will work around all four sides of the base rectangle to create the foundation for the body rounds.
With RS facing, do not turn. Rotate work 90 degrees clockwise.
Side B (right short end): Work 16 sc evenly along the short end, 1 sc per row end. (16 sc)
Corner: Work 1 sc into the corner chain.
Side C (bottom foundation chain): Sc in each of the 50 foundation chain sts along the bottom. (50 sc)
Corner: Work 1 sc into the corner chain.
Side D (left short end): Work 16 sc evenly along the short end. (16 sc)
Join with sl st to the first sc of Row 16.
Total perimeter: 50 + 16 + 50 + 16 = 132 sc
Place a stitch marker at the join point.
Section 3: Setup Round for Cluster Pattern
Round 1 Setup: With Color B (Teal), join with a standing double crochet in the marked stitch.
Work as follows: (1 GC in current sc, ch 1, skip 1 sc) around. At end of round, sl st to top of first GC to join. Move marker. (66 GCG)
Section 4: Bag Body, Granny Cluster Rounds
From here, all rounds are worked into the ch-1 spaces of the previous round.
Follow this color stripe sequence exactly:
Rounds 1-2 (Color B, Teal): (1 GC into next ch-1 sp, ch 1) around, sl st to join. (66 GCG)
Rounds 3-4 (Color C, Seafoam): Join Color C with StDC. (1 GC into next ch-1 sp, ch 1) around, sl st to join. (66 GCG)
Rounds 5-6 (Color D, Aqua): Join Color D. (1 GC into next ch-1 sp, ch 1) around, sl st to join. (66 GCG)
Rounds 7-8 (Color E, Cobalt Blue): Join Color E. (1 GC into next ch-1 sp, ch 1) around, sl st to join. (66 GCG)
Rounds 9-10 (Color F, Light Blue): Join Color F. (1 GC into next ch-1 sp, ch 1) around, sl st to join. (66 GCG)
Rounds 11-12 (Color G, White/Cream): Join Color G. (1 GC into next ch-1 sp, ch 1) around, sl st to join. (66 GCG)
Rounds 13-14 (Color F, Light Blue): Join Color F. (1 GC into next ch-1 sp, ch 1) around, sl st to join. (66 GCG)
Rounds 15-16 (Color D, Aqua): Join Color D. (1 GC into next ch-1 sp, ch 1) around, sl st to join. (66 GCG)
Rounds 17-18 (Color C, Seafoam): Join Color C. (1 GC into next ch-1 sp, ch 1) around, sl st to join. (66 GCG)
Rounds 19-20 (Color B, Teal): Join Color B. (1 GC into next ch-1 sp, ch 1) around, sl st to join. (66 GCG)
Checkpoint: After Round 20, your bag body should measure approximately 10 inches from the base.
Section 5: Upper Band with Eyelet Row
Round 21 (Color A, Natural): Join Color A with StDC. (1 GC into next ch-1 sp, ch 1) around, sl st to join. (66 GCG)
Round 22 (Color A, Eyelet Round): Ch 4 (counts as dc plus ch 1), skip first ch-1 sp, (dc in top of next GC, ch 1, skip ch-1 sp) around, sl st to third ch of beginning ch-4. (66 dc plus 66 ch-1 sps)
This creates the decorative openwork band visible between the stripes and the solid top.
Round 23 (Color A): Ch 3 (counts as dc), 2 dc in same sp as join, ch 1, (1 GC in next ch-1 sp, ch 1) around, sl st to top of ch-3. (66 GCG)
Rounds 24-26 (Color A): (1 GC in next ch-1 sp, ch 1) around, sl st to join. (66 GCG)
Round 27 (Color A, Top Edging Setup): Sc in each GC top and each ch-1 sp around. (132 sc)
Round 28 (Color A, Top Edge): Sl st in each sc around. Fasten off. (132 sl st)
Checkpoint: Total height from base to top edge should measure approximately 13 inches.
Section 6: Straps (Make 2)
With Color A and J hook, chain 8.
Row 1: Sc in second ch from hook and in each ch across. Turn. (7 sc)
Rows 2 through 120: Ch 1, sc in each st across. Turn. (7 sc)
After Row 120, fasten off leaving a long tail. Strap should measure approximately 30 inches.
Surface Stripe Decoration
With RS of strap facing, work 3 parallel surface slip stitch lines along the length:
Line 1 (left edge): With Color H (Dark Teal), surface sl st along the 2nd column of sc from left edge. Fasten off.
Line 2 (center): With Color I (Navy Blue), surface sl st along the 4th column (center). Fasten off.
Line 3 (right of center): With Color B (Teal), surface sl st along the 6th column. Fasten off.
Strap Attachment
Position each strap end approximately 3.5 inches in from the side edges on the bag top. Strap ends should overlap the inside by about 2.5 inches.
Using Color A and a tapestry needle, sew each strap end using a box stitch (rectangle of running stitches with an X inside) for maximum strength. Repeat for the second strap on the back.
Section 7: Tassel
Cut 40 strands of yarn, each 14 inches long. Use a mix of Colors B, C, D, F, and G (approximately 8 strands of each).
Fold all strands in half. Thread the folded loop through the wooden bead from top to bottom.
Make the Tassel Cap: Magic ring, ch 2, work 5 dc into ring, join with sl st. (6 dc) Round 2: Ch 2, dc in same st, 2 dc in each st around, join. (12 dc)
Place the cap over the bead. With Color B, wrap yarn tightly 8 times around the tassel about 3/4 inch below the bead. Knot securely.
Trim strands to 5 to 6 inches below the neck. Attach to the front top corner of the bag.
Blocking and Finishing
Weave in all ends securely, working back and forth through several stitches for at least 2 inches.
Fill the bag with plastic bags or a towel to shape it. Mist lightly with water or diluted starch spray. Pat into shape with flat base and perpendicular sides. Allow to dry completely for 12 to 24 hours.
For extra stiffness, spray with fabric stiffener or a diluted white glue solution.
Size Customization Tips
For a wider bag: Increase the foundation chain by multiples of 4. Each additional 4 chains adds about 1.1 inches of width.
For a taller bag: Add additional 2-round color stripe blocks. Each pair adds approximately 1.5 inches of height.
For longer or shorter straps: Add or remove rows from the strap. Each row equals about 0.25 inches.
Care Instructions
Hand wash in cool water with gentle detergent. Reshape while damp and lay flat to dry. Do not wring or twist.
If machine washing is necessary, use a mesh laundry bag, cold water, and the gentlest cycle. Reshape immediately. Never tumble dry.
You Did It!
This Ocean Breeze Granny Tote Bag crochet pattern combines classic technique with modern coastal colors. The structured base, beautiful gradient, and thoughtful details like the eyelet band and striped straps make this a project you will be proud to carry everywhere.
Thank you so much for choosing this pattern. I truly appreciate you being here and I hope you love the finished bag as much as I do. If you make one, I would absolutely love to see it! Tag me on Instagram or share a photo in our Facebook group.
If this pattern caught your eye, go ahead and pin it to your crochet boards on Pinterest so you can find it when you are ready to start. And please drop a comment below if you make this tote. I read every single one and your photos always make my day!
You Might Also Like
- Terracotta Desert Shell Purse Free Crochet Pattern
- Dusty Rose Cable Cuff Slipper Boots Free Crochet Pattern
- Sage Green Ribbed Flared Dress Free Crochet Pattern
- Ocean Teal Woven Purse on Linen Free Pattern