
Go dig through your yarn stash right now. You know that gorgeous burgundy skein you have been saving for something special? This is the project. The Sunset Ombre Granny Square Tote combines classic granny square construction with a structured, boxy silhouette that looks way more complicated than it actually is.
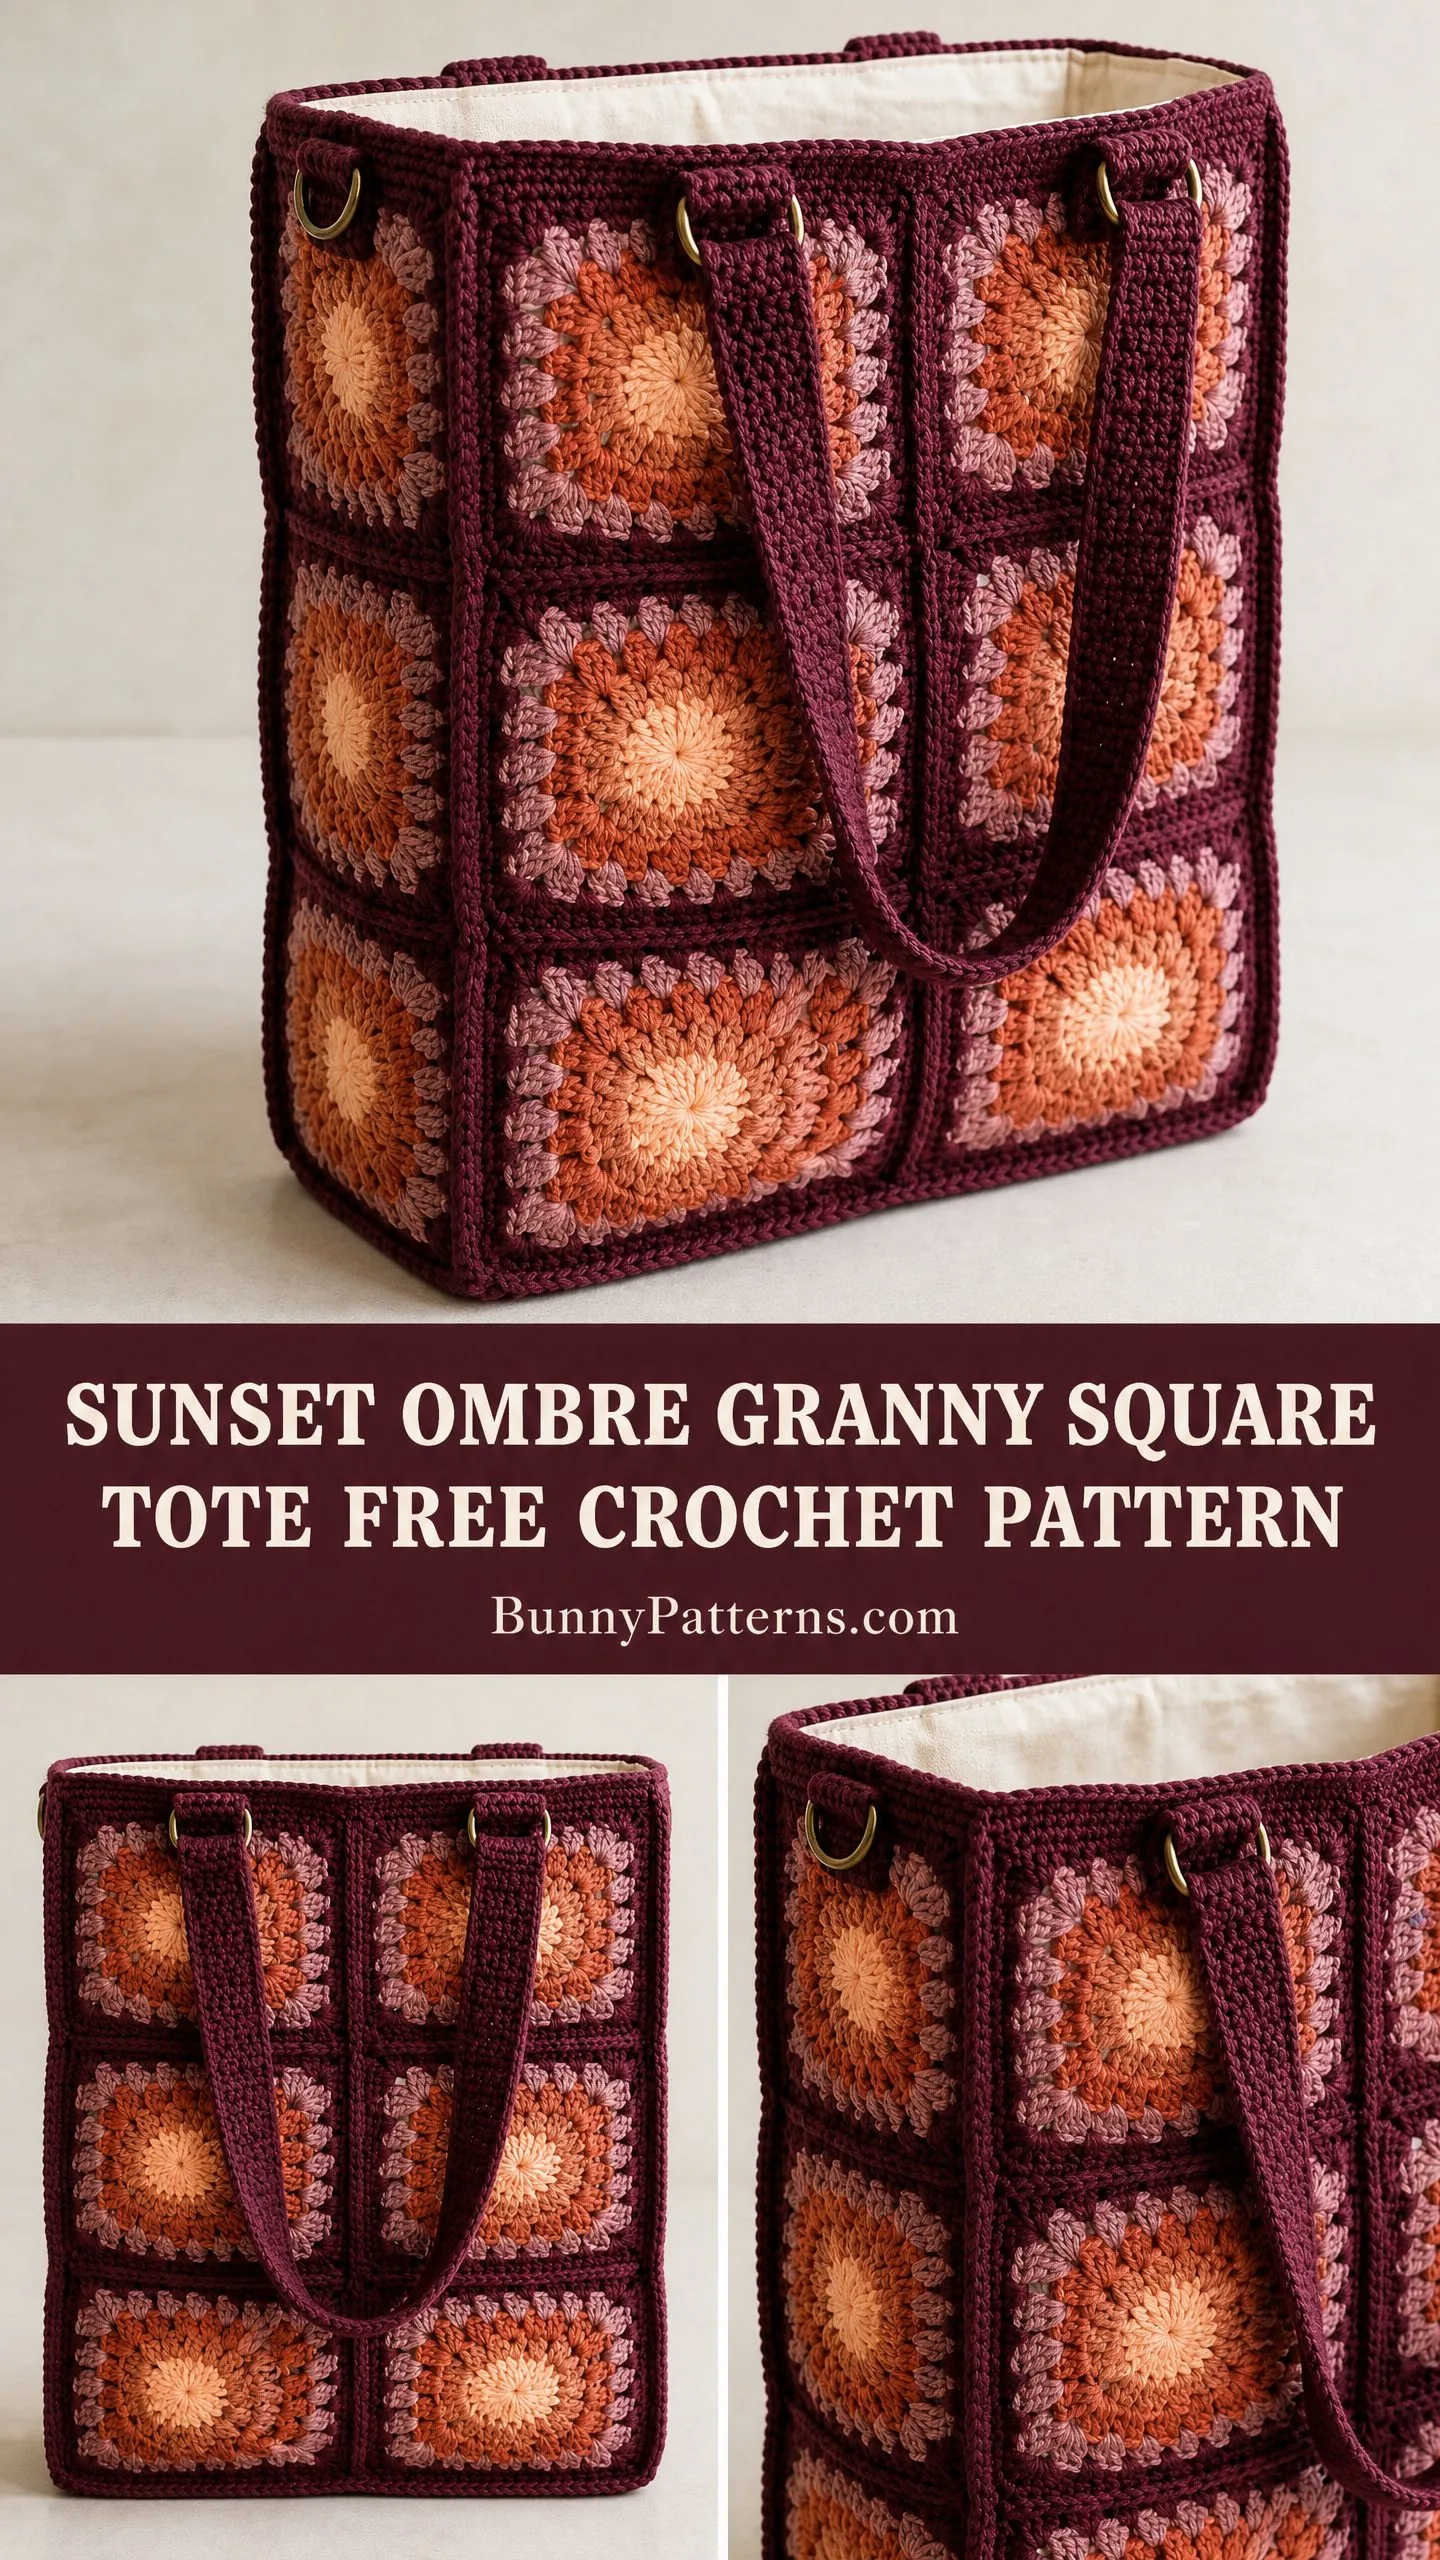
The magic here is in the color gradient. Each square starts with soft peach at the center and radiates outward through coral and terracotta before finishing in a deep burgundy border. When you join them all together, those wine-colored seams create a stunning grid pattern that doubles as structural reinforcement. Clever, right?
I will be honest with you. This is an intermediate project. You need to be comfortable with granny squares, joining motifs, and some basic sewing for the lining. But if you have made a few granny squares before and want to level up your skills, this tote is the perfect next step.
Why You Will Love This Crochet Tote Pattern
This bag checks all the boxes. It is practical enough for everyday use, beautiful enough to get compliments everywhere you go, and satisfying to make because you can see your progress as each square comes together. The finished tote measures approximately 14 inches wide by 14 inches tall by 4 inches deep. That is plenty of room for books, projects, groceries, or whatever else you need to haul around.
The retro-bohemian aesthetic works year-round, but those warm autumn tones make this especially perfect for fall. The canvas lining adds structure and durability, so your tote will hold its shape even when fully loaded. And those antique brass D-rings? They give the whole piece a polished, professional finish.
Materials You Will Need
Before you start, gather everything on this list. Having it all ready makes the process so much smoother.
Yarn (Worsted Weight Cotton or Cotton-Blend):
Total yarn needed: approximately 700 yards (640 m)
Hook: US size G-6 (4.0 mm) or H-8 (5.0 mm) depending on your gauge. The sample uses H-8 (5.0 mm).
Notions:
Yarn Suggestions
Choose a smooth, tightly spun cotton or cotton-blend. Fuzzy or stretchy fibers will not hold the boxy shape you want. Here are some excellent options:
Lion Brand 24/7 Cotton in Wine, Terracotta, Peach, and Blush. This 100 percent mercerized cotton is smooth, sturdy, and holds its shape beautifully.
Paintbox Yarns Cotton DK (used doubled) in Deep Burgundy, Terracotta, Peach Sorbet, and Blush Pink. Doubling it brings it into worsted weight range and adds stiffness.
WeCrochet Dishie in Wine, Terracotta, Peach, and Blush. This worsted-weight cotton is soft yet firm enough for structured accessories.
Gauge
Getting gauge right matters a lot for this project. One completed granny square (through Round 4) should measure 4.5 inches by 4.5 inches (11.5 cm by 11.5 cm) after light blocking with a US H-8 (5.0 mm) hook.
If your square is smaller, try a larger hook. If it is larger, go down a hook size. Since you are making 28 squares, even a small difference multiplies into a big problem.
Abbreviations and Definitions
Let me walk you through every abbreviation you will see in this pattern. If you are new to reading crochet patterns, bookmark this section.
Brackets [ ] mean work the instructions inside the number of times indicated.
Parentheses ( ) indicate the stitch count at the end of the row or round.
Special Stitches for This Granny Square Tote
Granny Cluster
This is the heart of every granny square. A granny cluster is simply 3 double crochet (dc) stitches worked into the same chain space. Yarn over, insert hook into the ch-sp, pull up a loop, yarn over, pull through 2 loops. Repeat twice more in the same space. That group of 3 dc counts as one cluster.
Flat Join
This technique creates those beautiful visible grid lines on your finished bag. Hold two squares with wrong sides together. Insert your hook through the back loop only (blo) of the corresponding stitch on both squares simultaneously. Draw up a loop of Color A and slip stitch through both loops. Continue across the seam. The ridge that forms on the right side becomes part of the design.
Step by Step Crochet Pattern Instructions
Granny Square (Make 28)
You need 28 identical squares. I know that sounds like a lot, but they work up fast once you get into a rhythm. Put on a podcast or a movie and enjoy the meditative repetition.
Begin with Color D. Make a magic ring, or chain 4 and join with a slip stitch to form a ring.
Round 1 (Color D):
Ch 3 (counts as first dc), work 2 dc into the ring, ch 2, [3 dc into the ring, ch 2] 3 times. Join with sl st to top of beginning ch-3. Fasten off Color D leaving a 6-inch tail. (4 clusters of 3 dc, 4 corner ch-2 spaces) (12 dc, 4 ch-2 sps)
Round 2 (Color C):
Join Color C with sl st into any corner ch-2 sp.
Ch 3 (counts as first dc), work 2 dc into same corner ch-2 sp, ch 2, 3 dc into same corner ch-2 sp, ch 1, [3 dc, ch 2, 3 dc into next corner ch-2 sp, ch 1] 3 times. Join with sl st to top of beginning ch-3. Fasten off Color C. (24 dc, 4 ch-2 sps, 4 ch-1 sps)
Round 3 (Color B):
Join Color B with sl st into any corner ch-2 sp.
Ch 3 (counts as first dc), 2 dc into same corner ch-2 sp, ch 2, 3 dc into same corner ch-2 sp, ch 1, 3 dc into next ch-1 side sp, ch 1, [3 dc, ch 2, 3 dc into next corner ch-2 sp, ch 1, 3 dc into next ch-1 side sp, ch 1] 3 times. Join with sl st to top of beginning ch-3. Fasten off Color B. (36 dc, 4 ch-2 corner sps, 8 ch-1 sps)
Round 4 (Color A):
Join Color A with sl st into any corner ch-2 sp.
Ch 3 (counts as first dc), 2 dc into same corner ch-2 sp, ch 2, 3 dc into same corner ch-2 sp, [ch 1, 3 dc into next ch-1 sp] twice, ch 1, [3 dc, ch 2, 3 dc into next corner ch-2 sp, [ch 1, 3 dc into next ch-1 sp] twice, ch 1] 3 times. Join with sl st to top of beginning ch-3. Fasten off Color A unless continuing to join immediately. (48 dc, 4 ch-2 corner sps, 12 ch-1 sps)
Checkpoint: Each finished square should measure 4.5 inches by 4.5 inches.
Square Layout
Here is how your 28 squares get distributed:
Joining Squares Into Panels
Lay your squares out in the correct configuration before you start joining. Make sure all squares are oriented the same way for consistent color flow.
Horizontal Joins (side by side):
Hold two squares with wrong sides together. Using Color A, work the flat join across the edge, going through back loops of corresponding dc stitches and through the ch-1 spaces. At corner ch-2 spaces, slip stitch through both corner spaces together.
Vertical Joins (rows to each other):
Work the flat join horizontally across the full width of two joined rows.
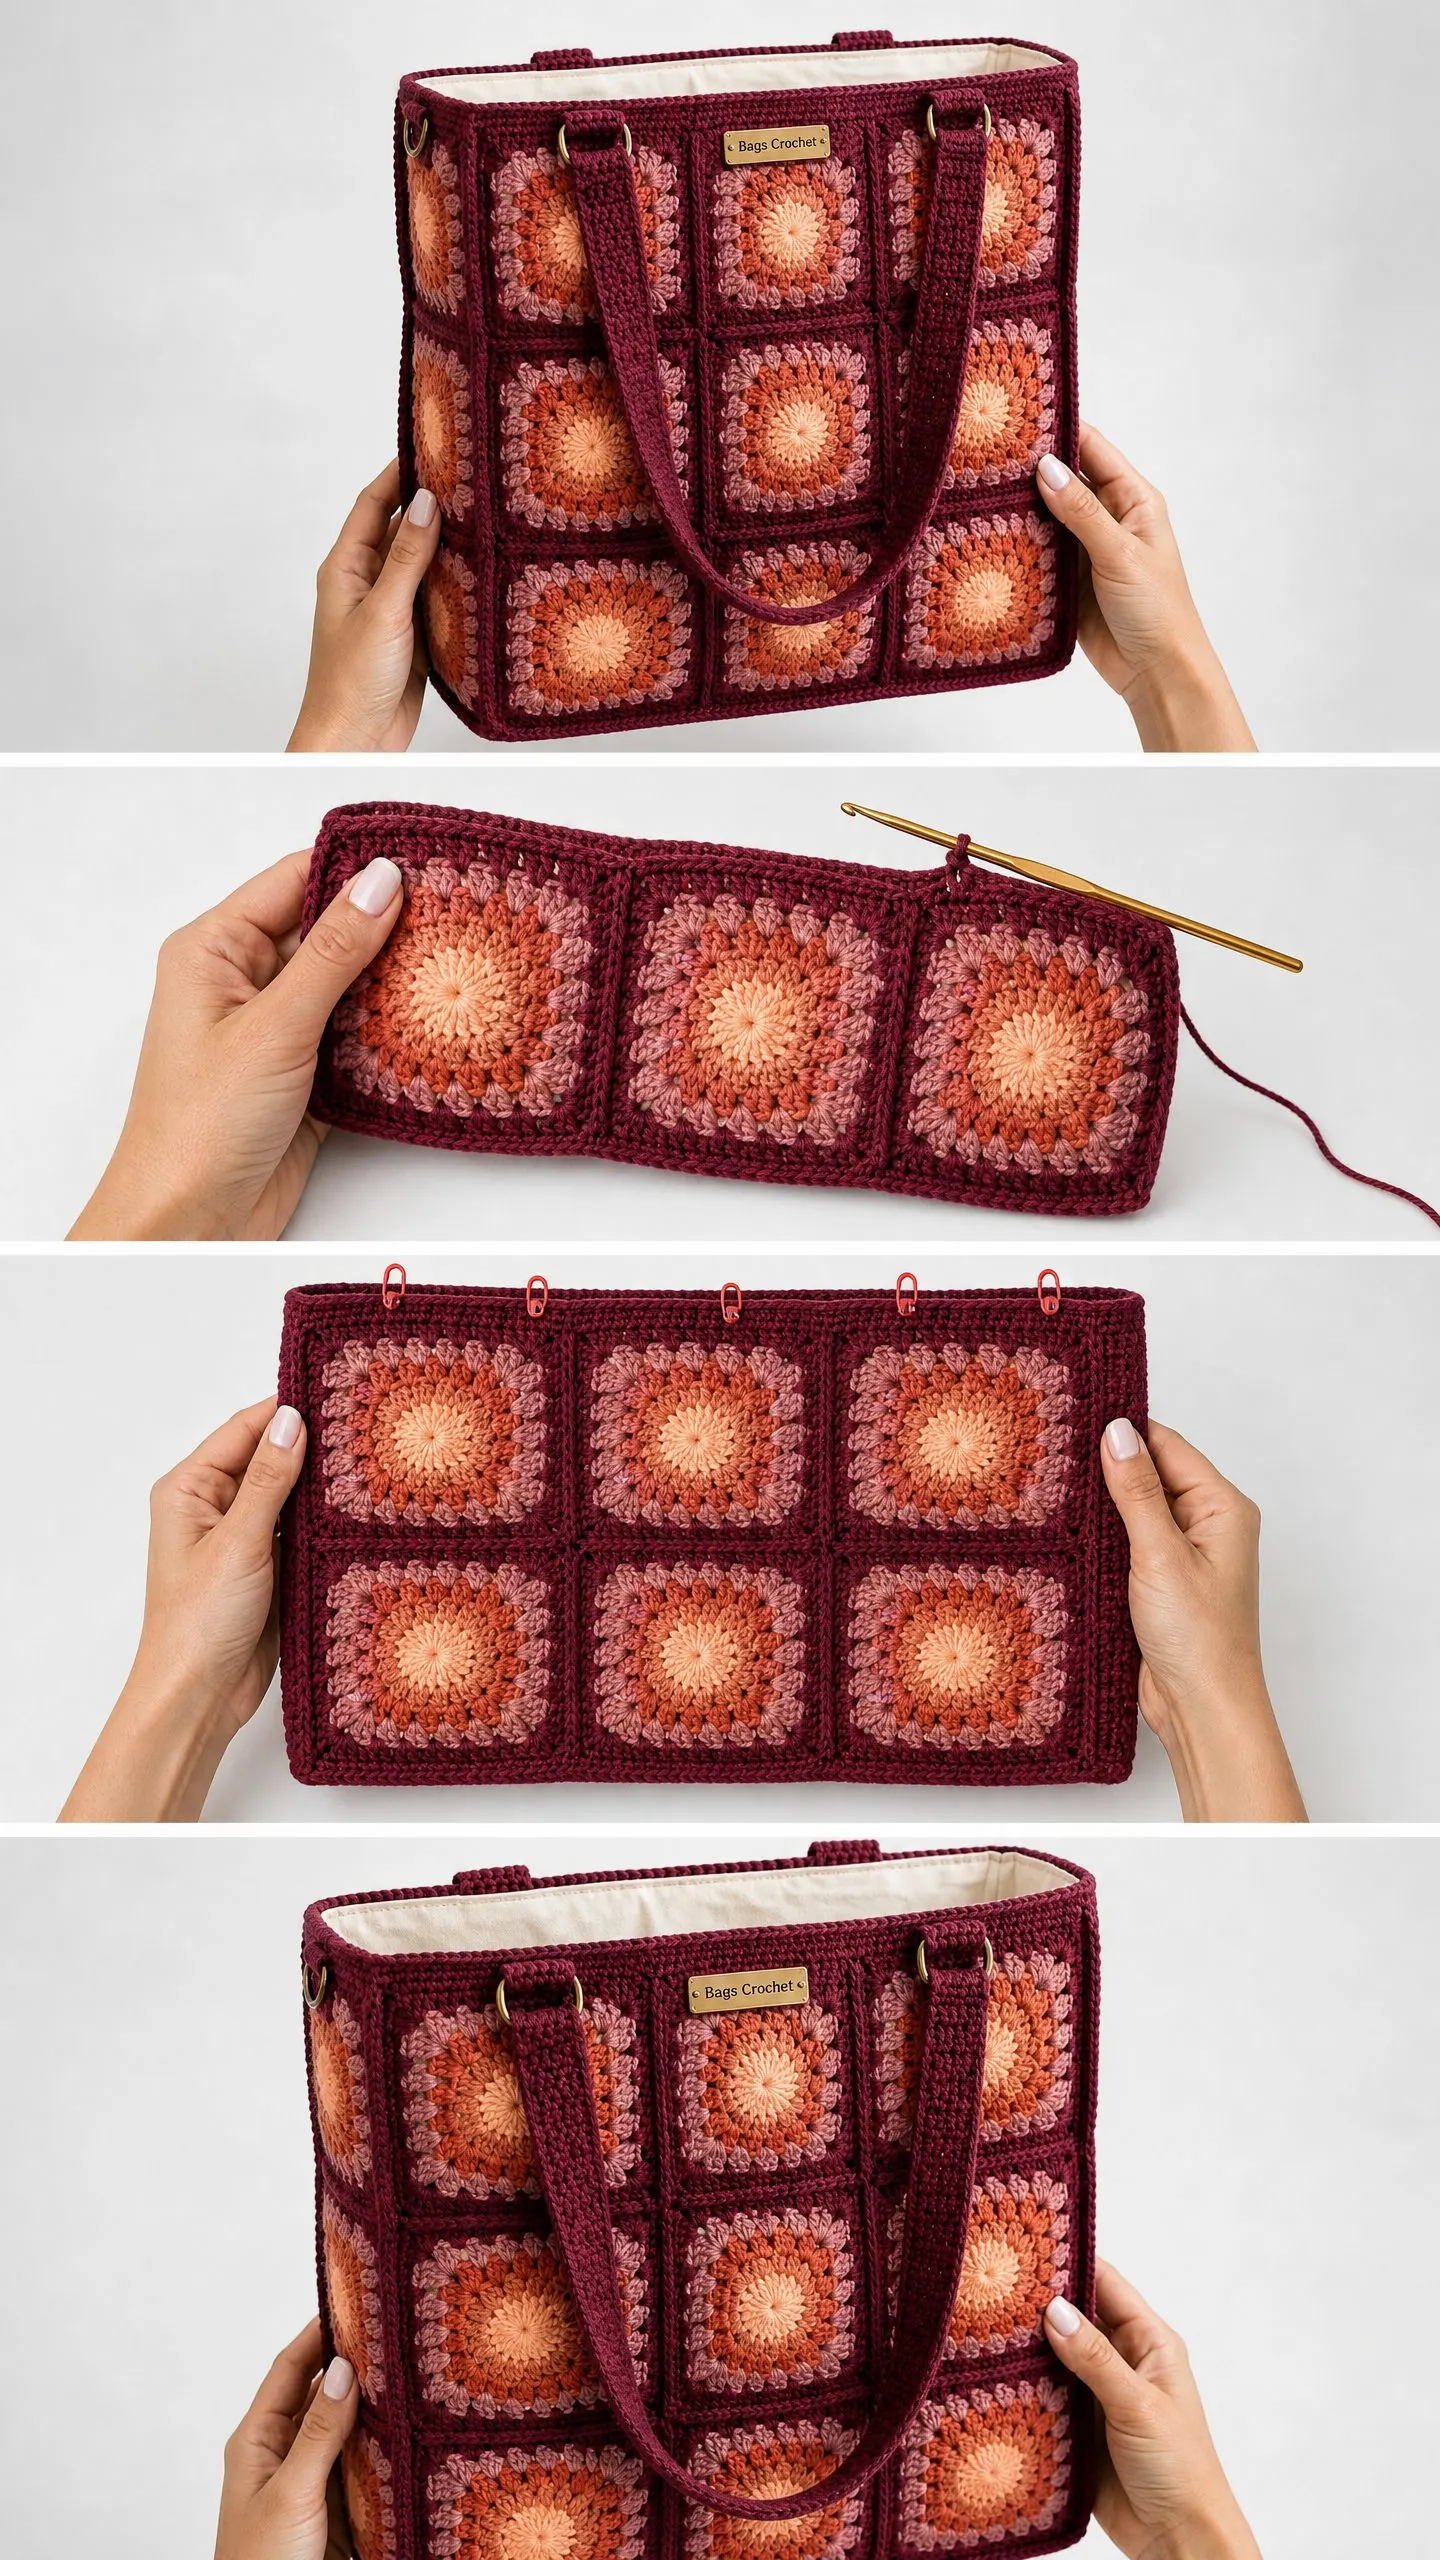
Complete all five panels: front (9 squares), back (9 squares), right side (3 squares), left side (3 squares), and base (3 squares).
Assembling the Bag Shell
Step 1: Hold the base panel and front panel with wrong sides together. Align the bottom edge of the front with one long edge of the base. Work flat join seam across. Fasten off.
Step 2: Repeat on the opposite long edge of the base, joining the back panel.
Step 3: Join the right side panel to the right edge of the front panel, down the full height. At the bottom corner, pivot and join along the short edge of the base. Continue up the right edge of the back panel. Repeat for the left side panel.
Your bag shell is now a 3D open box.
Top Border
With RS facing and Color A, join yarn at any corner of the top opening.
Round 1:
Ch 1 (does not count as a stitch), work 1 sc into each dc stitch and 1 sc into each ch-1 sp and 2 sc into each ch-2 corner sp around the entire top opening. Work 1 sc into each seam join point. Join with sl st to first sc. (104 sc)
Round 2:
Ch 1, sc in each sc around. Join with sl st to first sc. (104 sc)
Round 3:
Ch 1, sc in each sc around. Join with sl st to first sc. Fasten off Color A. (104 sc)
D-Ring Tabs (Make 4)
Using Color A, chain 10.
Row 1: Sc in 2nd ch from hook and in each ch across. Turn. (9 sc)
Rows 2-5: Ch 1, sc in each sc across. Turn. (9 sc)
Fold the tab in half around one D-ring. Slip stitch or whip stitch the two ends together, enclosing the D-ring. Make 4 tabs total.
Sew one tab at each top corner of the bag, centered over the seam where the side panel meets the front or back panel.
Handles (Make 2)
Using Color A, chain 6.
Row 1: Sc in 2nd ch from hook and in each ch across. Turn. (5 sc)
Continue working even in sc (ch 1, turn, sc in each sc across) until the handle measures 24 inches (61 cm) total length.
Thread one end through a D-ring, fold back 1 inch, and sew securely. Thread the other end through the corresponding D-ring on the same panel face. Fold and sew. Repeat for the second handle on the opposite panel.
Fabric Lining
Cut your fabric:
Sew the lining:
With right sides together, pin the long strip to the front rectangle. Sew up the right side, across the bottom, and up the left side using a 1/2 inch seam allowance. Attach the back rectangle to the remaining edges. Clip corners, press seams, turn right side out. Fold the top edge down 1/2 inch and press.
Insert and attach:
Place the lining inside the bag with wrong sides facing. The folded top should sit just below the top border. Slip stitch the lining to the inside of the border all the way around.
Finishing and Care
Weave in all ends securely, threading tails through at least 5 to 6 stitches in a zigzag pattern.
Blocking: Wet block before inserting the lining. Submerge in cool water, squeeze gently, roll in a towel, then shape into a boxy form. Stuff firmly to hold the shape while drying for 24 to 48 hours.
Care: Hand wash in cool water with mild detergent. Lay flat or reshape over a form to dry. Never tumble dry. Store stuffed with tissue paper to maintain shape.
You Did It!
This Sunset Ombre Granny Square Tote crochet pattern takes some time and attention to detail, but the finished product is absolutely worth every stitch. You have created something beautiful, practical, and uniquely yours.
Thank you so much for choosing this pattern for your next project. I genuinely hope you love making it as much as I loved designing it. If you finish your tote, I would absolutely love to see it! Tag me on Instagram or share a photo in my Facebook group.
If this pattern caught your eye, go ahead and pin it to your crochet boards on Pinterest so you can find it when you are ready to start. And please drop a comment below if you make one. I read every single comment, and seeing your finished projects honestly makes my day!
You Might Also Like
- Sage Green Froggy Toilet Paper Cozy Free Crochet Pattern
- Unicorn Rainbow Toddler Dress Free Crochet Pattern
- Sunshine Daisy Book Cover Free Crochet Pattern
- Dusty Rose Belted Crochet Romper Free Crochet Pattern