
When I sat down to design this dress, I had three goals in mind. I wanted something that would make a little one squeal with delight, something that would actually hold up through real toddler life, and something that would let me play with color in a big way.
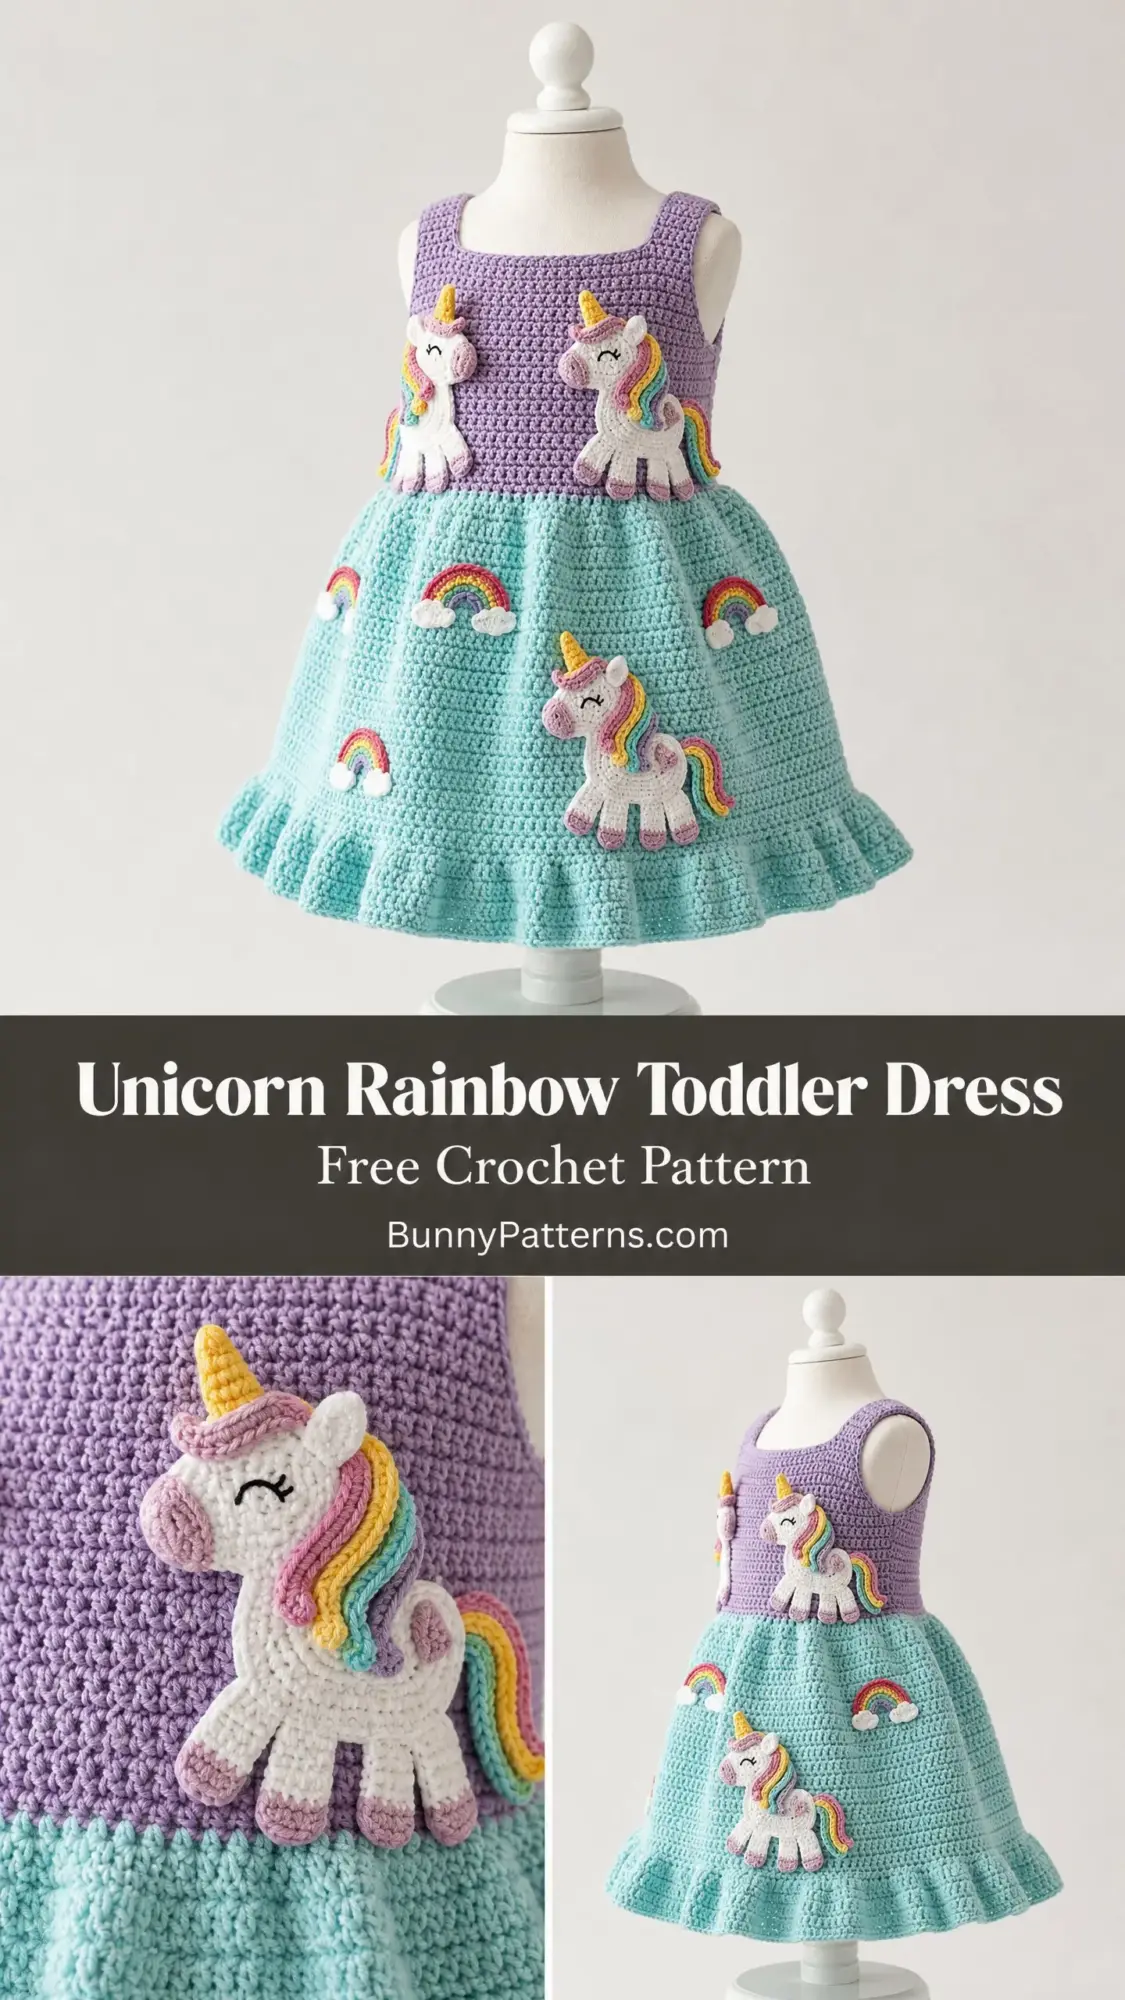
The unicorns had to be just right. Cute but not fussy. The rainbow details needed to pop without overwhelming the whole piece. And that skirt? I wanted it to twirl.
I am SO pleased with how this turned out. The lavender bodice against that mint skirt is absolutely dreamy, and those little applique unicorns with their rainbow manes make me smile every single time I look at them.
About This Unicorn Rainbow Toddler Dress Crochet Pattern
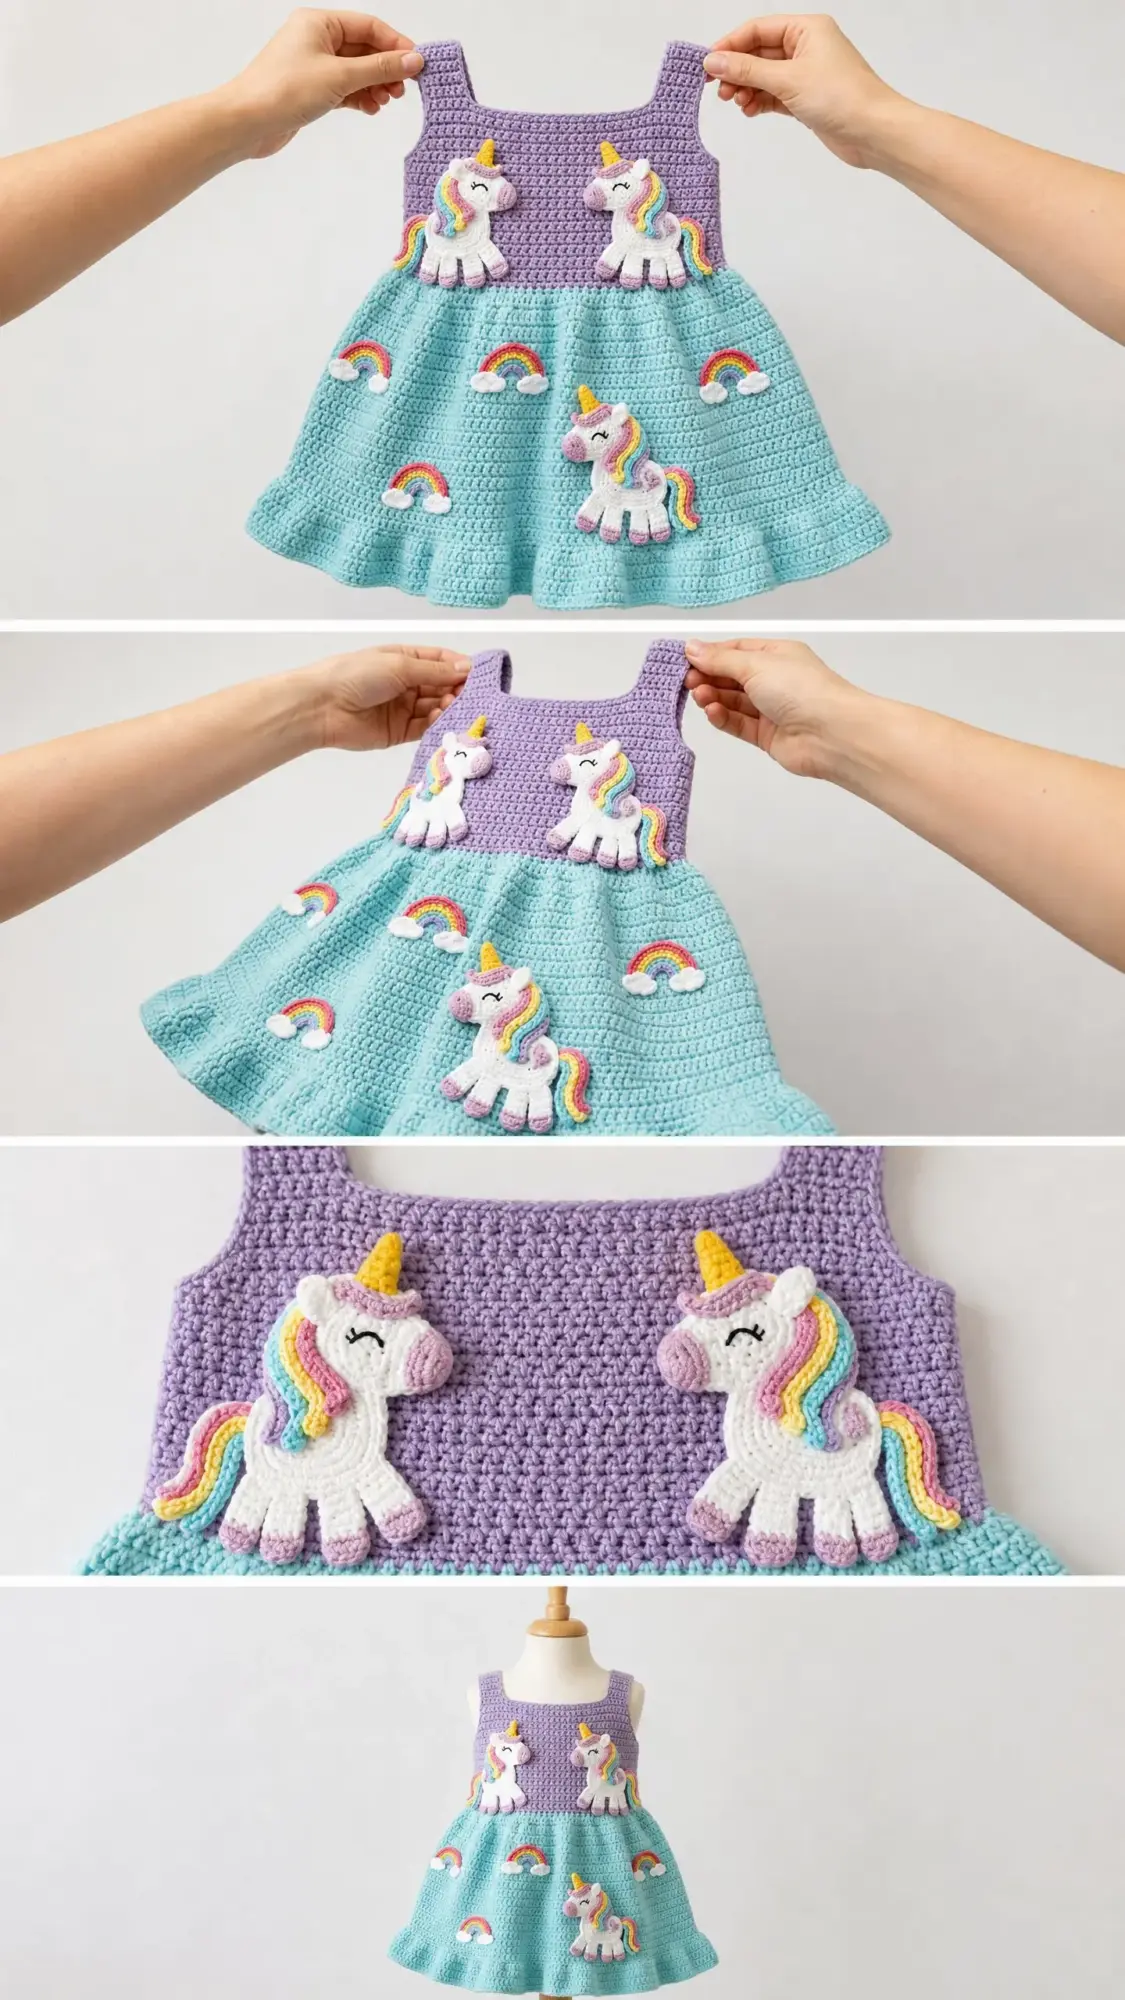
This whimsical toddler dress combines a fitted lavender bodice with a flared mint skirt that features a subtle waffle texture. Three dimensional unicorn appliques and small rainbow with cloud motifs get sewn onto the finished dress as the final magical touches. The bodice has wide square straps and an open back with button closure, making it easy to get on and off a wiggly toddler.
The skirt flares gradually from the waist and ends in a bouncy ruffled hem. Perfect for spinning and twirling. The construction starts flat for the bodice pieces, then transitions to working in the round for the skirt. All those adorable appliques get crocheted separately and attached at the very end.
Skill Level
This pattern is rated intermediate. Now, before you click away, let me break that down for you.
The base dress itself uses only single crochet (sc) and a simple waffle texture stitch. Both of these are totally accessible to confident beginners. What bumps this up to intermediate is the combination of techniques: shaping the bodice, transitioning from flat to in the round construction, working those gradual skirt increases, creating the ruffled hem, and assembling the three dimensional appliques.
If you have made a few projects and feel comfortable reading patterns, you can absolutely do this. Take it one section at a time.
Time Estimate
Plan for 14 to 20 hours total, depending on your speed. Here is how that breaks down:
This is not a weekend project, but it is absolutely doable over a week or two of evening crafting sessions.
Finished Measurements
This pattern is written for toddler size 2T/3T.
Materials Needed
Yarn
Main Color A (lavender/lilac): approximately 200 yards / 183 m, worsted weight, smooth cotton or cotton blend
Main Color B (mint/aqua): approximately 350 yards / 320 m, worsted weight, smooth cotton or cotton blend
Applique Color W (white): approximately 80 yards / 73 m, worsted weight or DK weight
Applique Color Y (yellow): approximately 10 yards / 9 m
Applique Color PK (soft pink): approximately 10 yards / 9 m
Applique Color LV (lavender): approximately 10 yards / 9 m
Applique Color BL (light blue): approximately 10 yards / 9 m
Applique Color GR (soft green): approximately 10 yards / 9 m
Applique Color OR (soft orange/peach): approximately 10 yards / 9 m
Yarn Suggestions
Option 1: Lion Brand 24/7 Cotton in "Lavender" (Color A) and "Mint" (Color B). This smooth mercerized cotton gives excellent stitch definition for the waffle texture and holds its shape beautifully after washing.
Option 2: Paintbox Yarns Simply DK held double for worsted weight gauge in "Spearmint" and "Lilac." Holding two strands together creates a slightly fluffier, softer fabric that feels wonderful against a child’s skin.
Option 3: WeCrochet Comfy Worsted in "Delphinium" (Color A) and "Seafoam" (Color B). This cotton acrylic blend is machine washable, which is incredibly practical for children’s garments.
Substitution Note: Choose a smooth worsted weight yarn with low halo so the waffle texture and applique details stay crisp and visible. Avoid fuzzy or bouclé yarns. Always check your gauge before beginning.
Hook
Notions
Gauge
With US G-6 / 4.00 mm hook and Color A or B in single crochet:
18 stitches = 4 inches / 10 cm
20 rows = 4 inches / 10 cm
Gauge swatch: Chain 22. Work single crochet for 24 rows. Block lightly. Measure the center 4 inches / 10 cm in both directions. Adjust hook size as needed.
Important: Gauge is critical for this garment. A difference of even one stitch per inch will significantly alter the chest circumference and dress length. Please, please take the time to check your gauge.
Abbreviations (US Terms)
Special Stitches
Waffle Stitch (worked in rows)
This creates that beautiful subtle grid texture you see on the skirt.
Row 1 (RS): Ch 1, sc in each st across, turn.
Row 2 (WS): Ch 2 (does not count as st), FPdc around first st, BPdc around next st, rep FPdc then BPdc across to last st, sc in last st, turn.
Row 3 (RS): Ch 1, sc in each st across, turn.
Repeat Rows 2 and 3 for pattern.
Surface Waffle Stitch (worked in rounds)
Round A: Ch 1, sc in each st around, sl st to first sc to join.
Round B: Ch 2 (does not count as st), FPdc around first st, BPdc around second st, rep around, sl st to first FPdc to join.
Repeat Rounds A and B for pattern.
Shell Stitch Ruffle
Work 5 dc all in the same stitch to create one shell. This is what gives the hem that gorgeous bouncy frill.
Picot (for rainbow clouds)
Ch 3, sl st in first ch of the ch-3. This creates a small decorative bump.
Pattern Notes
The dress is constructed in three main phases. First, the bodice is worked flat in two panels (back and front). These get seamed at the shoulders and sides. Then, the skirt is picked up around the joined waist edge and worked in the round downward. Finally, the ruffle is worked as the last round of the skirt. Appliques are made separately and sewn on last.
The back bodice has a center opening worked in two halves that overlap slightly, with button loops on one side and buttons sewn to the other.
Color A (lavender) is used for the entire bodice. Color B (mint) is used for the entire skirt and ruffle.
The turning chain at the start of each row does NOT count as a stitch unless specifically noted.
Step by Step Instructions
Section 1: Front Bodice
The front bodice is worked flat in rows. Turning chain of 1 does not count as a stitch.
With Color A and G-6 hook, chain 47.
Row 1 (RS): Sc in 2nd ch from hook and in each ch across. Turn. (46 sc)
Row 2 (WS): Ch 1, sc in each st across. Turn. (46 sc)
Row 3 (RS): Ch 1, sc in each st across. Turn. (46 sc)
Row 4 (WS): Ch 1, sc in each st across. Turn. (46 sc)
Row 5 (RS): Ch 1, sc in each st across. Turn. (46 sc)
Continue working even in sc until the piece measures 4.5 inches / 11.5 cm from the starting chain.
Front Bodice Armhole Shaping
Row 1 of armhole (RS): Sl st across first 3 sts, ch 1, sc in same st (3rd st) and across to last 3 sts. Leave last 3 sts unworked. Turn. (40 sc)
Row 2 of armhole (WS): Ch 1, sc2tog over first 2 sts, sc across to last 2 sts, sc2tog. Turn. (38 sc)
Row 3 of armhole (RS): Ch 1, sc2tog over first 2 sts, sc across to last 2 sts, sc2tog. Turn. (36 sc)
Row 4 of armhole (WS): Ch 1, sc in each st across. Turn. (36 sc)
Row 5 of armhole (RS): Ch 1, sc in each st across. Turn. (36 sc)
Continue even on 36 stitches for 4 more rows until armhole depth measures approximately 2.5 inches / 6.5 cm.
Front Bodice Strap Division
Left strap: Ch 1, sc in first 10 sts. Turn. Leave remaining sts unworked. (10 sc)
Work even on left strap for 6 rows. Fasten off, leaving a 12 inch / 30 cm tail for seaming.
Right strap: With RS facing, skip the center 16 sts, rejoin Color A at next st, ch 1, sc in same st and in each of next 9 sts. Turn. (10 sc)
Work even on right strap for 6 rows. Fasten off, leaving a 12 inch / 30 cm tail for seaming.
Section 2: Back Bodice (worked in two halves)
Left Back Panel
With Color A and G-6 hook, chain 25.
Row 1 (RS): Sc in 2nd ch from hook and in each ch across. Turn. (24 sc)
Work even in sc for same number of rows as front bodice even section (approximately 22 rows total to match 4.5 inches / 11.5 cm).
Left Back Armhole Shaping:
Row 1 of armhole (RS): Sl st across first 3 sts, ch 1, sc in same st and across to end. Turn. (21 sc)
Row 2 of armhole (WS): Ch 1, sc across to last 2 sts, sc2tog. Turn. (20 sc)
Row 3 of armhole (RS): Ch 1, sc across to last 2 sts, sc2tog. Turn. (19 sc)
Rows 4 through 9 of armhole: Work even. (19 sc)
Left Back Strap:
Next row (RS): Ch 1, sc in first 10 sts only. Turn. Leave remaining 9 sts unworked. (10 sc)
Work even on 10 sts for 6 rows. Fasten off, leaving a 12 inch / 30 cm tail.
Right Back Panel
With Color A and G-6 hook, chain 25.
Row 1 (RS): Sc in 2nd ch from hook and in each ch across. Turn. (24 sc)
Work even for same number of rows as left back panel.
Right Back Armhole Shaping:
Row 1 of armhole (RS): Ch 1, sc across to last 3 sts. Leave last 3 sts unworked. Turn. (21 sc)
Row 2 of armhole (WS): Ch 1, sc2tog, sc across to end. Turn. (20 sc)
Row 3 of armhole (RS): Ch 1, sc2tog, sc across to end. Turn. (19 sc)
Rows 4 through 9 of armhole: Work even. (19 sc)
Right Back Strap:
Next row (RS): Skip first 9 sts, rejoin yarn at 10th st, ch 1, sc in same st and in each of next 9 sts. Turn. (10 sc)
Work even on 10 sts for 6 rows. Fasten off.
Section 3: Assembling the Bodice
Step 1: Seam shoulders. Align front straps with back straps. Use mattress stitch or whip stitch to join the 6 row strap tops together.
Step 2: Seam sides. Align the left side of the front bodice with the left back panel, and the right side with the right back panel. Seam from the bottom waist edge upward to the underarm, leaving the armhole open.
Step 3: Back opening edging. With RS facing, Color A and G-6 hook, work a single crochet edging up the right back opening edge, across the back neck, and down the left back opening edge. Work 1 sc per row end along vertical edges. Turn.
Button loops: Ch 1, sc up to first button position (approximately 1 inch from neckline), ch 3, skip 1 sc, sc to next button position (approximately 1.5 inches lower), ch 3, skip 1 sc, sc to next button position (approximately 1.5 inches lower), ch 3, skip 1 sc, sc to bottom of opening. Fasten off.
Sew 3 buttons onto the left back edge aligned with the button loops.
Section 4: Skirt
The skirt is worked in the round, starting from the waist edge and working downward.
Waist Pickup Round
With RS facing, G-6 hook, and Color B, join at right side seam at the bottom waist edge.
Round 1 (pickup): Ch 1. Work 46 sc across the front, 23 sc across the left back, 23 sc across the right back. Sl st to first sc to join. (92 sc)
Skirt Waffle Texture
Round 2 (sc round): Ch 1, sc in each st around, sl st to first sc to join. (92 sc)
Round 3 (post stitch round): Ch 2 (does not count as st), FPdc around first sc, BPdc around next sc, rep (FPdc, BPdc) around, sl st to first FPdc to join. (92 sts)
Round 4 (sc round): Ch 1, sc in each st around, sl st to first sc to join. (92 sc)
Round 5 (increase round): Ch 1, (sc in next 22 sts, inc in next st) 4 times, sl st to first sc to join. (96 sc)
Round 6 (post stitch round): Ch 2, (FPdc, BPdc) around, sl st to first FPdc to join. (96 sts)
Round 7 (sc round): Ch 1, sc in each st around, sl st to first sc to join. (96 sc)
Round 8 (increase round): Ch 1, (sc in next 11 sts, inc in next st) 8 times, sl st to first sc to join. (104 sc)
Round 9 (post stitch round): Ch 2, (FPdc, BPdc) around, sl st to first FPdc to join. (104 sts)
Round 10 (sc round): Ch 1, sc in each st around, sl st to first sc to join. (104 sc)
Round 11 (increase round): Ch 1, (sc in next 12 sts, inc in next st) 8 times, sl st to first sc to join. (112 sc)
Round 12 (post stitch round): Ch 2, (FPdc, BPdc) around, sl st to first FPdc to join. (112 sts)
Round 13 (sc round): Ch 1, sc in each st around, sl st to first sc to join. (112 sc)
Round 14 (increase round): Ch 1, (sc in next 13 sts, inc in next st) 8 times, sl st to first sc to join. (120 sc)
Round 15 (post stitch round): Ch 2, (FPdc, BPdc) around, sl st to first FPdc to join. (120 sts)
Round 16 (sc round): Ch 1, sc in each st around, sl st to first sc to join. (120 sc)
Round 17 (increase round): Ch 1, (sc in next 14 sts, inc in next st) 8 times, sl st to first sc to join. (128 sc)
Round 18 (post stitch round): Ch 2, (FPdc, BPdc) around, sl st to first FPdc to join. (128 sts)
Round 19 (sc round): Ch 1, sc in each st around, sl st to first sc to join. (128 sc)
Round 20 (increase round): Ch 1, (sc in next 15 sts, inc in next st) 8 times, sl st to first sc to join. (136 sc)
Round 21 (post stitch round): Ch 2, (FPdc, BPdc) around, sl st to first FPdc to join. (136 sts)
Round 22 (sc round): Ch 1, sc in each st around, sl st to first sc to join. (136 sc)
Round 23 (increase round): Ch 1, (sc in next 16 sts, inc in next st) 8 times, sl st to first sc to join. (144 sc)
Round 24 (post stitch round): Ch 2, (FPdc, BPdc) around, sl st to first FPdc to join. (144 sts)
Round 25 (sc round): Ch 1, sc in each st around, sl st to first sc to join. (144 sc)
Round 26 (sc round, even): Ch 1, sc in each st around, sl st to first sc to join. (144 sc)
Round 27 (post stitch round): Ch 2, (FPdc, BPdc) around, sl st to first FPdc to join. (144 sts)
Round 28 (sc round, even): Ch 1, sc in each st around, sl st to first sc to join. (144 sc)
Do not fasten off. Proceed to ruffle.
Section 5: Ruffle
Round 29 (double up round): Ch 1, work 2 sc in every st around, sl st to first sc to join. (288 sc)
Round 30 (sc even): Ch 1, sc in each st around, sl st to first sc to join. (288 sc)
Round 31 (shell ruffle round): Ch 3 (counts as first dc), work 4 more dc in same st (first shell made), skip 1 st, sl st in next st, skip 1 st, (5 dc in next st, skip 1 st, sl st in next st, skip 1 st) around, sl st to top of beg ch-3 to join. Fasten off. (72 shells)
Section 6: Armhole Finishing
With Color A and G-6 hook, work 1 round of sc evenly around each armhole opening. Join, fasten off, weave in ends.
Section 7: Unicorn Appliques (Make 3)
Switch to your E-4 / 3.50 mm hook for all applique work.
Unicorn Body
With Color W, make a magic ring, ch 1.
Round 1: 6 sc in ring. (6 sc)
Round 2: Inc in each st around. (12 sc)
Round 3: (Sc in next st, inc) 6 times. (18 sc)
Round 4: (Sc in next 2 sts, inc) 6 times. (24 sc)
Round 5: (Sc in next 3 sts, inc) 6 times. (30 sc)
Rounds 6-10: Sc in each st around. (30 sc)
Round 11: (Sc in next 3 sts, sc2tog) 6 times. (24 sc)
Round 12: (Sc in next 2 sts, sc2tog) 6 times. (18 sc)
Stuff lightly with fiberfill if desired.
Round 13: (Sc in next st, sc2tog) 6 times. (12 sc)
Round 14: (Sc2tog) 6 times. (6 sc)
Fasten off, leaving a tail. Close remaining 6 sts.
Unicorn Head
With Color W, make a magic ring, ch 1.
Round 1: 6 sc in ring. (6 sc)
Round 2: Inc in each st around. (12 sc)
Round 3: (Sc in next st, inc) 6 times. (18 sc)
Round 4: (Sc in next 2 sts, inc) 6 times. (24 sc)
Rounds 5-7: Sc in each st around. (24 sc)
Round 8: (Sc in next 2 sts, sc2tog) 6 times. (18 sc)
Stuff lightly.
Round 9: (Sc in next st, sc2tog) 6 times. (12 sc)
Round 10: (Sc2tog) 6 times. (6 sc)
Fasten off, close remaining 6 sts.
Unicorn Horn
With Color Y, make a magic ring, ch 1.
Round 1: 4 sc in ring. (4 sc)
Round 2: (Sc in next st, inc) 2 times. (6 sc)
Round 3: Sc in each st around. (6 sc)
Round 4: (Sc in next 2 sts, inc) 2 times. (8 sc)
Round 5: Sc in each st around. (8 sc)
Fasten off, leaving a tail.
Unicorn Ears (Make 2 per unicorn)
With Color W, make a magic ring, ch 1.
Round 1: 5 sc in ring. (5 sc)
Round 2: (Sc, inc) twice, sc. (7 sc)
Round 3: Sc in each st around. (7 sc)
Round 4: Sc, sc2tog, sc, sc2tog, sc. (5 sc)
Fasten off, leaving tail. Flatten into a pointed ear shape.
Unicorn Legs (Make 4 per unicorn)
With Color W, make a magic ring, ch 1.
Round 1: 6 sc in ring. (6 sc)
Rounds 2-4: Sc in each st around. (6 sc)
Fasten off, leaving tail.
Unicorn Mane
Using colors PK, LV, BL, GR, OR, and Y, create chain loops:
With PK: leave a 6 inch tail, ch 12, sl st in first ch to form a loop. Fasten off.
With LV: ch 10, sl st to form loop. Fasten off.
With BL: ch 14, sl st to form loop. Fasten off.
With GR: ch 10, sl st to form loop. Fasten off.
With OR: ch 12, sl st to form loop. Fasten off.
With Y: ch 10, sl st to form loop. Fasten off.
Arrange loops in rainbow color order and attach to the head.
Unicorn Tail
Work same as mane but with 3 to 4 loops. Attach to back of body.
Unicorn Assembly
1. Embroider closed curved lines for sleeping eyes with small lash strokes using black floss.
2. Sew horn to top center of head.
3. Sew ears on each side of horn base.
4. Attach mane between ears and trailing behind head.
5. Sew head to front upper portion of body.
6. Sew four legs to underside of body.
7. Attach tail to back end of body.
Section 8: Rainbow and Cloud Appliques (Make 4 to 5)
Rainbow
Start with your first color, ch 16.
Row 1: Sc in 2nd ch from hook and each ch across. (15 sc) Fasten off.
Join next color at first st of Row 1, ch 1, sc in same st, (inc, sc, sc) across, ending with sc. Fasten off.
Continue adding rows in rainbow color order (OR, Y, GR, BL, LV, PK), increasing slightly on each row to create the arc shape.
Cloud
With Color W, make a magic ring, ch 1.
Round 1: 6 sc in ring. (6 sc)
Round 2: Inc in each st around. (12 sc)
Round 3: (Sc, inc) 6 times. (18 sc)
Round 4: Sc in each st around. (18 sc)
Fasten off. Make 2 cloud disks per rainbow. Sew both clouds side by side beneath the rainbow ends.
Finishing
Sew two unicorn appliques onto the bodice and one larger unicorn onto the skirt. Attach rainbow and cloud appliques around the skirt as shown. Weave in all remaining ends. Block lightly if needed.
Give the finished dress a gentle steam or light wash to relax the stitches. Those shells on the ruffle will really bloom after blocking.
Final Thoughts on This Crochet Pattern Tutorial
Making this unicorn rainbow toddler dress is such a satisfying project. Yes, it takes time. Yes, there are a lot of little pieces to make and attach. But watching it come together, seeing that little skirt start to flare, adding those sweet unicorn faces, it is pure joy.
The look on a toddler’s face when they see this dress for the first time? Worth every single stitch.
Thank you so much for choosing this pattern. I hope you love making it as much as I loved designing it. If you give it a try, I would absolutely love to see your finished dress! Tag me on Instagram or share in my Facebook group.
If this pattern made you excited to get hooking, save it to your Pinterest boards so you can find it again when you are ready to start. And please drop a comment below if you make this dress. I read every single one and seeing your creations truly makes my day!
You Might Also Like
- Boho Monstera Crochet Plant for Bedroom Shelf Decor
- Autumn Burnt Orange Maple Leaf Earrings Free Crochet Pattern
- Sage Green Bobble Stitch Sweater Vest Free Crochet Pattern
- Terracotta Earth Tone Backpack Free Crochet Pattern