
Looking for the perfect handmade gift that will make someone smile every single time they see it? This strawberry bat amigurumi combines two unexpectedly delightful things into one irresistible creature. The body works up in single crochet from bottom to top, the wings spread wide with that classic bat silhouette, and tiny embroidered seed dots add the finishing strawberry touch.
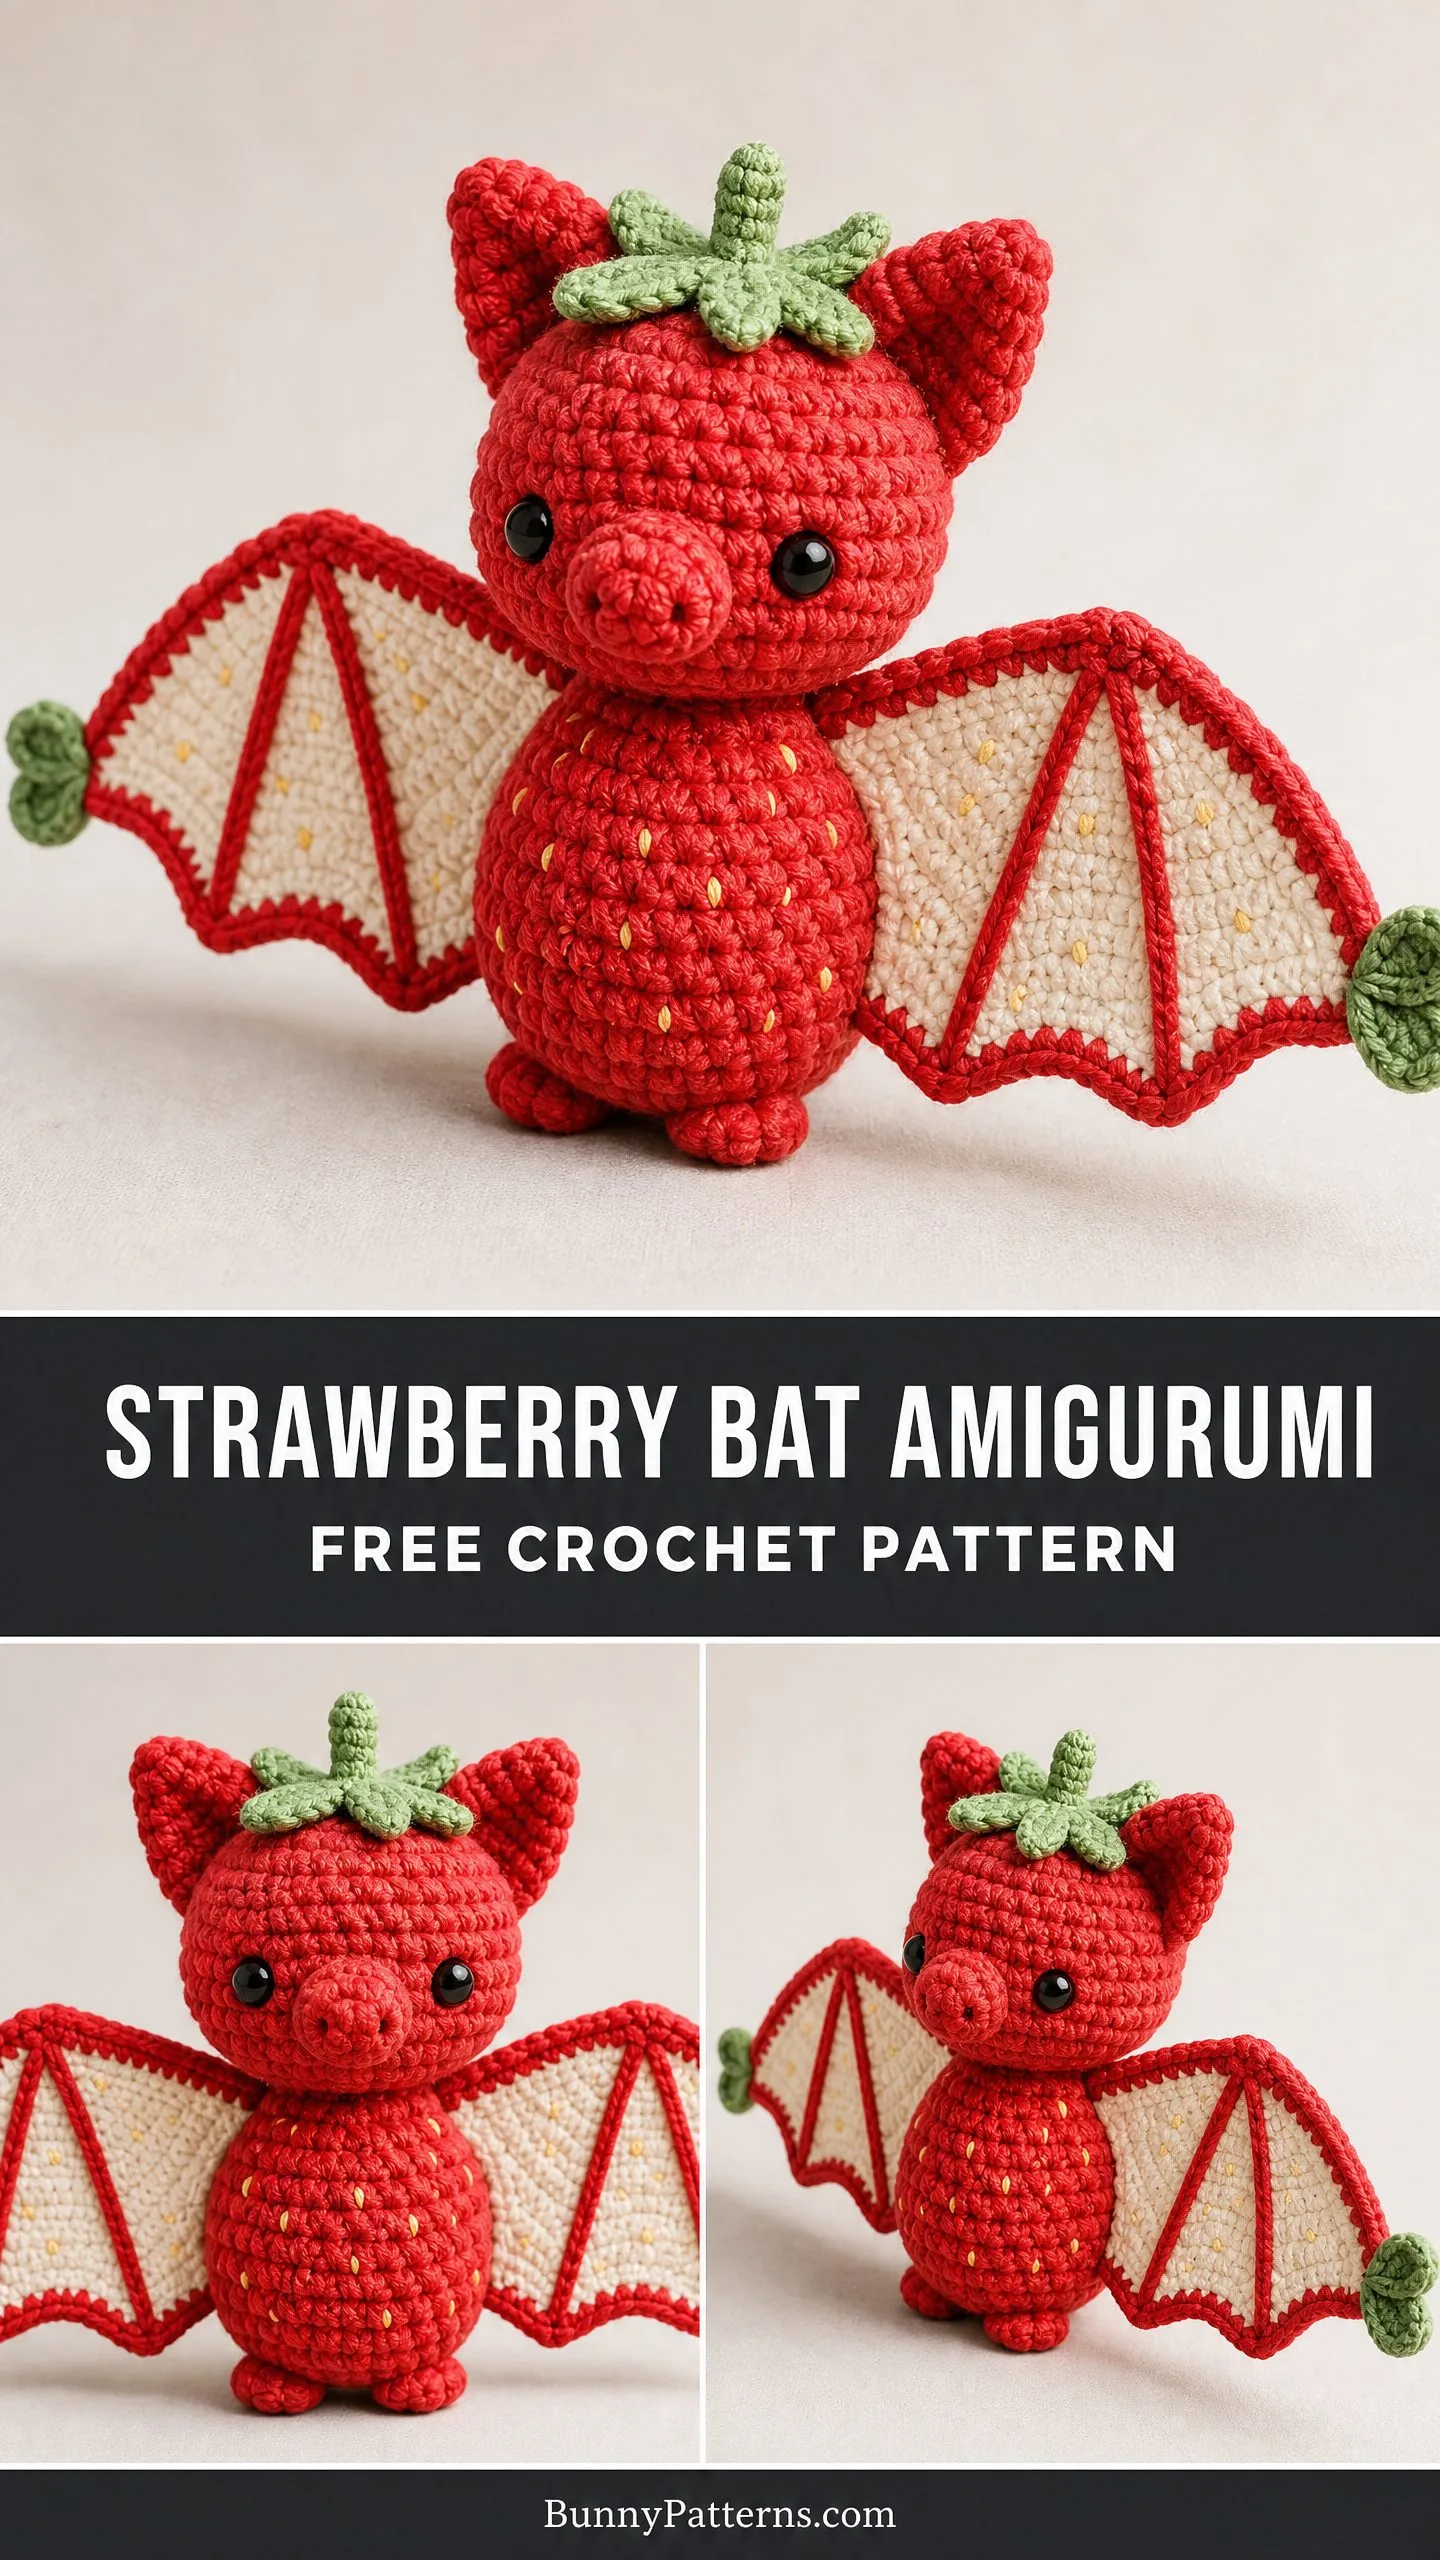
This pattern is ideal for anyone comfortable with basic amigurumi techniques who wants to create something truly memorable. It works up in about 12 to 18 hours across multiple sessions, making it a satisfying weekend project or a gift you can start well before a birthday. The finished piece stands approximately 7 inches tall with wings spanning about 14 inches wide.
Whether you are making this for a child, a friend who loves all things whimsical, or yourself, this little fruit bat delivers maximum charm. It also makes an excellent charity auction item or craft fair piece because honestly, who can resist a strawberry with wings?
About This Strawberry Bat Crochet Pattern
This amigurumi pattern creates a chubby strawberry-shaped body topped with a bat head, complete with pointy ears, a tiny snout, and outstretched wings. The design cleverly merges fruit and creature by using a red body worked in continuous rounds, cream-colored wing membranes dotted with gold embroidery to mimic strawberry seeds, and a green leaf crown sitting right on top of the head like a calyx.
The construction is straightforward once you understand the order. You will work the body and head as one continuous piece from the bottom up. Then you will make flat pieces for the ears, wings, and leaves, attaching them as you go. Everything comes together through careful assembly at the end.
Skill level: Intermediate. You should be comfortable with working in continuous rounds, shaping with increases and decreases, and attaching multiple components. If you have completed at least two amigurumi projects before, you will find this achievable with a little patience.
Materials You Will Need
Gathering your supplies before you start makes the whole process smoother. Here is everything this strawberry bat crochet tutorial requires.
Yarn:
Hook: US size G-6 (4.0 mm) crochet hook
Additional materials:
Yarn suggestions: Lion Brand Pound of Love works beautifully for this project. Use Scarlet for the red, Cream for the wing interiors, and Grass Green for the leaves. Any smooth worsted weight yarn that achieves gauge will work well. Avoid fuzzy or highly textured yarns because they will obscure the crisp stitch definition that gives this piece its fruit-like appearance.
Gauge
Getting gauge right matters for amigurumi because it affects both size and firmness.
With your G-6 (4.0 mm) hook and Color A in single crochet (sc) worked in continuous rounds:
5 stitches = 1 inch (2.54 cm)
5 rounds = 1 inch (2.54 cm)
To check your gauge, work a small swatch: magic ring, 6 sc. Round 2: 2 sc in each st (12 sc). Round 3: (sc, 2 sc in next st) around (18 sc). Round 4: (sc 2, 2 sc in next st) around (24 sc). Round 5: (sc 3, 2 sc in next st) around (30 sc). Your flattened circle should measure approximately 2.4 inches (6 cm) in diameter. Adjust your hook size up or down if needed.
Abbreviations and Stitch Definitions
Let me walk you through every stitch and abbreviation used in this pattern. If you are newer to amigurumi, read through this section carefully before starting.
Pattern Notes Before You Begin
A few things to keep in mind as you work through this step by step crochet pattern:
1. Work in continuous rounds for the body and head. Do not join rounds with a slip stitch. Use a stitch marker in the first stitch of each round and move it up as you go.
2. The body and head are one continuous piece. You will work from the bottom of the body straight up through the top of the head without cutting your yarn.
3. Stuff firmly as you work. Add stuffing before the opening becomes too small. A firmly stuffed piece holds its shape and keeps components secure.
4. All flat pieces (wings, ears, leaves) are worked in rows with turning chains. The turning chain 1 does not count as a stitch.
5. Insert safety eyes before closing the head. Position them between rounds 20 and 21, spaced approximately 5 stitches apart at center front.
6. Left and right are described from the perspective of the finished figure facing you.
Body and Head Instructions
Make 1. This is worked in one continuous piece from bottom to top.
Begin with Color A.
Rnd 1: MR, 6 sc into ring. Pull tail to close. (6)
Rnd 2: Inc in each st around. (12)
Rnd 3: (Sc, inc) rep around. (18)
Rnd 4: (Sc 2, inc) rep around. (24)
Rnd 5: (Sc 3, inc) rep around. (30)
Rnd 6: (Sc 4, inc) rep around. (36)
Rnd 7: (Sc 5, inc) rep around. (42)
Rnd 8: Sc in each st around. (42)
Rnd 9: Sc in each st around. (42)
Rnd 10: Sc in each st around. (42)
Checkpoint: After rnd 10, the base of the body should measure approximately 3.4 inches (8.5 cm) across the flat bottom. Begin stuffing from this point forward.
Rnd 11: (Sc 5, dec) rep around. (36)
Rnd 12: Sc in each st around. (36)
Rnd 13: (Sc 4, dec) rep around. (30)
Rnd 14: Sc in each st around. (30)
Rnd 15: (Sc 3, dec) rep around. (24)
Rnd 16: Sc in each st around. (24)
The body is now complete. Rounds 11 through 16 taper the upper body into the shoulder area. Continue without cutting yarn and begin head shaping.
Rnd 17: (Sc 3, inc) rep around. (30)
Rnd 18: (Sc 4, inc) rep around. (36)
Rnd 19: (Sc 5, inc) rep around. (42)
Rnd 20: Sc in each st around. (42)
Rnd 21: Sc in each st around. (42)
Checkpoint: At this point, insert safety eyes between rnds 20 and 21, spaced 5 stitches apart at the center front of the head. Secure the washers firmly on the inside.
Rnd 22: Sc in each st around. (42)
Rnd 23: (Sc 5, dec) rep around. (36)
Rnd 24: (Sc 4, dec) rep around. (30)
Rnd 25: (Sc 3, dec) rep around. (24)
Add more stuffing now. Fill head and upper body firmly before the opening narrows further.
Rnd 26: (Sc 2, dec) rep around. (18)
Rnd 27: (Sc, dec) rep around. (12)
Rnd 28: Dec around. (6)
Fasten off, leaving a 6-inch tail. Thread tail through yarn needle and weave through remaining 6 sts, pull tight to close. Knot and weave in end.
Checkpoint: Finished body-head piece should measure approximately 4.5 inches (11.5 cm) tall.
Ears Instructions
Make 2 with Color A.
Ch 2. Work 5 sc into the second ch from hook. Do not join. Work in rows.
Row 1 (RS): Ch 1, turn. 2 sc in first st, sc across to last st, 2 sc in last st. (7)
Row 2: Ch 1, turn. Sc in each st across. (7)
Row 3: Ch 1, turn. 2 sc in first st, sc across to last st, 2 sc in last st. (9)
Row 4: Ch 1, turn. Sc in each st across. (9)
Row 5: Ch 1, turn. Dec, sc 5, dec. (7)
Row 6: Ch 1, turn. Dec, sc 3, dec. (5)
Row 7: Ch 1, turn. Dec, sc 1, dec. (3)
Row 8: Ch 1, turn. Sc3tog (insert hook in first st, pull up loop, insert in second st, pull up loop, insert in third st, pull up loop, yarn over and pull through all 4 loops). (1)
Fasten off, leaving a 10-inch tail for sewing. Fold each ear slightly along its vertical axis to create a gentle cup shape before attaching.
Attachment: Sew ears to the top sides of the head at approximately rnds 18 and 19, positioned at the 10 o’clock and 2 o’clock positions when viewing the head from above.
Snout Instructions
Make 1 with Color A.
Rnd 1: MR, 6 sc into ring. (6)
Rnd 2: Inc in each st around. (12)
Rnd 3: (Sc, inc) rep around. (18)
Rnd 4: Sc in each st around. (18)
Fasten off, leaving a 12-inch tail. Do not stuff the snout. Flatten slightly and position at the center front of the face, with the lower edge aligned to rnd 17 of the head. Sew around the outer edge, leaving a small opening, push in a tiny amount of stuffing, then close completely.
Wings Instructions
Make 2. Each wing is constructed in two stages: the inner flat panel in Color B, then an outer edge and veining in Color A.
Wing Inner Panel
With Color B.
Foundation ch: Ch 21.
Row 1 (RS): Sc in 2nd ch from hook, sc across. (20)
Row 2: Ch 1, turn. Sc across. (20)
Row 3: Ch 1, turn. Sc across. (20)
Row 4: Ch 1, turn. Dec, sc 16, dec. (18)
Row 5: Ch 1, turn. Sc across. (18)
Row 6: Ch 1, turn. Dec, sc 14, dec. (16)
Row 7: Ch 1, turn. Sc across. (16)
Row 8: Ch 1, turn. Dec, sc 12, dec. (14)
Row 9: Ch 1, turn. Sc across. (14)
Row 10: Ch 1, turn. Dec, sc 10, dec. (12)
Row 11: Ch 1, turn. Sc across. (12)
Row 12: Ch 1, turn. Dec, sc 8, dec. (10)
Row 13: Ch 1, turn. Sc across. (10)
Row 14: Ch 1, turn. Dec, sc 6, dec. (8)
Row 15: Ch 1, turn. Sc across. (8)
Row 16: Ch 1, turn. Dec, sc 4, dec. (6)
Row 17: Ch 1, turn. Sc across. (6)
Row 18: Ch 1, turn. Dec, sc 2, dec. (4)
Row 19: Ch 1, turn. Sc across. (4)
Row 20: Ch 1, turn. (Dec) twice. (2)
Row 21: Ch 1, turn. Sc2tog. (1)
Fasten off. This triangular panel forms the main membrane of the wing.
Wing Outer Edge and Scallop Shaping
With Color A and RS of wing panel facing you, join Color A at the top right corner of the foundation chain edge.
Work a sc border along the foundation chain edge (top): Sc across the top edge working into each foundation chain loop. (20)
At the top left corner, work 3 sc in the corner stitch.
Work sc evenly down the left long diagonal edge of the wing, placing approximately 1 sc for every row end. Approximately 21 sc along this edge.
At the bottom point of the wing, work 3 sc in the single tip stitch.
Work sc evenly back up the right diagonal edge, matching the left side count. Approximately 21 sc.
At the top right corner (starting corner), work 2 sc to complete the corner, then sl st to the first sc of the border to join.
Do not fasten off. Now work the scalloped lower edge to create the bat wing points.
Turn so WS faces you. Work along the lower diagonal edge of the wing.
For the scallop points, work the following directly onto the border edge:
(Sl st into next sc, ch 8, sc in 2nd ch from hook, hdc, dc, dc, hdc, sc, sl st into same border sc) 3 times evenly spaced along lower edge.
These 3 scallop points create the classic multi-lobed bat wing silhouette. Space them at the outer third, middle third, and inner third of the wing.
Fasten off Color A and weave in ends.
Wing Veining
With Color A and a yarn needle, work 3 straight lines of surface slip stitches along the RS of the wing panel:
Line 1: From the top edge near center-right, draw a line diagonally down toward the outermost wing point scallop.
Line 2: From the same top edge origin point, draw a line toward the middle scallop.
Line 3: From the same top edge origin, draw a line toward the inner scallop.
Wing Seed Dot Embroidery
With Color D threaded on yarn needle, scatter approximately 8 to 12 tiny seed dot stitches across the cream panel of each wing. Bring needle up through the fabric from WS to RS, then insert back down very close to the entry point to form a tiny dot. Distribute dots unevenly for a natural appearance.
Strawberry Leaf Crown Instructions
Make 1 with Color C. The crown consists of 5 individual leaves joined at a center ring.
Individual Crown Leaves (make 5)
Ch 8.
Row 1: Sc in 2nd ch from hook, sc 3, hdc, dc, 3 dc in last ch. Now working along the opposite side of the foundation chain: dc, hdc, sc 3, sl st in the first sc. (approx 16 sts around)
Fasten off, leaving a 6-inch tail.
Joining the Crown
With Color C, work a small flat ring: MR, 5 sc into ring, sl st to close.
Sew the base of each of the 5 leaves evenly around the small ring, spacing them so they fan out like a strawberry calyx. Sew the entire crown assembly to the top of the head, centered over the closed top. Pull the tiny stem tip of the ring upward to create the strawberry stem nub.
Wing-Tip Leaf Clusters
Make 2 clusters (4 leaves total) with Color C.
Ch 6.
Row 1: Sc in 2nd ch from hook, sc 2, hdc, 3 dc in last ch, then working back along opposite side: hdc, sc 2, sl st.
Fasten off, leaving a tail. Bundle pairs together at their base and sew to the tip of each wing at the outermost scallop point.
Leg Nubs (Optional)
Make 2 with Color A. These help your strawberry bat stand independently.
Rnd 1: MR, 6 sc into ring. (6)
Rnd 2: Inc in each st around. (12)
Rnd 3: (Sc, inc) rep around. (18)
Rnd 4: Sc in each st around. (18)
Rnd 5: Sc in each st around. (18)
Rnd 6: (Sc, dec) rep around. (12)
Stuff lightly.
Rnd 7: Dec around. (6)
Fasten off with a 10-inch tail. Sew one leg nub to the lower front of the body on each side.
Assembly
1. Confirm snout is sewn to center front of face.
2. Confirm ears are attached at top sides of head.
3. Confirm leaf crown is sewn to top of head.
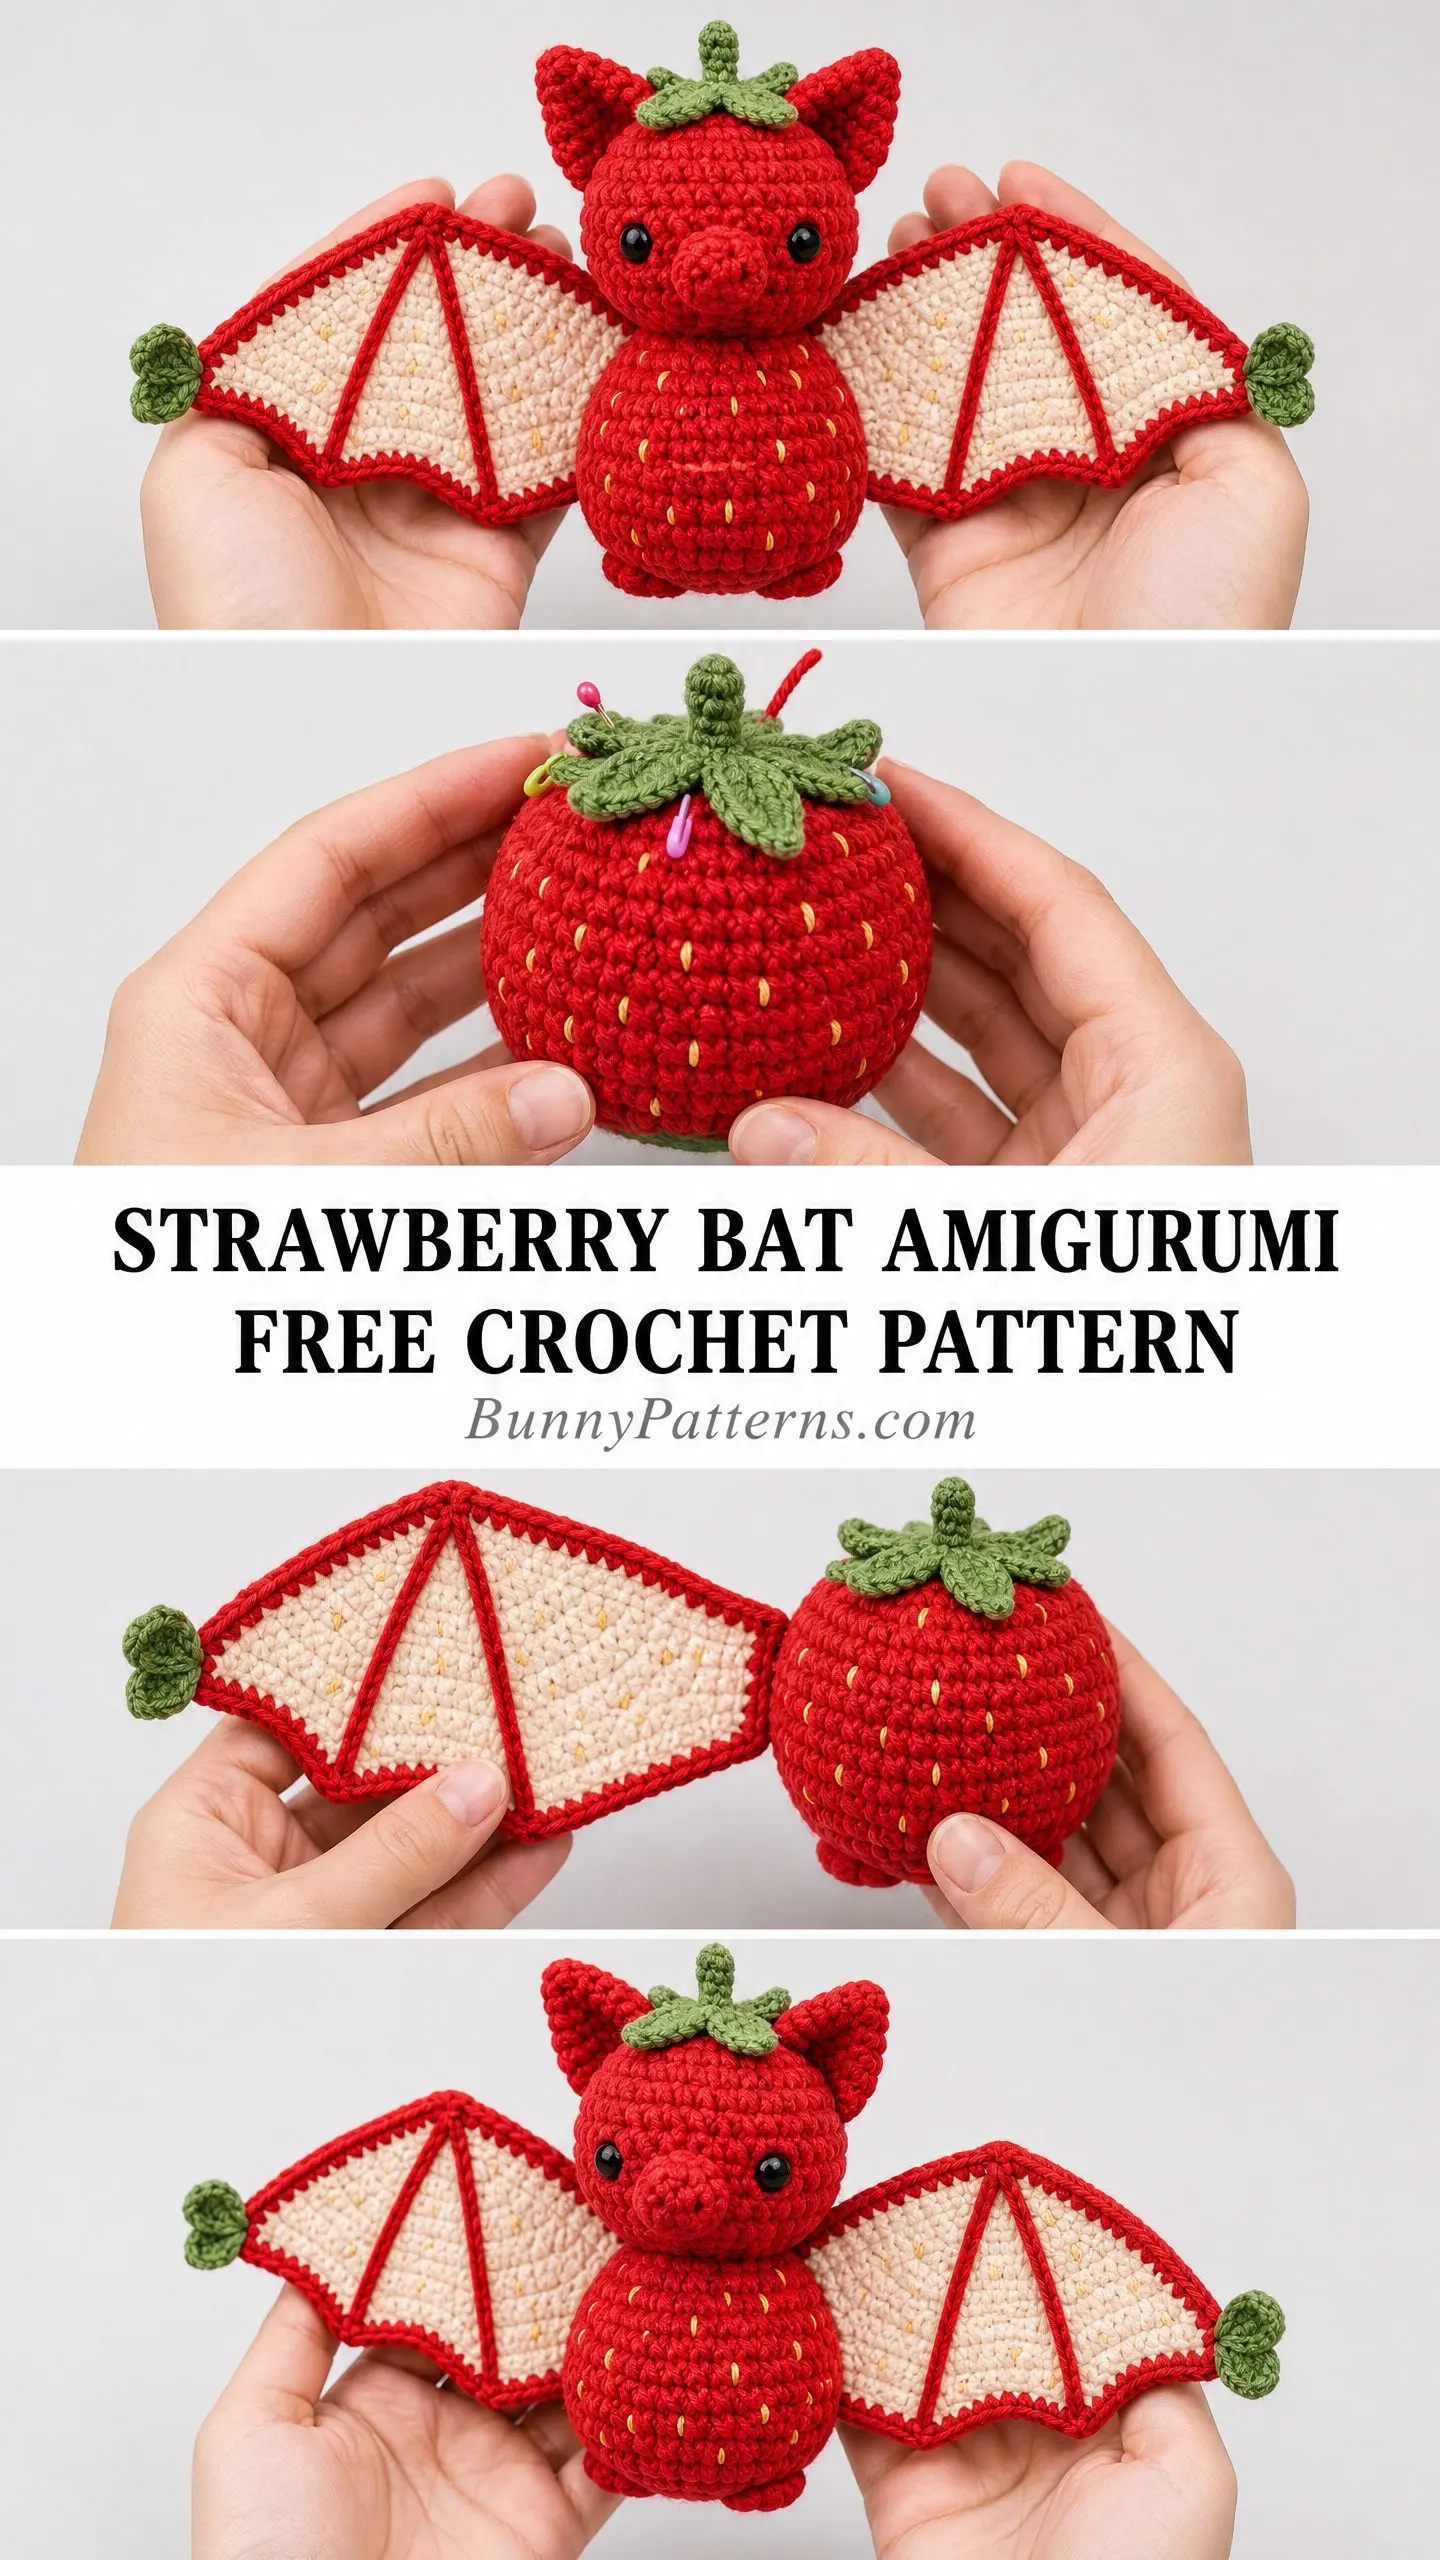
4. Position the left wing against the left side of the body. The wide top edge should align with rnds 16 through 22. The wing should angle slightly downward. Pin in place.
5. Using Color A, sew the straight top edge of the left wing along the body side, stitching through 6 to 8 body stitches to anchor firmly. Repeat for right wing.
6. Attach wing-tip leaf clusters to outer scallop of each wing.
7. Attach leg nubs to underside of body.
8. Review from all angles and weave in all remaining yarn ends securely.
Care Instructions
Hand wash in cool water with gentle detergent. Do not wring. Press gently in a clean towel to remove excess water, reshape by hand, and air dry flat. Store away from direct sunlight to prevent color fading.
For children under 3, substitute safety eyes with embroidered eyes using black yarn to eliminate small part risk.
Size Customization Tips
For a smaller version (4 to 5 inches tall): Use sport weight yarn (Category 2) with a US size B-1 or C-2 (2.25 to 2.75 mm) hook. All stitch counts remain identical. Use 9 mm safety eyes.
For a larger version (10 to 12 inches tall): Use bulky weight yarn (Category 5) with a US size J-10 (6.0 mm) hook. All stitch counts remain identical. Use 18 mm safety eyes.
I really hope you love making this strawberry bat as much as I loved designing it. There is something so satisfying about watching all those separate pieces come together into one adorable creature. Thank you for choosing this pattern for your next project!
If you make this little fruit bat, I would absolutely love to see it. Tag me on Instagram or share a photo in my Facebook group. Seeing your finished pieces is honestly the best part of sharing patterns.
Go ahead and save this pattern to your Pinterest boards so you can find it easily when you are ready to start. And if you do make one, drop a comment below. I love hearing how projects turn out and seeing the color combinations you choose!
You Might Also Like
- Dusty Rose Floral Granny Square Tote Free Crochet Pattern
- Ocean Breeze Granny Square Tote Free Crochet Pattern
- Lavender Purple Dreamy Tassel Clutch Free Crochet Pattern
- Terracotta Rust Textured Clutch Bag Free Crochet Pattern