
I named this tote "Ocean Breeze" because every motif reminded me of looking down at tidepools on a sunny afternoon. The white center is a flash of seafoam, the sand ring echoes the shore, and then teal and navy deepen like water pulling toward the horizon.
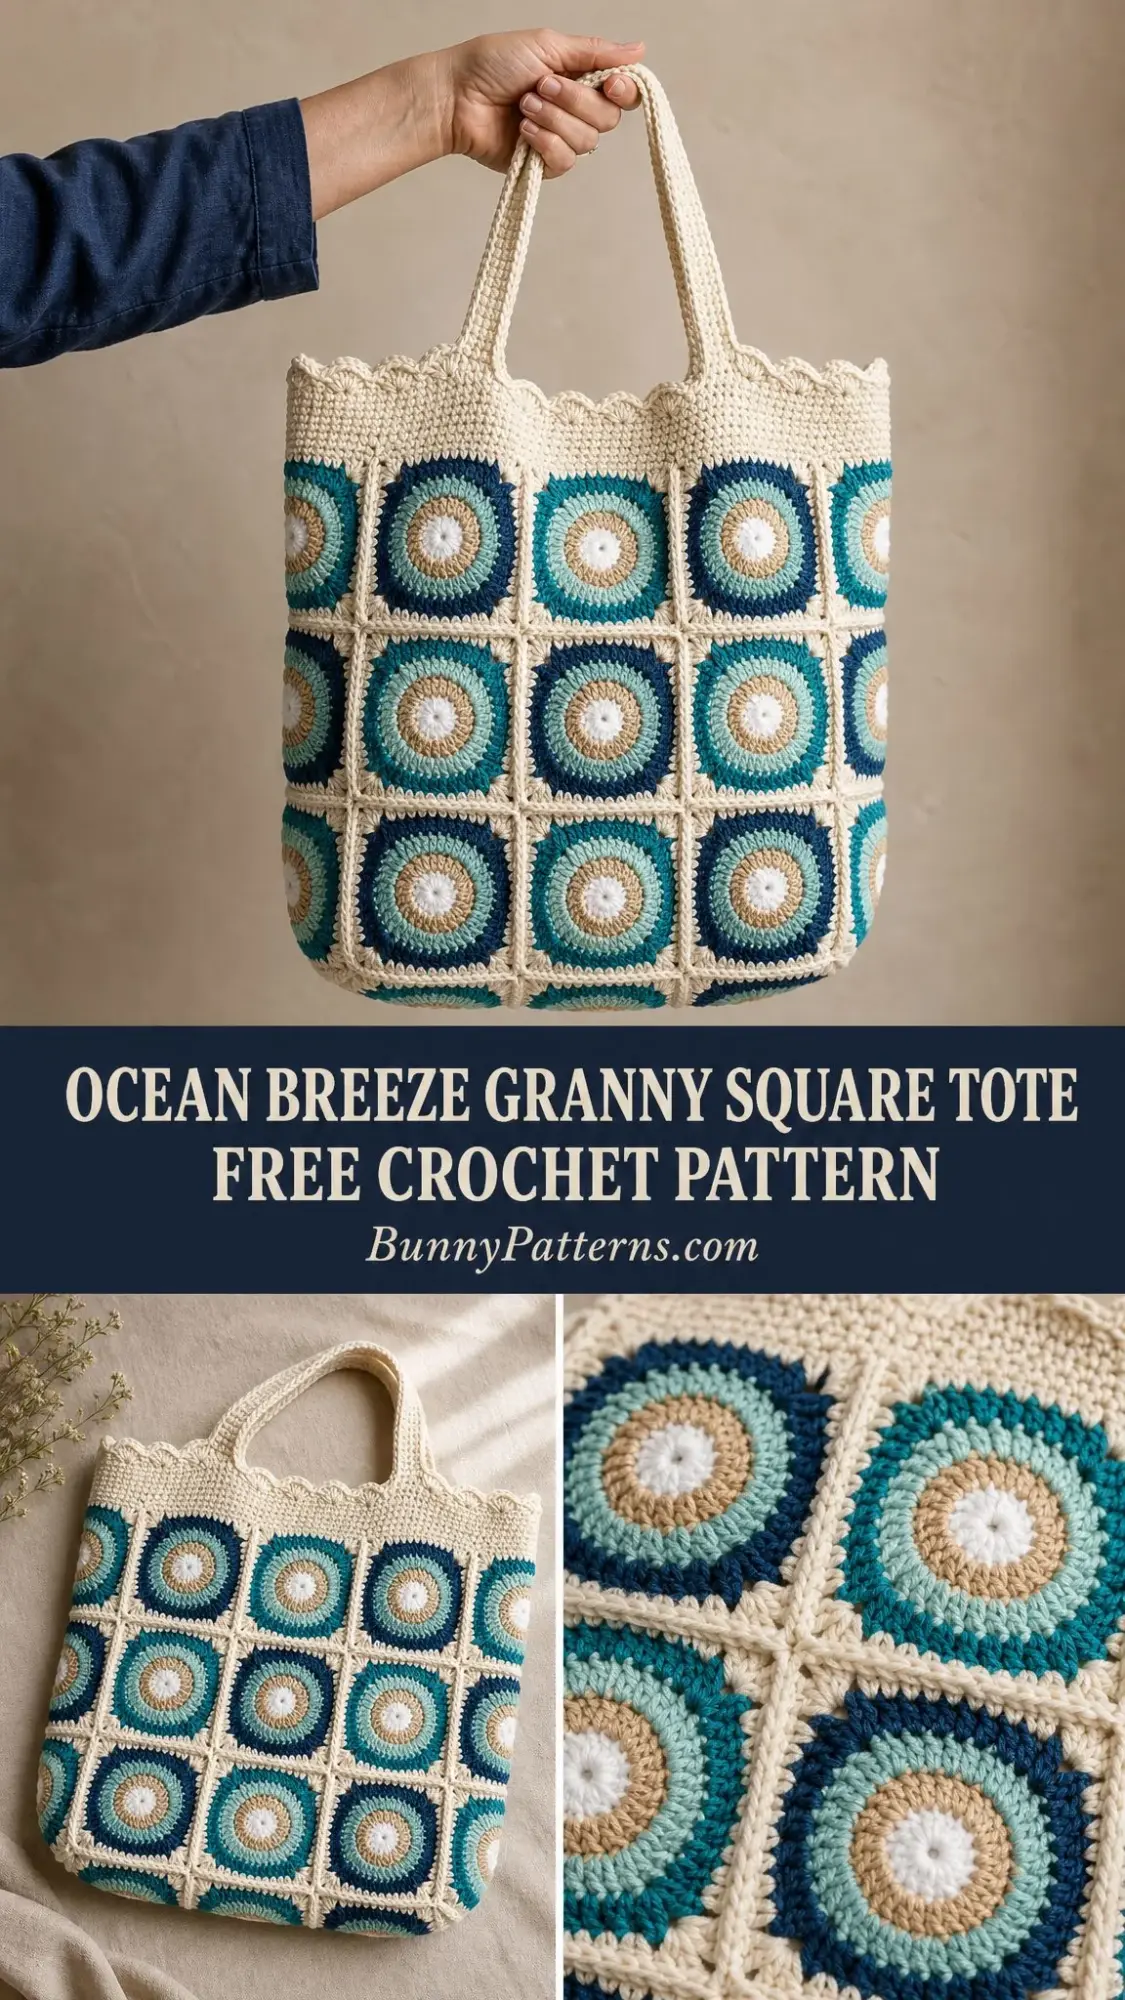
This pattern sat in my project folder for almost a year before I finally worked it up. I kept waiting for the right color palette, the right season, the right excuse. When I finally cast on that first magic ring, I wondered why I had waited so long.
The finished bag is generous enough for farmers market hauls, library runs, or beach day essentials. Each square works up quickly on its own, so you can tuck a few in your purse and stitch during lunch breaks or waiting rooms. Before you know it, you have a stack of little sunbursts ready to join into something beautiful.
Why You Will Love This Tote
This Ocean Breeze Granny Square Tote hits a sweet spot between interesting and approachable. The circle in square motif looks intricate, but it is built from basic stitches you probably already know. Single crochet (sc), half double crochet (hdc), and double crochet (dc) carry you through every round.
The construction method keeps things manageable. You make 30 individual squares first, then join them into a tube. No complicated shaping, no counting hundreds of stitches across endless rows. Just satisfying, portable pieces that come together at the end.
The scalloped edge along the rim adds a feminine touch without extra difficulty. It is a simple repeat that transforms a plain band into something special.
Materials and Tools
Before you begin, gather everything you need. Having your supplies ready makes the process smoother and more enjoyable.
Yarn: Worsted weight or Aran weight cotton yarn, approximately 650 to 750 yards (595 to 685 meters) total across five colors. Cotton or cotton blend holds the motif shape best and gives crisp stitch definition.
Color A (Cream): Main color for joining, top band, scallop, and handles
Color B (Sand): Second round of motif
Color C (Seafoam): Third round of motif
Color D (Teal): Fourth round of motif
Color E (Navy): Final round frame of motif
Suggested Yarns:
Hook: 4.0 mm (US G/6)
Notions: Tapestry needle, stitch markers, scissors
Skill Level: Confident Beginner
Time: 14 to 18 hours
Finished Size: 13 × 14 inches (33 × 35.5 cm)
Gauge
One finished motif measures 3 inches (7.5 cm) square after light blocking. Motif size matters more than row gauge for this project. If your square measures larger or smaller, adjust your hook size until a single square measures 3 inches.
Take time to check your gauge before making all 30 motifs. It will save frustration during assembly.
Abbreviations (US Terms)
ch: chain
st(s): stitch(es)
sl st: slip stitch, insert hook, yarn over, pull through both loops on hook
sc: single crochet, insert hook, yarn over, pull up a loop, yarn over, pull through both loops
hdc: half double crochet, yarn over, insert hook, yarn over, pull up a loop, yarn over, pull through all three loops
dc: double crochet, yarn over, insert hook, yarn over, pull up a loop, yarn over, pull through two loops, yarn over, pull through remaining two loops
sp: space
rep: repeat
MR: magic ring, adjustable loop that tightens to close the center
BLO: back loop only, work into the back loop of the stitch rather than both loops
UK Crocheters Note: US sc equals UK dc, US hdc equals UK htr, US dc equals UK tr. Convert throughout if you crochet in UK terms.
Special Stitches and Techniques
Scallop: In one stitch, work (sc, 3 dc, sc) to form a soft shell along the rim.
Invisible Join: Finish a color round by threading the tail under the first stitch’s top loops for a seamless ring. This creates a nearly invisible join that looks continuous.
Color Change: On the final yarn over of the last stitch, draw the new color through, then continue with the new color. This creates a clean transition between colors.
Pattern Notes
The body is built from 30 circle in square motifs. Each horizontal row uses 10 motifs: 4 for the front, 1 for the right side, 4 for the back, and 1 for the left side. The tote is 3 rows tall, plus a worked base.
Motifs are made first, then joined. Each round is worked with the right side facing and joined with a slip stitch unless stated otherwise. Carry no floats between colors. Fasten off and rejoin each color for clean color changes.
The Circle in Square Motif (Make 30)
This motif is worked in continuous rounds from the center out. Change color each round following the sequence A, B, C, D, E. Each finished square measures 3 inches (7.5 cm).
Round 1 (Color A, White): Make a magic ring, ch 1, work 8 sc in ring, pull tight to close center, sl st to first sc. (8 sc)
Round 2 (Color B, Sand): Join B with sl st, ch 1, work 2 sc in each st around, sl st to first sc. (16 sc)
Round 3 (Color C, Seafoam): Join C with sl st, ch 3 (counts as dc), dc in same st, dc in next st, 2 dc in next st, repeat from to around, sl st to top of ch 3. (24 dc)
Round 4 (Color D, Teal): Join D with sl st, ch 3, dc in next st, 2 dc in next st, dc in next 2 sts, repeat from to around to last st, 2 dc in last st, sl st to top of ch 3. (32 dc)
Round 5 (Color E, Cream, Square Round): Join E with sl st, ch 1. Sc in next st, hdc in next, dc in next, (2 dc, ch 2, 2 dc) in next st for corner, dc in next, hdc in next, sc in next 2, repeat from to 4 times total, sl st to first sc. Fasten off, leaving a 12 inch tail for joining. (44 sts and 4 corner ch-2 spaces)
The combination of sc, hdc, and dc around the circle creates the gradual transition from round to square. The corner clusters with chain 2 spaces give you clear corners for joining.
Joining the Motifs and Building the Body
Step 1: Block the Motifs
Lightly steam or wet block all 30 squares to a true 3 inches (7.5 cm). Flat, even squares join cleanly and create a professional finish. Take your time with this step.
Step 2: Lay Out the Rounds
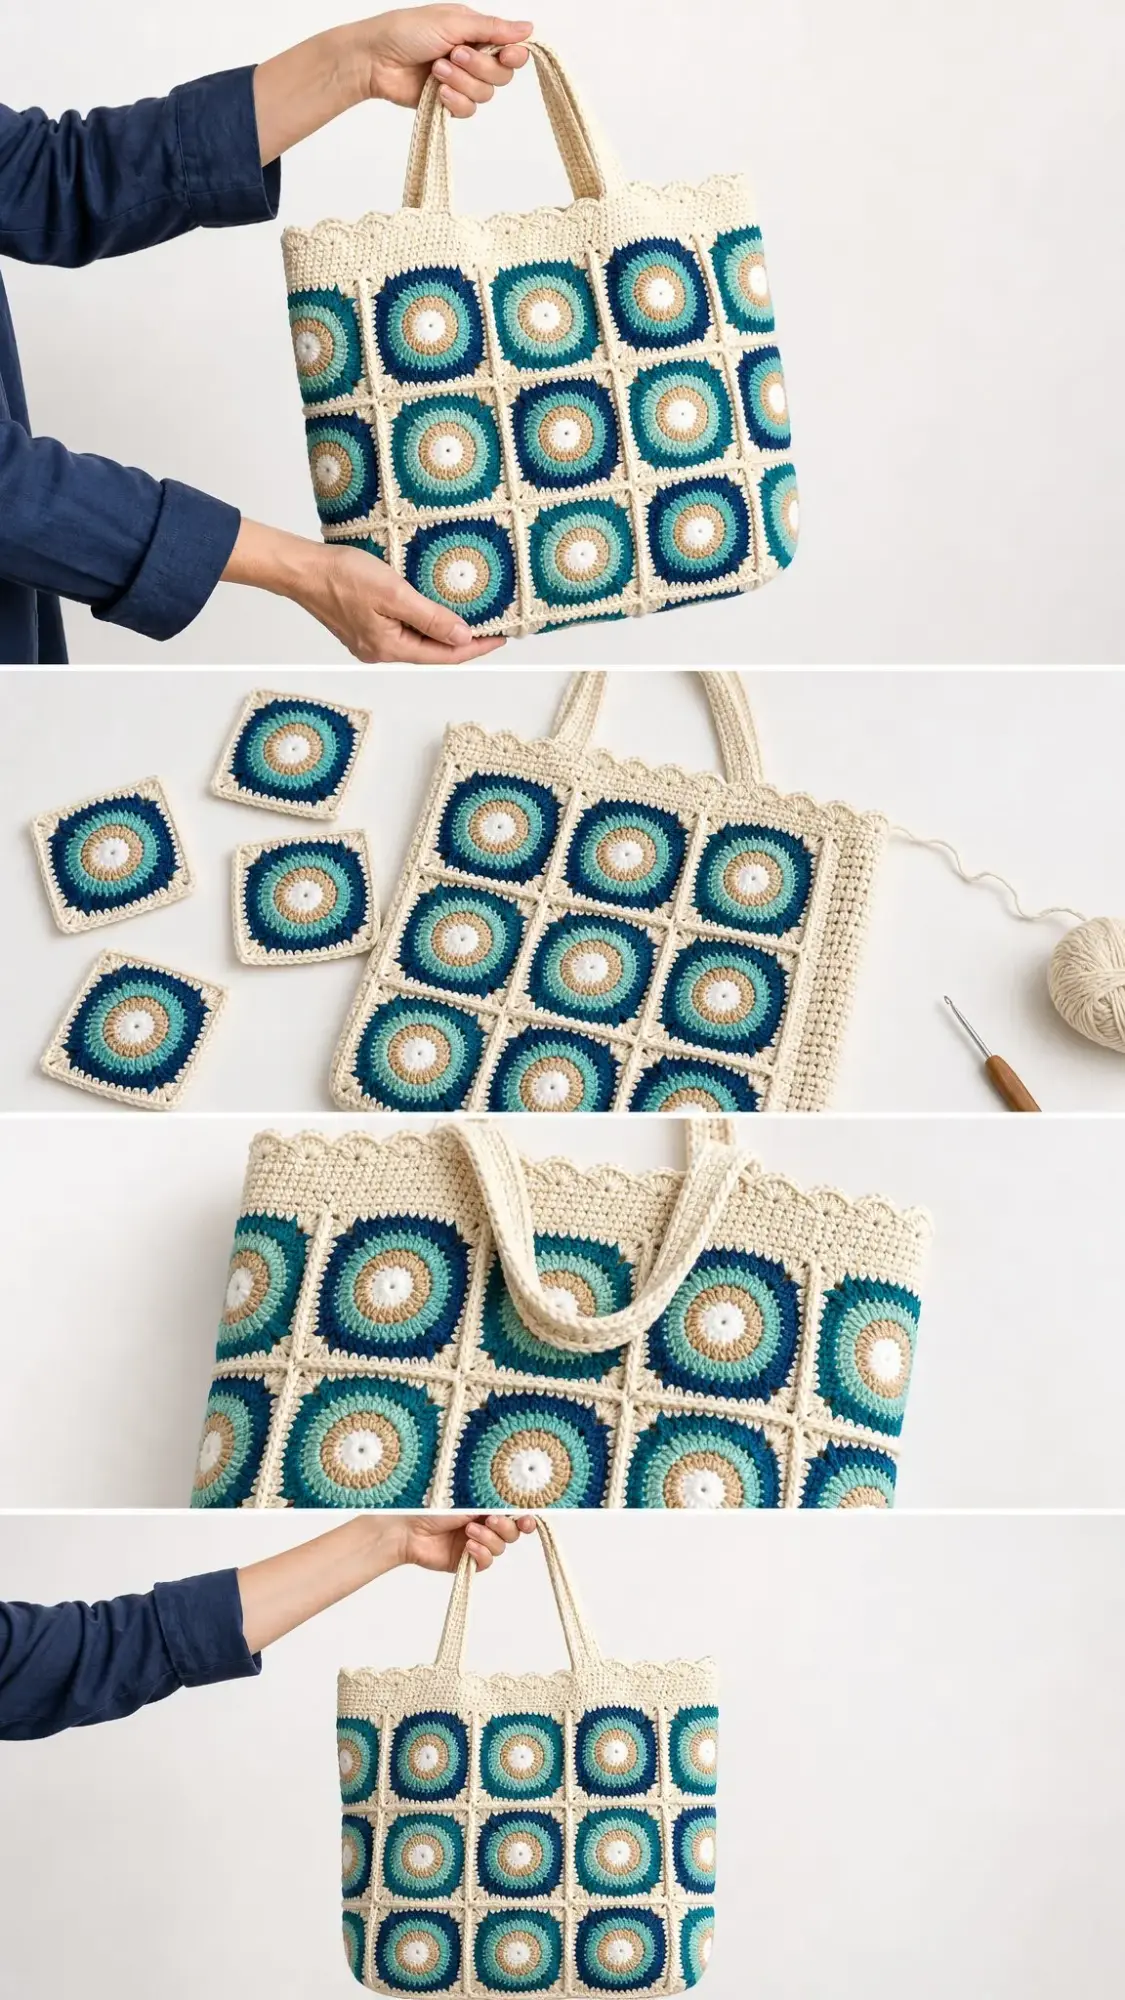
Arrange 10 motifs side by side for each of the 3 horizontal rows. Each row consists of 4 motifs for the front, 1 motif for the right side, 4 motifs for the back, and 1 motif for the left side.
Lay everything out on a flat surface and arrange the colors so they look balanced. Step back and check before you start joining.
Step 3: Join with Cream (Color A)
Hold two squares with wrong sides together. With Color A, sc through both back loops only across one edge, working (sc, ch 1) into each corner ch-2 space. (11 sc per edge)
This creates a raised seam on the right side that adds visual texture and frames each motif beautifully.
Step 4: Form the Tube
Join all squares in each row into a ring, then seam the three rings on top of one another so the circles align in neat columns. Check your alignment as you go.
Step 5: Work the Base
Across the bottom opening, flatten front to back and sc the two lower edges closed through both layers. (approximately 88 sc)
This creates a flat bottom for the tote that helps it stand upright when filled.
Top Band, Scallop Edge, and Handles
Top Band (Cream Color A)
Round 1: Join A at top edge, ch 1, sc evenly around the opening, sl st to first sc. (approximately 110 sc)
Rounds 2 through 5: Ch 1, sc in each st around, sl st to first sc. (110 sc each round)
Scallop Edge (Cream Color A)
Round 6: Ch 1, skip 1 st, (sc, 3 dc, sc) in next st, skip 1 st, repeat from to around, sl st to first sc. Fasten off. (approximately 27 scallops)
The scallop creates a soft, feminine edge that perfectly finishes the coastal feel of this tote.
Handles (Make 2, Cream Color A)
Row 1: Ch 9, sc in 2nd ch from hook and each ch across, turn. (8 sc)
Rows 2 through 90: Ch 1, sc in each st across, turn. (8 sc each row)
Handle measures about 22 inches (56 cm) for a 9 inch (23 cm) drop. For a firmer strap, fold lengthwise and whip stitch the long edge closed.
Attach: Pin handle ends to the top band, spanning the 2nd and 3rd motif columns on front and back. Sew securely through several stitches on the inside.
Finishing Your Ocean Breeze Tote
Weave in all ends on the wrong side and trim close to the fabric.
Wet block the finished tote over a towel stuffed form to set the shape. This helps the bag hold its structure when in use.
For extra structure, line the inside with cotton fabric or add a stiff base insert. This is optional but helpful if you plan to carry heavier items.
Care Instructions
Hand wash cool with mild soap. Do not wring, as this can distort the shape.
Reshape while damp and dry flat away from direct heat.
Spot clean between washes to protect the cream tones from yellowing.
Customizing Your Tote Size
Wider Tote: Add motif columns in multiples. Each additional column adds 3 inches (7.5 cm) to the width.
Taller Tote: Add a 4th row of motifs for an additional 3 inches of height.
Shorter Handles: Stop at Row 70 for a shoulder free hand carry option.
Keep the top band at 4 to 5 rounds so the scallop sits proud of the motifs and creates that beautiful wavy edge.
Tips for Success
Work your first motif slowly and check the stitch count at the end of each round. Once you have one perfect square, the rest will flow more easily.
When joining, keep your tension consistent. Too tight and the bag will pucker. Too loose and the seams will gap.
The invisible join technique takes practice but makes a noticeable difference in the finished look. Try it on a practice swatch first if it is new to you.
Cotton yarn can be harder on your hands than acrylic, so take breaks and stretch your fingers regularly during longer sessions.
Final Thoughts on This Crochet Pattern
This Ocean Breeze Granny Square Tote is the kind of project that rewards patience. Each little sunburst square is satisfying on its own, and watching them come together into a functional, beautiful bag feels like magic.
The coastal color palette works year round, but you could easily swap in autumn tones, rainbow brights, or monochromatic neutrals to match your style. The circle in square construction creates endless possibilities for personalization.
I hope this step by step crochet tutorial gives you everything you need to create your own version. Whether it becomes your market companion, beach bag, or gift for a friend, I would love to see how it turns out.
If you enjoyed this pattern, I would be so grateful if you saved it to your Pinterest boards for later. And please drop a comment below if you make your own Ocean Breeze Tote. Seeing your creations honestly makes my day, and I always love hearing which colors you chose!
You Might Also Like
- Terracotta Rust Textured Clutch Bag Free Crochet Pattern
- Sage Green Romantic Peplum Crochet Top Free Pattern
- Cream Boho Tassel Fringe Clutch Free Crochet Pattern
- Tropical Octopus Baby Blanket Free Crochet Pattern