
Amigurumi jellyfish look intimidating, don’t they? Those perfectly spiraled tentacles, that smooth rounded dome, those adorable kawaii faces. I get it. But here’s the truth: if you can single crochet in a circle and count to six, you can absolutely make this.
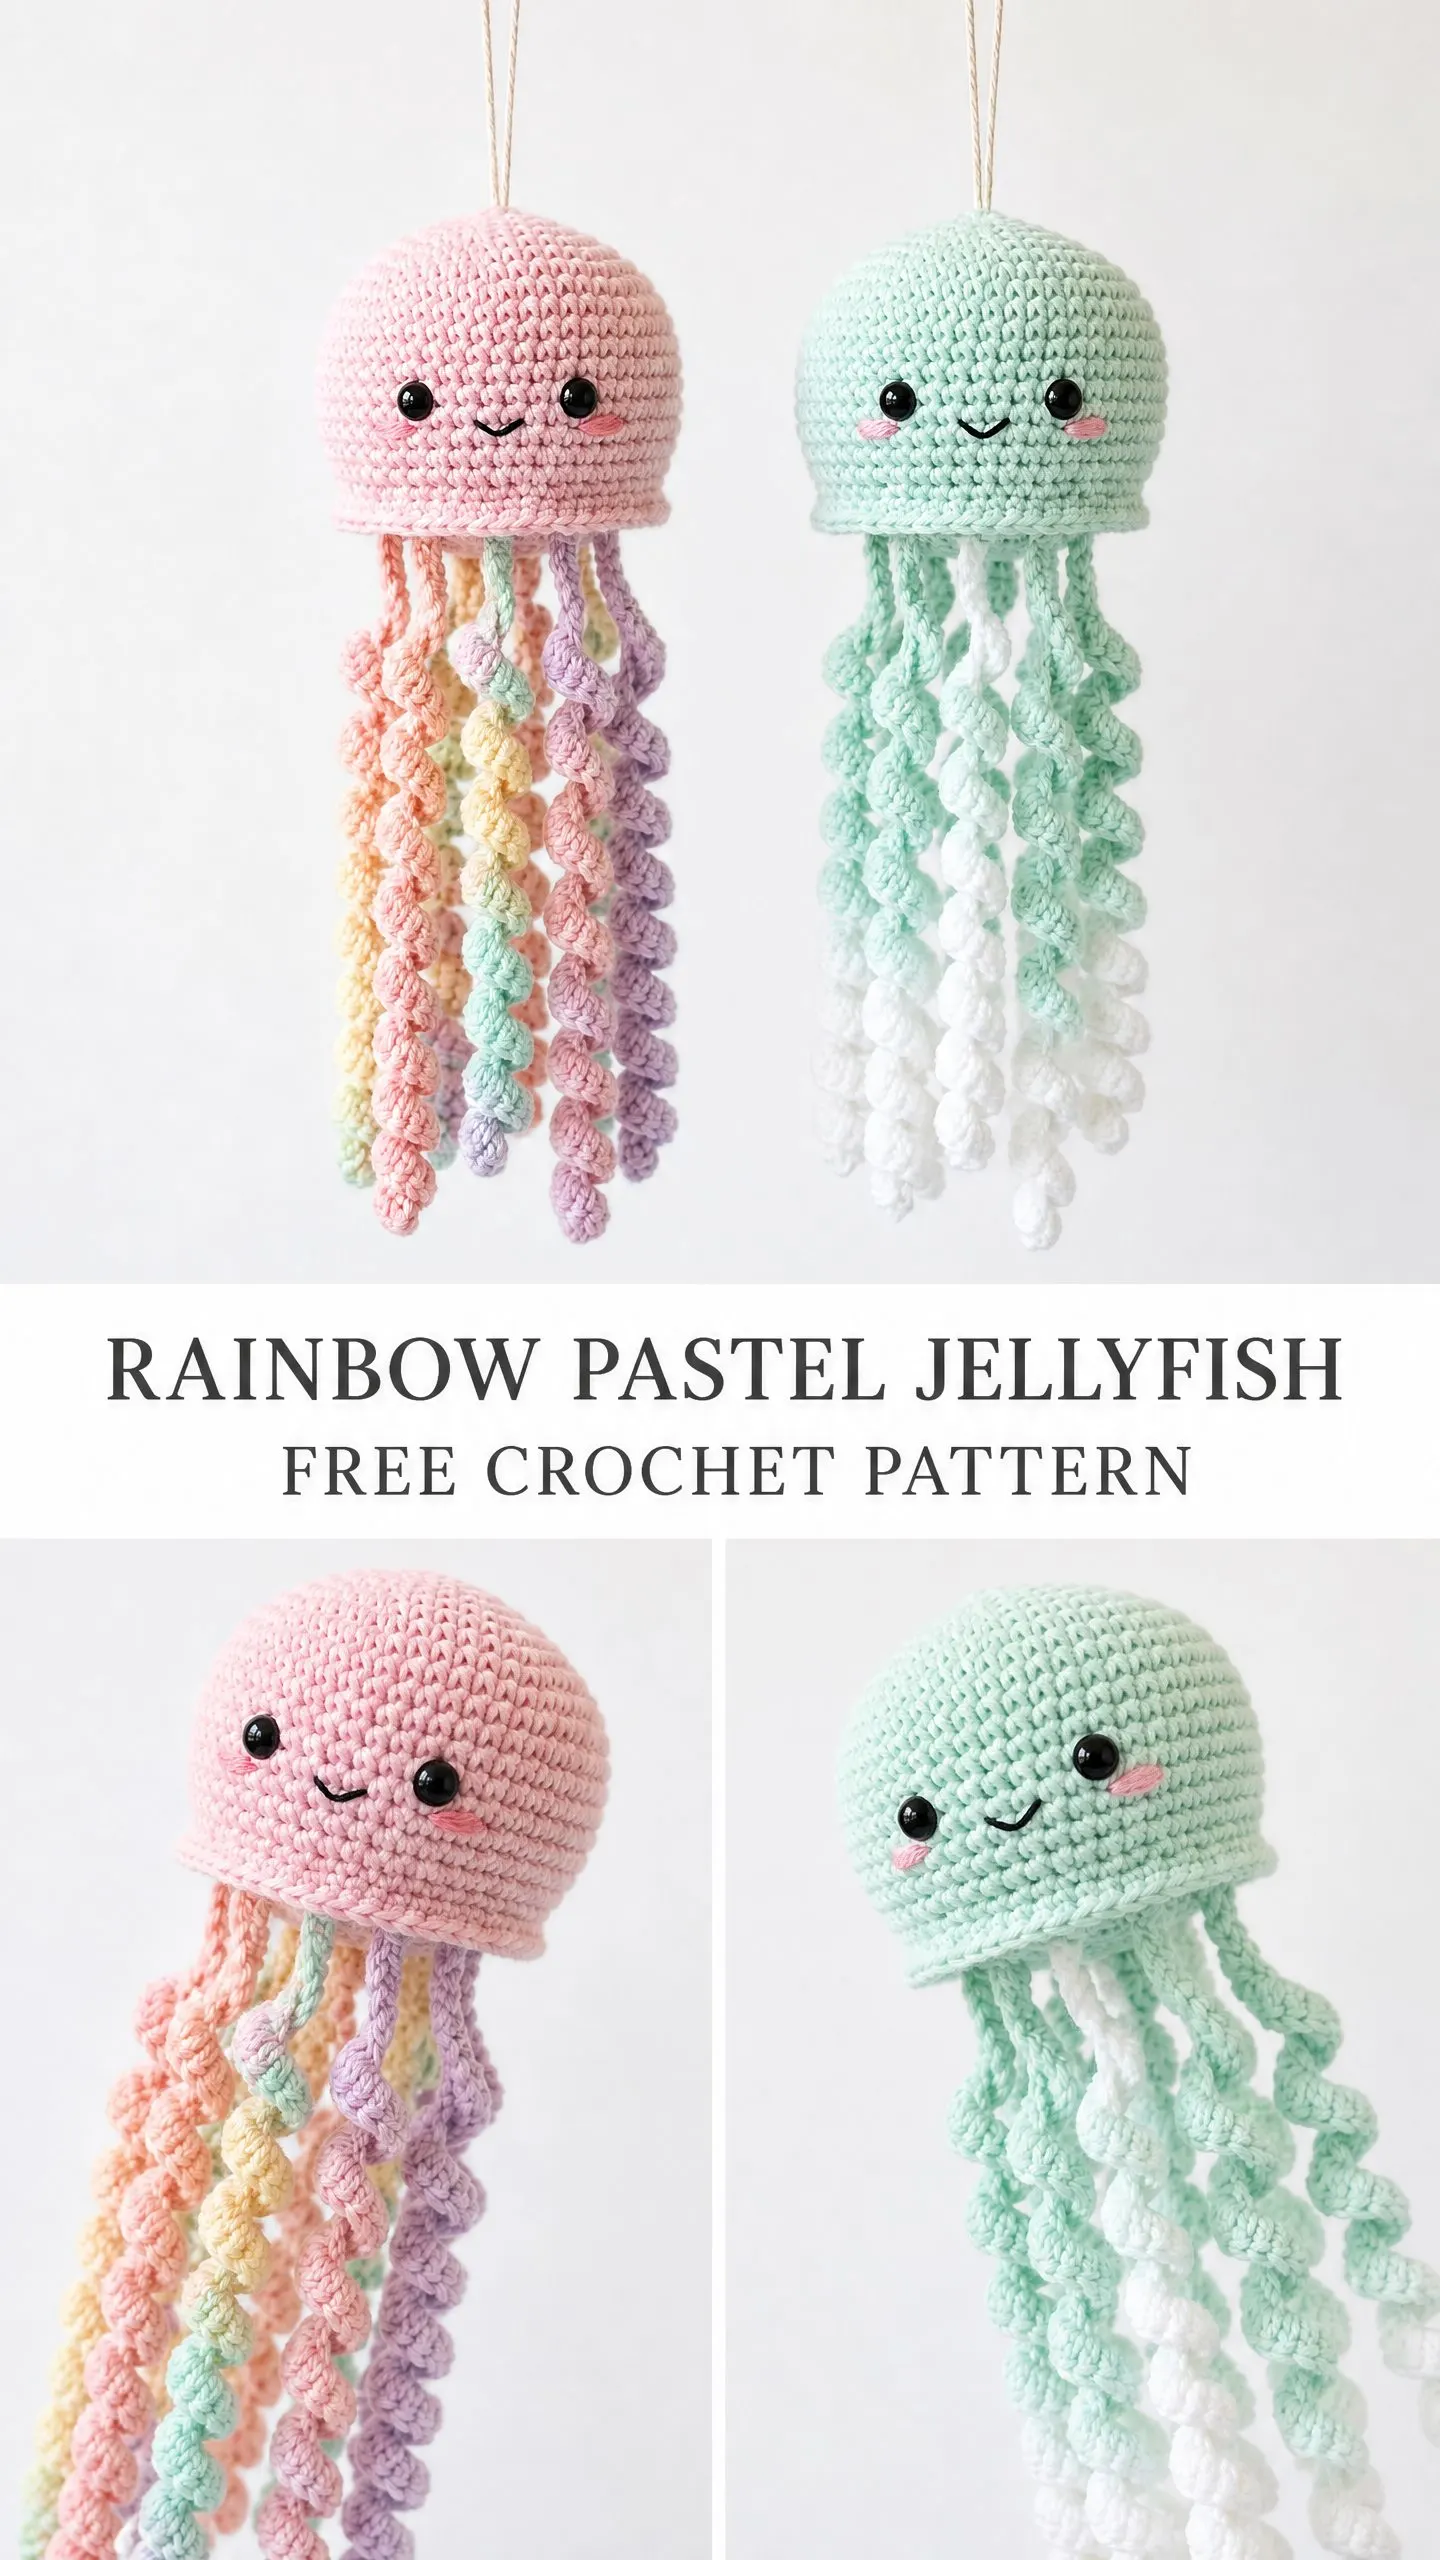
This rainbow pastel jellyfish pattern breaks down into just two simple components. A stuffed dome worked in continuous rounds. Curly tentacles that spiral all on their own as you stitch them. That’s it. No complex colorwork. No confusing assembly. No advanced techniques hiding in the fine print.
Whether you’ve made a dozen amigurumi projects or you’re ready to try your very first one, this jellyfish meets you where you are. Beginners will find clear guidance at every step. Experienced crocheters will appreciate the meditative rhythm of those spiral tentacles. Let’s make something adorable together.
About This Crochet Pattern
This hanging amigurumi jellyfish ornament features a rounded bell-shaped body with an embroidered kawaii face and curly spiral tentacles in gorgeous pastel rainbow colors. The construction is entirely seamless, worked in continuous rounds from the top of the bell downward. You’ll stuff the body firmly, close it at the base, then attach those dreamy spiraling tentacles around the bottom opening.
The piece hangs from a simple length of twine or jute cord inserted through the top center. Safety eyes and a sweet embroidered smile give it that irresistible kawaii character. Rosy cheeks add the finishing touch.
Skill level: Intermediate beginner. You should be comfortable working in continuous rounds, increasing and decreasing evenly, and inserting safety eyes before closing a piece. The spiral tentacles require counting carefully into a foundation chain, but no advanced stitches are involved.
Time estimate: 4 to 6 hours for an experienced beginner. First-time amigurumi makers should expect up to 8 hours, including tentacle shaping.
Finished Measurements
These measurements are based on the yarn and hook size listed below, worked at the stated gauge.
Materials Needed
Yarn:
DK weight yarn (CYCA 3 / Light), 100 percent cotton or cotton-blend recommended for stitch definition and firmness.
Hook:
US size D-3 / 3.25 mm crochet hook. A tighter fabric prevents stuffing from showing through.
Notions:
Recommended Yarn Suggestions
Lion Brand 24/7 Cotton DK: Excellent stitch definition, widely available, washes well, and comes in pastel colorways. Use Blush for the main color. Mix and match pastels for tentacles.
Paintbox Yarns Simply DK: 100 percent acrylic but has a matte cotton-like appearance. Very affordable and comes in a broad pastel range. Slight give in the stitch makes stuffing easier.
Drops Safran (Sport/DK): 100 percent Egyptian cotton with beautiful drape and structure. Produces crisp stitch definition. Slightly thinner, so a tension swatch is essential.
Substitution note: Any DK or light worsted weight yarn that produces a tight, dense fabric will work. Avoid fuzzy or bouclé yarns since stitch definition is key to the texture. The tentacle spirals will not show their shape properly with fluffy yarn. Adjust your hook size down one step if your swatch shows open gaps between stitches.
Gauge
12 single crochet (sc) x 14 rounds = 2 inches x 2 inches (5 cm x 5 cm) worked in continuous single crochet rounds with US D-3 / 3.25 mm hook.
Gauge matters here. It ensures the correct finished size and a dense fabric that holds stuffing without showing through.
To check gauge: chain 14, work 14 rows of sc, measure the center of your swatch.
Abbreviations (US Terms)
Special Stitches and Techniques
Magic Ring (MR)
The magic ring creates a tight, closed center for your work. Here’s how to make one:
1. Wrap yarn around two fingers, crossing the working yarn over the tail end to form a loop.
2. Insert hook into the center of the loop, draw up a loop of working yarn, chain 1 (this does not count as a stitch).
3. Work the required number of sc into the ring, then pull the tail end firmly to close the ring completely.
If magic rings frustrate you, you can chain 2 and work your starting stitches into the second chain from hook instead. The center won’t be quite as tight, but it works.
Spiral Tentacle
This technique creates a naturally curling coil. The tentacle is not worked in rounds. It’s a flat chain foundation with stitches worked back along it.
1. Using your desired tentacle color, leave a 6-inch (15 cm) tail for attaching. Make a slip knot and chain 26.
2. Starting in the 2nd chain from the hook, work 3 sc into each chain stitch all the way back to the starting tail end.
3. As you work the 3 sc into each chain, the strip will naturally begin to curl and coil into a spiral shape. Do not fight this curl. Allow it to happen.
4. At the end of the chain, fasten off, leaving a 6-inch (15 cm) tail for attaching.
Result: One finished tentacle measuring approximately 4 to 5 inches (10 to 13 cm) in its curled spiral form.
Tension tip: Keep your chain tension relaxed and consistent. Tight chains produce shorter, tighter spirals. Looser chains produce longer, more dramatic spirals. Adjust based on your preference.
Pattern Notes Before You Begin
1. The bell is worked in continuous rounds. Do not join with a slip stitch at the end of each round unless instructed. Use a stitch marker to track the beginning of each round. Move the marker up each round.
2. The right side faces outward throughout. You are always looking at the exterior of the bell as you work.
3. Stuff the bell firmly but not so tightly that stitches are distorted. Add stuffing gradually as the decreases proceed.
4. Safety eyes must be inserted and secured BEFORE the decrease rounds close the opening too small for your fingers. The instructions will note the specific round.
5. Cheek blush circles are optional. They can be made by working several satin stitches in a small circle with pink embroidery floss, or by lightly pressing a pink chalk pastel or blush onto the finished piece with a cotton swab.
6. The smile is a simple embroidered curve worked with a single strand of black embroidery floss using a backstitch along a gentle upward arc.
7. All tentacles are attached after the bell is fully closed and finished.
Jellyfish Bell Instructions
Using MC (pink pastel), begin with a magic ring.
Round 1: Work 6 sc into the magic ring. Pull ring closed. PM in first stitch of this round. (6 sts)
Round 2: Inc in each st around. (12 sts)
Round 3: (Sc 1, inc) rep 6 times. (18 sts)
Round 4: (Sc 2, inc) rep 6 times. (24 sts)
Round 5: (Sc 3, inc) rep 6 times. (30 sts)
Round 6: (Sc 4, inc) rep 6 times. (36 sts)
Round 7: (Sc 5, inc) rep 6 times. (42 sts)
Round 8: Sc in each st around. (42 sts)
Round 9: Sc in each st around. (42 sts)
Round 10: Sc in each st around. (42 sts)
Round 11: Sc in each st around. (42 sts)
Checkpoint
After Round 11, your bell should measure approximately 2.75 to 3 inches (7 to 7.5 cm) across at its widest point and approximately 1.75 inches (4.5 cm) in height from top to working edge. The fabric should be firm with no visible gaps.
Safety Eye and Face Placement
Before beginning Round 12, you need to add the face elements.
Safety eyes: Insert them between Rounds 5 and 6 of the bell (counting down from the top), approximately 6 to 7 stitches apart horizontally, centered on the front of the bell. The eyes should sit in the upper-center-front area of the bell. Lock backs firmly onto safety eye posts from inside.
Smile: Using black embroidery floss, embroider a small curved smile approximately 3 to 4 stitches below and between the eyes. Work a gentle upward arc of 4 to 5 backstitches. Secure ends inside.
Cheeks (optional): Using pink embroidery floss or chalk pastel, add small rosy circles below and to the outer side of each eye.
Continue Decreasing
Round 12: (Sc 5, sc2tog) rep 6 times. (36 sts)
Round 13: Sc in each st around. (36 sts)
Round 14: (Sc 4, sc2tog) rep 6 times. (30 sts)
Round 15: (Sc 3, sc2tog) rep 6 times. (24 sts)
Add stuffing now. Fill the bell approximately three-quarters full with polyfill. The shape should be a plump dome. Do not overstuff.
Round 16: (Sc 2, sc2tog) rep 6 times. (18 sts)
Round 17: (Sc 1, sc2tog) rep 6 times. (12 sts)
Add a small additional pinch of stuffing if needed to maintain the dome shape.
Round 18: (Sc2tog) rep 6 times. (6 sts)
Fasten off, leaving a 10-inch (25 cm) tail. Thread tail onto yarn needle and weave through the front loops of the remaining 6 stitches. Pull firmly to close the gap completely. Weave in end securely on the inside.
Final Checkpoint
The closed bell should measure approximately 3.5 inches (9 cm) at its widest diameter and approximately 2.75 inches (7 cm) in total height. It should be a smooth, even dome with no flat spots.
Hanging Cord
Cut a length of twine or jute cord measuring 16 to 18 inches (40 to 46 cm). Thread both ends onto a yarn needle (or fold in half and use a loop). Insert the needle through the very top center of the bell, through the closed magic ring point. Pull halfway through and tie both ends in a knot to form a hanging loop of your preferred size.
Alternatively, you can thread the cord from bottom to top and knot inside.
Tentacle Instructions
Make 10 total tentacles: 2 in each of the 5 pastel colors (peach, yellow, lavender, mint, pink).
For each tentacle:
Using tentacle color, leave a 6-inch (15 cm) starting tail. Chain 26.
Starting in the 2nd chain from the hook, work 3 sc into each chain across. (25 chains worked, 75 sc total in the tentacle strip)
Fasten off, leaving a 6-inch (15 cm) finishing tail.
The strip will coil naturally into a spiral as you work. Completed tentacle length in coiled form: approximately 4 to 5 inches (10 to 13 cm).
Repeat until you have 10 tentacles total.
Attaching the Tentacles
The tentacles attach around the bottom opening edge of the bell, which corresponds to approximately Round 11 to 12 level on the exterior, just inside the slight flare at the base of the shaping.
Look at the exterior base of the bell. You’ll see a slight ridge or natural edge where the bell begins to curve inward for the decreases.
Thread one tentacle tail onto a yarn needle. Insert the needle through the base edge of the bell from outside to inside. Bring the second tail through a neighboring stitch or the same spot. Tie both tails together in a firm double knot on the inside of the bell. Trim tails to approximately 0.5 inches (1.2 cm).
Spacing: With 42 stitches at Round 11, place one tentacle approximately every 4 stitches. This spaces 10 tentacles at roughly equal intervals with slight adjustment.
Color arrangement: Arrange colors in a repeating rainbow order: peach, yellow, lavender, mint, pink, peach, yellow, lavender, mint, pink. Feel free to customize this order to your preference.
Once all tentacles are attached, gently tug each one downward to confirm the attachment is secure. The spirals should hang freely and coil naturally.
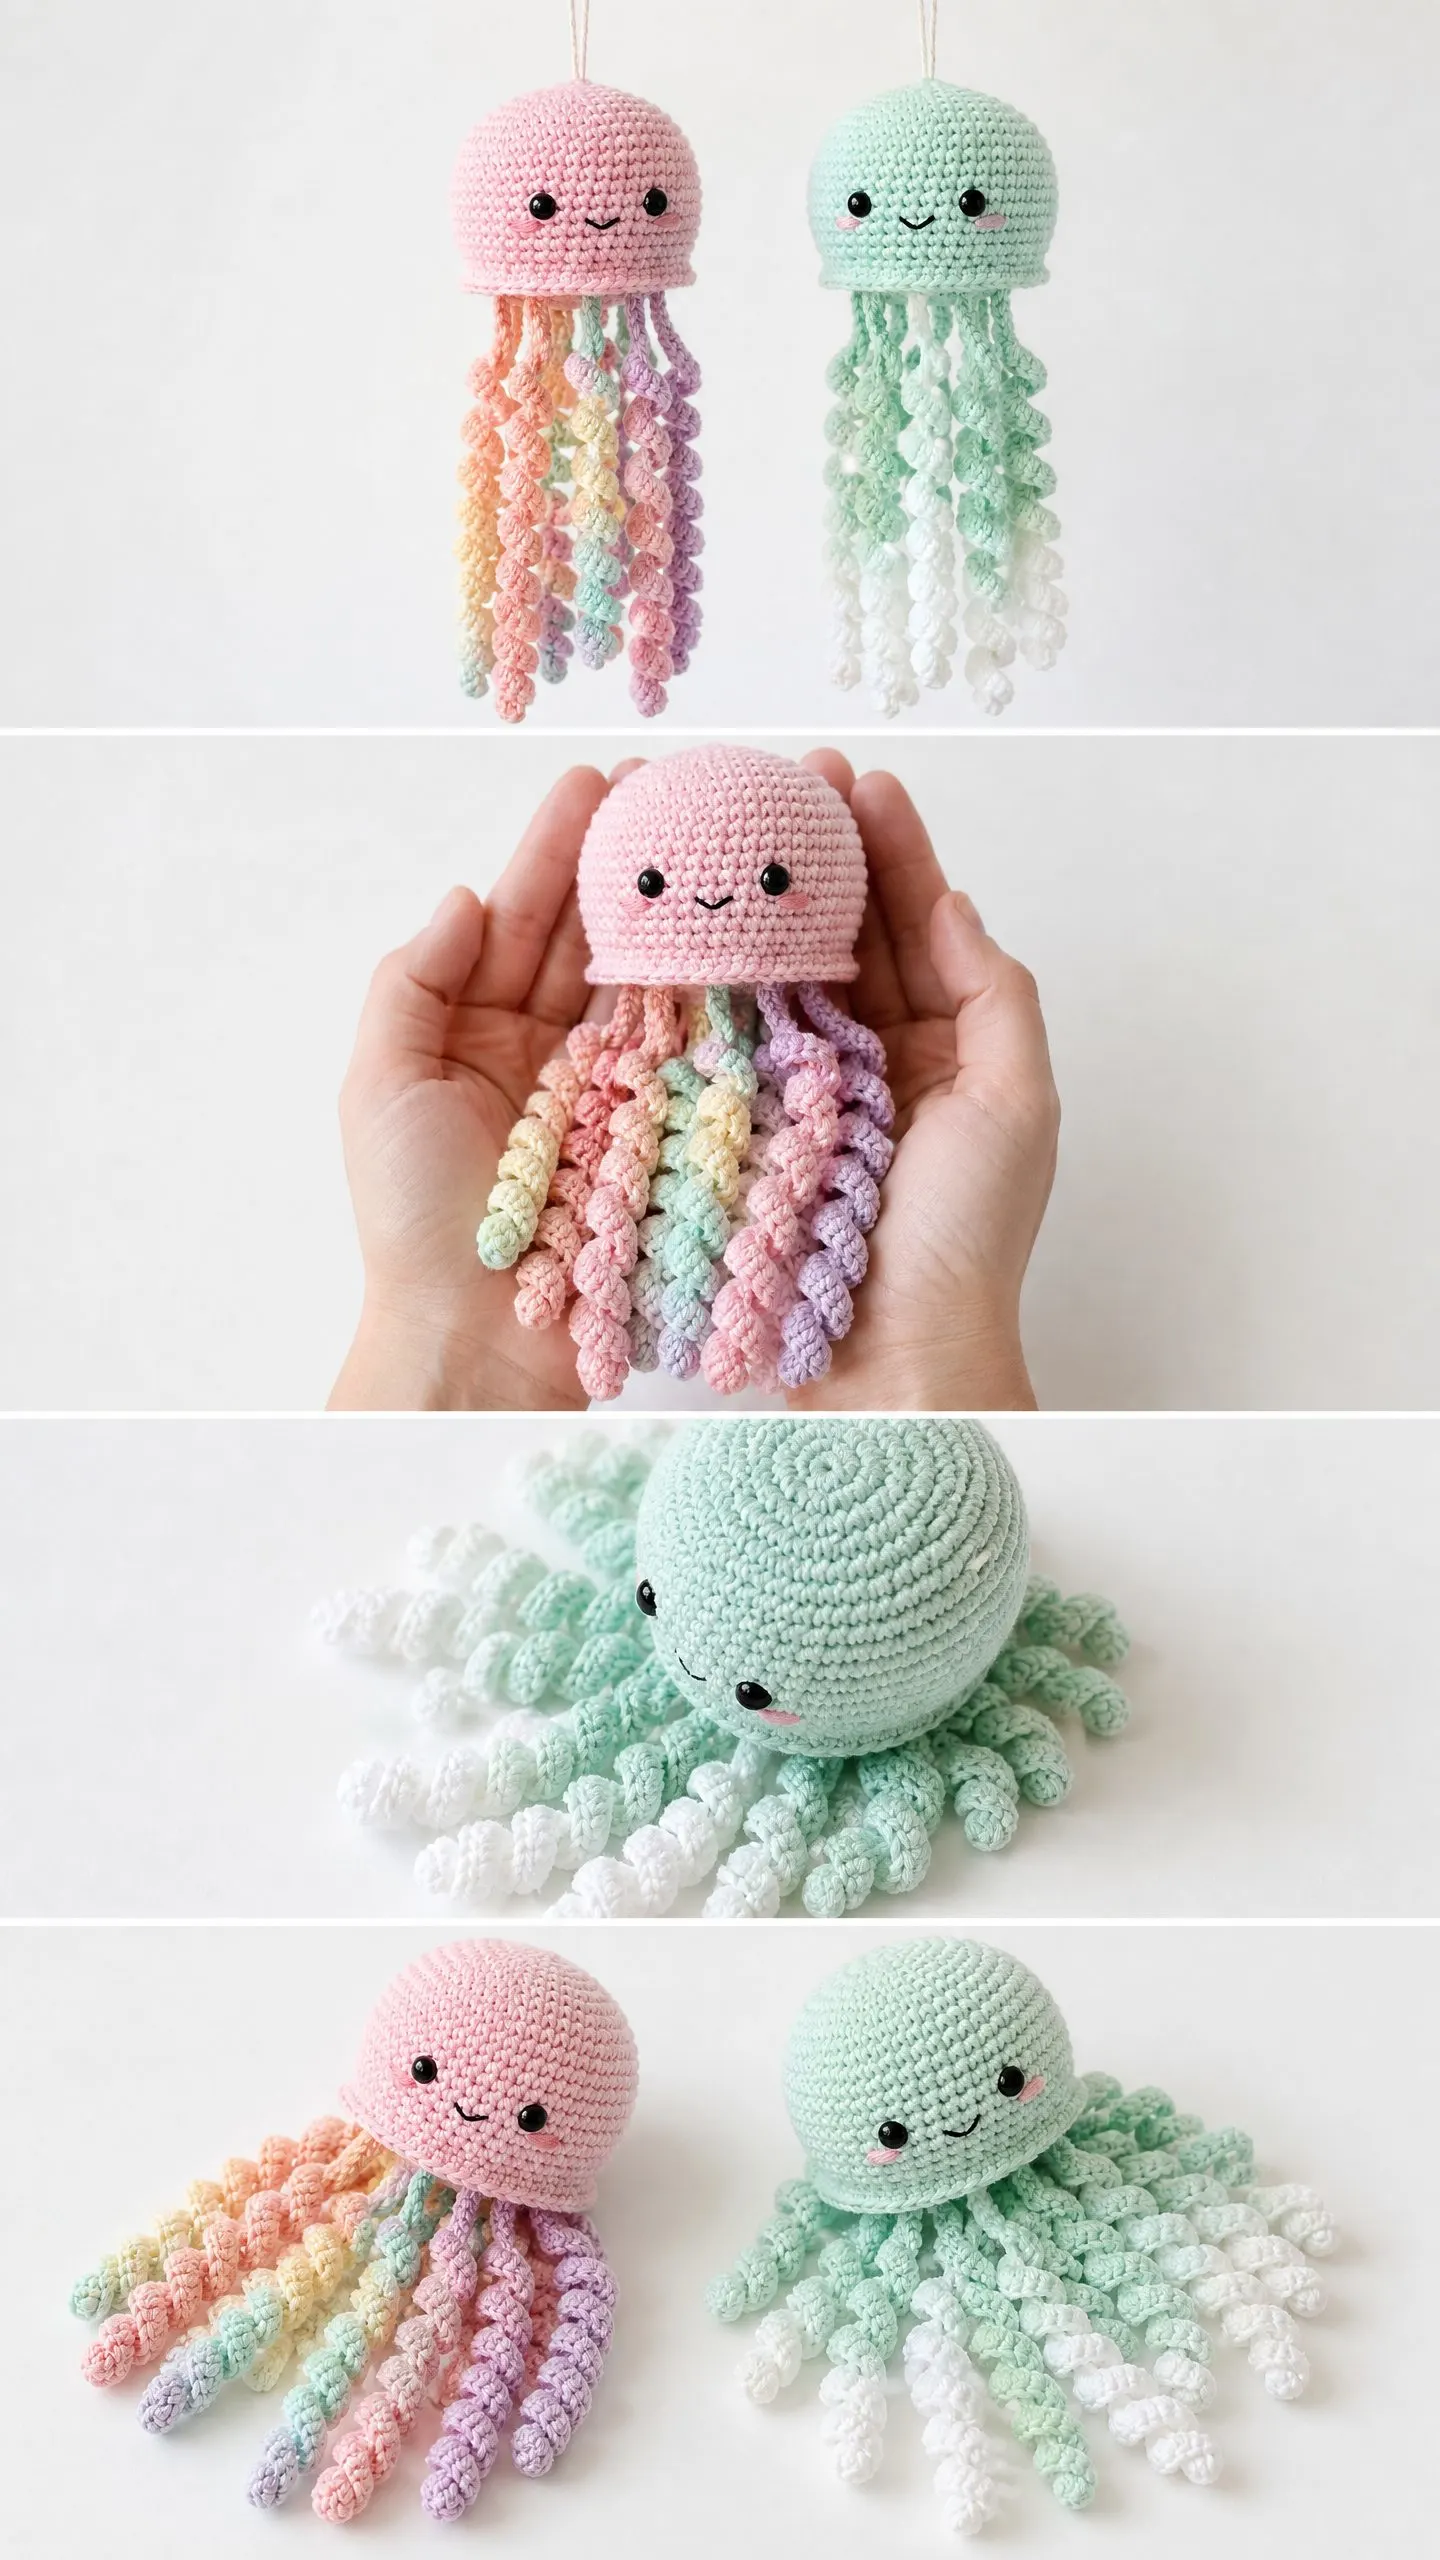
With all 10 tentacles attached, the finished jellyfish from hanging cord knot to the lowest tentacle tip should measure approximately 10 to 11 inches (25 to 28 cm) total.
Size Customization Tips
For a larger jellyfish: Use worsted weight yarn (CYCA 4) with a US size F-5 / 3.75 mm hook. This increases the bell diameter to approximately 4.5 to 5 inches (11 to 13 cm). Increase tentacle chain length to 36 chains for longer spirals.
For a miniature jellyfish: Use fingering weight yarn (CYCA 1) with a US size B-1 / 2.25 mm hook. Stop increases after Round 6 (36 sts) and proceed directly to even rounds and then decreases. A tentacle chain length of 16 will produce appropriately scaled spirals.
For fuller tentacles: Make 12 to 14 tentacles instead of 10 and space approximately every 3 stitches around the base.
For longer or shorter tentacles: Add or subtract chains in multiples of 2. Each additional 2 chains adds approximately 0.5 inches (1.2 cm) to the finished coiled tentacle length.
Finishing and Blocking
Weave in all ends securely on the inside of the bell using a yarn needle. Work ends back through at least 4 stitches in two directions to prevent unraveling.
For cotton yarn: Wet block the finished bell by misting lightly with water, gently shaping the dome with your hands, and allowing to air dry completely on a clean surface.
For acrylic yarn: Steam blocking is not recommended for this project since the stuffed dome holds its shape well. A light misting and reshape by hand is sufficient.
Tentacles do not require blocking. Their natural coil is part of the design. If tentacles look too stiff, mist them lightly with water and gently encourage the spiral shape with your fingers.
Care Instructions
Hand wash in cool water with mild soap. Do not wring. Press gently between two clean towels to remove excess water. Reshape dome while damp and hang by the cord to air dry, or lay flat.
Machine wash on a delicate cycle in a mesh laundry bag if yarn is machine-washable acrylic. Air dry only. Do not tumble dry since polyfill can clump and safety eyes can crack under heat.
Do not iron directly over safety eyes.
Safety note: This item contains small parts (safety eyes) and polyfill stuffing. It is intended as a decorative hanging ornament and is not suitable for children under 3 years of age.
Making the Mint Green Version
The reference images show two jellyfish: one in pink with rainbow tentacles, and one in mint green with a gradient of mint to white tentacles. To make the mint version, simply swap your main color to a soft mint pastel and make your tentacles in varying shades of mint and white instead of the rainbow colors.
Both versions use the exact same construction. Only the color choices differ.
You Did It!
I really hope you love making this rainbow pastel jellyfish as much as I loved designing it. These little guys make the sweetest nursery mobiles, baby shower gifts, or cheerful desk companions. The spiral tentacles are oddly satisfying to create, and watching them coil up as you stitch is genuinely delightful.
If you found this crochet tutorial helpful, I’d love for you to save it to your Pinterest boards so you can find it easily when you’re ready to start. And please leave a comment below if you make one. Seeing your finished jellyfish absolutely makes my day!
You Might Also Like
- Sage Green Summer Tote with Cream Tassels Free Crochet Pattern
- Mint Daisy Spring Barrel Handbag Free Crochet Pattern
- Charcoal Gray Modern Lace Maxi Skirt Free Crochet Pattern
- Blush Pink Daisy Crochet Tote Free Pattern