
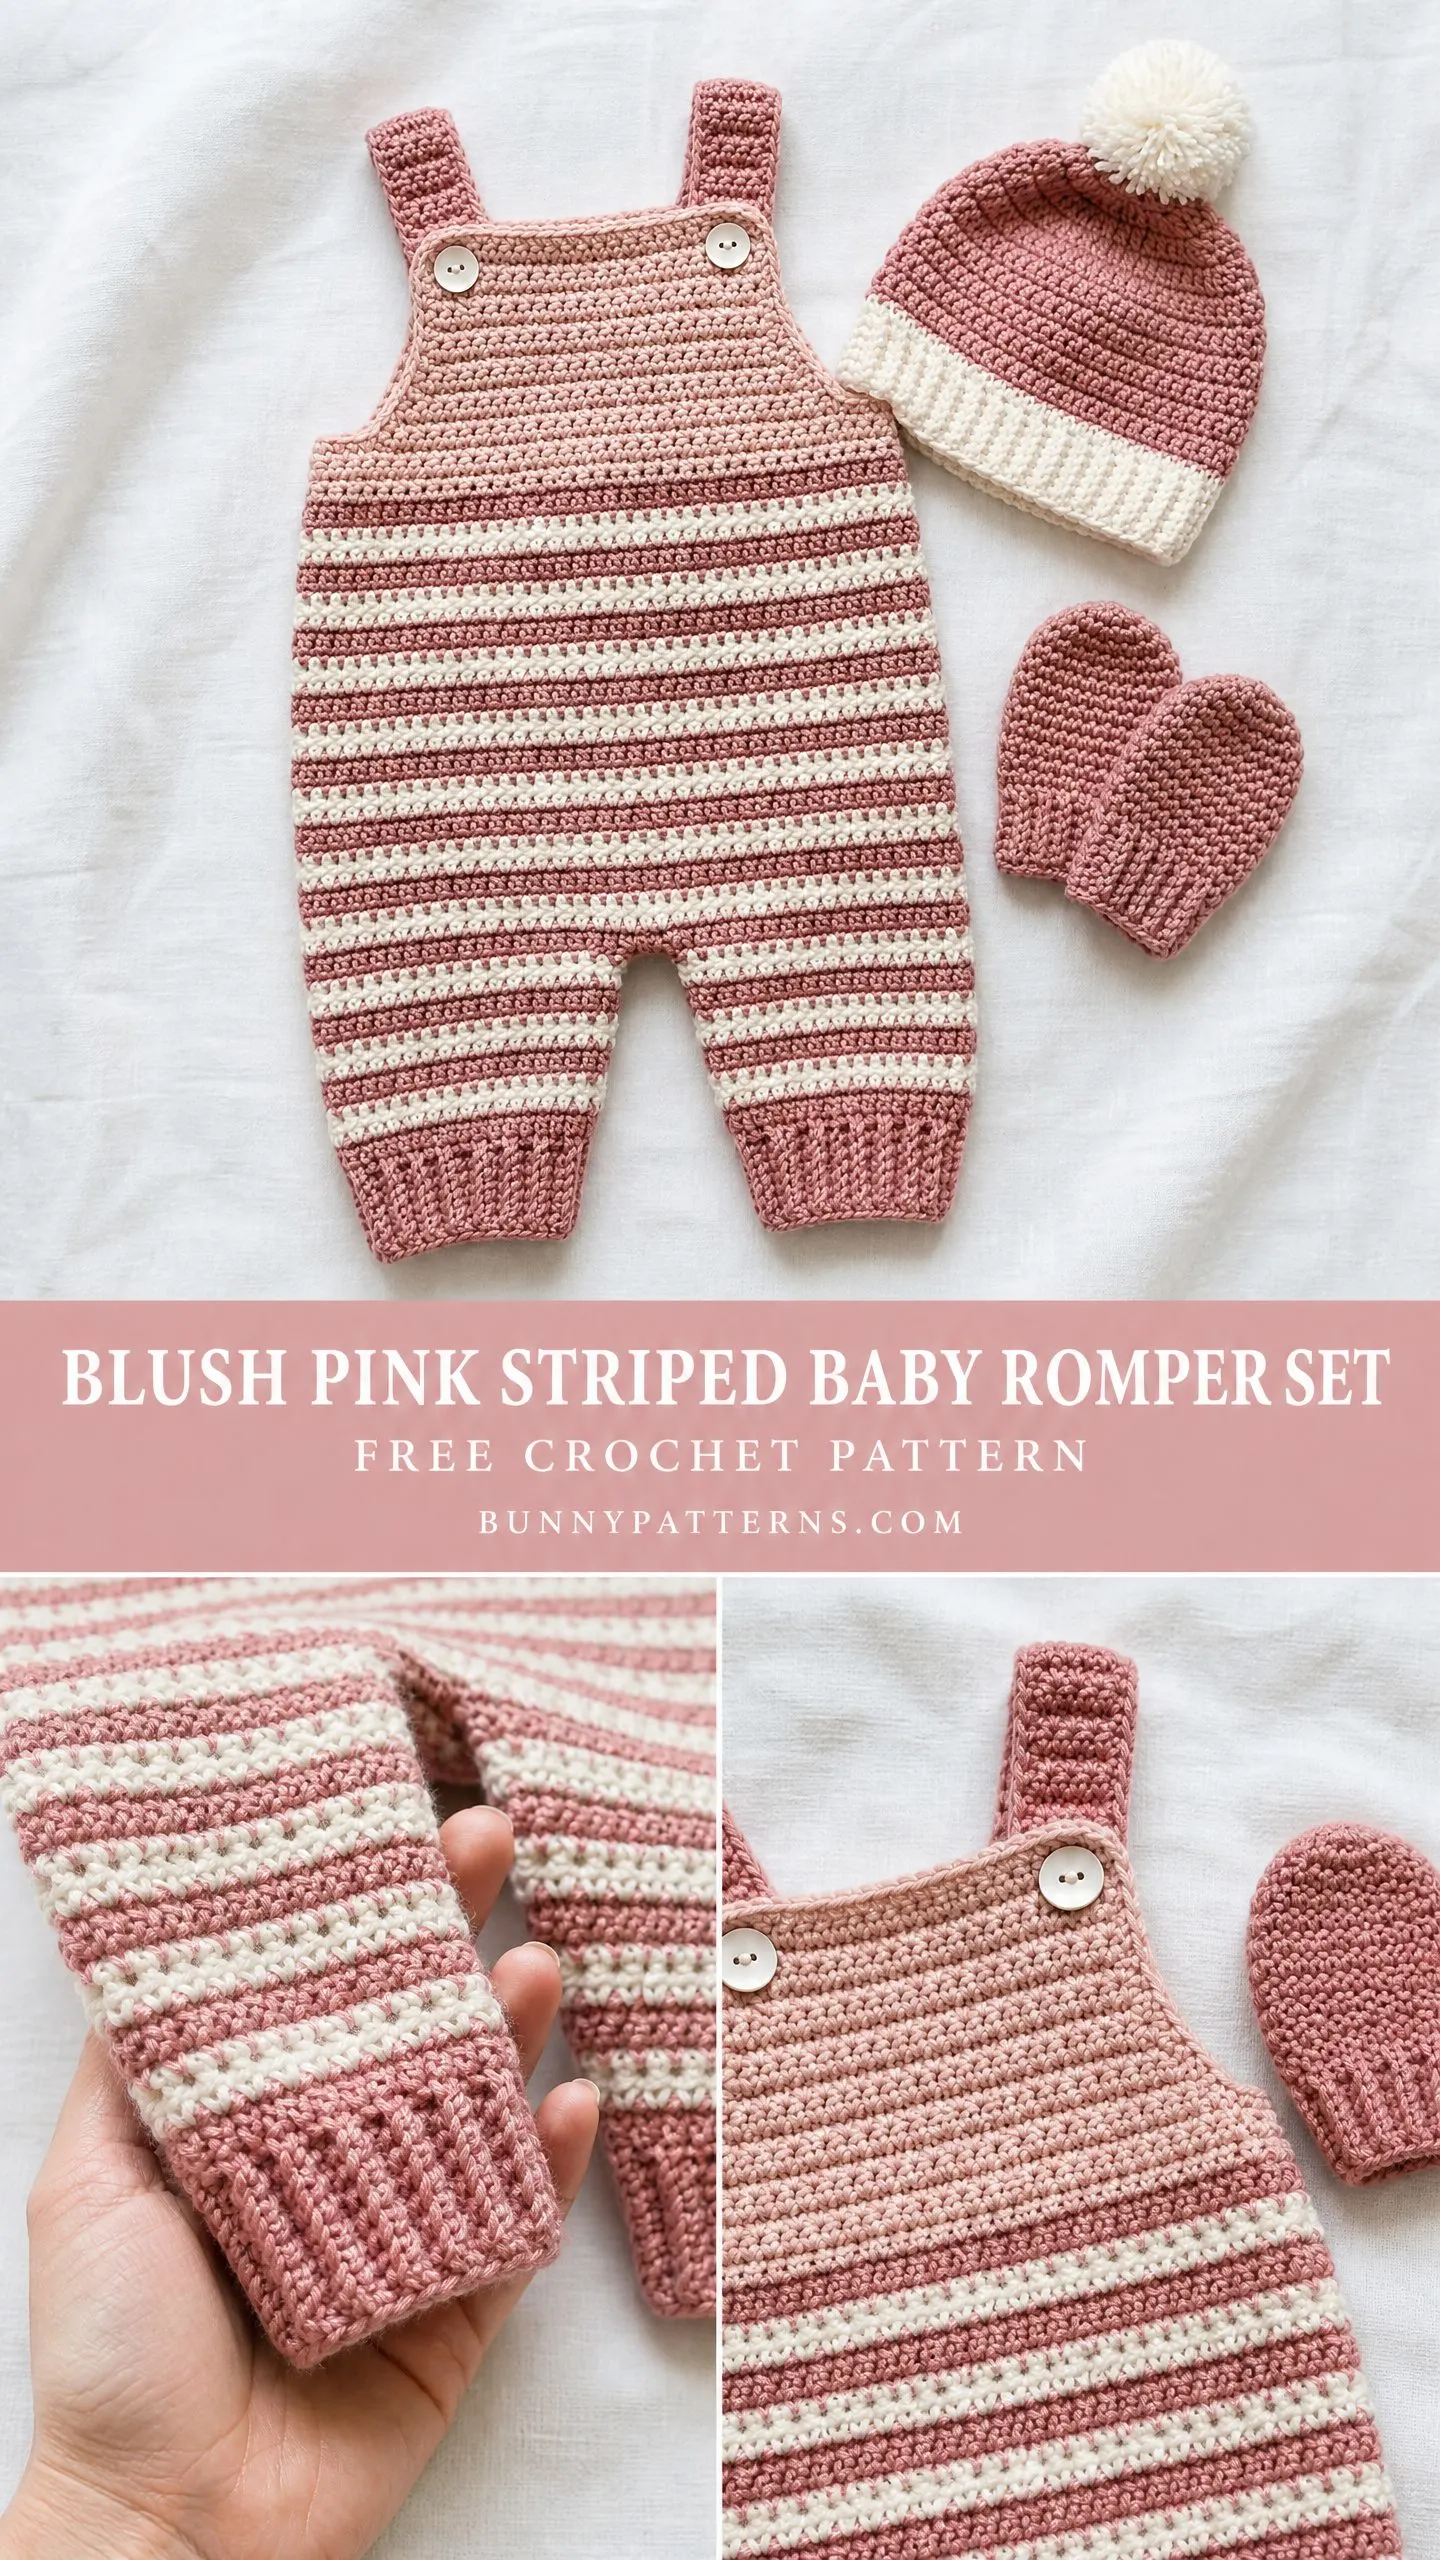
Looking for the perfect handmade gift for a new baby? This adorable three piece set has you covered. The blush pink striped baby romper set includes everything a little one needs to stay cozy: a classic overall style romper with crossed straps, a pompom topped beanie, and the sweetest pair of thumbless mittens.
This crochet pattern uses simple single crochet stitches throughout, making it accessible even if you have not tackled baby garments before. The construction is straightforward once you understand the flow. You will work the legs separately, join them at the crotch, then continue up the body in the round before shaping the bib.
The finished set fits newborns from zero to three months and works up in approximately 13 to 19 hours total. It makes a thoughtful shower gift, a treasured keepsake for your own little one, or a meaningful charity donation to hospital NICUs. The soft cotton yarn is gentle on delicate skin and easy to wash, which new parents will absolutely appreciate.
Why You Will Love This Crochet Pattern
The beauty of this baby romper set lies in its classic design. The alternating dusty rose and cream stripes create visual interest without complicated colorwork. You simply change colors every two rounds. The crossed shoulder straps with button closures give it that timeless overall look that photographs beautifully and stays put on wiggly babies.
I especially love that all three pieces coordinate perfectly. The hat features a cream ribbed brim that echoes the stripe pattern, topped with a fluffy cream pompom. The mittens are solid dusty rose with ribbed cuffs that match the romper leg cuffs. Together, the set looks polished and intentional.
The skill level is intermediate, but do not let that intimidate you. If you can work single crochet confidently, change colors, and follow row by row instructions, you can absolutely make this set. The shaping is gentle and the pattern walks you through every step.
Materials You Will Need
Gather these supplies before you begin:
Yarn:
Hook:
Notions:
Yarn Suggestions
Lion Brand 24/7 Cotton in Rose and Ecru works beautifully for this project. It is smooth, holds stitch definition well, and is machine washable.
Paintbox Yarns Cotton DK in Blush Pink and Paper White is another excellent choice. Use a 4.25 mm hook and check your gauge carefully since this yarn runs slightly thinner.
We Are Knitters The Cotton in Rose and Natural produces a lovely soft drape with a slightly loftier feel.
Choose any smooth worsted weight yarn that meets the gauge requirements. Avoid fuzzy or hairy yarns since they obscure stitch definition and make counting difficult. For baby items, machine washable yarns are essential for practicality.
Gauge
18 sc x 20 rows = 4 inches / 10 cm worked flat in single crochet with a 4.0 mm hook after blocking.
Gauge matters here because this is a fitted garment. If your gauge is off, the romper may not fit properly. Always work a gauge swatch before starting. If you get more stitches per inch, try a larger hook. Fewer stitches per inch means you need a smaller hook.
Finished Measurements
Romper (fits 0-3 months):
Hat (fits newborn to 3 months):
Mittens:
Abbreviations and Stitch Definitions
Let me walk you through every abbreviation used in this pattern. Even if you know these stitches, read through the definitions so we are speaking the same language.
Special Stitches
Invisible Decrease (dec): Insert hook into front loop only of next stitch, then insert hook into front loop only of the following stitch. Yarn over and draw through both loops on hook. Yarn over and draw through remaining 2 loops. One stitch decreased. This method creates a nearly invisible decrease that looks much neater than the standard sc2tog.
Ribbing Row: Ch 1, sc in blo of each stitch across or around. When repeated over several rows, this creates a stretchy ribbed texture perfect for cuffs and brims.
Crochet Pattern Instructions
Romper: Leg One
You will make two identical leg pieces first, then join them at the crotch.
Foundation: With Yarn A, ch 25. Join with sl st to form a ring, being careful not to twist.
Ribbed Cuff (Yarn A only):
Rnd 1: Ch 1, sc in each ch around. (25 sc)
Rnd 2: Ch 1, sc in blo of each sc around. (25 sc)
Rnd 3: Ch 1, sc in blo of each sc around. (25 sc)
Rnd 4: Ch 1, sc in blo of each sc around. (25 sc)
Rnd 5: Ch 1, sc in blo of each sc around. (25 sc)
After 5 ribbing rounds, cuff measures approximately 1 inch.
Leg Body (stripe sequence begins):
Change to Yarn B at end of Rnd 5.
Rnd 6: With Yarn B, ch 1, sc in each st around. (25 sc)
Rnd 7: With Yarn B, ch 1, sc in each st around. (25 sc)
Change to Yarn A.
Rnd 8: With Yarn A, ch 1, sc in each st around. (25 sc)
Rnd 9: With Yarn A, ch 1, sc in each st around. (25 sc)
Continue alternating 2 rounds Yarn B, 2 rounds Yarn A:
Rnds 10-11: Yarn B. (25 sc each round)
Rnds 12-13: Yarn A. (25 sc each round)
Rnds 14-15: Yarn B. (25 sc each round)
Rnds 16-17: Yarn A. (25 sc each round)
Rnds 18-19: Yarn B. (25 sc each round)
Rnds 20-21: Yarn A. (25 sc each round)
Rnds 22-23: Yarn B. (25 sc each round)
Rnds 24-25: Yarn A. (25 sc each round)
Fasten off but do not cut yarn. Leave a 12 inch tail for seaming.
Checkpoint: Each leg should measure approximately 6 inches total from bottom of cuff to top of leg opening.
Romper: Leg Two
Work exactly the same as Leg One. Do not fasten off this time.
Joining the Legs
With Leg Two still on your hook, place Leg One next to it with right sides both facing outward.
Set Up: On Leg Two, sc across 25 stitches. Ch 2 (this forms the crotch bridge). Insert hook into any stitch at the top of Leg One and sc across all 25 stitches of Leg One. Ch 2. Join to first sc of Leg Two with sl st to form a round.
You now have 25 sts + 2 ch + 25 sts + 2 ch in the round. Total: 54 stitches (treating each ch as 1 st).
Romper Body
Continue working in the round, maintaining the 2 round stripe sequence.
Rnds 2-15: Sc in each of 54 sts around. (54 sc each round)
Body rounds represent approximately 7 inches from the crotch to the top.
Checkpoint: After completing body rounds, the piece from crotch join to top should measure approximately 7 inches.
Dividing for Front Bib and Back
The front 27 stitches form the front bib. The back 27 stitches form the back body. Place a stitch marker and count carefully.
Front Bib (worked flat, Yarn A only)
Fasten off working yarn. Reattach Yarn A to first stitch of the front 27 stitches.
Row 1 (RS): Ch 1, sc in each of 27 sts. Turn. (27 sc)
Row 2 (WS): Ch 1, sc in each of 27 sts. Turn. (27 sc)
Row 3 (RS): Ch 1, dec, sc to last 2 sts, dec. Turn. (25 sc)
Row 4 (WS): Ch 1, sc in each of 25 sts. Turn. (25 sc)
Row 5 (RS): Ch 1, dec, sc to last 2 sts, dec. Turn. (23 sc)
Row 6 (WS): Ch 1, sc in each of 23 sts. Turn. (23 sc)
Rows 7-10: Ch 1, sc in each of 23 sts. Turn. (23 sc each row)
Button placement row:
Row 11 (RS): Ch 1, sc 3, ch 2, sk 2, sc 13, ch 2, sk 2, sc 3. Turn. (19 sc + 2 ch-2 spaces)
Row 12 (WS): Ch 1, sc 3, 2 sc in ch-2 sp, sc 13, 2 sc in ch-2 sp, sc 3. Turn. (23 sc)
Fasten off and weave in ends.
Back Body (worked flat)
Reattach yarn to first of the back 27 stitches.
Row 1 (RS): Ch 1, sc in each of 27 sts. Turn. (27 sc)
Row 2 (WS): Ch 1, sc in each of 27 sts. Turn. (27 sc)
Row 3 (RS): Ch 1, dec, sc to last 2 sts, dec. Turn. (25 sc)
Rows 4-6: Ch 1, sc in each of 25 sts. Turn. (25 sc each row)
Fasten off.
Straps (make 2)
With Yarn A, ch 5.
Row 1: Sc in 2nd ch from hook and in each ch across. Turn. (4 sc)
Row 2: Ch 1, sc in each of 4 sts. Turn. (4 sc)
Repeat Row 2 until strap measures 7 inches total length.
Last row (button loop): Ch 1, sc 1, ch 2, sk 2, sc 1.
Fasten off, leaving a 12 inch tail for sewing.
Pompom Beanie Instructions
The hat is worked in the round from the brim upward.
Foundation with Yarn B: Ch 58. Join with sl st to first ch, being careful not to twist.
Rnd 1: Ch 1, sc in each ch around. (58 sc)
Ribbed Brim (Yarn B):
Rnds 2-8: Ch 1, sc in blo of each sc around. Join. (58 sc each round)
Change to Yarn A.
Hat Body:
Rnds 9-18: With Yarn A, ch 1, sc in each st around. (58 sc each round)
Crown Decreases (Yarn A):
Rnd 19: (Sc 7, dec) 6 times, sc 4. (52 sc)
Rnd 20: (Sc 6, dec) 6 times, sc 4. (46 sc)
Rnd 21: (Sc 5, dec) 6 times, sc 4. (40 sc)
Rnd 22: (Sc 4, dec) 6 times, sc 4. (34 sc)
Rnd 23: (Sc 3, dec) 6 times, sc 4. (28 sc)
Rnd 24: (Sc 2, dec) 7 times. (21 sc)
Rnd 25: (Sc 1, dec) 7 times. (14 sc)
Rnd 26: (Dec) 7 times. (7 sc)
Fasten off, leaving a 10 inch tail. Thread tail through yarn needle, insert through each remaining 7 stitches, pull snug, and secure.
Make pompom with Yarn B, approximately 2 inches in diameter. Attach securely to hat crown.
Thumbless Mittens (make 2)
With Yarn A, ch 17. Join with sl st to first ch, being careful not to twist.
Ribbed Cuff:
Rnd 1: Ch 1, sc in each ch around. (17 sc)
Rnds 2-5: Ch 1, sc in blo of each st around. (17 sc each round)
Mitten Body:
Rnds 6-12: Yarn A, sc in each st around. (17 sc each round)
Mitten Top Shaping:
Rnd 13: (Sc 1, dec) 5 times, sc 2. (12 sc)
Rnd 14: (Dec) 6 times. (6 sc)
Fasten off, leaving an 8 inch tail. Thread through remaining 6 stitches, pull snug, and secure.
Finishing Your Baby Romper Set
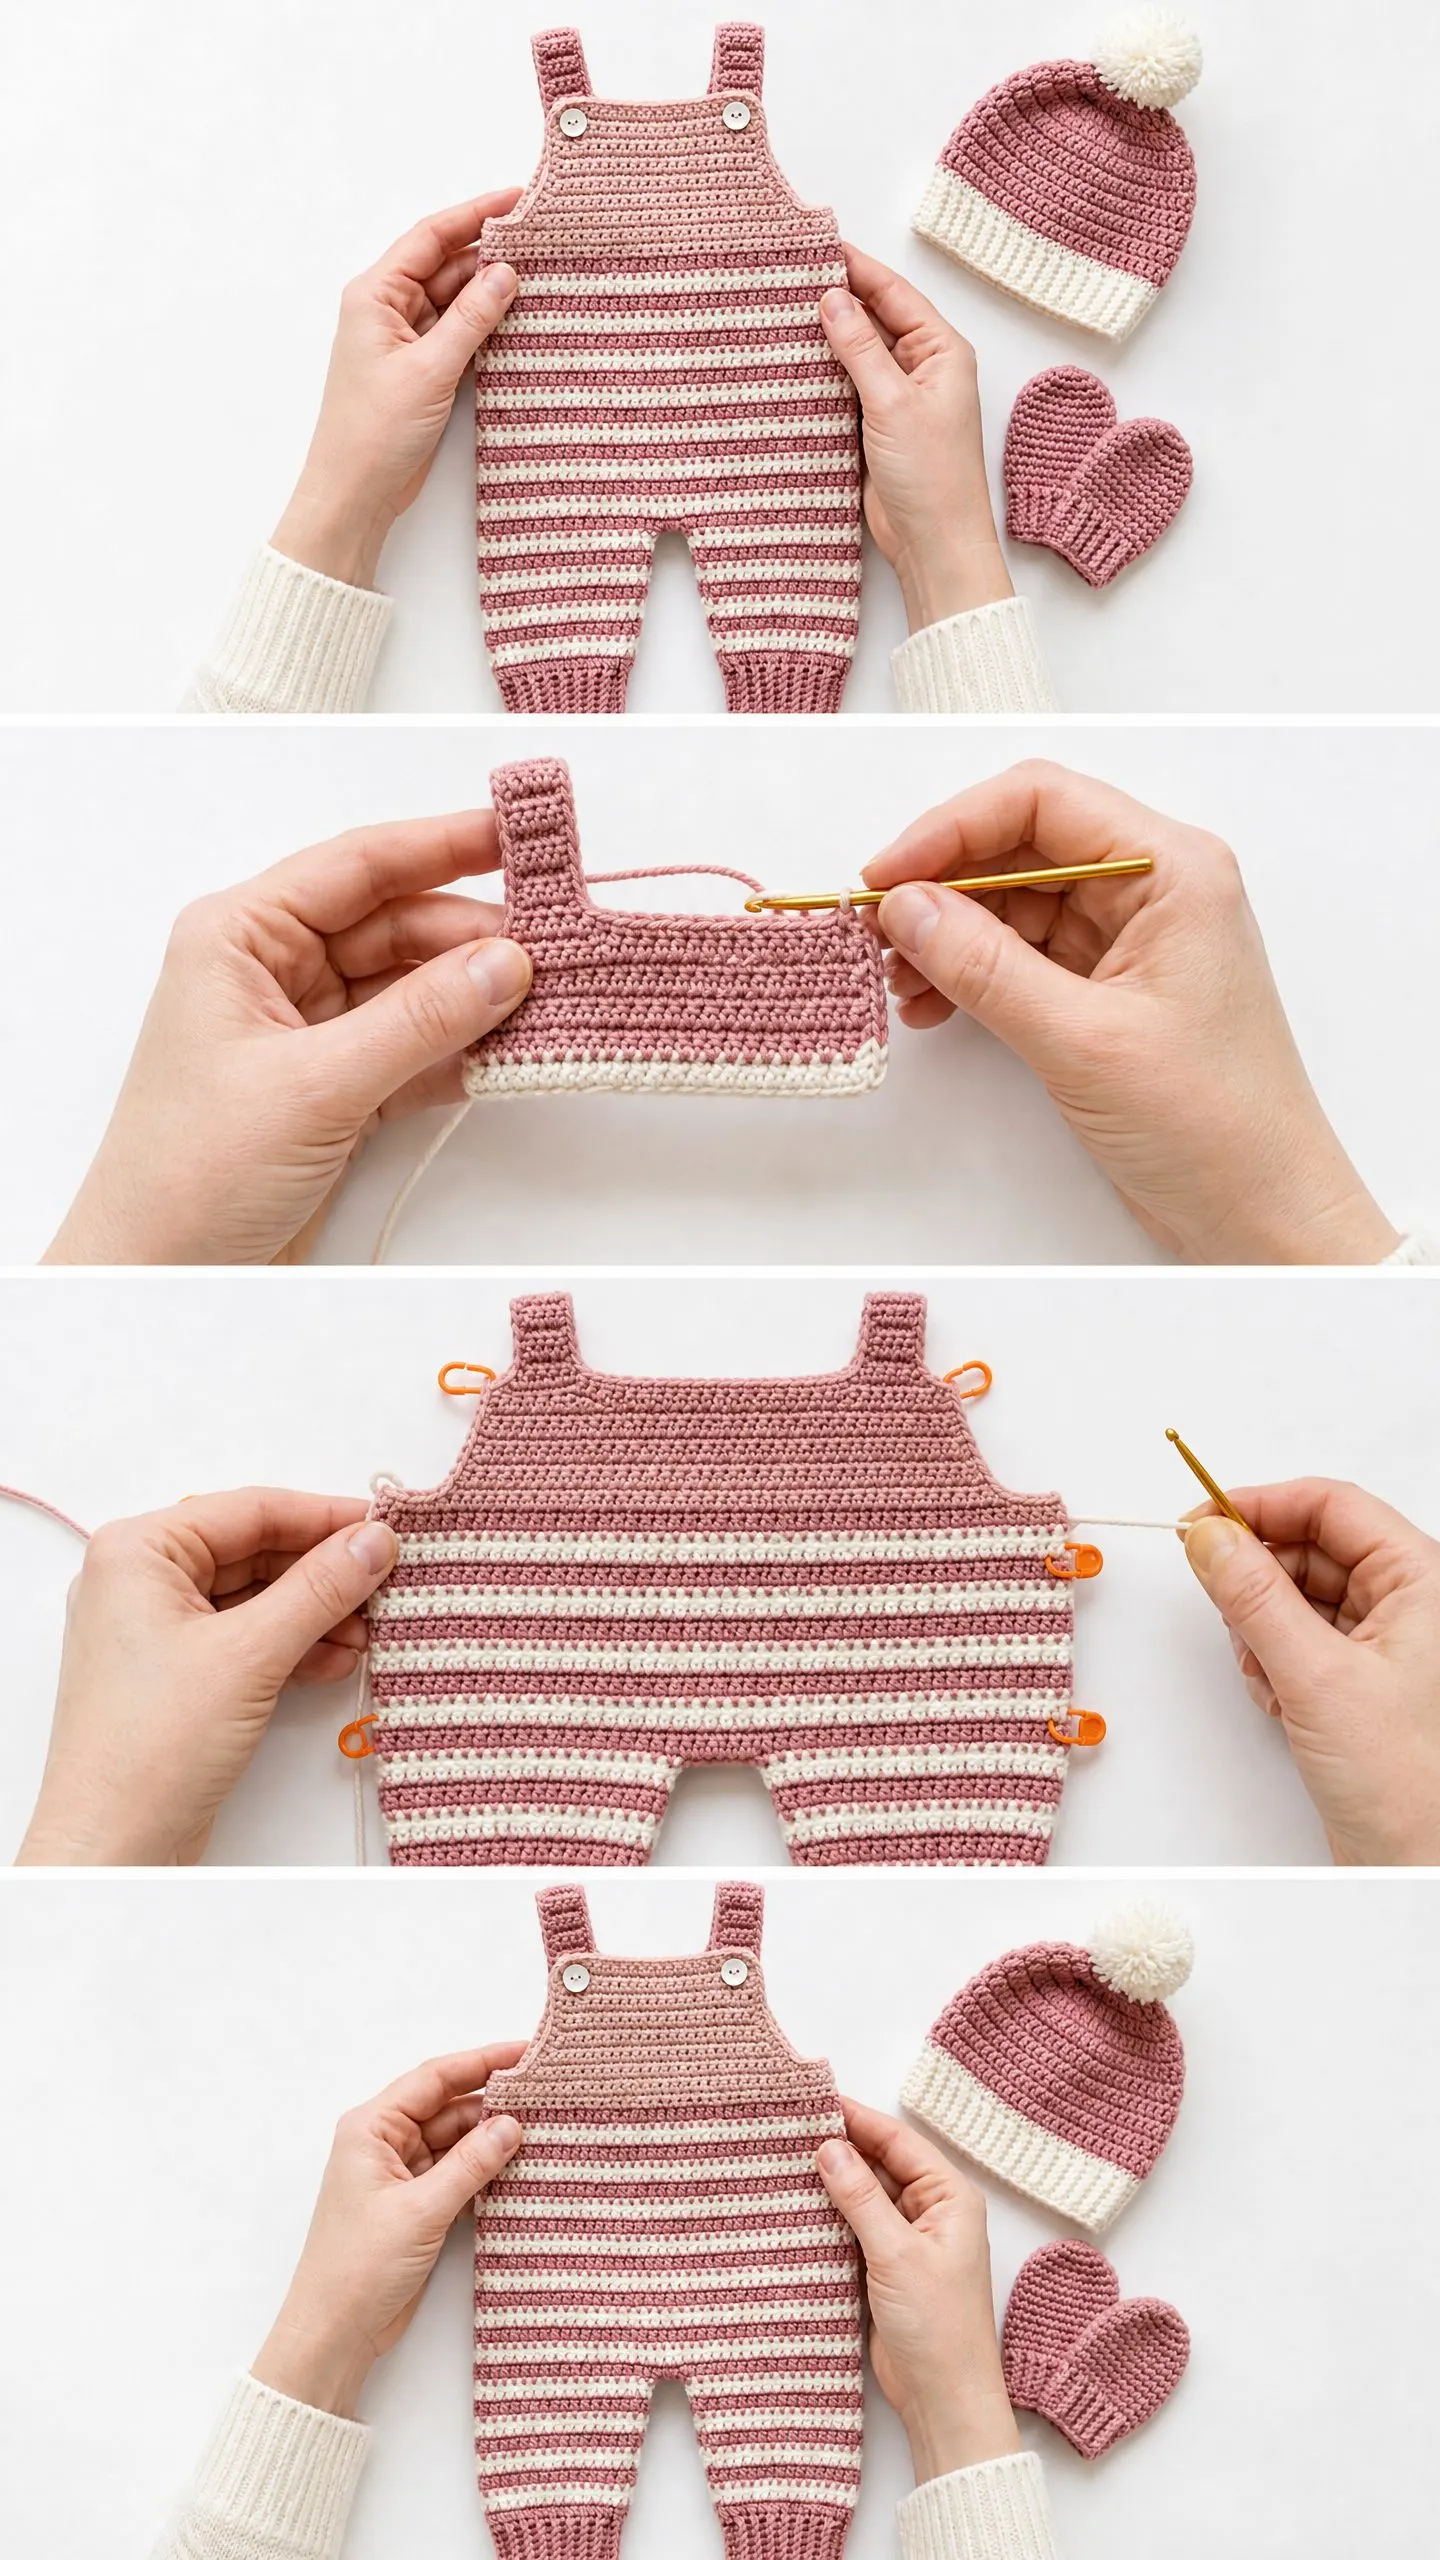
Seaming the Legs: Using your yarn needle and Yarn A, mattress stitch the inseam of each leg closed from cuff to crotch.
Strap Attachment: Sew the non loop end of each strap to the top back corners of the back body. The straps cross over the shoulders.
Button Sewing: Sew 2 buttons to the right side of the front bib top corners, positioned to align with the button loops.
Weave in All Ends: Thread all yarn tails through several stitches on the wrong side in different directions.
Blocking: Wet block all pieces by soaking in cool water, gently pressing out excess water, and laying flat to dry. Pin to finished measurements. This evens out stitches and helps the ribbing relax.
Size Customization Tips
For 3-6 months: Add 4 rounds to each leg, increase the starting chain by 3 stitches (ch 28), add 4 rounds to the body, and add 4 stitches to the hat foundation chain.
For newborn: Reduce leg rounds by 2, reduce leg circumference by 2 stitches (ch 23), and reduce body by 2 rounds.
Care Instructions
Machine wash gentle cycle in cold water. Lay flat to dry. Do not wring or tumble dry. Store folded in a dry location away from direct sunlight.
I hope you enjoy making this sweet baby romper set as much as I enjoyed designing it. If you found this crochet pattern helpful, save it to your Pinterest boards so you can find it easily when you are ready to start. And please leave a comment below if you make this set. I would absolutely love to see your finished projects and hear which color combinations you chose!
You Might Also Like
- Dusty Rose Belted Crochet Romper Free Crochet Pattern
- Sunflower Granny Square Mustard Tote Free Crochet Pattern
- Sage Green Froggy Toilet Paper Cozy Free Crochet Pattern
- Sage Green Boho Crochet Backpack Free Pattern