
I’ve been looking for a headscarf pattern that feels like wearing a summer garden, and this one is hands down my favourite find. The combination of delicate ivory blossoms, trailing green vines, and those adorable raised strawberries creates something truly special. If you love cottage-inspired accessories with a romantic feel, this Strawberry Blossom Headscarf is the pattern I’d recommend every single time.
Get the Ad-Free PDF Pattern
You can find the free pattern below, or you can purchase the ad-free printable PDF from my shop.
Get the Printable PDF →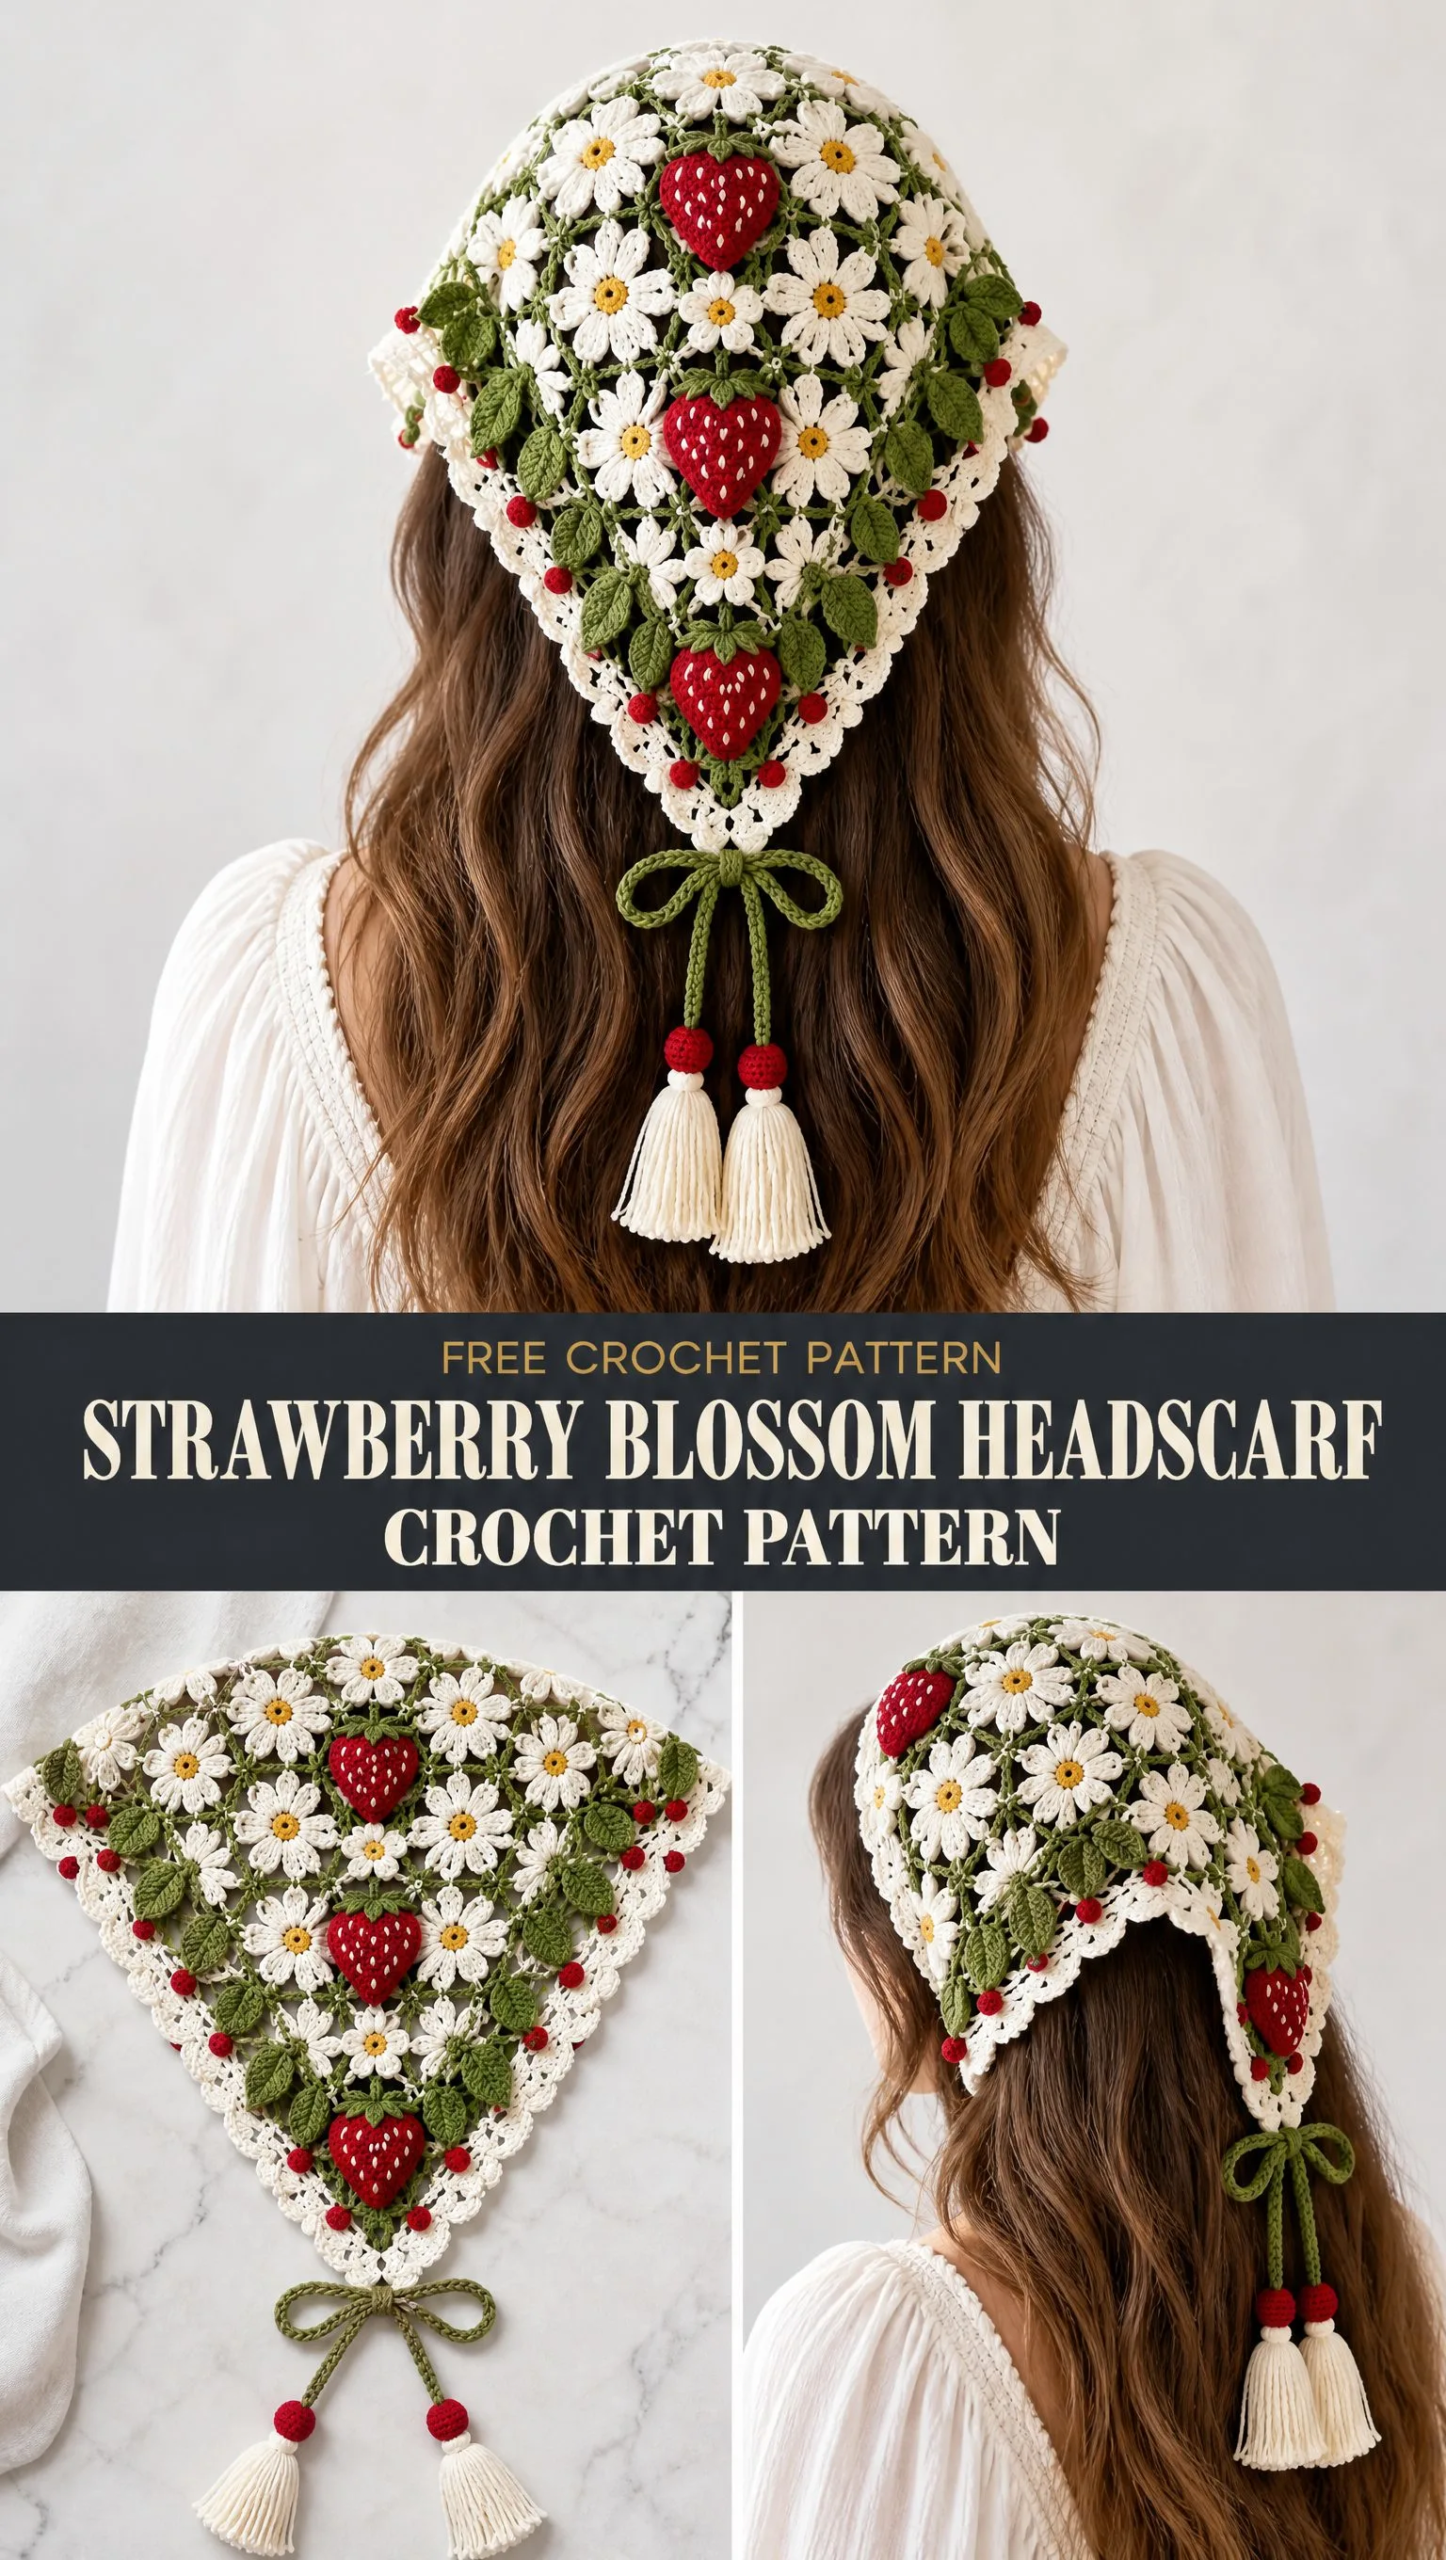
This triangular headscarf drapes beautifully over the crown of your head and narrows to a point at the back. The green tie cords finish in the sweetest ivory tassels with red bead caps. It’s the kind of piece that looks incredibly intricate but comes together through simple, manageable steps.
Whether you’re making this for yourself or as a gift for someone who adores all things floral and whimsical, you’re going to love the process. Let me walk you through everything you need to know to create your own.
About This Pattern
This crochet pattern creates a garden-style triangular headscarf featuring joined five-petal blossom motifs in ivory, green vine details worked in surface crochet, three raised strawberry appliques down the center, a beautiful scalloped edge, and tassel finishes on the tie cords.
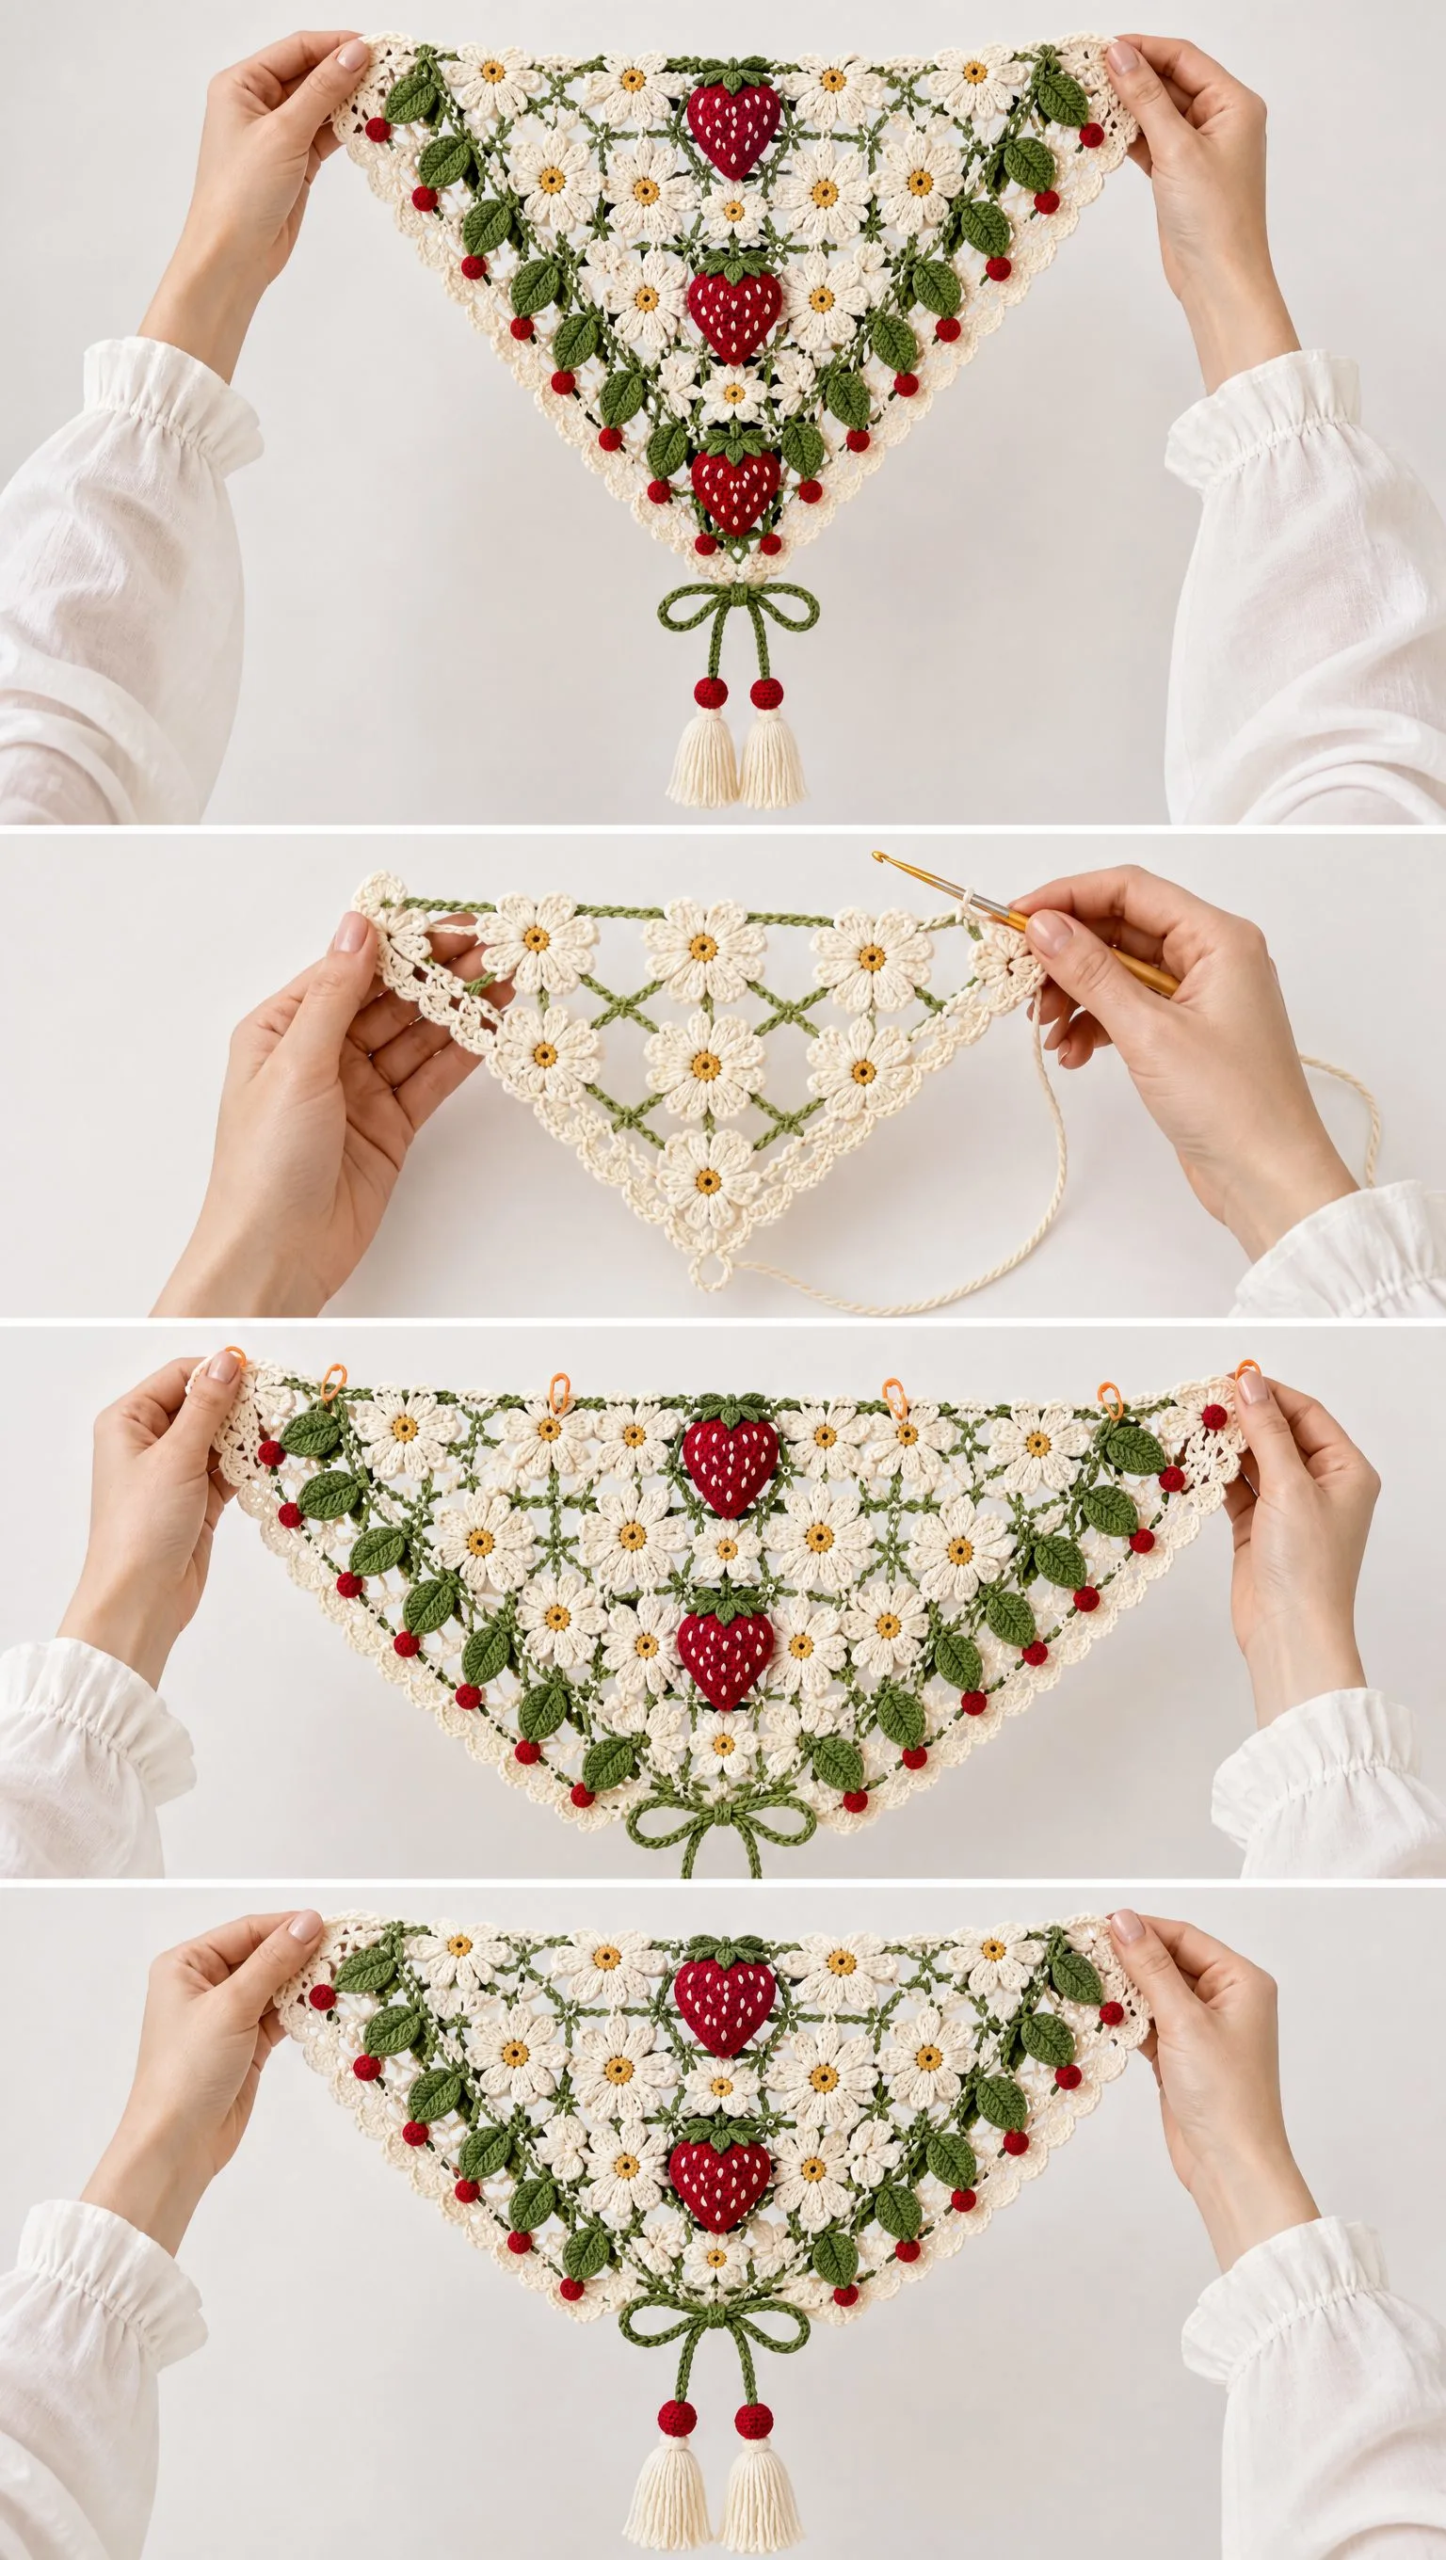
The construction method is really interesting. Instead of working the entire piece in rows, you’ll create individual flower motifs and then join them together in a triangular arrangement. This modular approach makes the project portable and gives you that gorgeous lacy, open look.
Skill Level: Intermediate. You’ll be using basic crochet stitches combined with joined motifs, appliques, surface crochet, and decorative finishing techniques. If you’ve made granny squares and joined them before, you already have most of the skills you need.
Finished Measurements
The completed headscarf measures approximately:
These measurements give you a scarf that sits comfortably on the crown and provides nice coverage without being too bulky.
Materials You’ll Need
Before you begin, gather these supplies:
Yarn:
Tools:
Cotton yarn works beautifully for this project because it holds the motif shapes crisply and has a lovely matte finish that shows off the stitch definition. The fine weight keeps everything delicate and wearable.
Gauge
Before diving into the full project, create a small blossom motif sample. Your fabric should be open and airy while keeping the motifs firm enough to hold the triangular shape. If your motifs feel too stiff, go up a hook size. If they’re floppy and don’t hold their shape, go down a hook size.
Stitch Abbreviations
Let me explain each abbreviation you’ll encounter:
Part 1: Crown Base
The crown is constructed from joined five-petal blossom motifs. This is the foundation of your entire headscarf, so take your time with these flowers.
Five-Petal Blossom Motif
Step 1: Make a magic ring. If you’re not familiar with this technique, it’s simply an adjustable loop that you work your first stitches into. It allows you to pull the center closed tightly.
Step 2 (Round 1): Chain 1, then work 10 single crochet stitches into the ring. Join with a slip stitch to the first sc. You should have 10 stitches around your ring.
Step 3 (Round 2): Chain 2, then make five petal spaces around the circle using groups of double crochet stitches separated by chain spaces. This creates the framework for your petals.
Step 4 (Round 3): In each petal space, work the following:
Repeat around to form five rounded petals. Each petal should have a nice, curved shape with the three dc stitches creating the fullest part.
Step 5: Add a small yellow center by working surface stitches or embroidery stitches into the middle of your flower. This little pop of yellow brings the blossom to life.
How Many Motifs Do You Need?
Make enough motifs to create a triangular arrangement:
The exact number will depend on your gauge and desired size, but plan for approximately 15 motifs total.
Joining the Motifs
Join your motifs using invisible mattress-style crochet joins or slip stitch joins through matching loops. Either method works well. The goal is a secure join that doesn’t create bulk or disrupt the lacy look of your flowers.
When arranging your motifs, lay them out in the triangular shape first before joining. This helps you visualize the final piece and ensures your flowers are oriented the way you want them.
Part 2: Green Chain Connections
Using your leaf green yarn, you’ll now create the vine-like connections that give this piece its garden feel.
Step 1: Attach yarn between blossom motifs.
Step 2: Crochet chains following the open spaces between motifs. Let the chains flow naturally in the gaps.
Step 3: Add small connecting slip stitches at motif edges to secure the chains.
Step 4: Keep joins flexible so the scarf drapes naturally. You don’t want the connections too tight, or your headscarf will feel stiff.
These green chains create a lovely network of vines throughout the lacy flower fabric.
Part 3: Strawberry Appliques
Make 3 raised strawberries. These are worked separately and then sewn onto the center line of your scarf.
Strawberry Body
Step 1: Start with red yarn and a magic ring.
Step 2 (Round 1): Work 6 sc into ring. (6 sts)
Step 3 (Round 2): Increase around. Work 2 sc in each stitch. (12 sts)
Step 4: Continue increasing until a rounded berry shape forms. You’re essentially making a small amigurumi-style shape.
Step 5: Decrease gradually to create the pointed bottom that gives strawberries their characteristic shape.
Step 6: Add cream seed stitches randomly across the berry surface. Small French knots or straight stitches work beautifully for this.
Green Calyx
The calyx is the leafy top of the strawberry.
Step 1: Attach green yarn at the strawberry top.
Step 2: Crochet 5 small pointed leaf shapes:
Step 3: Secure neatly and weave in the end.
Once all three strawberries are complete, sew them down the center line of the scarf, spacing them evenly from near the top to near the point.
Part 4: Vine and Leaf Border
Along both diagonal edges of your triangle, you’ll add a decorative vine with leaves.
Step 1: Attach green yarn.
Step 2: Crochet a chain vine following the edge.
Step 3: Add pointed leaves every few stitches.
Individual Leaf Instructions
For each leaf:
The vine and leaf border frames your blossom motifs beautifully and adds to the botanical garden aesthetic.
Part 5: Ivory Scalloped Edge
Using ivory yarn, you’ll add a feminine scalloped edge around the entire triangle.
Step 1: Work sc evenly around the triangle edge. Count your stitches to ensure they’re divisible by 4 for the scallop pattern.
Step 2: Create scallops as follows:
Step 3: Add small red crochet bobbles between scallops. These little pops of red tie in with your strawberries and add delightful texture.
Part 6: Back Point and Tie
At the triangle point, you’ll create the tie cords that secure the headscarf.
Step 1: Attach green yarn.
Step 2: Crochet two narrow cords:
Step 3: Tie cords into a bow. When wearing the scarf, these cords hang down at the back and create a sweet finishing touch.
Part 7: Tassel Finish
Make two ivory tassels to complete the look.
Step 1: Wrap ivory yarn around a card approximately 30 times. A credit card or small piece of cardboard works perfectly for this.
Step 2: Tie the top securely with a separate piece of yarn.
Step 3: Cut the bottom loops.
Step 4: Trim evenly to create a neat, uniform tassel.
Step 5: Attach a red crochet bead cap above each tassel. This small detail ties in with the strawberry theme.
Step 6: Attach tassels to the green cords.
Finishing Your Headscarf
Take your time with these final steps. They make a real difference in the polished look of your finished piece.
Care Instructions
Your finished headscarf should be treated gently to preserve all those beautiful dimensional details.
Hand wash gently in cool water. Lay flat to dry on a towel, reshaping as needed. Store folded to protect the raised appliques. Avoid hanging, which can stretch the delicate lacework.
Tips for Success
Take your time with the motifs. The blossom motifs are the foundation of this piece. Getting them consistent makes the joining process much easier.
Lay out before joining. Always arrange your motifs in the triangular shape before you start joining. This lets you adjust placement and orientation.
Don’t skip blocking. Blocking opens up the lacework and makes your stitches look more professional. Cotton responds beautifully to wet blocking.
Keep the connections loose. The green chain connections should be flexible, not tight. This ensures your headscarf drapes nicely instead of bunching up.
Secure the appliques well. The strawberries are the star of this design. Sew them on securely so they don’t wobble or come loose with wear.
Why This Pattern Works
What I love about this Strawberry Blossom Headscarf crochet pattern is how it breaks a complex-looking design into manageable pieces. You’re not trying to create intricate lacework in one overwhelming piece. Instead, you make simple flowers, join them, add charming details, and finish with pretty edging.
Each component is straightforward on its own. The magic happens when you bring everything together.
The modular construction also makes this project wonderfully portable. Toss a few flower motifs in your bag and crochet while waiting at appointments or watching TV. By the time you’re ready to join everything, you’ve already made significant progress without needing to concentrate intensely.
Design Notes
The finished piece combines floral lace, strawberry garden details, and botanical edging for a romantic cottage-inspired crochet accessory. It’s the kind of headscarf that draws compliments and starts conversations.
This design works beautifully for spring and summer events, garden parties, or anytime you want to add a touch of whimsy to your outfit. The ivory base keeps it versatile, while the strawberry and vine details make it memorable.
I hope you love making this pattern as much as I enjoyed sharing it with you. If you create your own Strawberry Blossom Headscarf, I would absolutely love to see it! Tag me on Instagram or share a photo on Facebook.
If this pattern caught your eye, save it to your Pinterest boards so you can find it when you’re ready to start stitching. And please drop a comment below if you make one. I love hearing how your projects turn out and seeing the color combinations you choose!
Want a Quick & Easy Printable Version?
Get a clean, beautifully formatted PDF of this pattern — easy to follow step by step, ready to print or save on any device. No scrolling, no distractions, just the pattern.
Get the Printable PDF →You Might Also Like
- Sage Green Moss Stitch Baby Romper Free Crochet Pattern
- Blush Pink Ruffle Crochet Romantic Top Free Pattern
- Lavender Sunflower Granny Square Baby Blanket Free Pattern
- Autumn Fox Lace Crochet Sweater Free Pattern