
Last summer, my best friend called me in a mild panic. She was six months pregnant, had just finished decorating the nursery in soft sage and cream, and realized she had nothing handmade to bring her baby home in. "Can you make something?" she asked. "Something that looks like it belongs in those aesthetic Instagram photos but won’t fall apart after one wash?"
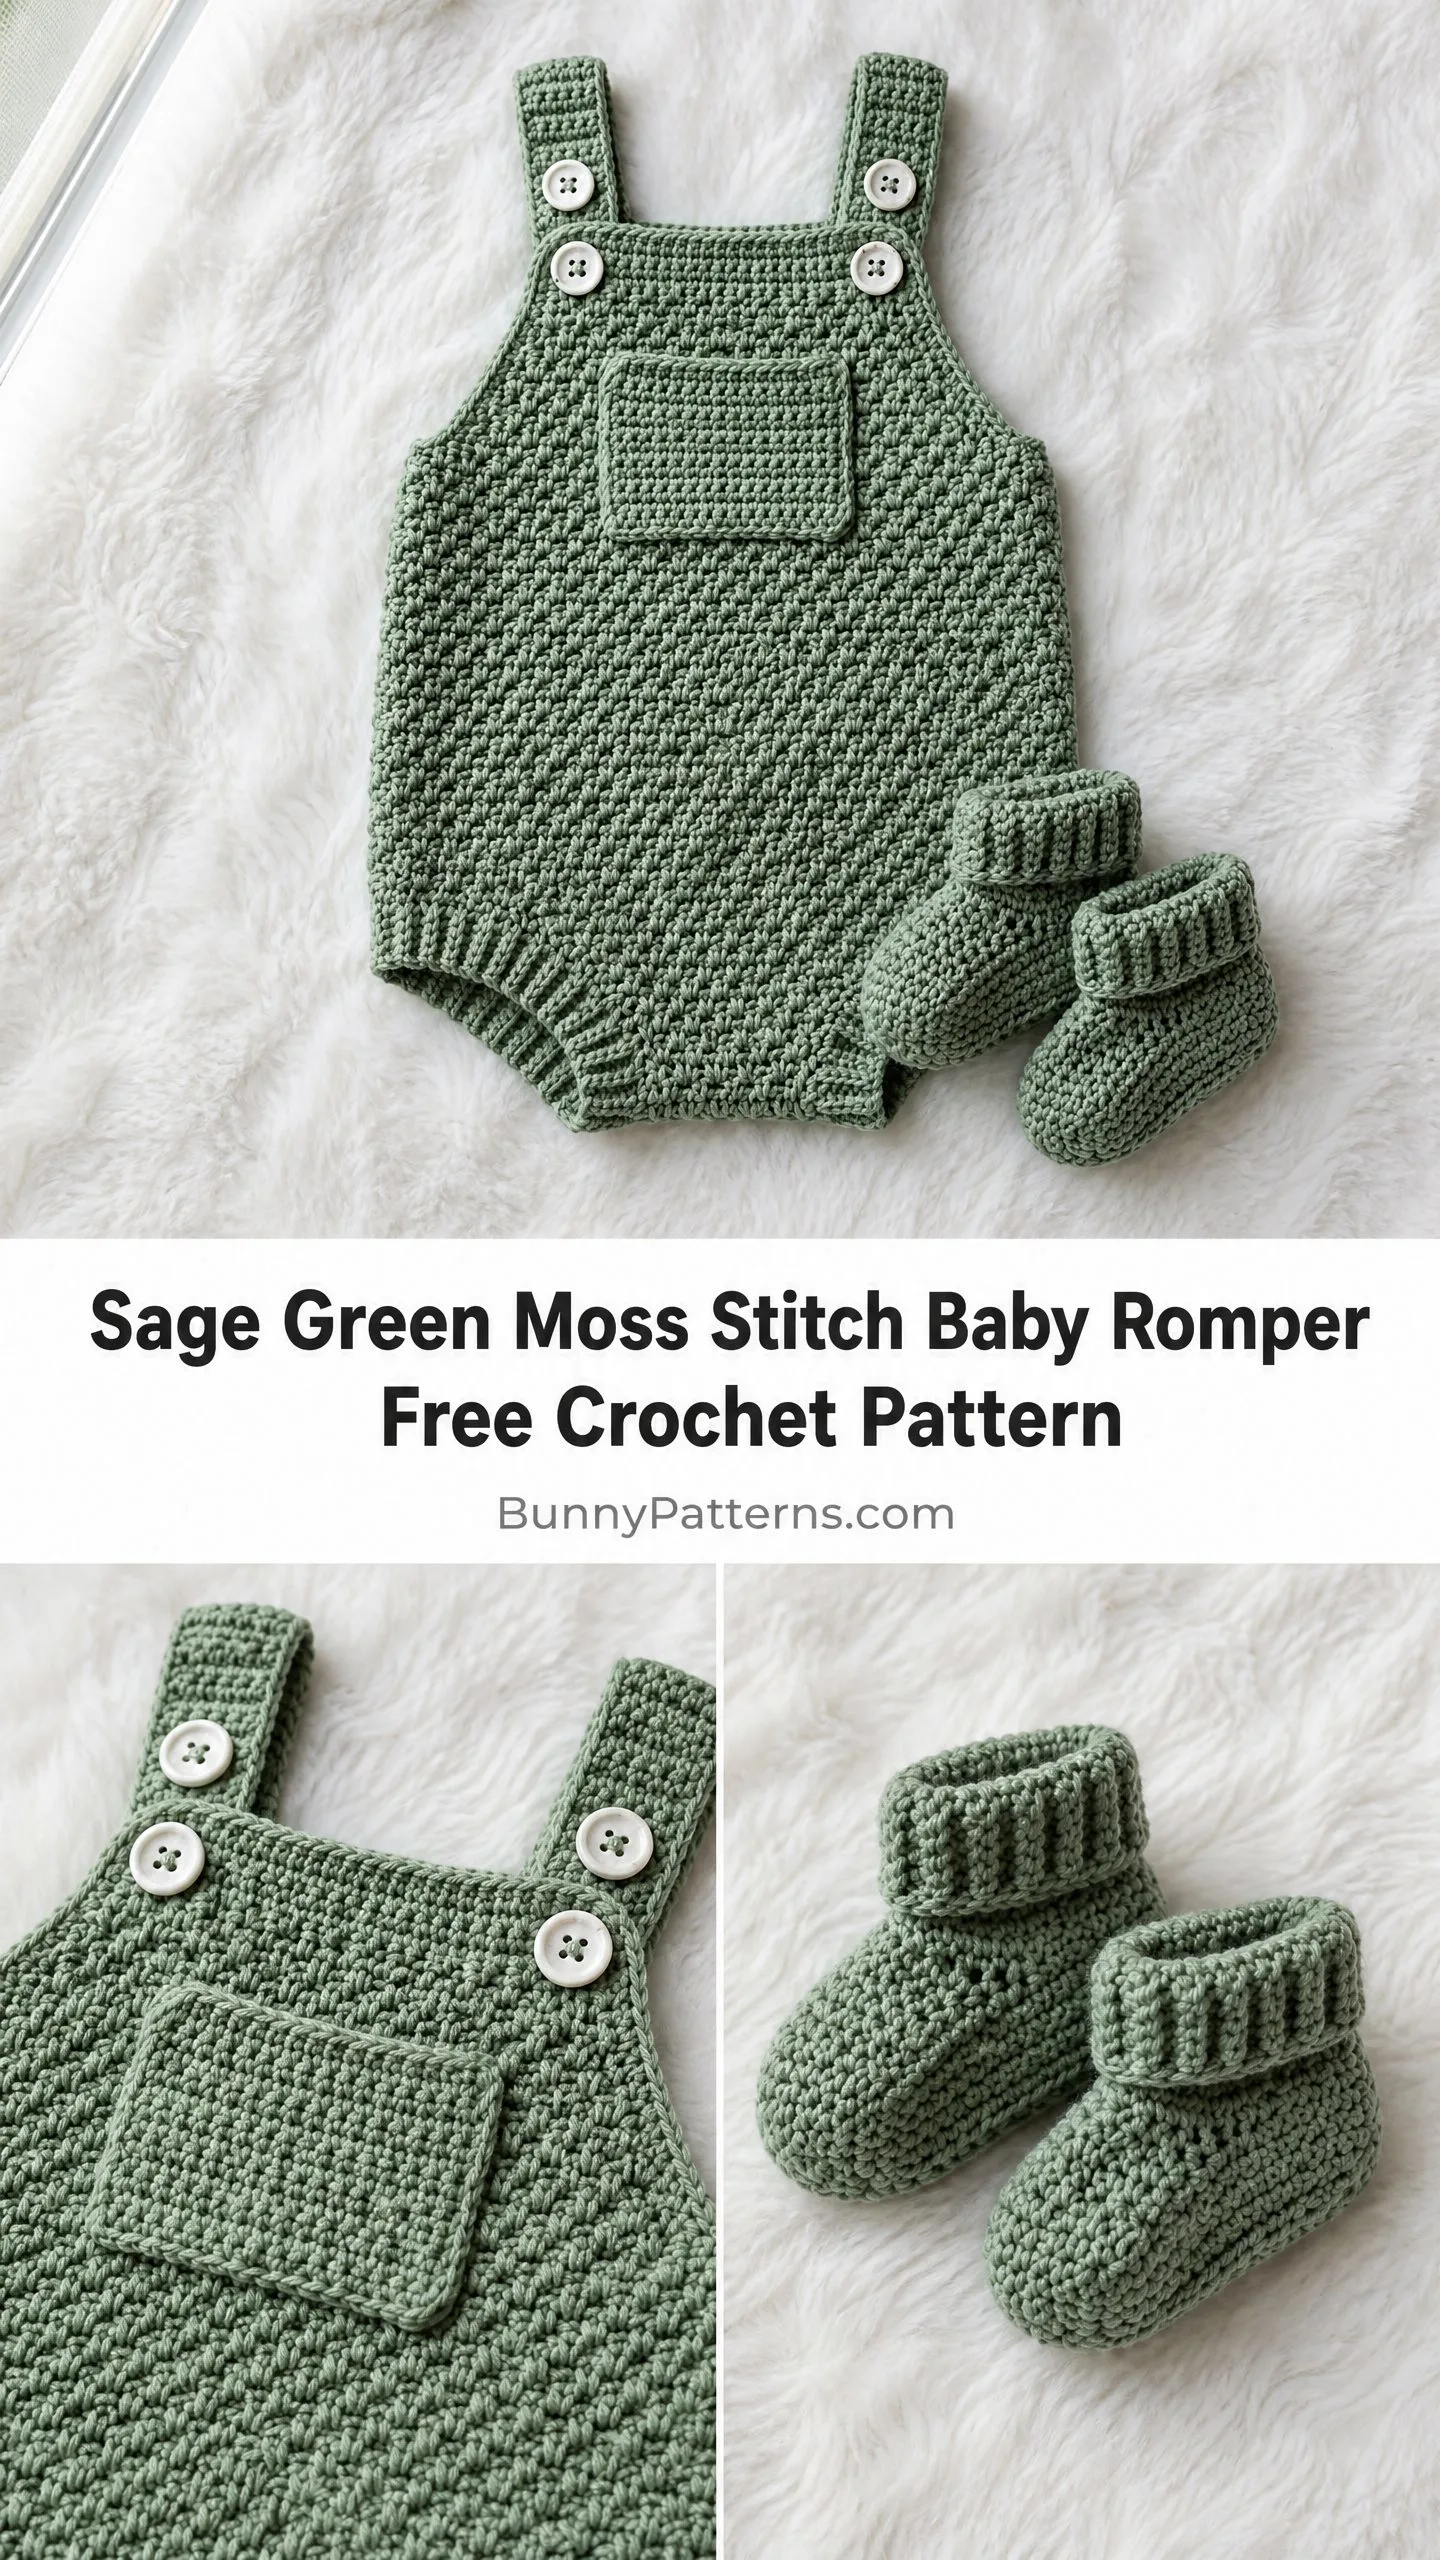
I laughed, grabbed my hook, and got to work. What came out of that frantic weekend of swatching and frogging is this little romper set. It has become one of my favorite baby patterns to gift.
The moss stitch gives it that gorgeous woven texture without being fussy to work. The matching booties take it from cute to heirloom-worthy. And every single time I hand one of these sets to a new parent, they look at me like I just gave them something from a fancy boutique. Trust me, you can absolutely make this.
Why This Baby Romper Pattern Works So Well
This pattern creates a sleeveless overall-style romper with adjustable button shoulder straps, a sweet front chest pocket, and ribbed leg openings that keep everything in place without being tight. The coordinating booties feature the same textured body with a cozy ribbed cuff.
The whole set is worked in moss stitch, which you might also hear called linen stitch or granite stitch. This stitch creates a dense, slightly raised fabric with a woven appearance that photographs beautifully and holds up to washing. The texture comes from alternating single crochet stitches with chain spaces, then offsetting them on the next row.
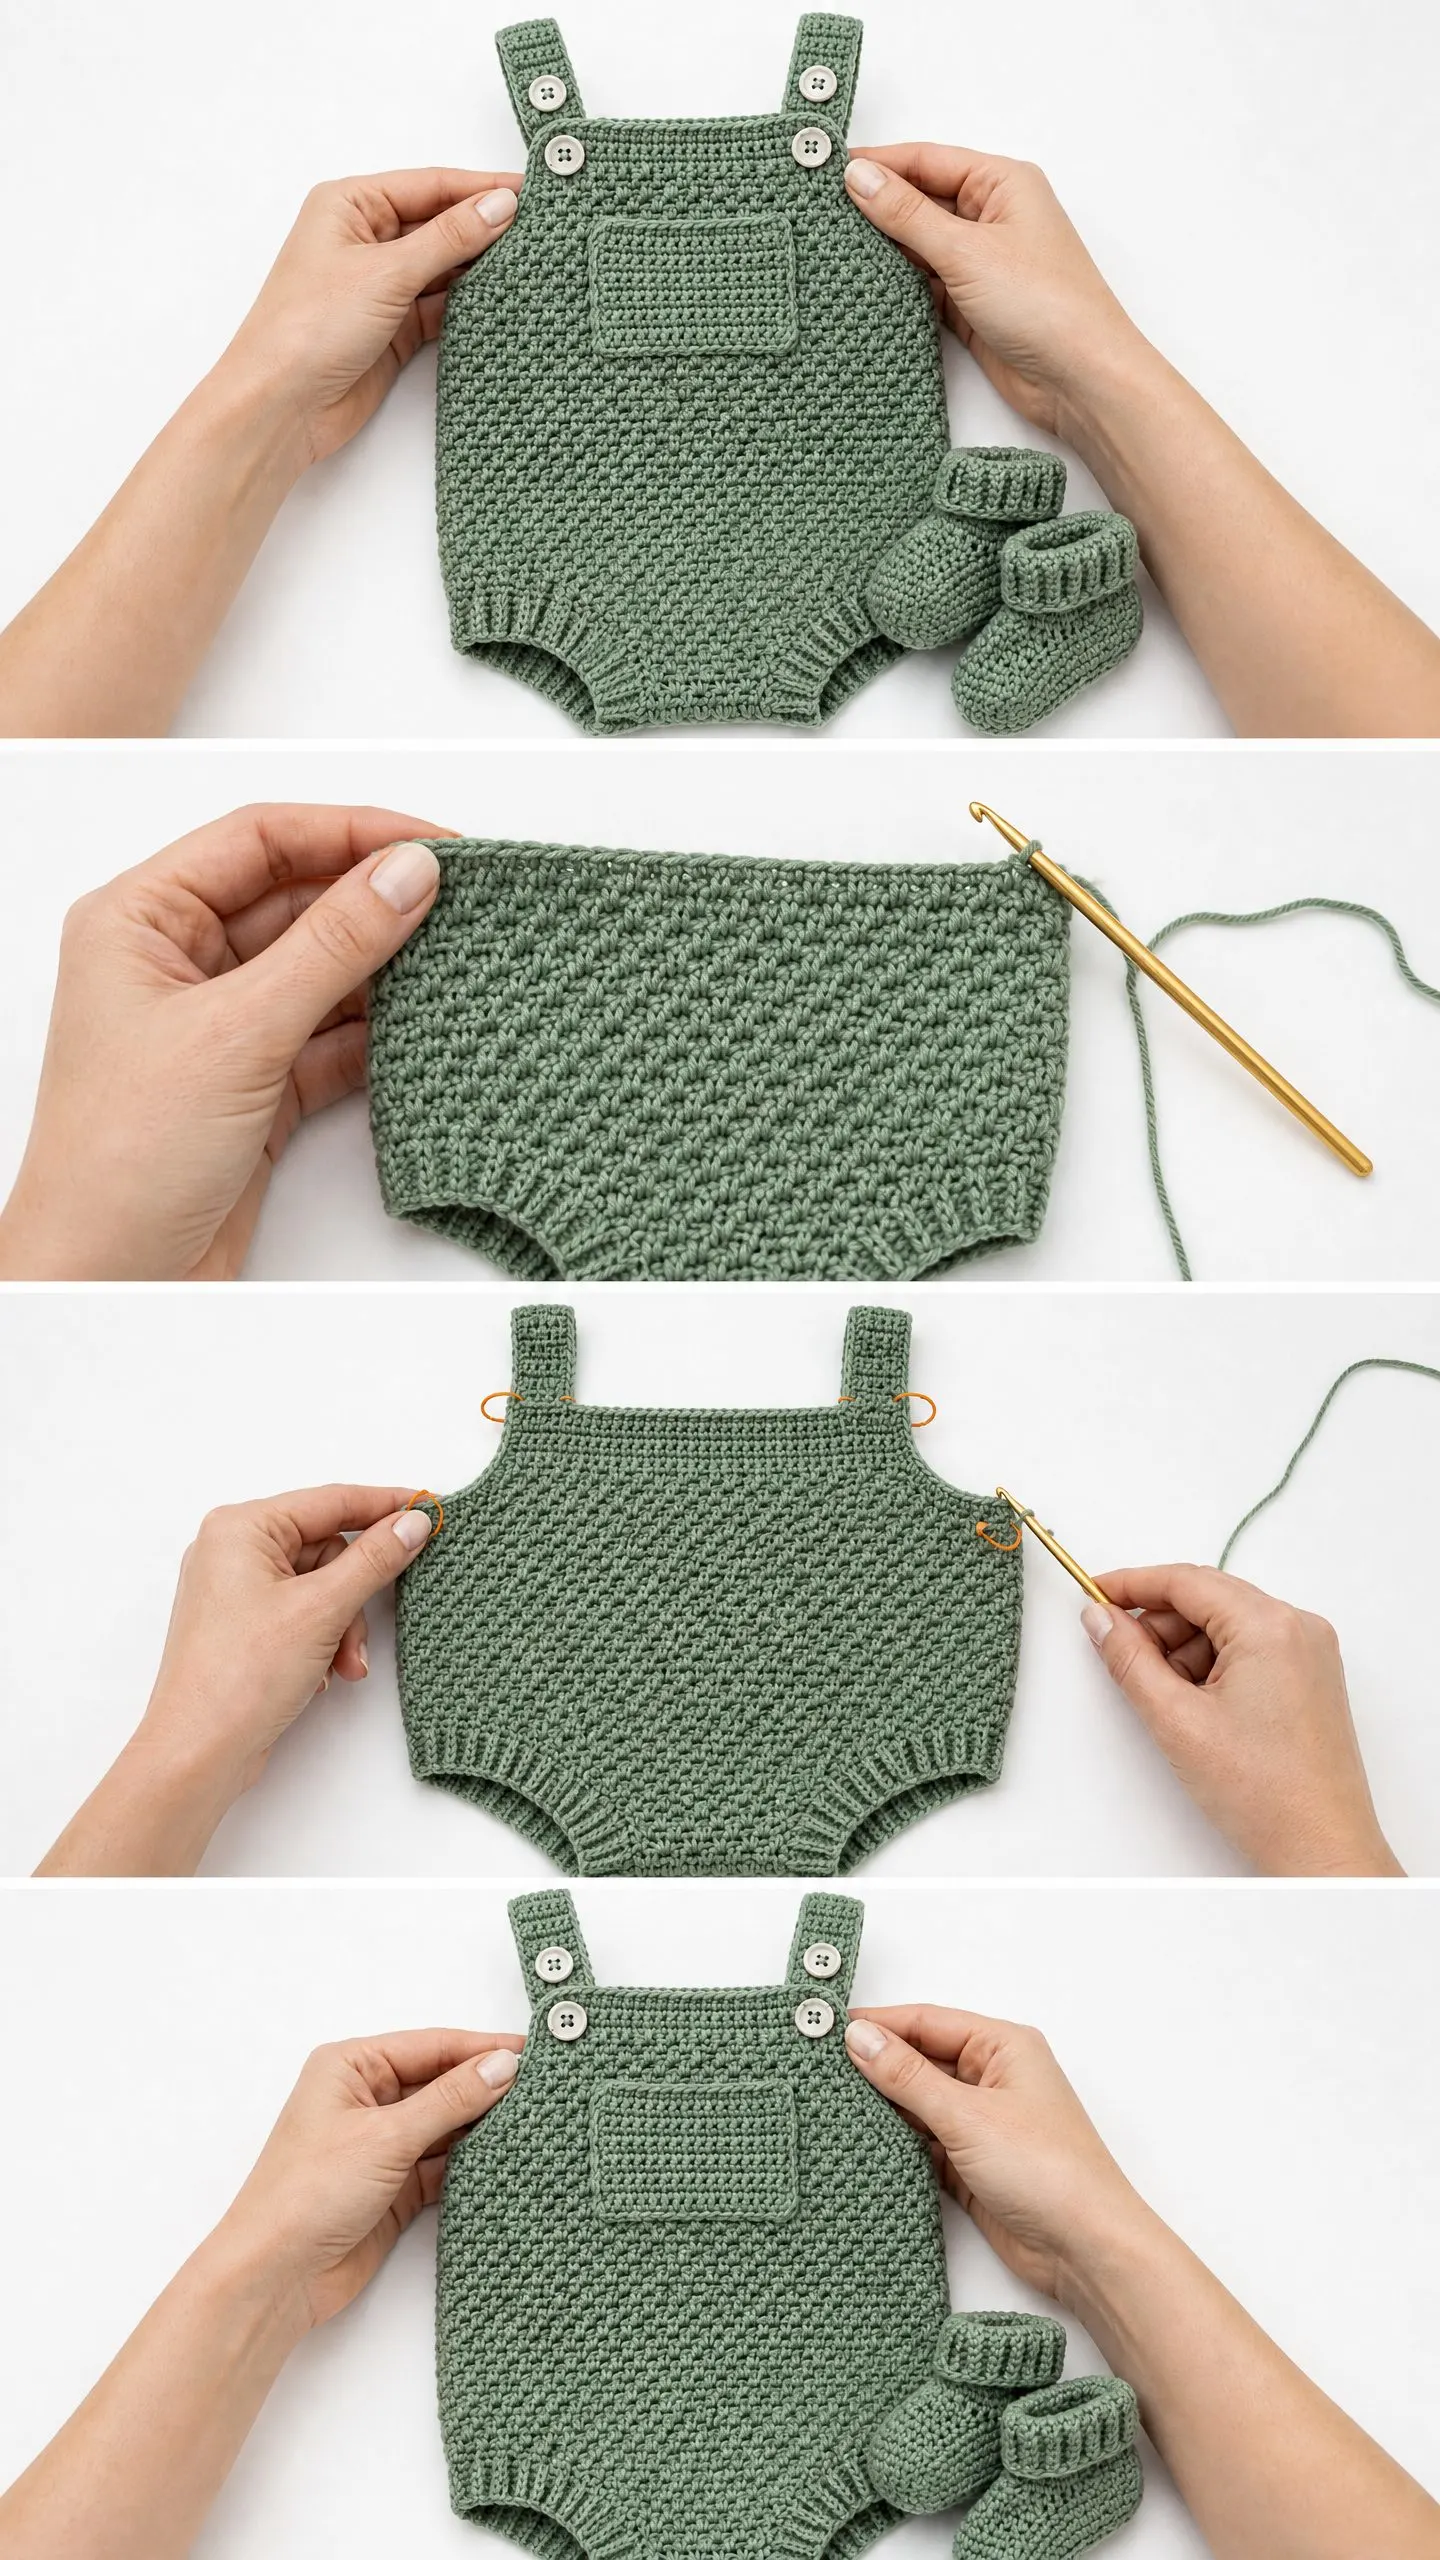
The romper is constructed in two flat panels, one for the front and one for the back. You work from the bottom up, seam the sides, add the leg ribbing, attach the straps, and sew on the pocket. The booties are worked in the round from the toe up. Nothing too tricky here, just solid intermediate techniques that give you professional-looking results.
Skill Level and Time Estimate
This pattern is rated intermediate. The moss stitch itself is simple, but you need consistent tension across many rows. You will also be seaming flat panels, picking up stitches around curved leg openings, and constructing booties from scratch.
If you are a confident beginner who has made a few garments before, you can absolutely tackle this. Take your time with the seaming sections and do not skip the gauge swatch.
Here is how long each section takes:
Finished Measurements
Romper (Size 0-3 months):
Booties:
Size customization tips for 3-6 months and 6-12 months are included at the end of this pattern.
Materials You Will Need
Yarn: Approximately 300 yards / 275 meters of DK weight (Light 3) yarn in sage green
Hooks:
Notions:
Yarn Suggestions
Option 1: Lion Brand Feels Like Butta in Sage. This is DK weight, 100% polyester, with 218 yards per skein. It is soft, machine washable, and the consistent twist helps the moss stitch read crisply. You will need approximately 2 skeins.
Option 2: Paintbox Yarns Simply DK in Spearmint or Grass Green. This is an affordable, widely available acrylic option with excellent stitch definition. You will need approximately 3 skeins.
Option 3: Paintbox Yarns Cotton DK in Stormy Green. Cotton gives the fabric a denser, more structured feel that works perfectly for warm weather. Check your gauge carefully since cotton has less stretch. You will need approximately 3 skeins.
Any DK weight yarn that achieves the stated gauge may be substituted. For baby garments, prioritize machine-washable yarns. Avoid novelty or highly textured yarns since they will hide the moss stitch pattern.
Gauge
Using G-6 / 4.0 mm hook in moss stitch pattern:
18 stitches x 24 rows = 4 inches x 4 inches / 10 cm x 10 cm
For ribbing sections using E-4 / 3.5 mm hook in back loop only single crochet ribbing:
20 stitches x 22 rows = 4 inches x 4 inches / 10 cm x 10 cm
Gauge is critical for a fitted garment. Make a swatch larger than 4 inches on each side to account for edge distortion. Adjust your hook size as needed before beginning.
Abbreviations (US Terms)
Special Stitches
Moss Stitch (also called granite stitch or linen stitch)
This stitch creates a dense, textured fabric with a woven appearance. When worked flat in rows:
Row 1 (RS): Ch 1, sc in first st, ch 1, sk 1 st, (sc in next st, ch 1, sk 1 st) across to last st, sc in last st. Turn.
Row 2 (WS): Ch 1, sc in first st, ch 1, sk ch-1 sp, (sc in next sc, ch 1, sk ch-1 sp) across to last st, sc in last st. Turn.
Repeat Row 2 for pattern.
Important note: In this pattern, stitch counts refer to the total number of single crochet stitches only, not counting chain spaces.
Back Loop Only Single Crochet Ribbing (BLO sc rib)
Work all sc stitches through the back loop only. This creates a stretchy ribbed fabric.
Row 1: Sc in 2nd ch from hook and in each ch across. Turn.
Row 2 onward: Ch 1, sc BLO in each st across. Turn.
Single Crochet Two Together (sc2tog)
Insert hook into next st, yo and pull up a loop (2 loops on hook). Insert hook into following st, yo and pull up a loop (3 loops on hook). Yo and draw through all 3 loops. One decrease made. This reduces 2 stitches to 1 stitch.
Pattern Notes Before You Begin
1. The romper is constructed in two flat panels: front and back. Each panel is worked from the bottom crotch edge upward through the body and bib section. Side seams are joined after both panels are complete.
2. The front panel is taller than the back panel due to the bib extension above the chest.
3. Shoulder straps are worked separately and sewn to the back top edge. Buttons are sewn onto the front bib top corners, and buttonholes in the straps allow adjustable length.
4. Leg openings are finished after seaming by picking up stitches around the opening and working BLO sc ribbing in the round.
5. The moss stitch is worked over an even number of working stitches. The foundation chain must be odd.
6. When working moss stitch, the ch 1 at the beginning of each row does NOT count as a stitch.
7. Mark the RS of your work with a stitch marker at the beginning to keep track of orientation.
8. All stitch counts in parentheses at the end of a row refer to sc stitches only.
Romper Front Panel Instructions
The front panel is worked from the bottom edge up through the body and bib.
Foundation: Ch 39.
Row 1 (RS): Sc in 2nd ch from hook, ch 1, sk 1 ch, (sc in next ch, ch 1, sk 1 ch) across to last ch, sc in last ch. Turn. (20 sc)
Row 2: Ch 1, sc in first sc, ch 1, sk ch-1 sp, (sc in next sc, ch 1, sk ch-1 sp) across to last sc, sc in last sc. Turn. (20 sc)
Rows 3 through 46: Rep Row 2. Turn at end of each row. (20 sc each row)
After Row 46, the main body panel is complete and measures approximately 7.5 inches / 19 cm tall.
Bib Section (Front Panel continued)
Continue on all 20 sc.
Row 47: Ch 1, sc in first sc, ch 1, sk ch-1 sp, (sc in next sc, ch 1, sk ch-1 sp) across to last sc, sc in last sc. Turn. (20 sc)
Rows 48 through 66: Rep Row 47. Turn at end of each row. (20 sc each row)
Top edge of bib:
Row 67: Ch 1, sc in each sc and each ch-1 sp across. Turn. (39 sc)
Row 68: Ch 1, sc in each sc across. Turn. (39 sc)
Fasten off. Weave in ends.
Checkpoint: The completed front panel should measure approximately 10.5 inches / 26.5 cm from foundation to top of bib, and 8 inches / 20.5 cm wide.
Romper Back Panel Instructions
The back panel is shorter than the front as it ends at underarm level without a bib.
Foundation: Ch 39.
Row 1 (RS): Sc in 2nd ch from hook, ch 1, sk 1 ch, (sc in next ch, ch 1, sk 1 ch) across to last ch, sc in last ch. Turn. (20 sc)
Row 2: Ch 1, sc in first sc, ch 1, sk ch-1 sp, (sc in next sc, ch 1, sk ch-1 sp) across to last sc, sc in last sc. Turn. (20 sc)
Rows 3 through 46: Rep Row 2. Turn at end of each row. (20 sc each row)
Top edge of back panel:
Row 47: Ch 1, sc in each sc and each ch-1 sp across. Turn. (39 sc)
Row 48: Ch 1, sc in each sc across. Turn. (39 sc)
Fasten off. Weave in ends.
Checkpoint: The completed back panel should measure approximately 7.5 inches / 19 cm from foundation to top edge, and 8 inches / 20.5 cm wide.
Seaming the Panels
Place front and back panels with RS facing each other. Align the bottom edges and side edges.
Using a yarn needle and matching yarn, seam the right side edge from the bottom corner up approximately 5 inches / 12.5 cm. This creates one side seam and leaves the upper portion open as the leg opening and armhole.
Seam the left side edge from the bottom corner up approximately 5 inches / 12.5 cm in the same manner.
The remaining unseamed portion above the side seams on each side forms the armhole openings. Turn RS out.
Leg Opening Ribbing Instructions
Work the ribbing for each leg opening separately using the E-4 / 3.5 mm hook.
Attach yarn at the inside seam of one leg opening with a sl st.
Set up rnd: Ch 1, sc evenly around the leg opening, placing approximately 36 sc evenly around the entire opening. Sl st to first sc to join. Do not turn. (36 sc)
Rib Rnd 1: Ch 1, sc BLO in each sc around. Sl st to first sc. (36 sc)
Rib Rnd 2: Ch 1, sc BLO in each sc around. Sl st to first sc. (36 sc)
Rib Rnd 3: Ch 1, sc BLO in each sc around. Sl st to first sc. (36 sc)
Rib Rnd 4: Ch 1, sc BLO in each sc around. Sl st to first sc. (36 sc)
Fasten off. Weave in ends.
Rep for second leg opening.
Shoulder Straps Instructions (Make 2)
Each strap is a long narrow rectangle worked in moss stitch with buttonholes at one end.
Using G-6 / 4.0 mm hook, ch 7.
Row 1: Sc in 2nd ch from hook, ch 1, sk 1 ch, sc in next ch, ch 1, sk 1 ch, sc in last ch. Turn. (3 sc)
Row 2: Ch 1, sc in first sc, ch 1, sk ch-1 sp, sc in next sc, ch 1, sk ch-1 sp, sc in last sc. Turn. (3 sc)
Rows 3 through 8: Rep Row 2. Turn. (3 sc each row)
The ch-1 spaces in the moss stitch naturally serve as buttonholes.
Solid section:
Row 9: Ch 1, sc in each sc and each ch-1 sp across. Turn. (5 sc)
Row 10: Ch 1, sc in each sc across. Turn. (5 sc)
Rows 11 through 44: Rep Row 10. Turn. (5 sc each row)
Fasten off, leaving a 12-inch tail for sewing.
Rep for second strap.
Attach each strap: Pin straps to the WS of the back panel top edge, placing each strap approximately 1.5 inches / 4 cm from the side edge. Sew securely using the yarn tail.
Sew two buttons to each side of the front bib top, positioned approximately 1 inch / 2.5 cm from the top edge and 1.5 inches / 4 cm from the center.
Chest Pocket Instructions
Using G-6 / 4.0 mm hook, ch 17.
Row 1: Sc in 2nd ch from hook, ch 1, sk 1 ch, (sc in next ch, ch 1, sk 1 ch) across to last ch, sc in last ch. Turn. (8 sc)
Rows 2 through 10: Ch 1, sc in first sc, ch 1, sk ch-1 sp, (sc in next sc, ch 1, sk ch-1 sp) across to last sc, sc in last sc. Turn. (8 sc)
Pocket top edge:
Row 11: Ch 1, sc in each sc and each ch-1 sp across. Turn. (15 sc)
Row 12: Ch 1, sc in each sc across. Fasten off. (15 sc)
Position the pocket centered on the front bib, with the bottom approximately 0.5 inches / 1.5 cm above the body-to-bib transition. Sew along the bottom and both side edges, leaving the top open.
Optionally sew two decorative buttons to the top corners of the pocket.
Booties Instructions (Make 2)
The booties are worked in the round from the toe outward using the E-4 / 3.5 mm hook throughout.
Toe
Magic ring.
Rnd 1: Ch 1, work 6 sc into magic ring. Sl st to first sc to join. (6 sc)
Rnd 2: Ch 1, 2 sc in each sc around. Sl st to first sc. (12 sc)
Rnd 3: Ch 1, (sc in next sc, 2 sc in next sc) around. Sl st to first sc. (18 sc)
Rnd 4: Ch 1, (sc in next 2 sc, 2 sc in next sc) around. Sl st to first sc. (24 sc)
Foot Body
Rnd 5: Ch 1, sc in first sc, ch 1, sk 1 sc, (sc in next sc, ch 1, sk 1 sc) around. Sl st to first sc. (12 sc)
Rnd 6: Ch 1, sc in first ch-1 sp, ch 1, sk sc, (sc in next ch-1 sp, ch 1, sk sc) around. Sl st to first sc. (12 sc)
Rnds 7 through 10: Rep Rnd 6. (12 sc each rnd)
Ankle Transition
Rnd 11: Ch 1, sc in each sc and each ch-1 sp around. Sl st to first sc. (24 sc)
Cuff Ribbing
Rnd 12: Ch 1, sc BLO in each sc around. Sl st to first sc. (24 sc)
Rnd 13: Ch 1, sc BLO in each sc around. Sl st to first sc. (24 sc)
Rnd 14: Ch 1, sc BLO in each sc around. Sl st to first sc. (24 sc)
Rnd 15: Ch 1, sc BLO in each sc around. Sl st to first sc. (24 sc)
Rnd 16: Ch 1, sc BLO in each sc around. Sl st to first sc. (24 sc)
Fasten off. Weave in ends.
Rep for second bootie.
Size Customization Tips
For 3-6 months:
For 6-12 months:
Strap length can be increased or decreased by 4 rows at a time to adjust length without affecting button placement.
Finishing and Blocking Your Baby Romper
Weave in all remaining ends securely, burying the tail under at least 1 inch of stitches.
Wet blocking is strongly recommended. Submerge the finished romper and booties in cool water. Gently squeeze out excess water without wringing. Lay flat on a blocking mat and pin to the finished measurements. Allow to dry completely, which takes 12 to 24 hours depending on humidity.
If using acrylic yarn, steam blocking is preferred. Hold a steam iron approximately 1 inch above the surface and allow steam to penetrate the fabric. Do not press the iron directly onto the crochet.
Blocking significantly evens out the moss stitch texture and softens the fabric.
Sew all buttons securely using strong thread or thin yarn. For areas that will receive frequent stress, particularly the strap attachment points, consider using a small flat button on the WS as backing.
Care Instructions
You Made It!
Thank you so much for making this pattern with me. I hope you love how your sage green baby romper turned out. That moss stitch texture is just something special, and the matching booties really complete the set beautifully.
If you make this romper, I would absolutely love to see it! Tag me on Instagram or share a photo in my Facebook group. Seeing your finished projects is genuinely the best part of sharing patterns.
Go ahead and save this baby romper crochet pattern to your Pinterest boards so you can find it again later. And please drop a comment below if you make one of these sweet little sets. I read every single comment and it makes my day to hear how your projects turn out!
You Might Also Like
- Ocean Blue Jellyfish Trio Free Crochet Pattern
- Sunset Ombre Mesh Halter Top Free Crochet Pattern
- Blush Pink Bunny Ear Hooded Coat Free Crochet Pattern
- Sage Green Woodland Baby Dress Free Crochet Pattern