
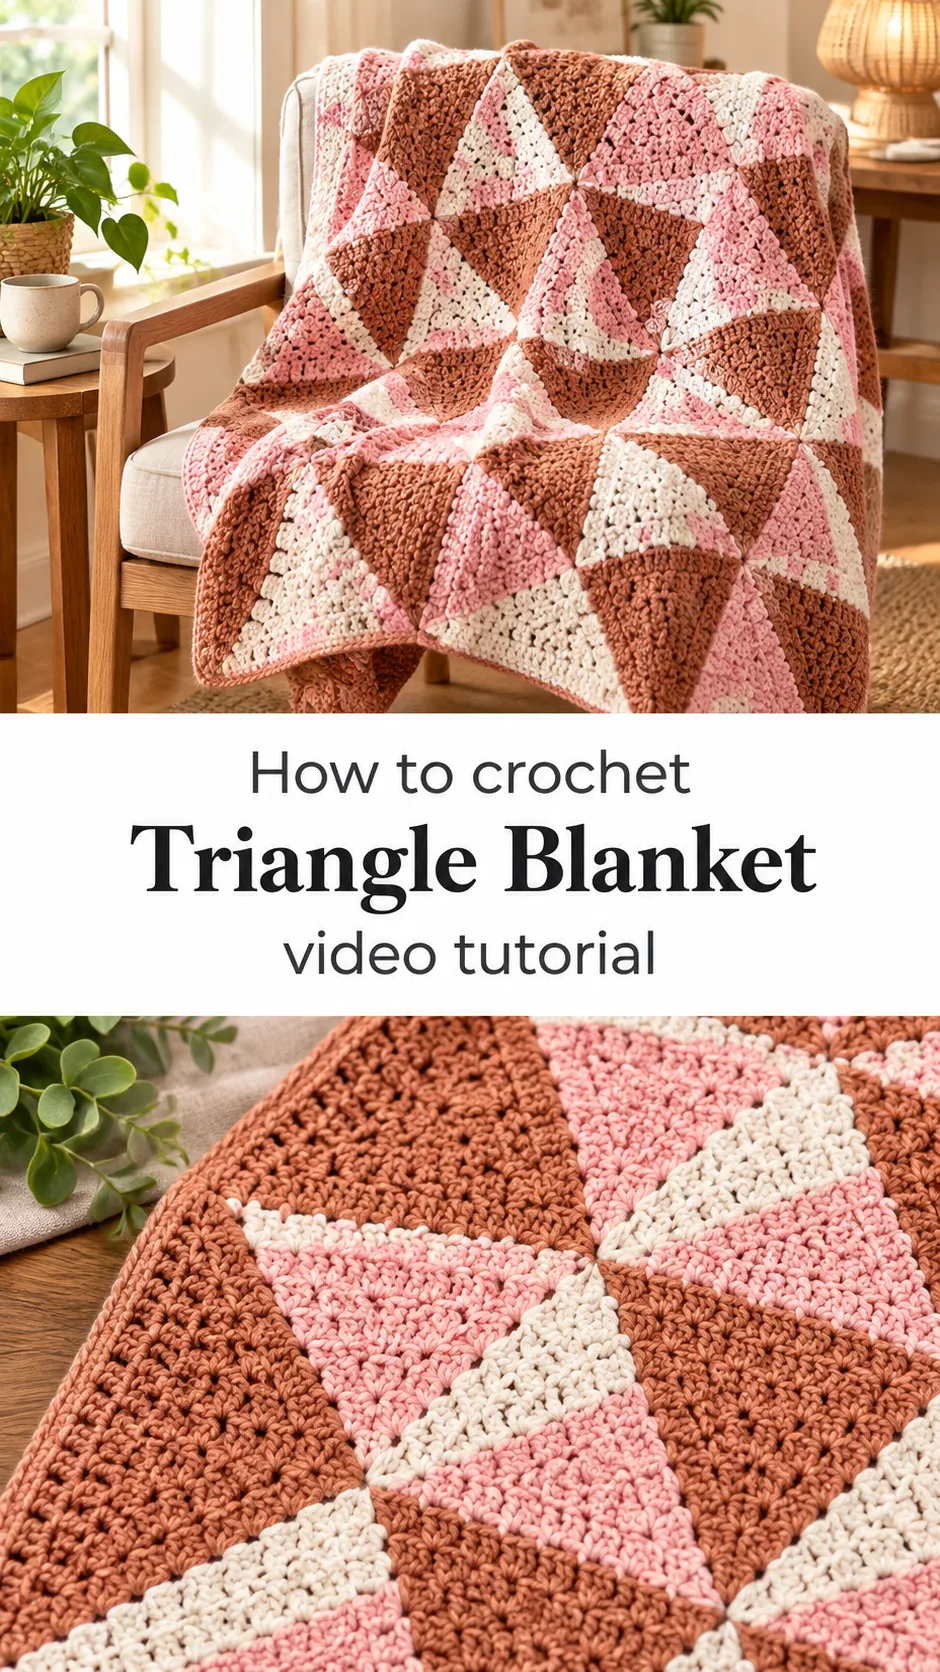
A crochet triangle blanket turns a simple square into a bold diagonal statement, with a wedge of cream and blush pink cutting across a field of warm terracotta. It is calm to stitch and striking to own.
[IMAGE]
The Crochet Triangle Blanket
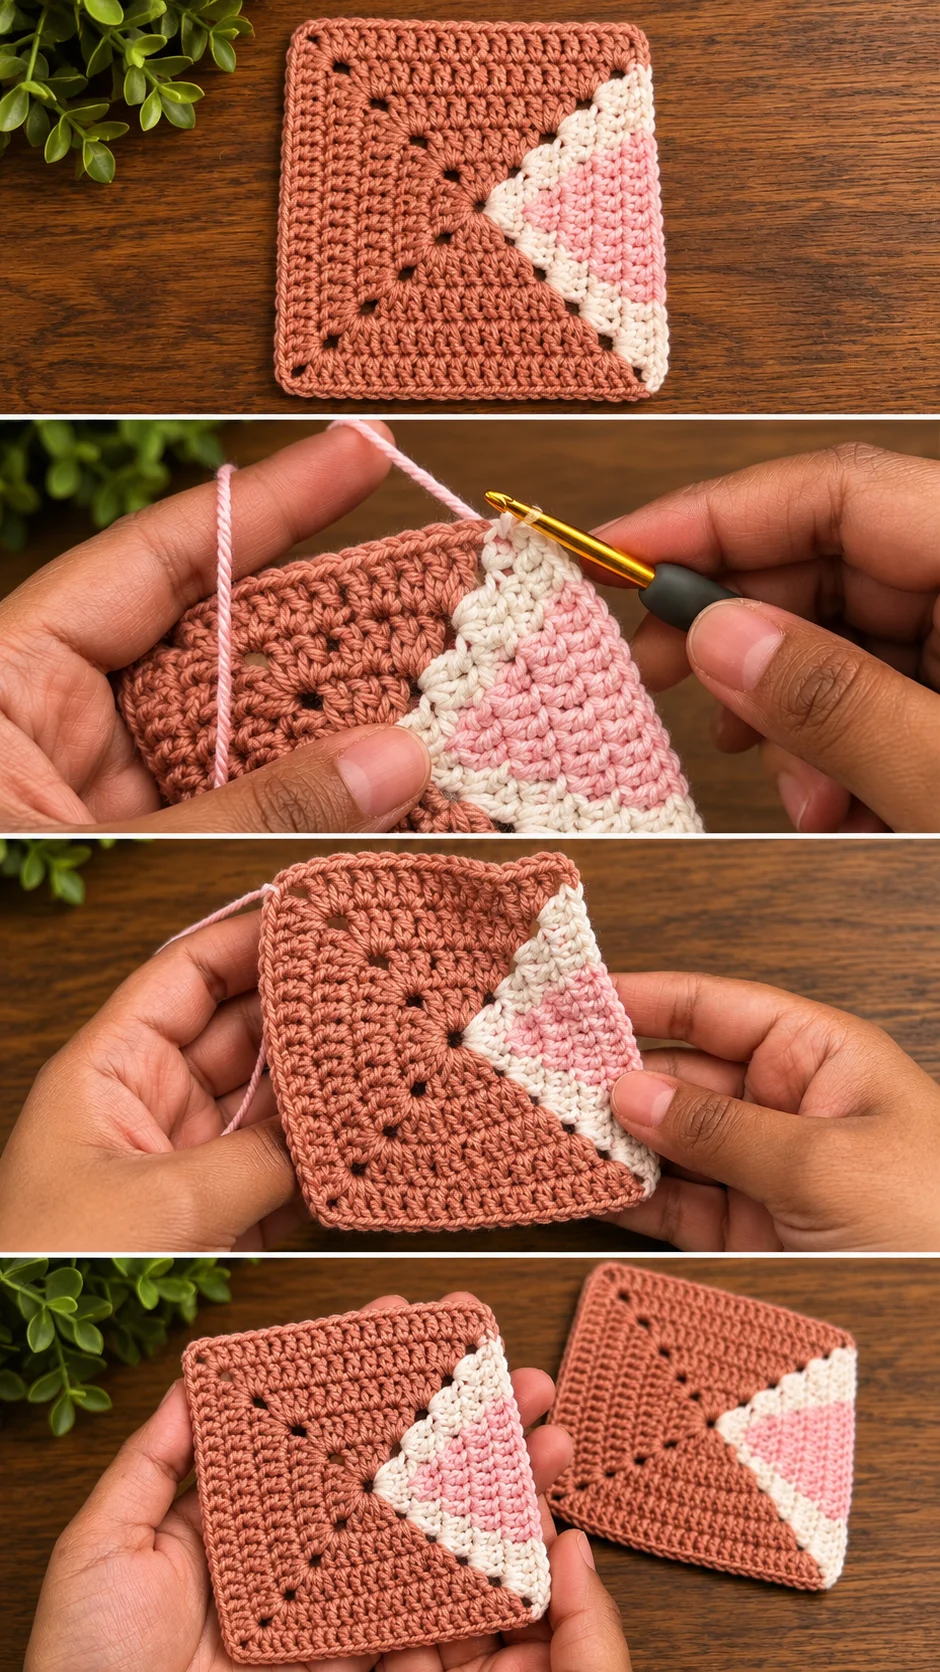
The crochet triangle blanket starts from a very humble idea: a square with one clever twist. Most of the surface is worked in a dusty terracotta rose, a soft clay shade that reads as warm rather than loud. Then a diagonal wedge of cream and pale pink breaks across one side and points toward the centre. The effect is graphic and modern, yet the colours keep it gentle. The terracotta part looks dense and firm, built from tight rows that run in rounds around a central point. The wedge has a different texture, a slightly raised, woven look that sets it apart. Small gaps at the corners and along the diagonal add a quiet openwork detail. Joined together, many squares like this would make a throw with a rhythm of triangles. It suits a sofa, a reading chair or the foot of a bed.
Each square also works alone. Made on its own it becomes a coaster, a trivet or a mug mat, and a handful of them make a thoughtful gift. Making a few as a trial is a smart way to learn the colour change before committing to a full blanket. The project also builds a useful skill: changing colours cleanly along a diagonal edge.
[IMAGE]
Triangle Blanket Related Posts:
- Crochet 3D Flower Square: A Beautiful Granny Motif
- Crochet Prada Style Bag: A Chic and Trendy Accessory
- Crochet Hooded Duster Cardigan: A Chic Boho Statement
- Crochet Pillow Cover: A Charming Home Décor Accent
Materials
For a crochet triangle blanket like this one, choose a smooth, medium-weight yarn in three colours: a terracotta rose for the main field, a soft cream, and a pale blush pink. The stitches in the photos are plump and well defined, which suggests a mercerised or combed cotton, or a cotton blend with a little body. A hook around 4 to 5 mm is a sensible starting point, though your own gauge swatch should decide. A matching tapestry needle is needed for weaving in ends, and a pair of sharp scissors keeps the colour changes tidy. If you plan to join many squares into a throw, buy all the yarn for the main colour at once. Dye lots in earthy shades like terracotta can vary noticeably, and a visible shift between squares is hard to hide.
[IMAGE]
Understanding the Square’s Structure
The square appears to grow outward from the centre in rounds. Lines of tiny holes run from the middle toward each corner, which is the classic sign of corner spaces being worked at every turn. That is what keeps the piece flat and square rather than curling into a bowl.
The wedge is the clever part. The cream and pink section sits on one side, with its point reaching toward the middle and its widest edge meeting the border. Its stitches look more textured than the surrounding fabric, which suggests the colour section is worked in a different stitch or at a different angle from the plain rounds.
Colour changes happen in clean bands: cream along the outer edges of the wedge, pink through the middle. That symmetry is what makes the triangle look deliberate. Watch the video closely at the moment the colour switches, because the way the new yarn is picked up determines how crisp the diagonal line looks.
The outer border is worked in the terracotta again, wrapping the whole square in a firm frame. That frame is what makes the squares easy to join later.
Choosing the Best Yarn for a Crisp Geometric Look
Geometric designs live or die by stitch definition. Cotton gives that crispness, because it has little fuzz to blur the edge where one colour meets another. It also holds its shape on a large piece, which matters in a blanket that will be tugged and washed.
A cotton and acrylic blend is a good alternative. It is a little softer and springier, and it handles the washing machine more forgivingly. Pure wool will work too, but its halo of fibres softens the diagonal line, so the graphic effect is quieter.
Avoid very fluffy or brushed yarns. They hide the stitch texture that gives the wedge its character, and the small corner gaps disappear. A yarn with visible twist shows off every stitch.
If the finished square feels stiff, go up a hook size. If the fabric looks loose or the gaps are too wide, go down. A swatch of one round will tell you before you have used much yarn.
Planning Colour and Size
The palette in the photos is warm and quiet: terracotta, cream and blush. Terracotta carries the weight, so the wedge reads as a soft highlight. For a similar mood, try sage with oatmeal and a pale mint, or navy with cream and a dusty blue.
For a bolder look, make the wedge colours high contrast, such as mustard and white on charcoal. Keep the main colour the same across all squares so the triangles become the pattern rather than the background.
The wedge can also turn. Rotate each square a quarter turn before joining and the triangles form pinwheels or zigzags across the blanket. Lay the squares on the floor and arrange them before sewing anything.
For size, decide the finished blanket first, then work backward. Measure one finished square after blocking, divide your target width and length by it, and buy yarn for a few extra squares.
Keeping Edges Straight and Corners Sharp
Square motifs go wrong at the corners. If your corners look pinched, you probably tightened the stitches around the corner spaces. Loosen your tension there and the gaps will open into neat little holes like the ones in the photos.
If the sides bow outward, you have added too many stitches along the edge. If they pull inward, you have skipped some. Count each side against the first square to keep them consistent.
If the wedge puckers where it meets the terracotta, the two colours are being worked at different tensions. Slow down at the join and keep the working yarn at the same tension as the surrounding stitches.
Block every square to the same size before joining. Pin each one flat, mist lightly or steam if the yarn allows, and let it dry fully.
Weaving In Ends Neatly
Every colour change leaves tails, and a blanket made of many squares leaves a lot of them. Weave each tail along the back of its own colour, so cream stays in the cream area and does not show through the terracotta. Do this as you finish each square rather than saving it all for the end.
How to Style a Crochet Triangle Blanket
In the photos the squares sit on warm wood, where the terracotta looks at home. That earthy tone suits natural materials: oak furniture, linen cushions, woven baskets and green plants.
Draped over a neutral sofa, a throw of these squares gives a room a single point of colour. On a bed it works as a foot-of-bed layer over white or oatmeal bedding. In a nursery, a smaller version in softer shades makes a pram or cot blanket.
Single squares can also become coasters, wall hangings or cushion fronts. Sew four together for a small pillow cover, or back one with felt for a trivet.
Following the Video Tutorial
Watch the video once before touching the yarn. On the second viewing, pause at the start of the wedge, because the way the first colour is introduced decides how the diagonal sits. Replay the corner turns until the rhythm feels natural.
Pay attention to how the creator hides the yarn change and how the stitches are inserted along the diagonal edge. Work your first square slowly and treat it as a swatch. The second one will go much faster.
A Warm Handmade Statement
The crochet triangle blanket is a simple square with a confident idea. Terracotta gives it warmth, cream and pink give it a crisp diagonal accent, and the corner gaps add a delicate touch.
Three things decide how it turns out: a smooth yarn with good stitch definition, even tension at the corners, and clean colour changes along the diagonal. Block each square and plan the layout before joining.
Make one, then make twenty.
Crochet Triangle Blanket tutorial video by Knitting time, shown below.
[VIDEO]
Follow us on Pinterest and subscribe to the Newsletter so you don’t miss a thing!
Tutorial and photos of this triangle blanket by: Knitting time🧶by Dina.