
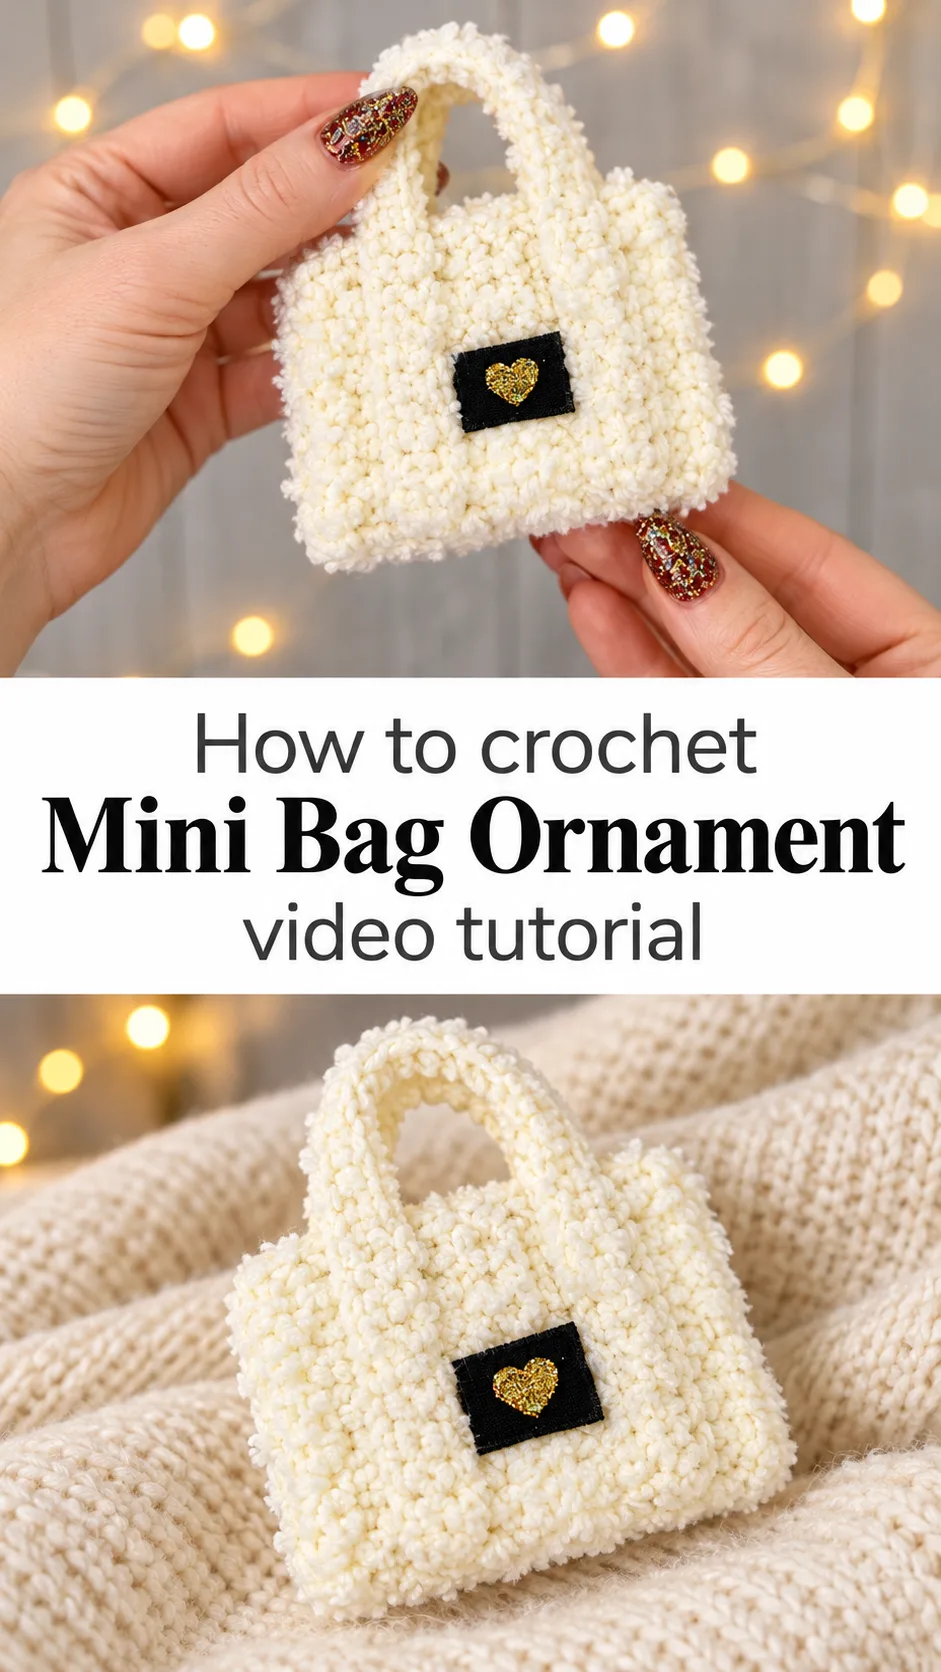
A crochet mini bag ornament is a palm-sized handbag in soft cream yarn, with a tiny black label and a golden heart that catches the tree lights. It is quick to make and surprisingly stylish once it hangs among the baubles.
The Crochet Mini Bag Ornament
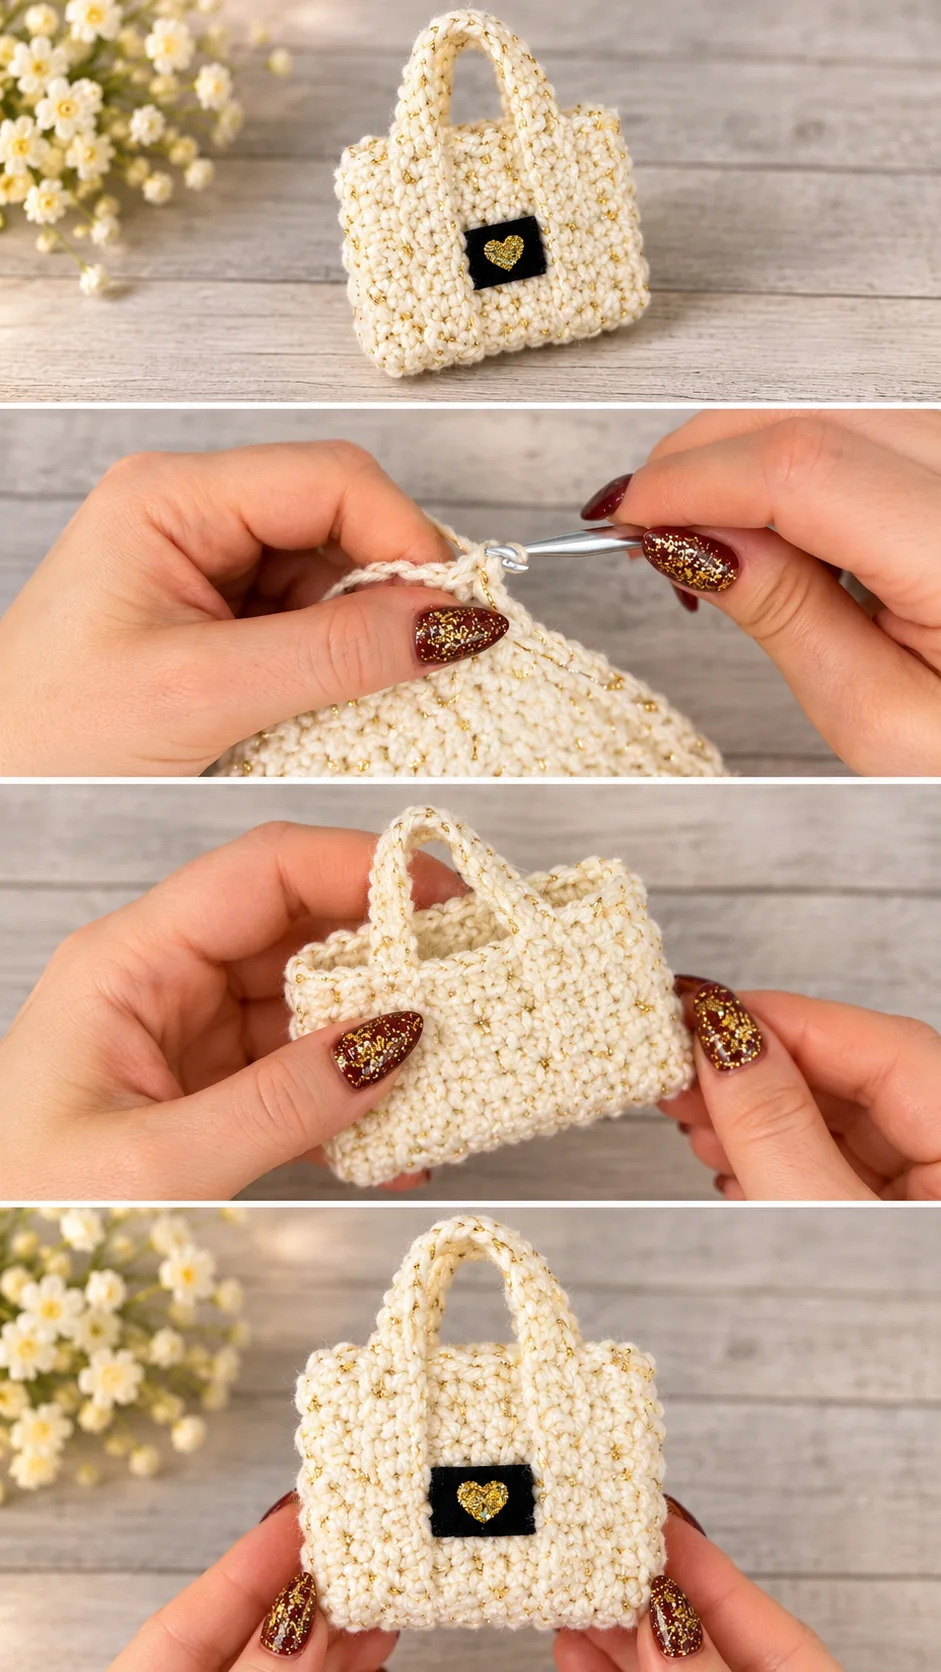
The crochet mini bag ornament is a miniature tote with a rounded top handle, a boxy body and a small black patch at the front. The patch carries a glittery gold heart, which turns a simple shape into something that looks like a boutique handbag. The design sits comfortably between ornament and accessory. It is small enough to hang on a branch, yet detailed enough to be admired up close. The version shown in two textures proves how far the look can change with the yarn. One is dense and textured with fine gold flecks, the other soft and fluffy like shearling. Both keep the same tidy outline. You can hang it on a tree, tie it to a gift, or tuck a tiny treat inside. It is a festive piece with a fashion wink.
The bag also works as a gentle introduction to making small structured items. The shape is simple, the finish is neat, and the payoff is high. Make one as a test and you will probably want a whole set.
Bag Ornament Related Posts:
- Crochet Pom Poms: A Quick and Playful Accent
- Crochet Chunky Bean Stitch Hat: A Warm Winter Essential
- Crochet Pinwheel Square: A Charming Geometric Accent
- Crochet Shell Stitch: A Timeless and Elegant Classic
Materials
The crochet mini bag ornament needs very little, which is part of its charm. The main yarn is a cream or ivory in a chunky or bulky weight, and the stitch size in the photos suggests something quite thick. One version appears to use a cream yarn with a fine gold metallic strand or sequin flecks running through it, giving a tweedy sparkle. The other uses a fluffy chenille-style yarn with a plush, curly surface. Choose a hook that sits a little below what the label recommends, because a tight fabric holds the boxy shape and keeps the bag from slumping. You will also need a scrap of black felt or fabric for the label, a small gold glitter heart (sticker, glitter foam or a hand-painted shape), fabric glue, scissors and a yarn needle. A loop of ribbon or thin cord is useful if you want to hang it. The felt matters because it does not fray, so the tiny rectangle keeps crisp edges.
Understanding the Structure
The bag is built from a few simple parts: a body that folds into a boxy shape, side panels or gussets that give it depth, and a single handle rising from the top. The fabric looks worked flat in rows rather than in the round, with visible seams at the sides.
The handle is the most telling feature. It is a narrow strip that arches upward and attaches at both sides of the top edge, so it stands up on its own. That only works when the stitches are firm. A loose handle will flop forward and spoil the silhouette.
Think of the project as flat pieces that become three-dimensional through folding and seaming. Seeing where the fold lines fall will help more than counting stitches, so watch that part of the video closely and pause when the sides are joined.
The top edge also needs a little attention. In the photos it sits straight and level, with the handle emerging from the centre, which suggests the rows end evenly before the handle begins. If your edge looks wavy, check that you have not added or skipped stitches at the row ends.
Choosing the Best Yarn for the Look
Yarn decides the personality of this ornament more than any other choice. A smooth chunky yarn with a gold thread gives a dressy, tweed-like result, and the stitches stay visible, so the small texture of the fabric shows. A fluffy chenille or boucle-style yarn gives a cosy, plush bag that resembles sherpa, but the stitches disappear into the pile.
If you pick the fluffy kind, expect it to be harder to see your stitches. Work in good light and count your rows as you go. The reward is a bag that looks soft and expensive, and the pile hides small tension wobbles.
Avoid thin, slippery yarns for this project. They will not support the handle, and the sides will collapse inward. If you only have fine yarn, hold two strands together and keep the tension firm.
For colours, cream with gold is the classic choice and matches the photos. Deep red with a gold thread would look festive, while blush pink with silver turns it into a delicate winter ornament. Keep the label black or navy so the glitter heart still stands out.
Making the Label Patch
The black label is the detail that makes people look twice. It is a small rectangle placed low on the front, with the gold heart centred on it. Cut the felt slightly smaller than you think you need, because a large patch will look clumsy on such a small bag.
Glue the heart to the felt first, let it dry, and only then attach the patch to the bag. This keeps glue off the yarn. If you are working with the fluffy yarn, press the patch down firmly and part the pile around it so the edges look clean. Fabric glue holds well, but a few tiny stitches at the corners make it permanent.
Assembling the Bag
Assembly is where this ornament either looks polished or slightly crooked. Before sewing, lay the pieces out and check that the sides match in height. Pin or clip them if you can, even though the bag is tiny.
Join the seams with a yarn needle and the same yarn, working through the edge stitches so the seam stays flat. In the textured version, the seams sit neatly along the sides without bulk. If a seam puckers, unpick it and try again with a looser tension in the sewing yarn, since a tight seam pulls the fabric in.
Attach the handle last. Check that both ends sit at the same distance from the corners, otherwise the handle will lean. If the bag will not hold its shape, a small piece of cardboard or stiff craft foam tucked inside the base works as a hidden support.
How to Style a Crochet Mini Bag Ornament
The obvious home is the Christmas tree. Loop a thin ribbon or a gold cord through the handle and hang it near the front of a branch, where the glitter heart can catch the fairy lights. A cluster of three in slightly different yarns looks deliberate and rich.
It also works as a gift topper. Tied to a wrapped box, the bag becomes part of the present, and it can hold a small item such as a gift card, a piece of chocolate or a pair of earrings. Add one to a garland across a mantel, or place a few on a shelf next to candles for a quiet, boutique feel.
For gifting, make a matching set in cream, pink and green and present them together. People who love fashion and crochet will appreciate the tiny designer-bag joke. Small bags like this also make charming party favours.
Tips for a Neat Finish
Weave in every end carefully, because short yarn tails on a small item show easily. With the fluffy yarn, tuck ends into the seam so the pile hides them. With the metallic-flecked yarn, make sure the gold strand does not poke out of the surface.
If the fabric feels floppy, go down a hook size on the next one. If it feels stiff and hard to sew, go up half a size or switch to a softer yarn. When the bag leans to one side, the handle is usually the cause, so unpick one end and re-sew it level.
Steam gently from a distance if the shape needs refreshing, but never press the fluffy yarn flat. A light pat with your hands is enough to shape the corners. Keep the glitter heart away from heat, since some craft glitter can lift or melt.
Following the Tutorial
The video is the best guide for the way the pieces are worked and joined, so treat it as your main reference. Watch the section on the handle twice before you start, and pay attention to how the strip is attached at the top edge. Pause where the sides are brought together, because the alignment there decides how square the bag looks.
Make the first bag with a plain, smooth yarn if you are unsure, then move on to the fluffy version once the shape feels familiar. Work in a good light and replay any step that looks different from your own piece.
A Tiny Handmade Treasure
This crochet mini bag ornament is a small project with a big personality. A boxy body, an upright handle and a glittering heart on a black label are all it takes to make it look like a festive designer piece.
What decides the result is simple. Use a firm tension so the handle stands, choose a yarn that suits the look you want, keep the label small and neat, and seam the sides evenly. Do those four things and each bag will turn out charming.
Make one, hang it up, and watch it catch the light.
Follow us on Pinterest and subscribe to the Newsletter so you don’t miss a thing!
Tutorial and photos of this mini bag ornament by: Crochet Pink Pumpkin.