
The crochet magic ring is the quiet trick behind every flat, tight-centered circle, a starting loop that pulls shut so no hole is left behind.
The Crochet Magic Ring
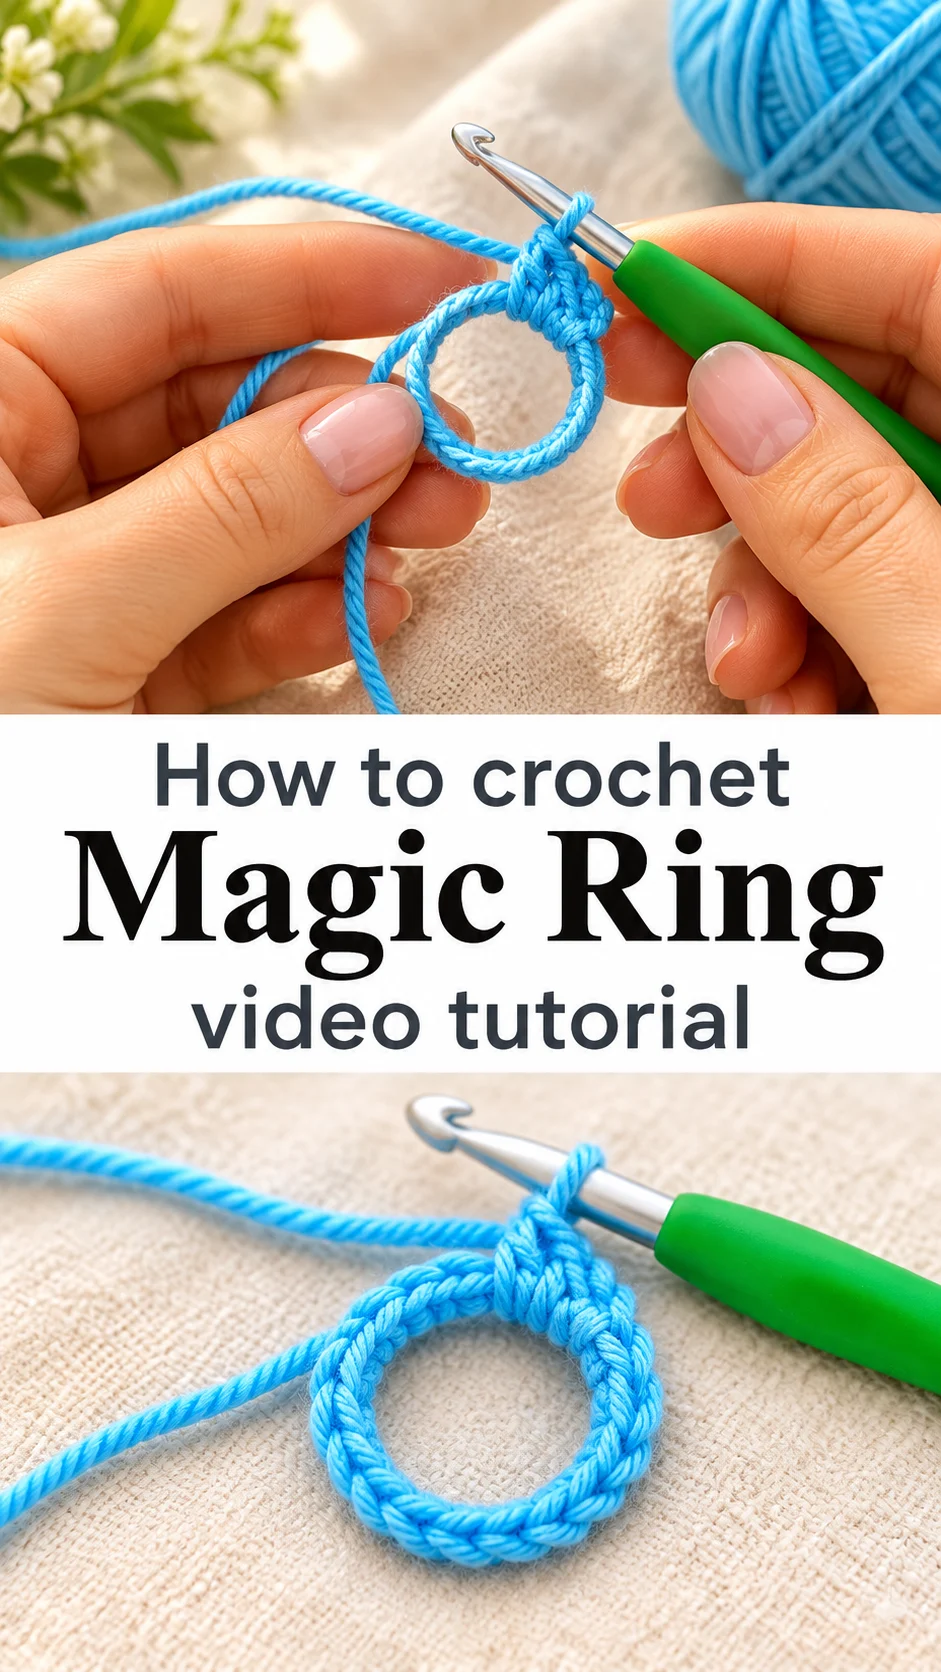
The crochet magic ring is an adjustable loop that lets you begin work in the round without a visible gap at the middle. Instead of chaining and joining, you wrap the yarn around your fingers, work the first round of stitches into that loop, and then pull the tail to cinch everything closed. The result is a small, dense, flat disc, like the little blue circle growing on the hook in the photos. It is the standard start for amigurumi, hats, coasters, flowers and any motif that spreads out from a center point. Once your hands know the wrap, it takes seconds. Until then, it can feel like a puzzle with too many fingers involved. The payoff is a clean centre that holds its shape, and the technique is worth learning once and using forever.
Think of it as the foundation stitch for round work. Many makers choose it over the chain-and-join start because stuffed toys leak filling through an open middle, and a hat crown with a hole looks unfinished. It is also a gentle skill builder, since it teaches you to control tension with both hands at once.
Magic Ring Related Posts:
- Crochet Granny Square Bag: A Chic Two-Tone Accessory
- Crochet Fur Tote Bag: A Chic Winter Essential
- Crochet Striped Blanket: A Timeless Comfort Classic
- Crochet Floral Blanket: A Timeless Textured Classic
Materials
The crochet magic ring needs very little: one hook, a ball of yarn and a pair of scissors. The sample shown uses a bright turquoise yarn, smooth and slightly glossy, which looks like a standard acrylic or acrylic blend, and a slim hook with a green soft-grip handle. For practice, choose a smooth, light-colored worsted-weight yarn so you can see every loop and strand clearly. Dark or fuzzy yarn hides the loop you need to find when tightening. Pick a hook that matches the yarn label, roughly 4 to 5 mm for worsted weight, and keep a tapestry needle nearby for weaving in the tail. The tail matters more here than in most projects, so leave a generous length, about six inches, because it is what you pull to close the ring and later secure.
Understanding the Ring
A magic ring is built from two parts: the loop and the working yarn. The loop is the circle you form around your fingers. The working yarn is the strand attached to the ball, which you use to make stitches. Every stitch in round one goes into the loop, over both the circle and the tail lying along it.
The tail is the one that closes the circle. Pulling it slides the loop smaller, while pulling the working yarn does nothing useful. Learning to tell them apart is the first step, and almost every early mistake comes from mixing them up.
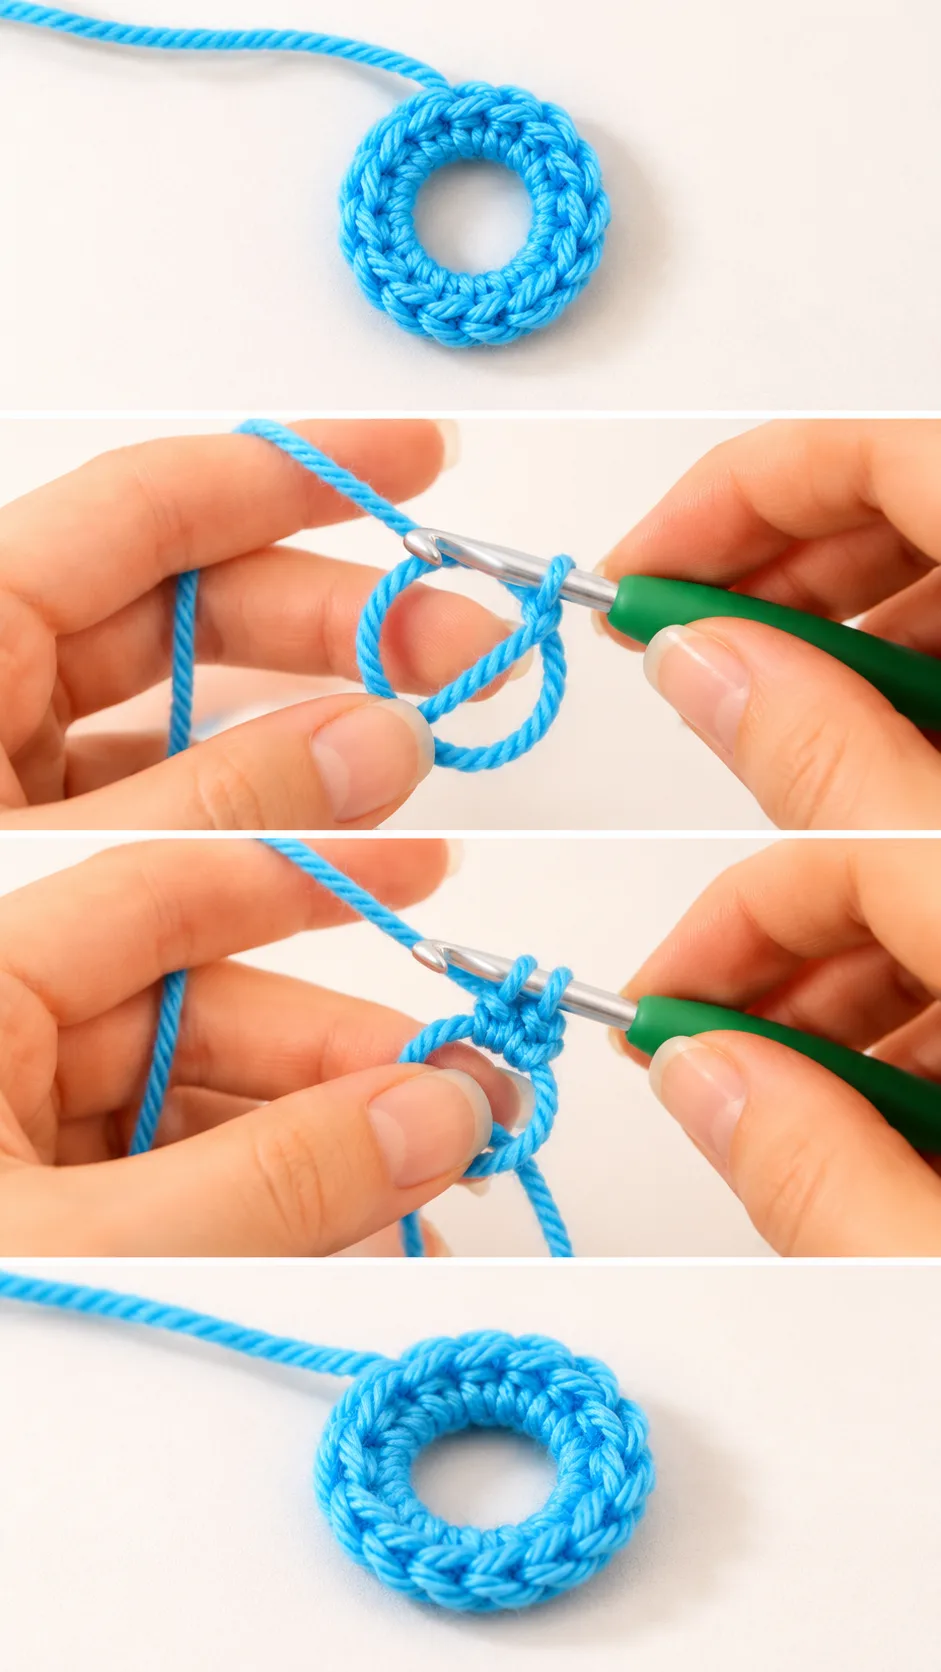
In the photos, the yarn is draped over the fingers of the left hand, forming an open diamond of strands between them. That open shape is the target. Keep it relaxed rather than tight so the hook has room to enter.
Once the first stitches are worked, the ring looks like a small cluster of blue posts around a hole. Do not close it yet. Finish the whole first round, then pull.
How to Hold the Yarn
Hand position decides whether the ring feels natural or awkward. The yarn crosses over the fingers of the non-hook hand so that one strand lies across the front and the tail hangs behind. The thumb and middle finger pinch the crossing point, which keeps the loop from collapsing while you work.
Hold it firmly but not tightly. If the yarn is clamped, the hook cannot slide in. If it is too loose, the loop slips off your fingers before the first stitch is done. A good test is whether you can still wiggle the loop with your index finger.
When you move to the first stitches, shift your grip so the pinch sits right at the crossing point. The photos show this clearly, with the thumb pressing the yarn junction while the hook reaches through. Pause the video here and copy it slowly. This position is the one most beginners struggle to find on their own.
Working the First Round
The first round is made of stitches worked into the ring, crowded close together. In the sample, the stitches are dense and short, resembling single crochet, and they bunch up into a tidy ring of posts. The number of stitches depends on your pattern, so follow the designer’s count rather than guessing.
Insert the hook through the loop and under the tail, so both strands are caught inside each stitch. This is what makes the ring strong. If you only go under the loop and miss the tail, the ring can unravel after you pull it closed.
Keep each stitch snug against the last. Stitches that sprawl leave gaps, and a gappy first round defeats the point of the technique. If the posts look crowded, that is correct, because the circle will open into a flat disc as the next rounds add stitches.
Closing the Ring
When the first round is complete, take the tail and pull it gently. One of the two strands inside the loop will slide, and the hole will shrink. If nothing moves, you are pulling the wrong strand or the working yarn, so release and try the other one.
Pull until the center disappears but stop before the stitches buckle. Over-tightening makes a cupped, bowl-shaped start instead of a flat disc. If the middle still shows a pinhole afterward, tug the tail again from the back.
Best Yarns for a Smooth Start
Smooth, round-plied yarn gives the cleanest result. It slides when you cinch, grips itself when you stop and shows each stitch clearly. The bright acrylic in the photos is a good example. Cotton works too and holds a tight center well, though it has less give, so closing the ring takes a firmer tug.
Avoid very fuzzy yarns such as mohair blends when learning. The fibers cling together and hide the loop you need to find. Slippery silk and bamboo can slide loose after closing, so for those, secure the tail with a few extra stitches.
For amigurumi, choose a yarn a shade or two lighter than your final color while practicing, since you need to see inside the loop. If the ring keeps coming undone, a thicker yarn with more texture is often more forgiving than a thin slick one.
Where to Use the Magic Ring
The ring suits anything that begins at a center. Amigurumi heads, bodies and limbs are the classic use, because a closed center keeps stuffing inside. Hat crowns, flat coasters, appliqué flowers, granny-style circles and basket bases all start the same way.
It also works for small flat motifs joined later into larger pieces. A cluster of rings with different first-round counts can become petals, suns or snowflakes. Learning the ring once opens a long list of patterns that begin with the words “magic ring”.
For a project where a small hole is actually wanted, such as a drawstring bag base or a ring-centered motif, a chain-loop start may suit better. Choose the ring when you want solid.
Tips for a Neat Magic Ring
If the ring unravels, you probably missed the tail when stitching or pulled the wrong strand. Redo it, making sure each stitch passes over both strands inside the loop. If the center stays loose after closing, pull the tail harder from the back and then weave it in across several stitches, not just one.
If your stitches will not fit into the loop, start with a larger circle and work fewer, looser stitches at first, then tighten. If the disc cups instead of lying flat, you may have pulled too hard or packed too many stitches in round one, so check the count in your pattern.
Weave in the tail with a needle, running it through the back of the stitches in two directions. Skipping this step is the usual reason a ring slowly loosens during use, especially in toys that get squeezed.
Following the Tutorial
This is one of those skills best learned by watching hands. In the video, pay close attention to where the yarn crosses the fingers and how the hook enters the loop. Pause when the first stitch goes in and replay it until your own position matches. Seeing the tail sit alongside the loop makes the abstract idea click.
Practice the wrap a few times before adding stitches, since the wrap is the part your hands must memorize. Then work a full first round, close it, and look at the result. Pull it out and repeat three or four times. By the fifth attempt, it usually feels natural.
A Handy Handmade Habit
The crochet magic ring is a small trick with a large reach. It gives every round project a tight, flat, professional-looking center, and once learned it never leaves your toolkit.
Remember the things that decide success: catch both strands in every stitch, keep the tail long, pull the right strand to close, and weave the end in well. With those four habits, the ring behaves.
Close the circle, and begin.
Video tutorial for the crochet magic ring by the original creator, linked below.
Follow us on Pinterest and subscribe to the Newsletter so you don’t miss a thing!
Tutorial and photos of this magic ring by: B.Hooked Crochet.