
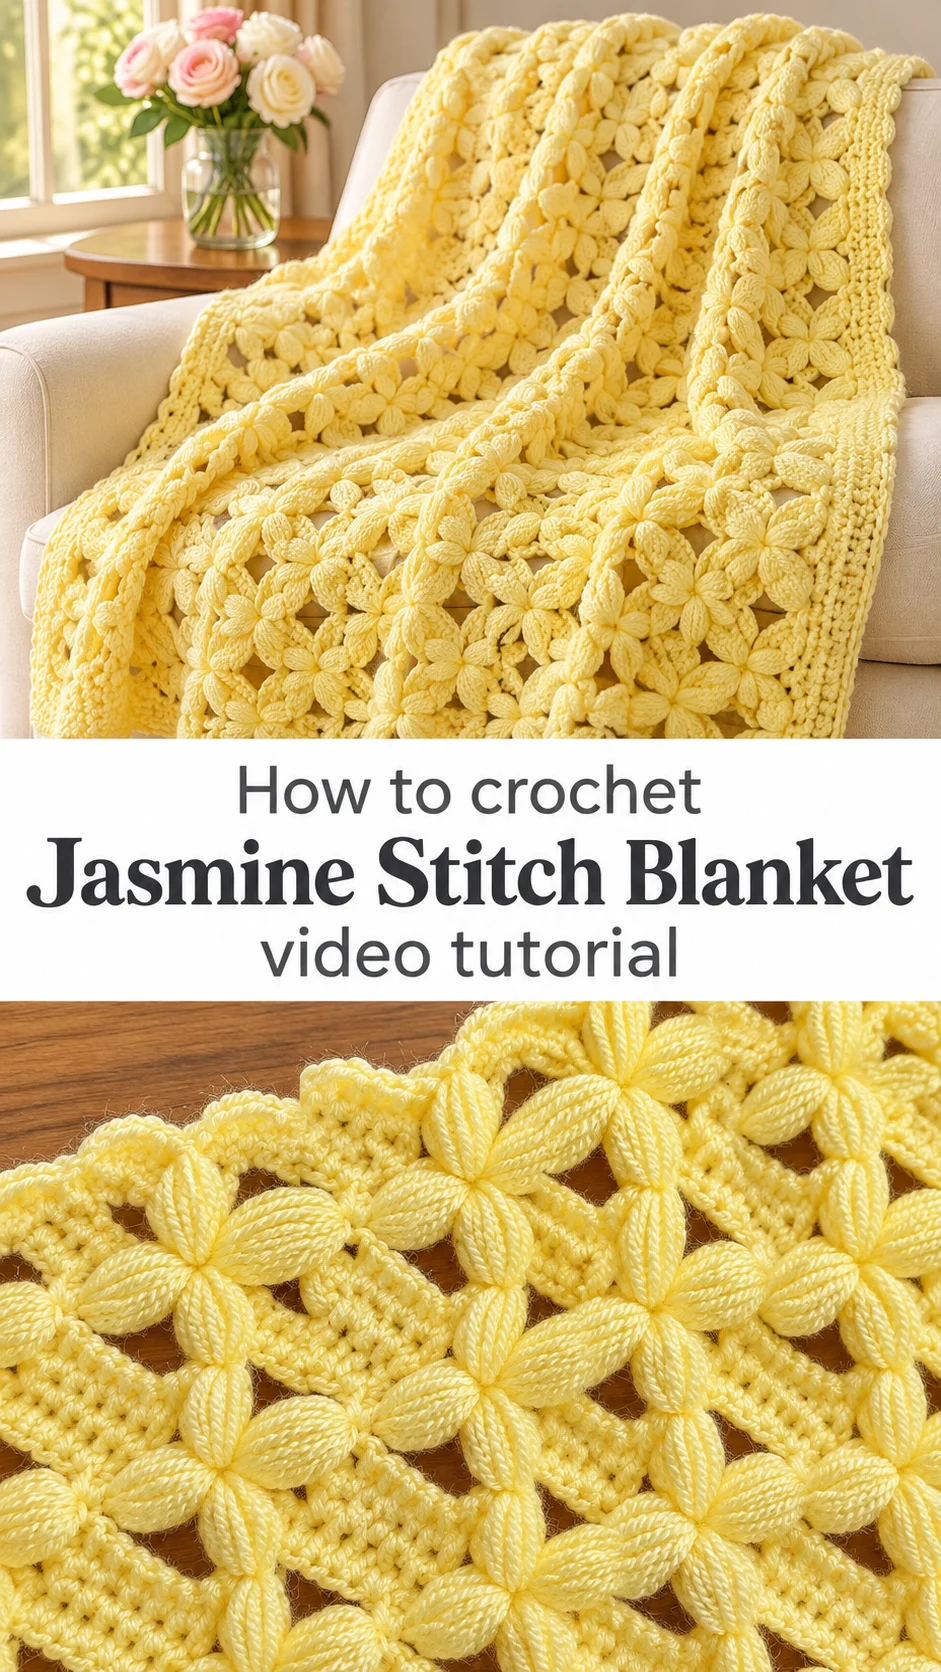
The crochet jasmine stitch blanket turns simple puff clusters and dense little panels into a fabric that looks like a field of pale yellow blossoms. It is soft to hold, rich to look at, and surprisingly calming to work.
The Crochet Jasmine Stitch Blanket
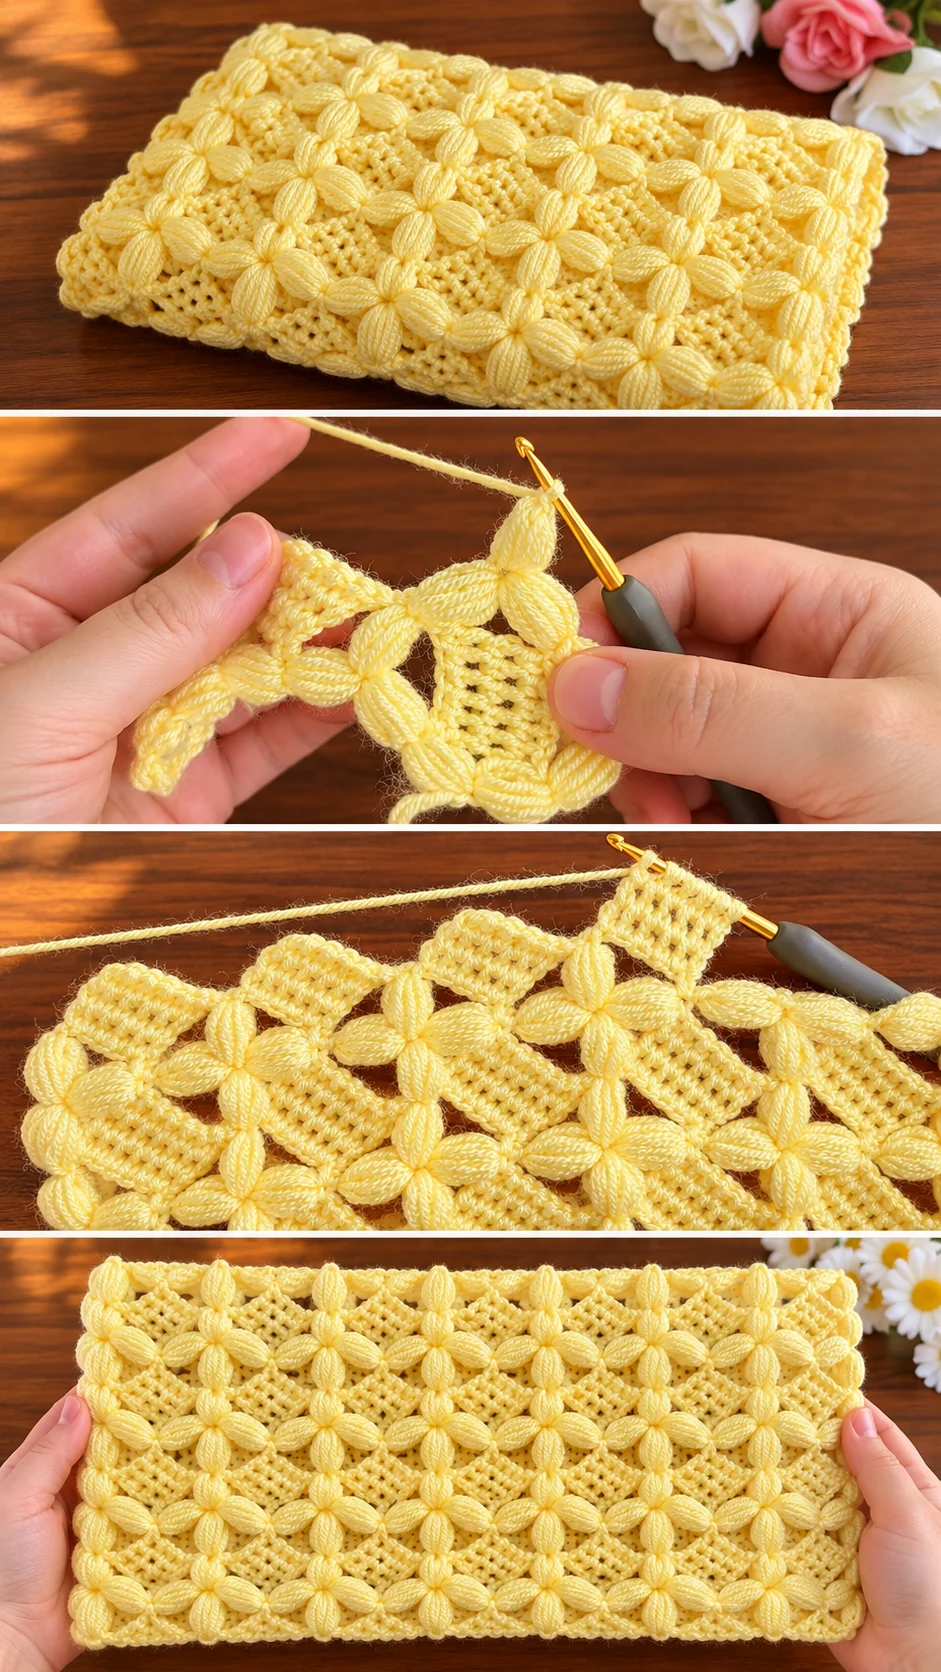
The crochet jasmine stitch blanket is built from four plump puff stitches that meet at a single point, forming a small flower with a pinched centre. Between these flowers sit narrow, tightly worked rectangles that read almost like woven ribbon. The two textures alternate on a diagonal, so the surface seems to ripple even when it lies flat. Small open gaps appear where the puffs and panels meet, which lets light through and keeps the fabric from feeling heavy. The butter yellow of the sample gives it a gentle, sunlit look. It suits a sofa throw, a pram cover, or a keepsake for a nursery. Few stitch patterns look this intricate while staying this soft.
Think of it as a pattern for someone who wants a project with presence. It makes a thoughtful gift for a new baby, a housewarming or a bridal shower. It also builds a useful skill: working puff stitches evenly, so each one sits plump and matching its neighbours.
Stitch Blanket Related Posts:
- Crochet Baby Blanket: A Soft and Timeless Treasure
- Crochet Two-Tone Men’s Beanie: A Bold Winter Essential
- Crochet Mini Duckling: A Tiny and Charming Keepsake
- Crochet Shell Stitch Blanket: A Vibrant Textured Treasure
Materials
For a crochet jasmine stitch blanket, choose a smooth, soft yarn in a light shade, since the puffs show their shape best when the strand has a clean, rounded twist. The sample appears to be a fine to medium cotton or cotton-acrylic blend with a slight matte finish, which is a good guide. A hook around 3 to 4 mm suits yarn of this weight, though the label on your skein is the better starting point. Pick a hook with a comfortable ergonomic handle, because puff stitches mean many loops on the hook and a lot of repeated pulling. Add a yarn needle for weaving in ends, stitch markers for the edges, and a tape measure. Buy all the yarn for the blanket in one go and check the dye lot, since pale yellows show colour differences quickly. Smooth yarn matters most here, because a fuzzy or splitty strand blurs the puff outlines and makes the loops hard to count.
Choosing the Best Yarn for This Stitch
Cotton gives the cleanest result. It holds the shape of each puff, so the flowers stay crisp and the little panels keep their firm, ribbed look. It also feels cool, which makes the blanket pleasant in warm rooms.
A cotton-acrylic blend is the practical alternative. It is lighter on the hands, a little more forgiving, and easier to wash, which matters for baby use. Choose a blend with a tight twist so the strand does not split when you gather several loops at once.
Avoid very fluffy or brushed yarns. They hide the puffs, and the open gaps between motifs fill with fuzz. If your puffs look messy no matter how carefully you work, the yarn is usually the cause, so switch to something smoother before you commit to a full blanket.
For colour, the soft yellow in the sample is a lovely start. Cream, pale sage, powder blue, blush pink and ivory all keep the same gentle character, and each lets the shadows inside the puffs do the decorating.
The Stitch Repeat: Puff Flowers and Ribbon Panels
Two elements make this blanket different from other puff stitch throws. The first is the four-petal flower, where puffs radiate in an X shape from a tight centre. The second is the compact panel of short, dense stitches that links one flower to the next.
Because the panels are firm and the puffs are airy, the fabric has real structure. It does not slump the way an all-puff blanket can. The diagonal arrangement also means the pattern looks different from every angle, which hides small irregularities well.
Watch the video closely at the moment the puffs are closed off. Pause where the hook gathers the loops, and notice how the tension is kept even before the final pull through. This one move decides whether the centres look neat or loose.
If your puffs look flat, you are probably pulling the loops too tight as you draw them up. If they look sloppy and uneven, you are pulling them up to different heights. Aim for loops the same length each time, and the flowers will match.
Keeping the Panels Even
The dense panels are where tension problems show most. If they come out stiff and cramped, go up a half hook size for those stitches only. If they look loose and open, work them with a firmer hand so they keep their ribbon-like look.
Yarn and Size Planning
Textured stitches like this one use more yarn than plain double crochet, because each puff wraps several loops into a single stitch. Buy more than you think you need, and consider adding an extra skein to your estimate.
Make a generous swatch before you begin. Work several flowers and panels, wash it the way you will wash the finished blanket, and let it dry flat. Measure it afterward. That swatch tells you how far the yarn will go and whether the drape suits your purpose.
Decide the size by use. A pram or lap blanket needs far fewer repeats than a sofa throw, and the pattern grows in clear, repeating units, so it is easy to stop at a size that works. Keep a note of how many repeats wide you have worked, so every row stays consistent.
How to Keep the Edges Straight
Edges are the hardest part of a stitch with diagonal motifs. The side of the work can wave in and out as each row begins and ends at a different point in the repeat.
Place a stitch marker at the first and last stitch of every row. This stops you from skipping the turning stitch, which is the usual cause of narrowing sides. Count the repeats now and then rather than trusting your eye.
If the edge ripples, you have most likely added extra stitches at the turn. If it pulls inward, a stitch has been missed. Both are easy to correct if you catch them within a row or two, so check early.
Adding a Border
A simple border helps the blanket look finished. A few rounds of single crochet in the same yellow keep the soft, unified look and tidy the uneven zigzag of the sides. A contrasting cream or white round would also frame the pattern nicely.
Work an extra stitch or two in each corner so the border lies flat instead of cupping. Pin or steam the finished edge lightly if it curls, and let it rest overnight.
How to Style a Crochet Jasmine Stitch Blanket
The sample is shown in a soft yellow against warm wood and white flowers, and that mood translates easily to a bedroom or nursery. Draped over the foot of a bed, the open gaps let the sheet colour show through and add depth.
On a neutral sofa, folded over one arm, it gives a gentle lift without overwhelming the room. Over a rocking chair in a nursery, it works as a decorative layer that also warms a lap.
A smaller version also makes a lovely stroller cover or a photo prop for newborn pictures. Keep the colours soft and the background plain so the stitch texture does the talking.
Tips for a Polished Finish
Weave in ends along the dense panels rather than through the puffs, because the firm fabric hides tails far better. Change skeins at the edge or at the start of a panel, not in the middle of a flower.
Block the finished blanket gently. Pin it flat, mist it with water, and let it dry. This relaxes the puffs, evens the diagonal lines, and opens the small gaps so the pattern reads clearly.
Wash by hand or on a delicate cycle, and dry flat. Hanging a wet blanket pulls the puffs out of shape, and a hot dryer can flatten them. The yarn label gives the final word, but gentle handling keeps the texture lofty.
A Soft Handmade Heirloom
The crochet jasmine stitch blanket rewards patience with a fabric that is both airy and sturdy, sculptural and soft. It looks complicated, yet it is built from one repeating idea.
Four things decide how it turns out: smooth yarn, even loop height in the puffs, steady tension in the panels, and careful edges. Get those right and the rest follows.
Pause the video often and replay the puff closure until your hands know it.
Small blossoms, many times over.
Video tutorial by Örgü Diyarı, whose clear demonstration of the crochet jasmine stitch blanket makes this textured pattern approachable.
Follow us on Pinterest and subscribe to the Newsletter so you don’t miss a thing!
Tutorial and photos of this jasmine stitch blanket by: Örgü Diyarı KNİTTİNG .