
A crochet textured beanie turns a simple winter hat into something you want to touch, with a pebbled fabric, a deep folded brim and a fluffy white pom pom on top.
The Crochet Textured Beanie
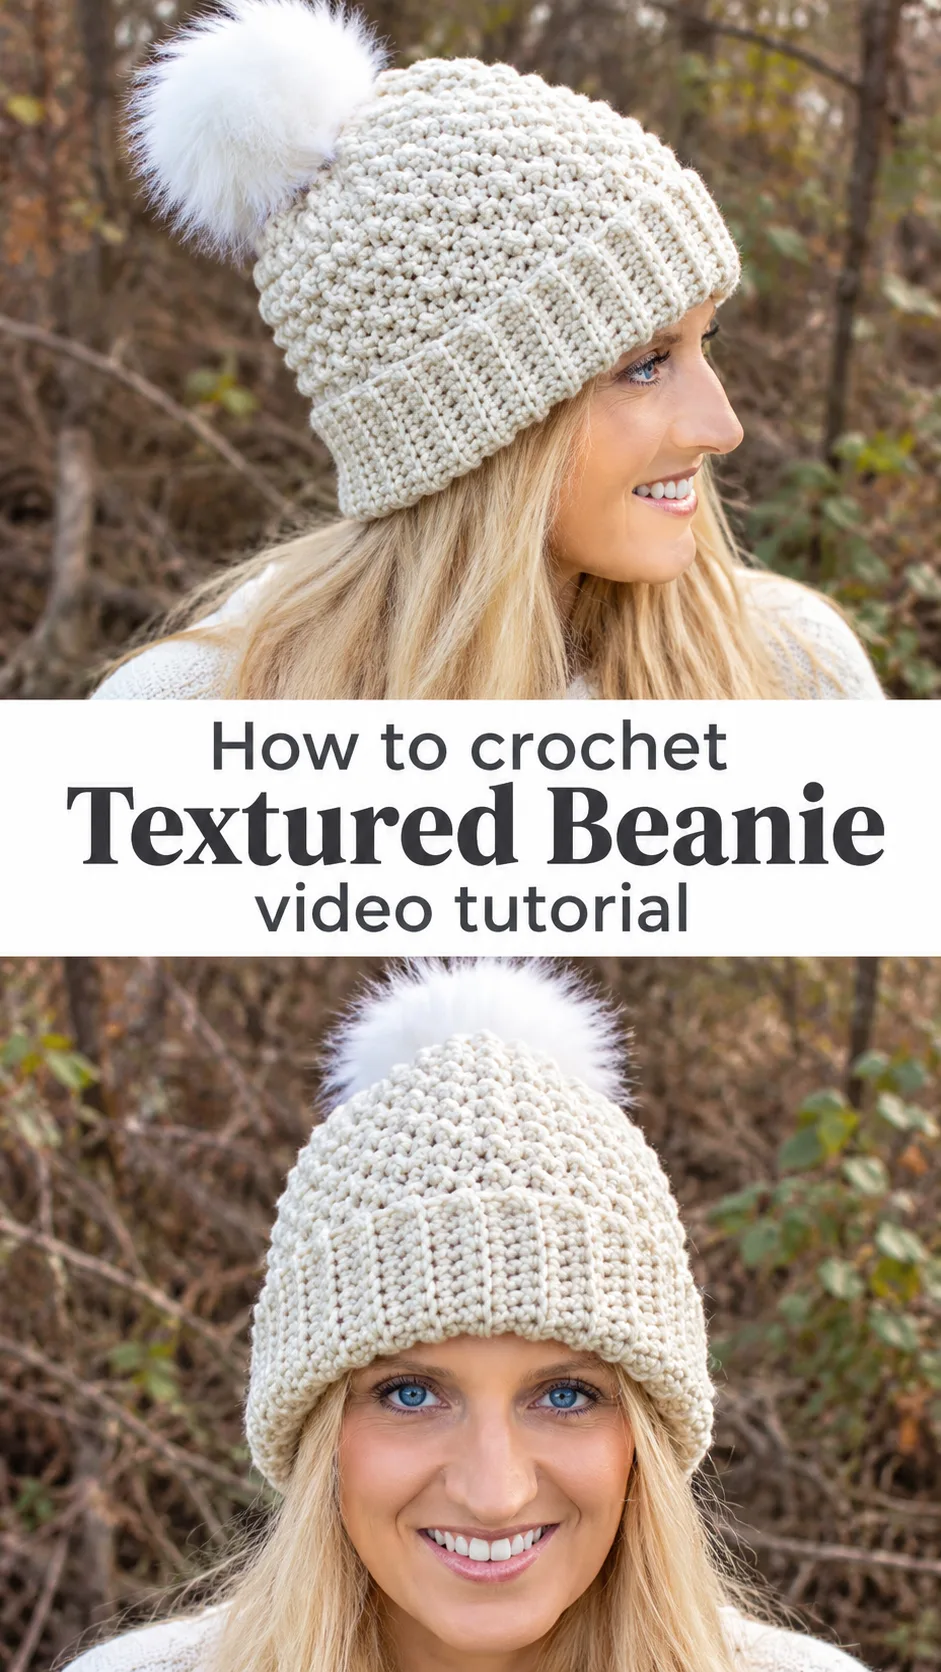
This crochet textured beanie is made in a soft cream yarn with a thick, slightly bumpy fabric. The body looks like tiny slanted stitches stacked in neat columns, which gives it far more character than plain rounds of double crochet. A ribbed brim sits at the bottom and folds up into a generous cuff. The cuff stays firm and hugs the head. On top sits a large faux fur pom pom in bright white, which gives the cream a fresh, wintry contrast. The shape is slightly slouchy, with room at the crown but a snug edge. It looks right with a wool coat on a cold walk, and just as right with a puffer jacket on the way to the slopes.
Beyond its looks, the hat is a very giftable project. It uses a small amount of yarn, works up quickly, and teaches a stitch combination you will want to reuse on cowls, headbands and mitts. The neutral colour suits almost anyone. Make one for yourself first.
Textured Beanie Related Posts:
- Crochet Floral Motif: A Timeless and Versatile Classic
- Crochet Granny Triangle Shawl: A Warm Bohemian Wrap
- Crochet Reversible Cardigan: A Chic Versatile Wrap
- Crochet Triangle Scarf: A Delicate Lace Accent
Materials
For a crochet textured beanie like this one, choose a smooth, medium to bulky weight yarn in cream or ivory. The stitches in the photos look plump and rounded, which suggests a wool blend or a soft acrylic with some body. A hook around 5 to 6 mm is a sensible general range for that thickness, and the hook in the tutorial appears to be in that region. Go up half a size if your fabric feels stiff, and down half a size if it feels floppy. You will also need a yarn needle for weaving in ends and a faux fur pom pom, ideally one with a snap or tie loop so you can remove it for washing. White fur against cream yarn looks deliberate and soft. Stitch markers are handy for tracking the start of each round or row.
Understanding the Stitch Texture
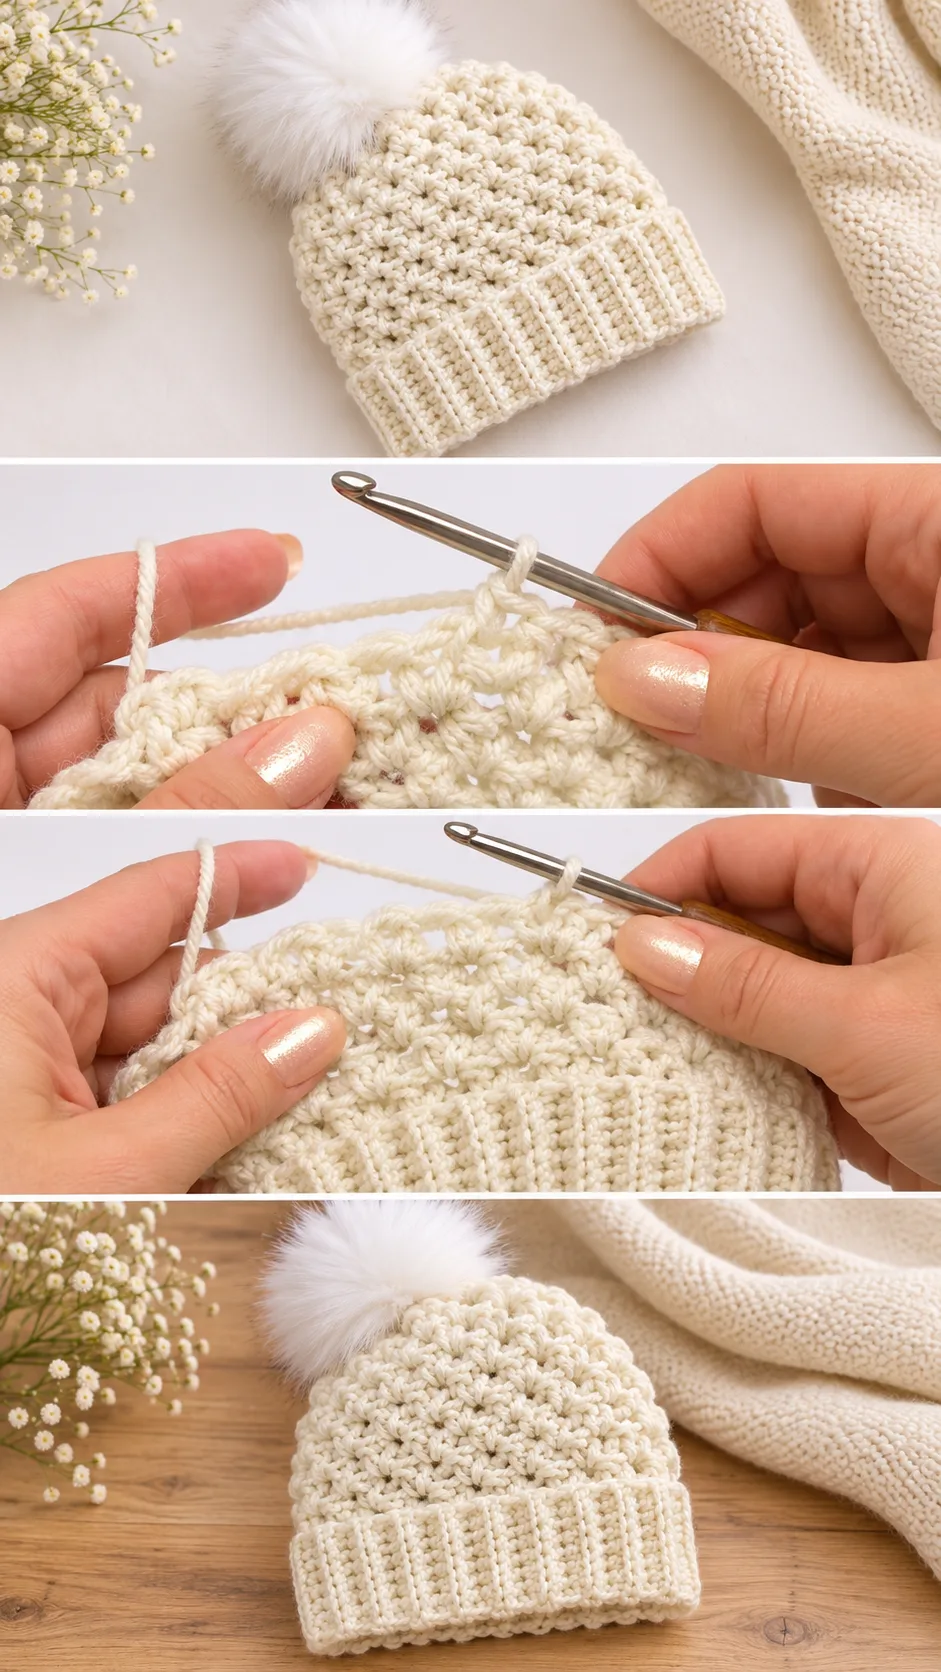
The texture is the whole point of this hat. Close views of the fabric show a combination of half double crochet and slip stitch, the same pairing flashed on screen in the tutorial. Together they build a dense, bumpy surface with small diagonal ridges.
Because slip stitches have almost no height, they pull the half double crochets closer together. That is why the fabric feels thick and warm instead of airy. It also means the hat holds its shape well without any lining.
The tricky part is tension. Slip stitches worked too tightly make the fabric stiff and hard to hook into on the next pass. If that happens, loosen your grip on the yarn and insert the hook more deliberately. Pause the video where the hook enters the work and copy the hand position.
Count your stitches at the end of the first few rows. The pattern looks regular, but it is easy to skip a stitch when the loops are small. A quick check early saves a lot of unravelling later.
Choosing the Best Yarn for a Warm, Soft Hat
Yarn decides how the beanie wears. A wool or wool blend gives real warmth and a slightly bouncy fabric that keeps the texture crisp. It suits cold climates, though some people find pure wool itchy against the forehead.
A soft acrylic is easier to wash and kinder to sensitive skin. Pick one with a smooth twist, because fuzzy yarns hide the stitch definition that makes this hat special. In the photos every little bump is clearly visible, so a clean, round strand is the right match.
Avoid cotton for this design. It has little stretch, so the dense stitches would feel tight and heavy, and the brim could lose its spring. If you want a lighter hat for mild weather, a cotton blend with some acrylic or wool is a better compromise.
For colour, the cream in the photos feels timeless. Heathered grey, dusty rose or forest green would all show the texture nicely. Very dark yarns hide it, so choose a mid or light shade if the stitch pattern matters to you.
The Ribbed Brim: The Detail That Holds It All Together
The brim looks like classic ribbing, with fine vertical lines running up the band. It reads as a separate strip from the textured body and is deep enough to fold back into a thick cuff. This gives the hat its snug fit and covers the ears.
Crocheted ribbing is usually worked in a way that makes the lines run vertically, so the band stretches sideways to fit the head. Watch the tutorial closely at this stage, because the hook placement is subtle. Replay it until the ridges look the same as the ones in the video.
If the brim feels too loose after a few wears, the band was probably worked with a larger hook or a relaxed tension. A fix is to redo the band with a smaller hook. If it is too tight to pull on, go up a hook size next time and keep the same stitch count.
Attaching the Body to the Band
The body appears to join to the brim along its edge, so the join needs even spacing. Pin or mark the halfway and quarter points first. This stops one side from bunching and keeps the seam, if there is one, tidy at the back of the head.
How to Style a Crochet Textured Beanie
In the photos the beanie is worn with the cuff folded and the pom pom sitting high, paired with a white top and long loose hair. The tone-on-tone cream and white gives a soft, snowy look, and the natural woodland backdrop shows how well it suits autumn and winter walks.
For a sharper outfit, wear it with a camel coat and leather gloves. The texture gives a plain wool coat some interest without competing with it. On a ski day, match it with a white or navy shell jacket and let the pom pom be the highlight.
You can also wear it unfolded for a longer, slouchier look that covers the ears fully. Pull it back slightly from the forehead for a casual feel. Swap the pom pom for a smaller one if you prefer a lower profile.
Tips for a Neat, Even Finish
Weave in ends along the dense ridges rather than across them. The thick fabric hides tails well, but ends tucked against the grain can poke through. Split the yarn strands a little with the needle so they grip.
If the finished hat looks lumpy, steam it lightly or lay it damp over a bowl to dry. Blocking relaxes the stitches and evens out small tension differences. Skip heavy pressing, because it flattens the texture you worked for.
If the crown puckers or points, the shaping rounds were probably uneven. Check the top against the video and redo a few rows if needed. Attach the pom pom last, through the centre of the crown, and tie it securely on the inside so it does not wobble.
Caring for Your Hat
Remove the faux fur pom pom before washing, since the fibres mat when soaked. Wash the hat by hand in cool water with a mild soap, press out the water in a towel, and dry it flat. This protects the stitch definition and prevents stretching.
Do not hang a wet hat, because the weight pulls the brim out of shape. Store it folded in a drawer, not crushed under heavy items. A quick brush of the pom pom with a soft comb brings back its fluff.
A Cosy Handmade Treasure
This crochet textured beanie is a warm, good-looking project built on one clever stitch pairing and a well-made brim. Its charm lies in the slanted, pebbled fabric and the soft pom pom on top.
Four things decide how it turns out: a smooth, round yarn, an even tension, a snug ribbed band and a neat join. Get those right and the hat will look polished.
Make one for the cold months ahead.
Video tutorial by Naztazia, who shows how to make this crochet textured beanie step by step on her YouTube channel.
Watch the Tutorial
Follow us on Pinterest and subscribe to the Newsletter so you don’t miss a thing!
Tutorial and photos of this textured beanie by: naztazia.