
I have been dreaming about designing a mini backpack for ages. Something cute enough for a quick coffee run, structured enough to actually hold your essentials, and interesting enough to keep me engaged while crocheting. When I finally sat down to work on this blush pink beauty, I wanted the flap to be the star of the show with that gorgeous shell texture, while keeping the body simple and satisfying to stitch. I am SO pleased with how it turned out, and I cannot wait for you to make one too!
Get the Ad-Free PDF Pattern
You can find the free pattern below, or you can purchase the ad-free printable PDF from my shop.
Get the Printable PDF →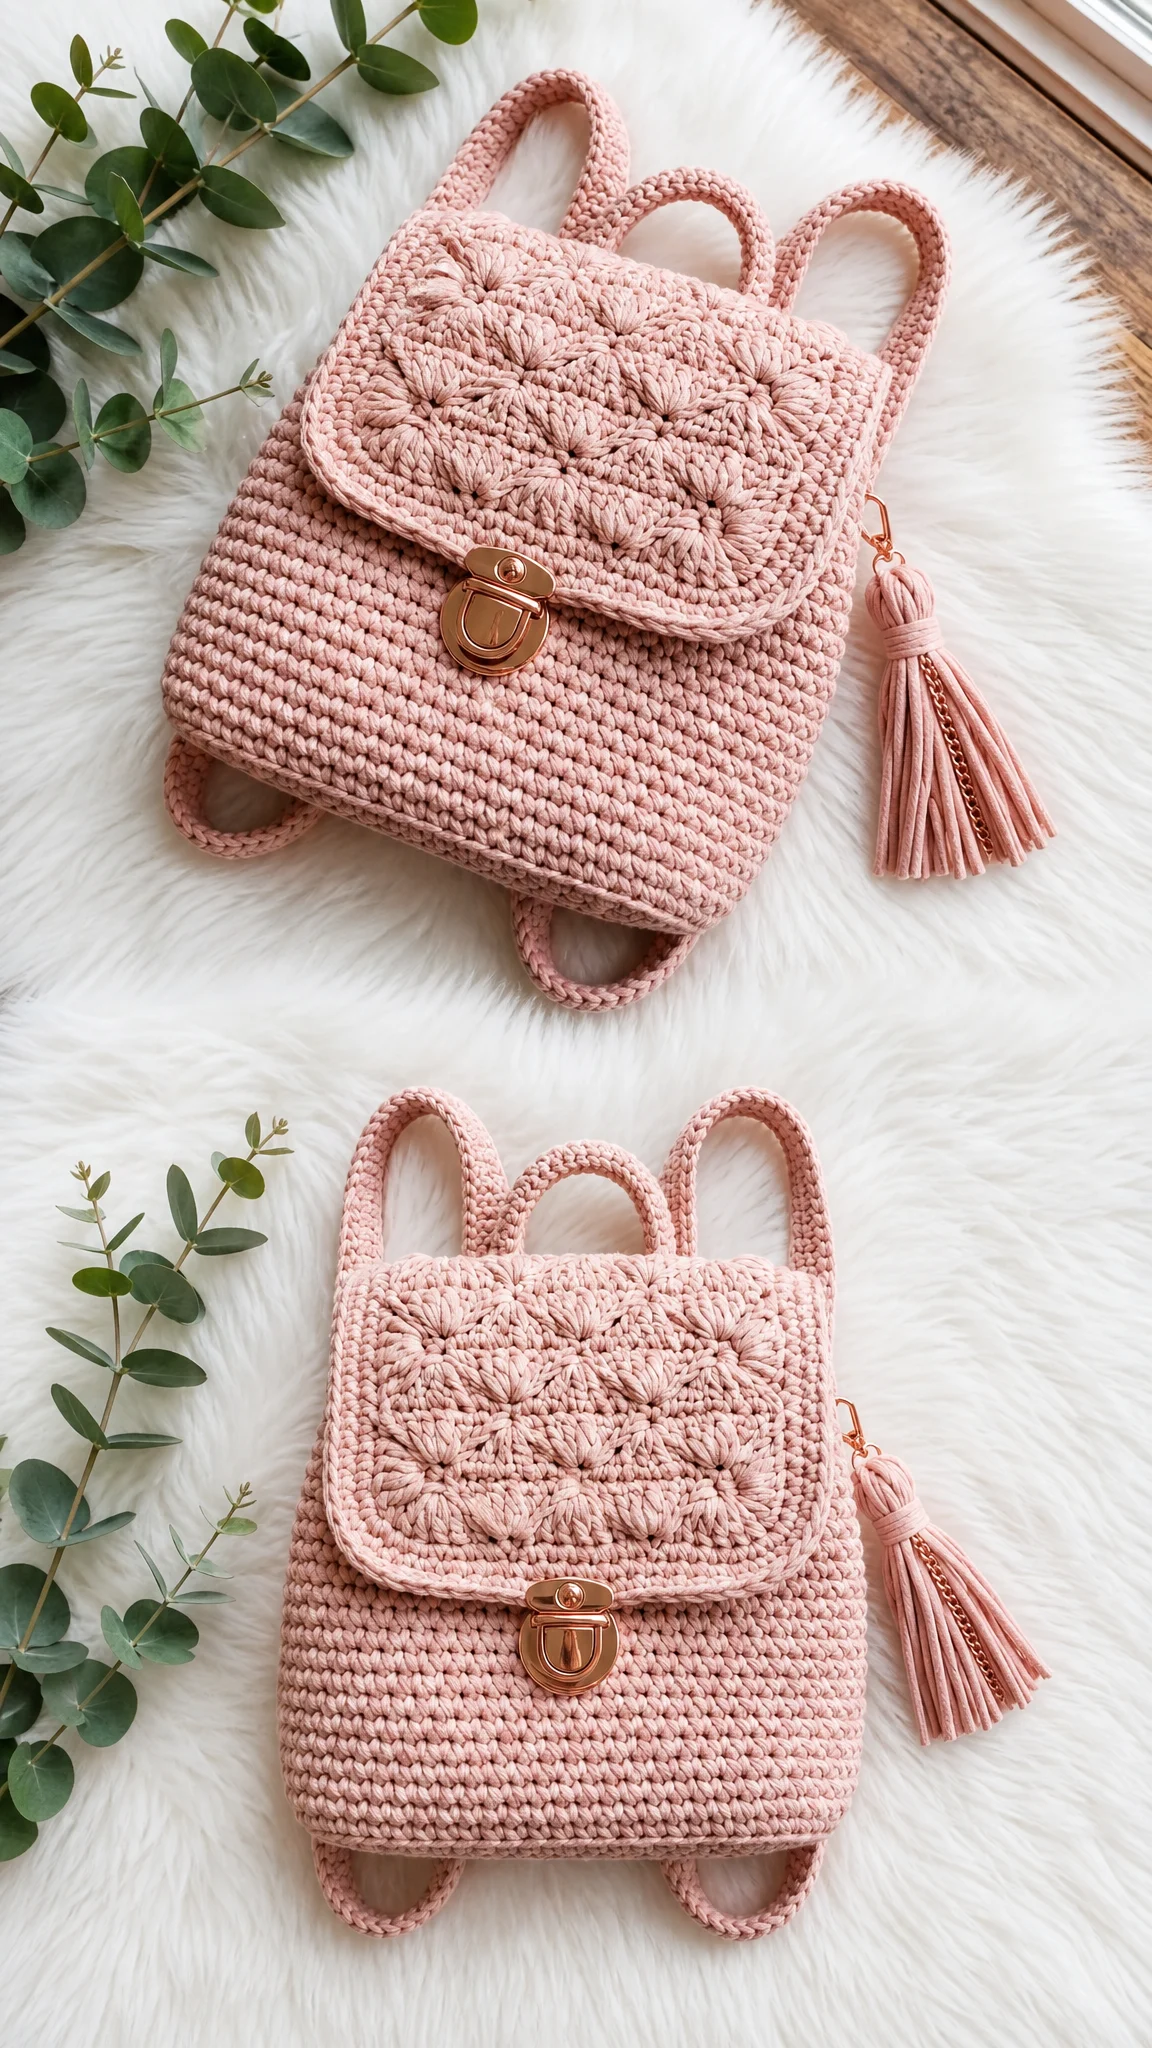
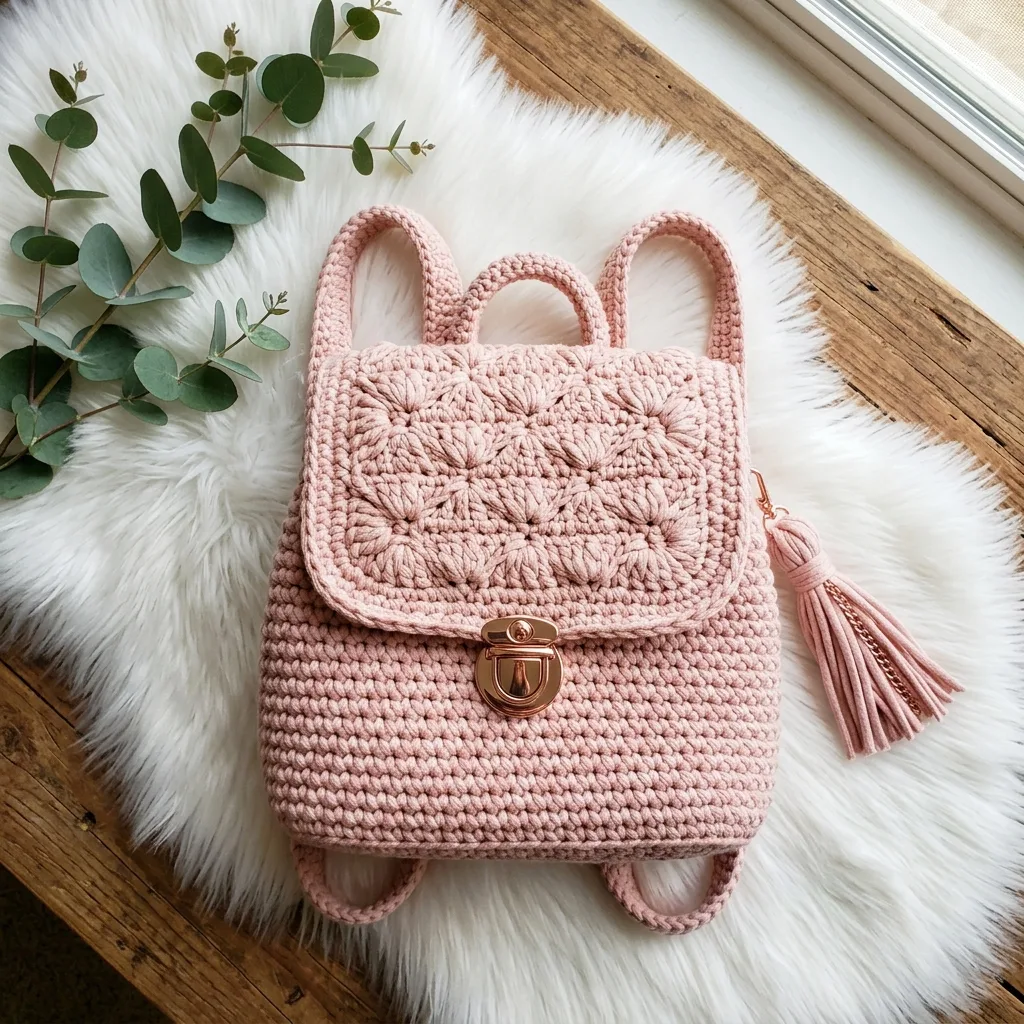
This sweet little backpack combines a textured shell stitch flap with a clean single crochet body, finished off with adjustable straps, a stylish push lock closure, and an optional tassel for extra charm. It works up surprisingly quickly, and the construction is more straightforward than it looks. Whether you are heading to the farmers market or need a hands-free option for running errands, this mini backpack has you covered.
About This Crochet Mini Backpack Pattern
This crochet mini backpack pattern creates a compact, functional bag that measures approximately 8 inches wide, 9 inches tall, and 3 inches deep. The size is perfect for carrying your phone, wallet, keys, and a few small essentials without weighing you down.
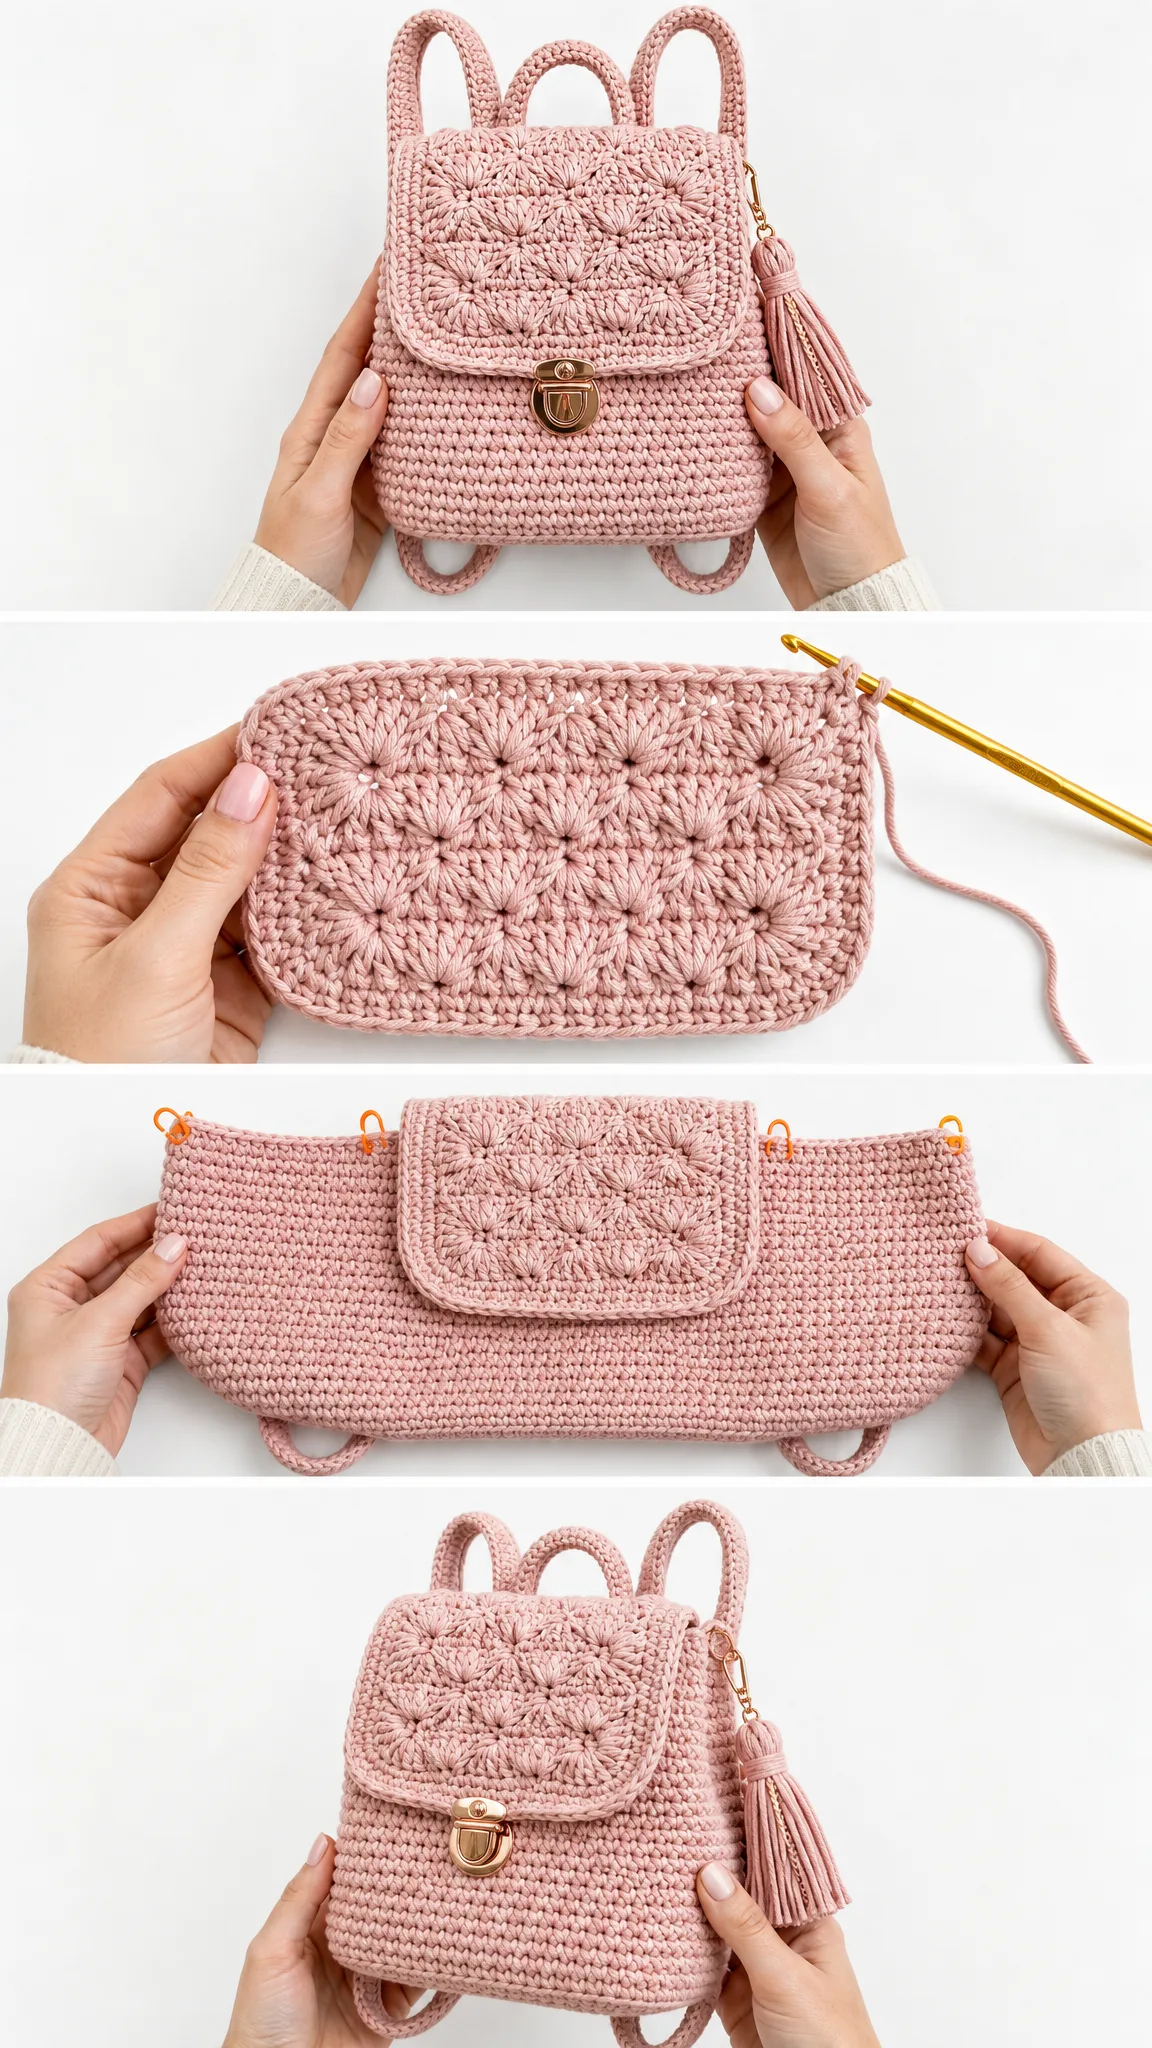
The design features two distinct textures. The main body uses rows of single crochet (sc) worked in the round, creating a dense, sturdy fabric that holds its shape beautifully. The flap showcases a lovely shell stitch pattern that adds visual interest and a touch of elegance to the finished piece.
Skill level: Intermediate beginner. If you can work single crochet confidently and are ready to try shells, you can absolutely make this backpack.
Estimated time: 8 to 12 hours depending on your pace.
Materials You Will Need
Gathering your supplies before you start makes the whole process smoother. Here is everything you need for this project:
Yarn:
Hook:
Notions:
Gauge:
16 sc × 18 rows = 4 inches (10 cm) in single crochet
Check your gauge before starting. A slightly firm gauge gives the backpack more structure.
Stitch Abbreviations and Definitions
Let me walk you through every stitch abbreviation used in this pattern. Even if you know these stitches well, a quick refresher never hurts.
ch = chain. Wrap yarn over hook and pull through the loop on your hook. This creates the foundation for most crochet projects.
sc = single crochet. Insert hook into stitch, yarn over and pull up a loop (2 loops on hook), yarn over and pull through both loops. This is your workhorse stitch for the bag body.
sl st = slip stitch. Insert hook into stitch, yarn over and pull through both the stitch and the loop on your hook in one motion. Used for joining rounds.
dc = double crochet. Yarn over, insert hook into stitch, yarn over and pull up a loop (3 loops on hook), yarn over and pull through 2 loops (2 loops remain), yarn over and pull through remaining 2 loops. This taller stitch creates the shells.
shell = a group of stitches worked into the same stitch or space. For this pattern, each shell consists of 5 dc worked into one stitch.
st(s) = stitch(es)
sp = space
sk = skip
rnd(s) = round(s)
Pattern Notes Before You Begin
A few things to keep in mind as you work through this crochet backpack tutorial:
Step by Step Instructions
The Base
The backpack starts with an oval base that creates the structured bottom.
Foundation: Ch 21.
Rnd 1: Sc in 2nd ch from hook and in each of the next 18 ch, 3 sc in last ch (this creates the turn at the end). Working along the opposite side of the foundation chain, sc in each of the next 18 ch, 2 sc in the last ch. Do not join. Place a stitch marker in the first sc to mark the beginning of your rounds. (42 sc)
Rnd 2: 2 sc in the first st, sc in the next 18 sts, 2 sc in each of the next 3 sts, sc in the next 18 sts, 2 sc in each of the last 2 sts. (48 sc)
Rnd 3: Sc in the first st, 2 sc in the next st, sc in the next 18 sts, [sc in the next st, 2 sc in the next st] 3 times, sc in the next 18 sts, [sc in the next st, 2 sc in the next st] twice. (54 sc)
Rnd 4: Sc in the first 2 sts, 2 sc in the next st, sc in the next 18 sts, [sc in the next 2 sts, 2 sc in the next st] 3 times, sc in the next 18 sts, [sc in the next 2 sts, 2 sc in the next st] twice. (60 sc)
Your base should now measure approximately 3 inches wide by 7 inches long. If it is significantly different, check your gauge and adjust your hook size if needed.
The Body
Now we build up the sides of the backpack. This section is wonderfully meditative, just round after round of single crochet.
Rnd 5: Working in the back loops only for this round (this creates a nice defined edge at the base), sc in each st around. (60 sc)
Rnds 6 through 35: Sc in each st around. (60 sc)
That is 30 rounds of single crochet for the body. The body should measure approximately 6.5 to 7 inches tall from the base edge.
Tip: If you lose track of your rounds, count the ridges on the outside of your work. Each ridge represents one round.
Shaping the Top Opening
Rnd 36: Sc in each of the first 15 sts, ch 5, sk 5 sts (this creates the first strap opening), sc in the next 20 sts, ch 5, sk 5 sts (second strap opening), sc in the remaining 15 sts. (50 sc + 2 ch-5 spaces)
Rnd 37: Sc in each sc and in each ch around. (60 sc)
Rnds 38 and 39: Sc in each st around. (60 sc)
Sl st in the next st. Fasten off and weave in this end.
The Flap
The flap is where the magic happens! That beautiful shell texture gives your backpack its charming character. The flap is worked flat in turned rows.
Row 1: With the back of the backpack facing you, join yarn to the 8th stitch from the right side seam along the back top edge. Ch 1, sc in the same st and in each of the next 23 sts. Turn. (24 sc)
Row 2: Ch 1, sc in each st across. Turn. (24 sc)
Row 3: Ch 1, sc in the first st, sk 2 sts, 5 dc in the next st (shell made), sk 2 sts, [sc in the next st, sk 2 sts, 5 dc in the next st, sk 2 sts] 3 times, sc in the last st. Turn. (4 shells + 5 sc)
Row 4: Ch 3 (counts as first dc), 2 dc in the first st, sc in the center dc of the next shell, [5 dc in the next sc, sc in the center dc of the next shell] 3 times, 3 dc in the last st. Turn.
Row 5: Ch 1, sc in the first st, 5 dc in the next sc, [sc in the center dc of the next shell, 5 dc in the next sc] 3 times, sc in the last st. Turn.
Rows 6 through 11: Repeat Rows 4 and 5 three more times.
Row 12: Ch 1, sc evenly around the entire flap edge, working 3 sc in each corner to keep it flat. Fasten off and weave in ends.
The flap should measure approximately 4 inches tall and 6 inches wide.
The Straps (Make 2)
Each strap is worked flat and then attached to the bag.
Foundation: Ch 7.
Row 1: Sc in the 2nd ch from hook and in each ch across. Turn. (6 sc)
Rows 2 through 85: Ch 1, sc in each st across. Turn. (6 sc)
Your strap should measure approximately 19 inches long and 1.5 inches wide. You can adjust the length by adding or removing rows. Remember that the straps will stretch slightly with use, so err on the shorter side if you are between sizes.
Fasten off, leaving a long tail for sewing.
The Top Handle
This small loop at the top lets you hang your backpack or grab it quickly.
Foundation: Ch 6.
Row 1: Sc in the 2nd ch from hook and in each ch across. Turn. (5 sc)
Rows 2 through 20: Ch 1, sc in each st across. Turn. (5 sc)
Fasten off, leaving a long tail.
Assembly
Time to put all the pieces together! Take your time with this section for a professional-looking finish.
Attaching the Straps
1. Thread the strap tail onto your yarn needle.
2. Position the bottom ends of both straps at the base of the bag, approximately 1.5 inches apart on the back panel.
3. Whip stitch each strap end securely in place, going over the join several times for strength.
4. Thread the top ends of the straps through the ch-5 openings you created earlier.
5. Fold the top end of each strap down about 1 inch and stitch it to itself to create an adjustable loop. Alternatively, you can use small D-rings or slider hardware for easier adjustment.
Attaching the Top Handle
1. Fold the handle piece in half to form a loop.
2. Position it at the center top of the back panel, just below the flap attachment point.
3. Stitch both ends securely to the inside of the bag.
Installing the Closure
1. Position the push lock clasp on the center of the flap, about 1 inch from the bottom edge.
2. Mark where the prongs will go through.
3. Carefully create small holes for the prongs using your hook or a small pointed tool.
4. Push the prongs through and fold them flat on the inside of the flap. You can back this with a small piece of felt or fabric for a cleaner finish.
5. Position the catch plate on the front of the bag body, aligning it with the clasp.
6. Install as directed by your hardware.
Adding the Optional Tassel
A tassel adds such a sweet finishing touch! To make one:
1. Wrap yarn around a 4-inch piece of cardboard about 30 times.
2. Thread a 12-inch piece of yarn under the wraps at one end and tie tightly.
3. Cut the wraps at the opposite end.
4. Wrap another piece of yarn around the bundle about half an inch from the top and tie securely.
5. Trim the ends evenly.
6. Attach to the zipper pull, strap, or flap corner with a small chain or jump ring.
Optional Lining
Adding a fabric lining makes your backpack more polished and helps it hold its shape. If you would like to add one:
1. Cut two pieces of lining fabric to match the front and back panels, plus half an inch seam allowance on all sides.
2. Cut one piece for the base and sides, or piece these together.
3. Sew the lining pieces together, leaving the top open.
4. Press the top edge under by half an inch.
5. Slip the lining inside the bag with wrong sides together.
6. Hand stitch the lining to the top edge of the bag using a whip stitch or blind hem stitch.
Customization Ideas
Once you have mastered this basic crochet mini backpack pattern, try these variations:
Color play: Use two colors, one for the body and a contrasting shade for the flap. Or work the flap in stripes for a playful look.
Different closures: Swap the push lock for a magnetic snap, a button and loop, or even a drawstring closure inside with the flap as a decorative cover.
Sizing up: Add more stitches to your foundation chain and more rounds to the body for a larger backpack. Just maintain the proportions.
Embellishments: Add crocheted flowers, appliqués, or embroidered details to the flap. A small pocket on the inside is practical too.
Care Instructions
To keep your handmade backpack looking beautiful:
Troubleshooting Common Issues
Bag is too floppy: Your gauge may be too loose. Try going down a hook size. You can also add a piece of plastic canvas to the base for extra structure.
Flap curls: Block the flap by pinning it flat while damp and letting it dry completely. The shell stitch naturally wants to curl a bit, but blocking helps.
Straps twist: Make sure you are not accidentally turning the strap as you attach it. Pin it in place first and check that it lies flat before stitching.
Stitches look uneven: This often improves with blocking. Cotton yarn especially benefits from a good wet block.
Why You Will Love This Pattern
This step by step crochet backpack pattern hits that sweet spot between interesting and achievable. The shell stitch flap gives you something beautiful to look at as you work, while the single crochet body lets you relax and get into a rhythm. The finished backpack is sturdy, practical, and undeniably cute.
It also makes a wonderful gift! For birthdays, graduations, or just because, a handmade backpack shows real care and thoughtfulness. Make one in the recipient’s favorite color for an extra personal touch.
Thank you so much for choosing this pattern for your next project! I really hope you enjoy making this sweet little backpack as much as I enjoyed designing it. If you make one, I would absolutely love to see it. Tag me on Instagram or share a photo in my Facebook group, seeing your creations truly makes my day!
If this pattern caught your eye, go ahead and save it to your Pinterest boards so you can find it when you are ready to start. And please drop a comment below if you make one or have any questions along the way. Happy hooking!
Want a Quick & Easy Printable Version?
Get a clean, beautifully formatted PDF of this pattern — easy to follow step by step, ready to print or save on any device. No scrolling, no distractions, just the pattern.
Get the Printable PDF →You Might Also Like
- Coral Reef Charm Bracelet Free Crochet Pattern
- Lavender Dreams Candy Bolster Pillow Free Crochet Pattern
- Coral Reef Fish Crochet Beach Tote Free Pattern
- Ocean Blue Coastal Granny Square Backpack Crochet Pattern