
Let me guess. You’ve seen those gorgeous crocheted backpacks all over Instagram and Pinterest, and you’ve convinced yourself they’re way too complicated. Too much shaping. Too many fiddly parts. Hardware that seems impossible to attach. I’m here to tell you that you’re wrong, and I mean that in the kindest possible way. This mini backpack looks incredibly polished and professional, but it breaks down into manageable pieces that even an adventurous beginner can tackle. The oval base? Just increases around a foundation chain. The body? Straight rounds with no shaping at all. The flap? Basic decreases you probably already know. If you can single crochet and you’re willing to try one new technique, you can absolutely make this bag.
Get the Ad-Free PDF Pattern
You can find the free pattern below, or you can purchase the ad-free printable PDF from my shop.
Get the Printable PDF →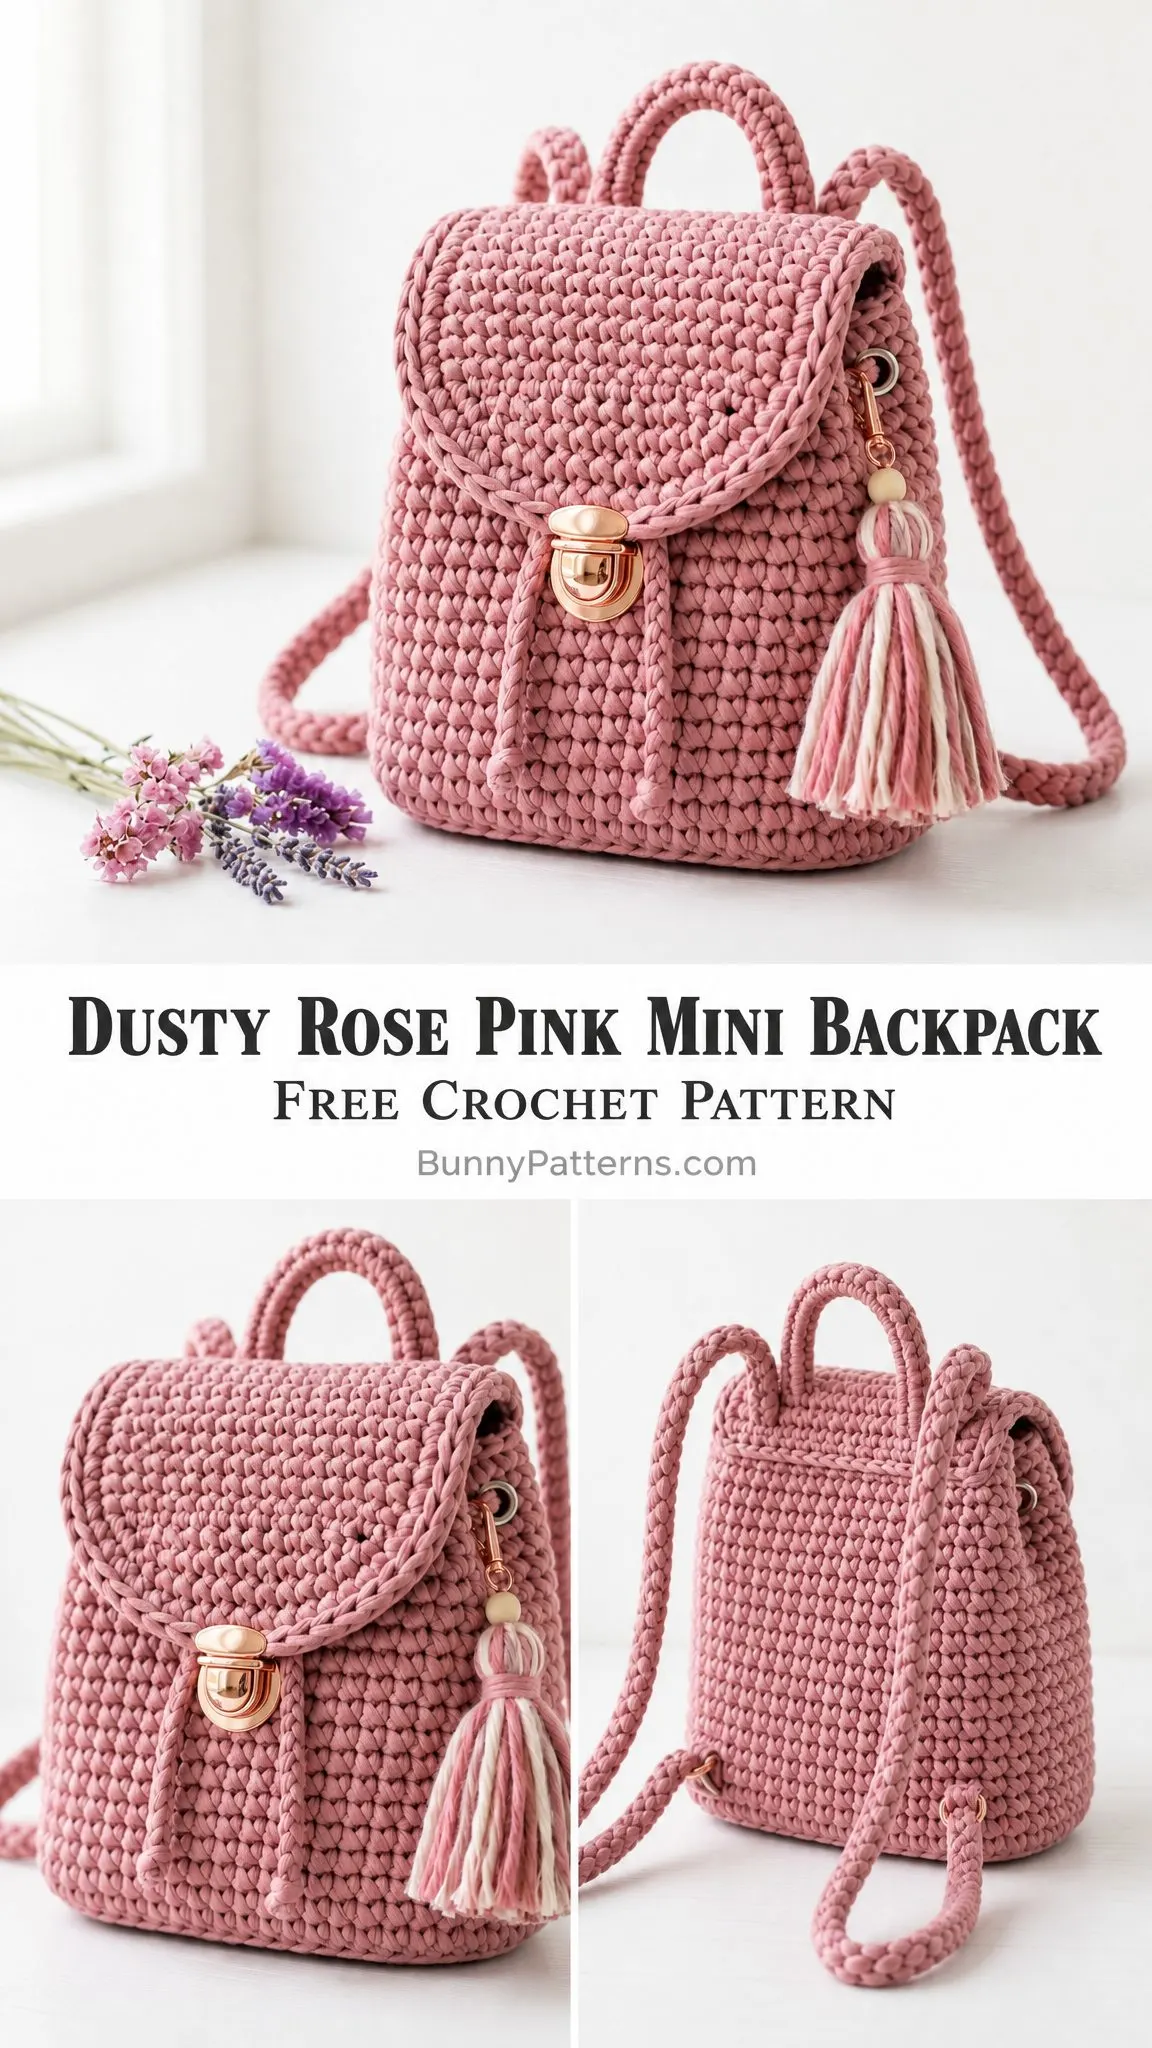
About This Dusty Rose Mini Backpack Crochet Pattern
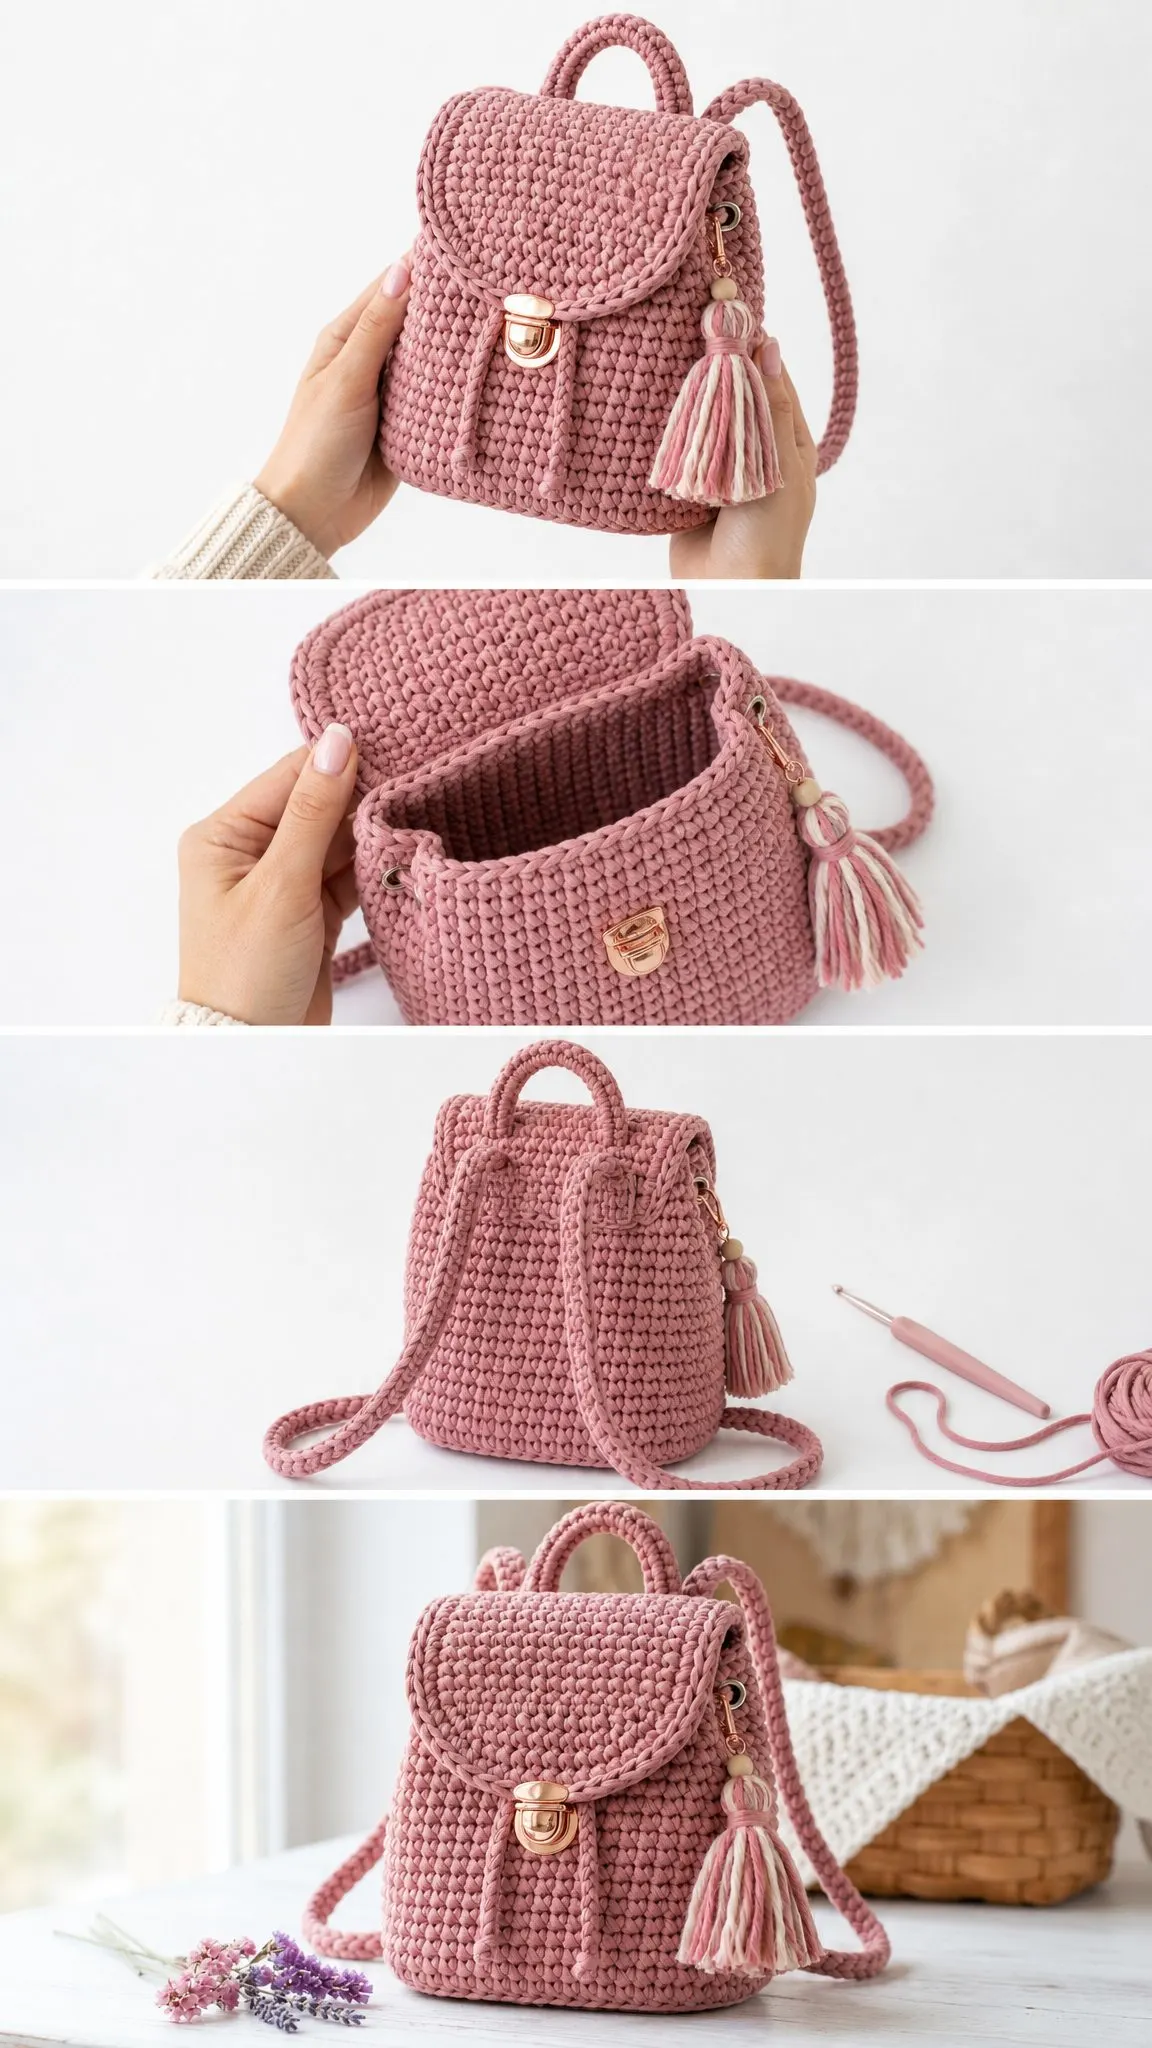
This plush mini backpack features an oval base, a sturdy upright body, a rounded flap with a corded border, rose gold style hardware, braided straps, and a soft tassel charm. The entire bag is worked mainly in center single crochet, which creates that dense, woven looking texture you see in the photos.
The finished size measures approximately 7.5 inches wide by 8 inches tall by 3.5 inches deep (19 x 20 x 9 cm), not including the straps and handle. The strap length is adjustable before you do your final stitching, so you can customize the fit.
Skill level: Intermediate. You’ll work in continuous rounds, shape an oval base, place hardware, crochet cords, sew pieces cleanly, and finish with decorative details.
Time estimate: 7 to 10 relaxed hours, plus blocking and finishing time.
Materials You’ll Need
Before you start gathering supplies, let me walk you through everything this crochet tutorial requires.
Yarn:
Hook:
Notions:
Yarn Suggestions:
If you’re wondering what yarn will give you the best results, here are some excellent options:
When substituting yarn, choose a bulky or super bulky weight that creates a dense fabric at gauge. If your fabric collapses or feels floppy, go down a hook size or plan to add a lining.
Gauge
Getting gauge right matters more for this project than for most. The bag’s shape depends on creating a firm fabric that holds its structure.
8 center single crochet stitches by 9 rounds equals 4 inches (10 cm) after a gentle steam block.
Match both stitch gauge and round gauge before starting. If your stitches are too loose, the bag will be floppy and won’t stand up properly.
Stitch Guide and Abbreviations
Let me define every stitch and abbreviation you’ll encounter in this step by step pattern.
ch = chain
sl st = slip stitch
st(s) = stitch(es)
sc = single crochet (insert hook, yarn over, pull up a loop, yarn over, pull through both loops)
csc = center single crochet (explained in detail below)
inc = increase (work 2 single crochet stitches in the indicated stitch)
dec = decrease (single crochet 2 stitches together)
RS = right side
rem = remaining
UK crocheters: US single crochet equals UK double crochet.
How to Work Center Single Crochet (csc)
This is the special stitch that gives the backpack its beautiful woven texture. Don’t let it intimidate you. It’s simply a single crochet worked in a slightly different spot.
1. Insert your hook into the center V of the next stitch, between the two vertical bars. Instead of going under the top two loops like a regular single crochet, you’re going right through the middle of the stitch.
2. Yarn over and pull up a loop to the height of the round.
3. Yarn over and pull through both loops on your hook.
Tip: Keep your tension relaxed so the next round is easy to enter. If you’re finding it hard to insert your hook, you’re probably pulling too tight.
How to Work Romanian Cord
Romanian cord creates those beautiful braided straps and the handle. Here’s how to crochet it:
1. Chain 2, then single crochet in the 2nd chain from hook.
2. Turn the cord slightly clockwise. Insert your hook under the two side loops along the left edge, yarn over, pull up a loop, yarn over, pull through both loops.
3. Repeat step 2, always rotating the cord and working under the side loops. Stop when you reach the stated length.
The cord twists as you work, which is exactly what should happen. That’s what creates the braided appearance.
Pattern Notes Before You Begin
Left-handed makers: Work the same stitch counts. Your spiral will travel in the opposite direction. Place the flap and hardware by measurement rather than by left/right wording in the instructions.
Base Instructions
Work in dusty rose yarn. Chain 13.
Round 1: Single crochet in 2nd chain from hook, single crochet in next 10 chains, 3 single crochet in last chain. Working along the opposite side of the foundation chain, single crochet in next 10 chains, 2 single crochet in first chain. (26 sc)
Round 2: Increase in first stitch, single crochet 10, increase in next 3 stitches, single crochet 10, increase in last 2 stitches. (32 sc)
Round 3: [Single crochet 1, increase] once, single crochet 10, [single crochet 1, increase] 3 times, single crochet 10, [single crochet 1, increase] 2 times. (38 sc)
Round 4: [Single crochet 2, increase] once, single crochet 10, [single crochet 2, increase] 3 times, single crochet 10, [single crochet 2, increase] 2 times. (44 sc)
Base Checkpoint
Your base should measure about 7.25 by 3.25 inches (18.5 x 8 cm). A slight cup shape is fine and actually helps the bag stand up. However, if you see a strong ruffle, your stitches are too loose. Go down a hook size and try again.
Body Instructions
Round 5: Working through back loops only, center single crochet in each stitch around. (44 csc)
Working in the back loops only creates that nice defined ridge between the base and the body walls.
Rounds 6 through 21: Center single crochet in each stitch around. (44 csc each round)
Round 22: Single crochet in each stitch around to firm the top edge. (44 sc)
Round 23: Slip stitch loosely in each stitch around. Fasten off, leaving an 18 inch (46 cm) tail for tidying the edge. (44 slip stitches)
Body Checkpoint
After Round 21, your body should measure approximately 7.5 inches (19 cm) wide at the front and 7.5 to 8 inches (19 to 20 cm) tall from base to top edge.
Flap Instructions
The flap is worked flat in dusty rose yarn. Chain 21.
Row 1: Single crochet in 2nd chain from hook and in each chain across. Chain 1, turn. (20 sc)
Rows 2 through 5: Single crochet in each stitch across. Chain 1, turn. (20 sc)
Row 6: Decrease, single crochet 16, decrease. Chain 1, turn. (18 sc)
Row 7: Decrease, single crochet 14, decrease. Chain 1, turn. (16 sc)
Row 8: Decrease, single crochet 12, decrease. Chain 1, turn. (14 sc)
Row 9: Decrease, single crochet 10, decrease. Chain 1, turn. (12 sc)
Row 10: Decrease, single crochet 8, decrease. Do not turn. (10 sc)
Flap Edging
Single crochet around the entire flap as follows: 2 single crochet in lower corner, single crochet 8 across lower edge, 2 single crochet in lower corner, single crochet 10 up side, single crochet 20 across top, single crochet 10 down side. Join with slip stitch. (52 sc)
Corded Border
Make a 24 inch (61 cm) Romanian cord and sew it around the outer flap edge, easing it smoothly around the curved portion.
Attaching the Flap and Lock
Center the straight top edge of the flap over the back top edge of the bag, spanning 20 body stitches. Sew securely through the flap top and body Rounds 21 through 23.
Close the flap and mark the lock position at the front center, about 2.75 inches (7 cm) below the top edge. Install the lock following your hardware’s instructions, reinforcing the inside with lining fabric or a small felt patch.
Make two 5.5 inch (14 cm) Romanian cords and sew them vertically from the flap curve toward the lock for that decorative drawstring style accent you see in the photos.
Top Handle
Make a Romanian cord 9 inches (23 cm) long. Curve it into a handle shape and sew each end to the back top edge, about 2 inches (5 cm) apart.
Wrap each handle foot with yarn 6 to 8 times before knotting inside the bag for a polished look.
Shoulder Straps (Make 2)
Make a Romanian cord 34 inches (86 cm) long for each strap, or adjust to your desired wearing length.
Thread one strap from a lower back ring up through the matching upper side ring, then back down to the same lower ring. Sew or knot the ends securely at the lower ring.
Repeat for the second strap.
Important: Try the backpack on before final trimming. Bulky yarn shortens slightly as knots are tightened.
Hardware Placement Guide
Side Charm Loop
Attach a small side ring to the right side of the flap and body overlap. Clip the tassel charm to this ring after finishing.
For a removable charm, use a swivel clasp. For a permanent charm, sew through the tassel loop and ring several times.
Tassel Charm Instructions
Cut 14 strands of dusty rose yarn and 8 strands of cream yarn, each 9 inches (23 cm) long.
Fold all strands over a swivel clasp or a 6 inch (15 cm) tie strand. Wrap another strand around the bundle 0.75 inch (2 cm) below the fold and knot firmly.
Trim ends evenly to about 4 inches (10 cm). Add a wooden bead above the wrap if desired for extra charm.
Finishing Your Mini Backpack
Weave in all yarn tails on the inside of the bag. Secure hardware areas with extra stitches through the inner wall only.
Optional lining: Cut a rectangle and oval base from cotton fabric, sew into a simple pouch, then hand stitch the lining to the inside top edge. This is especially helpful if you used chenille yarn.
Steam lightly from 2 to 3 inches (5 to 8 cm) away. Shape the front, back, and sides with your hands while the fabric is warm. Let dry completely before use.
Final Checkpoint
Before calling your backpack complete, check these things:
Care Instructions
Spot clean with cool water and mild soap. Do not machine wash once hardware is installed. Reshape while damp and dry flat away from direct heat.
Troubleshooting Common Issues
| Problem | Solution |
|---|---|
| Base ruffles | Use a smaller hook or tighten the increase rounds |
| Body leans to one side | Keep the marker at the start of round and gently block the spiral |
| Center single crochet is hard to enter | Pull loops up taller and do not over tighten |
| Flap does not reach lock | Steam block longer, or move the lock up slightly before final install |
| Straps stretch over time | Use cord yarn, sew through rings twice, or line the straps with ribbon |
Size Customization Tips
For a wider bag: Add chains to the starting chain in multiples of 2. Each added chain increases the front width slightly while keeping the oval ends balanced. Keep the body stitch count even so the flap can be centered easily.
For a taller bag: Add body rounds before Round 22. Each 2 extra rounds adds about 0.9 inch (2.25 cm) at pattern gauge. Make the straps 2 to 4 inches (5 to 10 cm) longer for adult crossbody wear.
Maker Tips for Success
Use stitch markers at the front center, back center, and each side after Round 5. These markers make flap placement, ring placement, and lock placement much cleaner.
A firm lining is optional but incredibly helpful when using plush chenille yarn. It keeps the backpack upright and protects the stitch fabric from keys or other items that might snag.
Thank you so much for choosing this pattern for your next crochet project! I truly hope you love making this mini backpack as much as I loved designing it. If you give it a try, I’d absolutely love to see your finished bag. Tag me on Instagram or share a photo in the comments on Facebook.
If you want to come back to this dusty rose mini backpack crochet pattern later, go ahead and save it to your Pinterest boards now so you don’t lose it. And please drop a comment below when you make yours. I love hearing which yarn colors you choose and seeing how each backpack turns out a little different. Happy crocheting!
Want a Quick & Easy Printable Version?
Get a clean, beautifully formatted PDF of this pattern — easy to follow step by step, ready to print or save on any device. No scrolling, no distractions, just the pattern.
Get the Printable PDF →You Might Also Like
- Pink Strawberry Couple Amigurumi Free Crochet Pattern
- Dusty Rose Lace Panel Crochet Sweater Free Pattern
- Sage Wildflower Crochet Backpack Free Pattern
- Ocean Blue Ombre Drawstring Bucket Bag Free Crochet Pattern