
Tapestry crochet looks intimidating. I get it. All those color changes, carrying yarn inside your stitches, reading charts round after round. But here is the truth: if you can single crochet, you can absolutely make this bag.
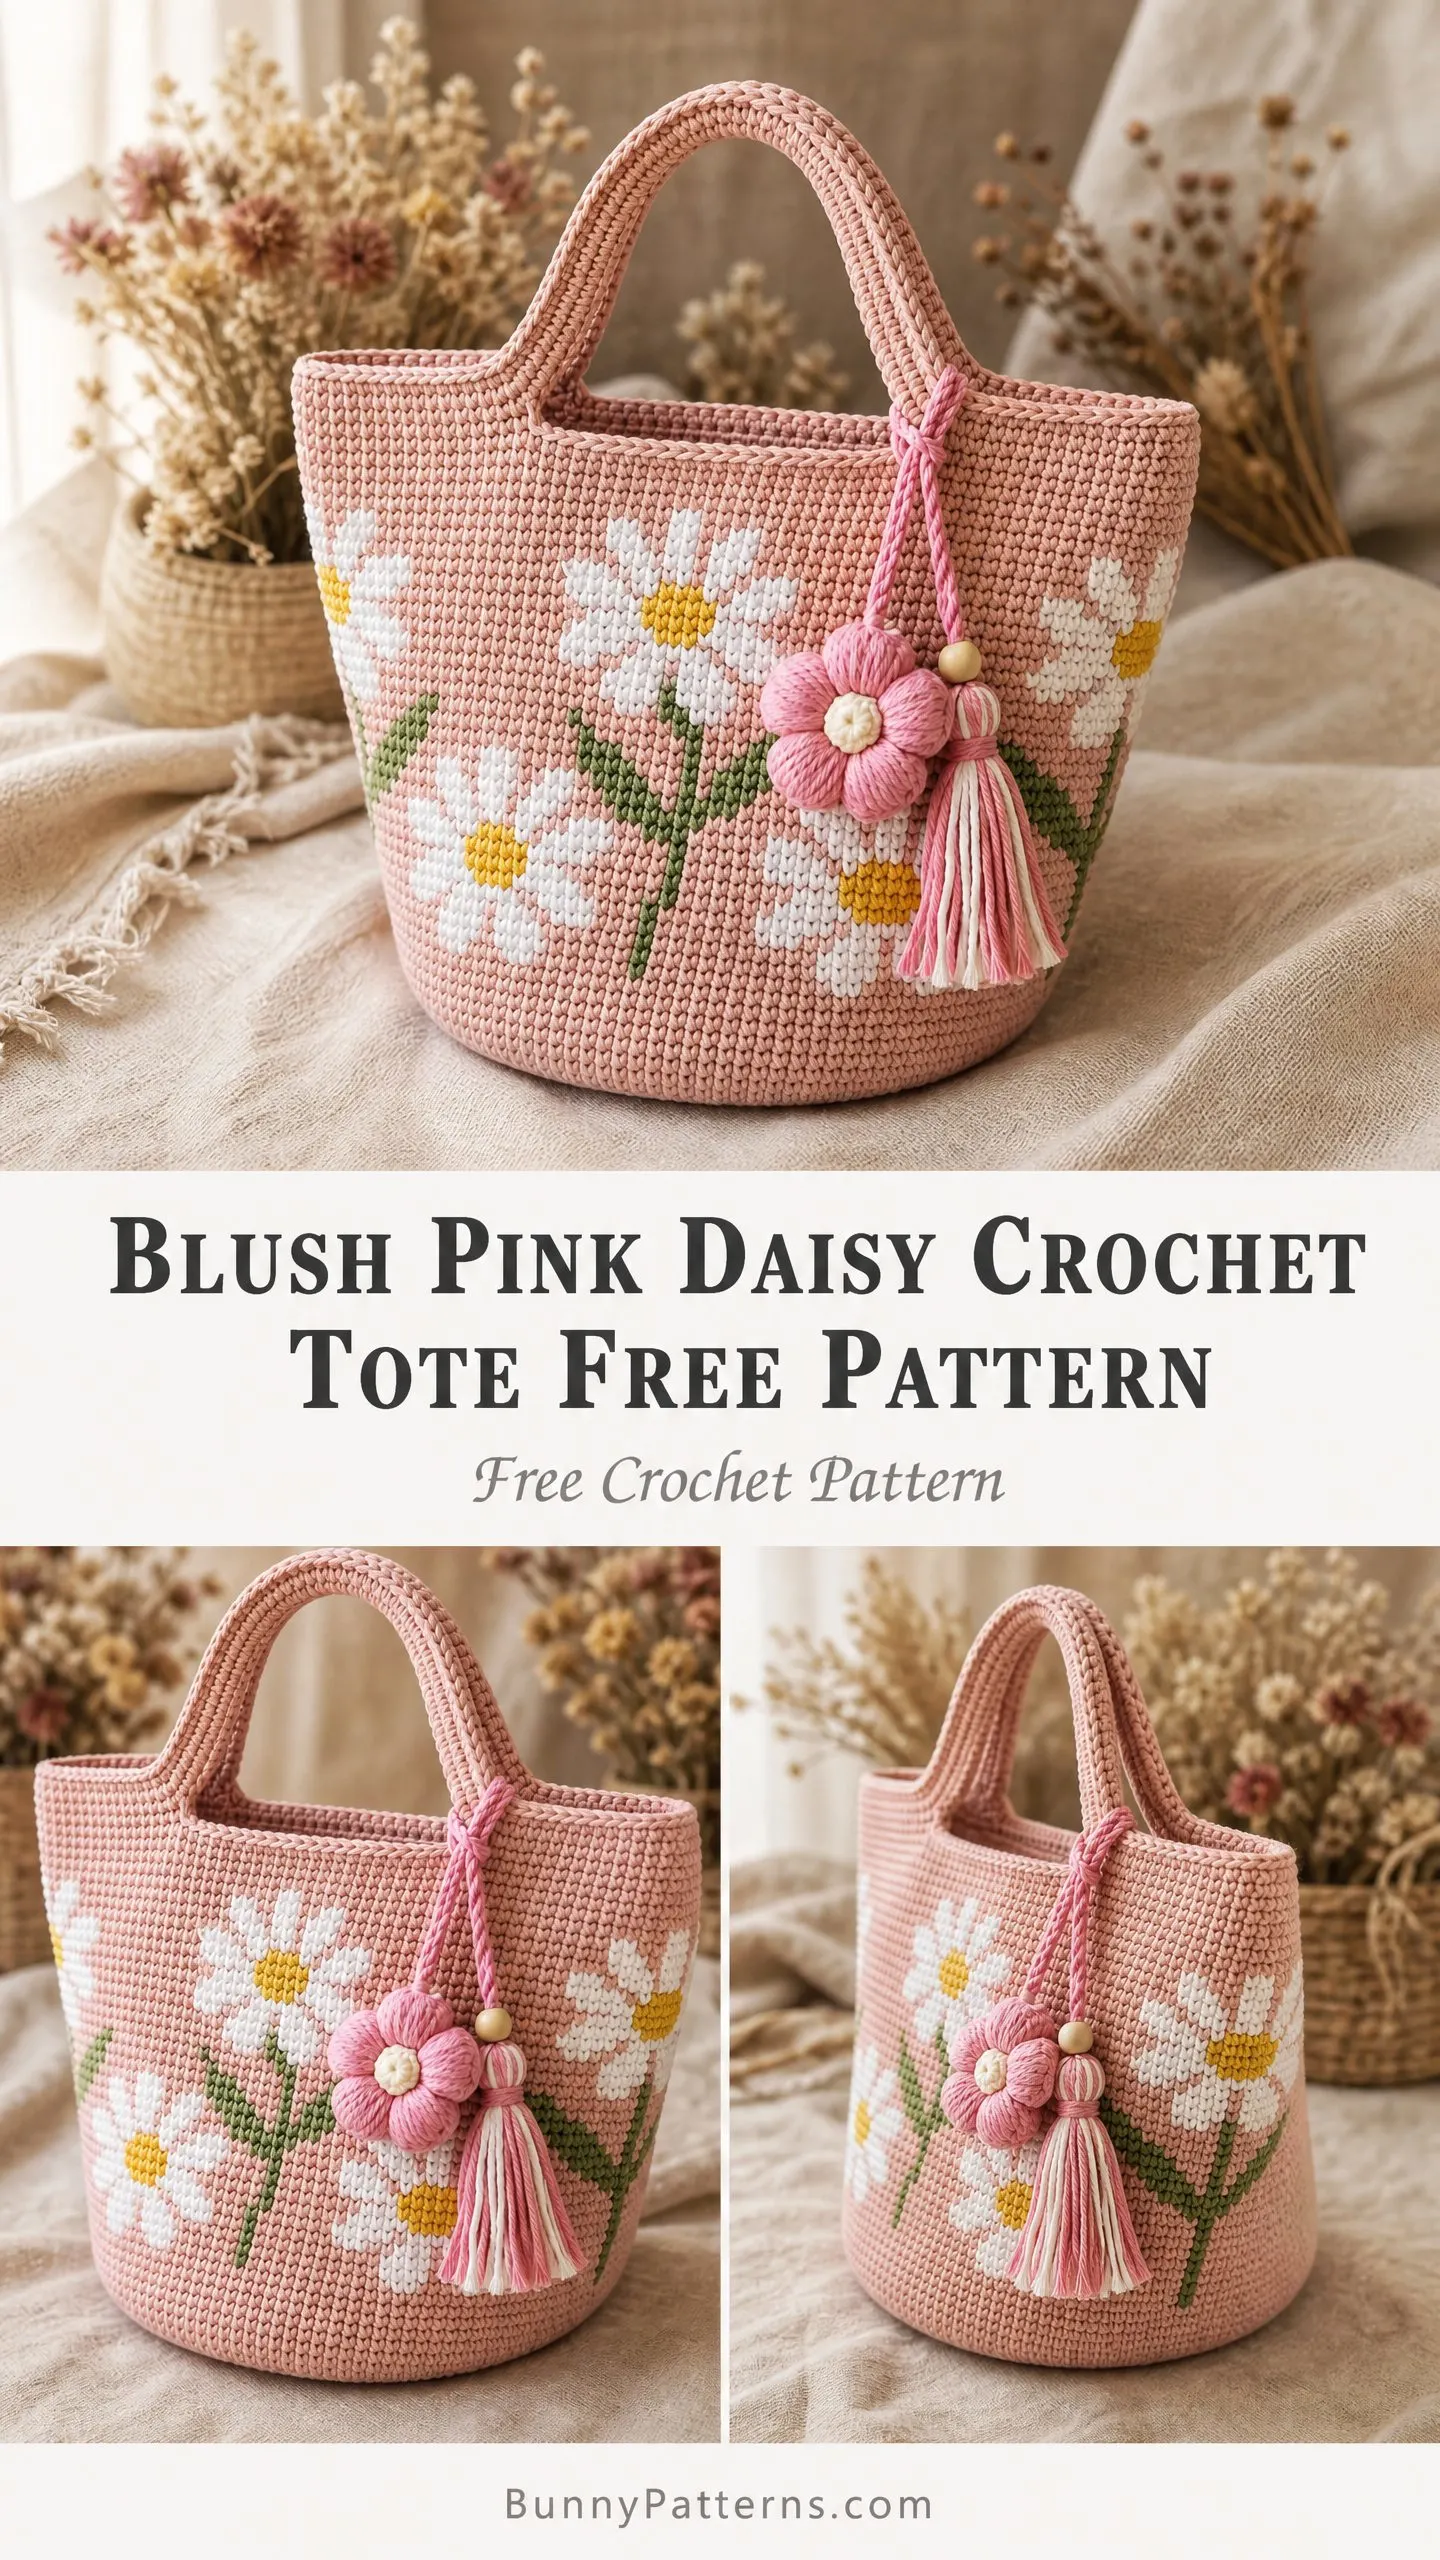
This blush pink daisy tote breaks down into simple, manageable pieces. The base is just an oval. The body is continuous rounds of single crochet. The colorwork? It is just switching colors at specific stitch counts. Nothing fancy. No magic. Just patience and counting.
Whether you have been crocheting for years or you are ready to level up from your first few projects, this tote meets you where you are. I have written out every single color change stitch by stitch. No guessing. No squinting at tiny chart squares. Just follow along, and those cheerful daisies will appear like magic under your hook.
About This Crochet Tote Pattern
This bucket style tote features large daisy motifs with white petals, sunny yellow centers, and green stems against a soft blush pink background. The design wraps all the way around the bag, so you get beautiful flowers on the front, back, and sides.
The bag measures approximately 11 inches wide by 9 inches tall (not counting the handles), with a base diameter of about 7 inches. In metric, that is roughly 28 cm by 23 cm with an 18 cm base. The handles add another 4.5 inches of height above the opening.
A sweet finishing touch brings everything together: a crocheted flower charm with wooden beads and a two tone tassel that dangles from one handle. It is the kind of detail that makes people ask where you bought it.
Skill Level
I would call this intermediate to advanced. You need to be comfortable with single crochet worked in continuous rounds and ready to manage multiple yarn colors at once. The tapestry technique itself is not difficult once you understand it, but it does require focus and consistent tension.
If you have never tried colorwork before, I recommend practicing the tapestry single crochet technique on a small swatch first. Once you get the rhythm of carrying yarn inside your stitches, the rest is just counting.
Time estimate: Plan for 18 to 25 hours total. The colorwork sections take longer than plain single crochet because of all the color switching.
Materials You Will Need
Yarn
You will need worsted weight cotton or cotton blend yarn in four colors:
Yarn suggestions that work beautifully:
1. Lion Brand 24/7 Cotton in Rose, White, Buttercup, and Fern. This mercerized cotton has excellent stitch definition and is machine washable. You will need 2 skeins of Rose and 1 skein each of the other colors.
2. Paintbox Yarns Cotton DK held double, or their Cotton Worsted line, in Dusty Rose, Pure White, Daffodil Yellow, and Grass Green.
3. WeCrochet Shine Worsted in Blush, White, Canary, and Pistachio. The cotton modal blend gives a lovely subtle sheen.
Important: Avoid fuzzy or textured yarns like chenille or boucle. They will hide your pretty daisy motifs.
Hook and Notions
Gauge
18 single crochet stitches by 20 rounds = 4 inches / 10 cm, worked in continuous rounds using the tapestry colorwork technique.
Gauge matters here because it affects your finished size. Tapestry colorwork tends to pull in tighter than solid single crochet, so always swatch with the technique you plan to use. If your swatch is too tight, go up half a hook size. Too loose? Go down.
Abbreviations and Stitch Definitions
Let me walk you through every abbreviation used in this pattern:
Special Technique: Tapestry Single Crochet
This technique hides your unused yarn colors inside your stitches. Here is how it works:
1. Hold your working yarn as usual
2. Lay all non working yarn strands flat across the top of your work, pointing right
3. Insert hook into the next stitch
4. Yarn over with working color only and pull up a loop
5. Yarn over and draw through both loops to complete the single crochet
6. The non working yarns are now trapped inside that stitch
To switch colors: Complete your stitch up to the last yarn over. Drop the current color and pick up the new color to finish pulling through. The new color is now your working color.
Keep your tension slightly looser than normal to compensate for the extra yarn inside each stitch.
Pattern Instructions
Base
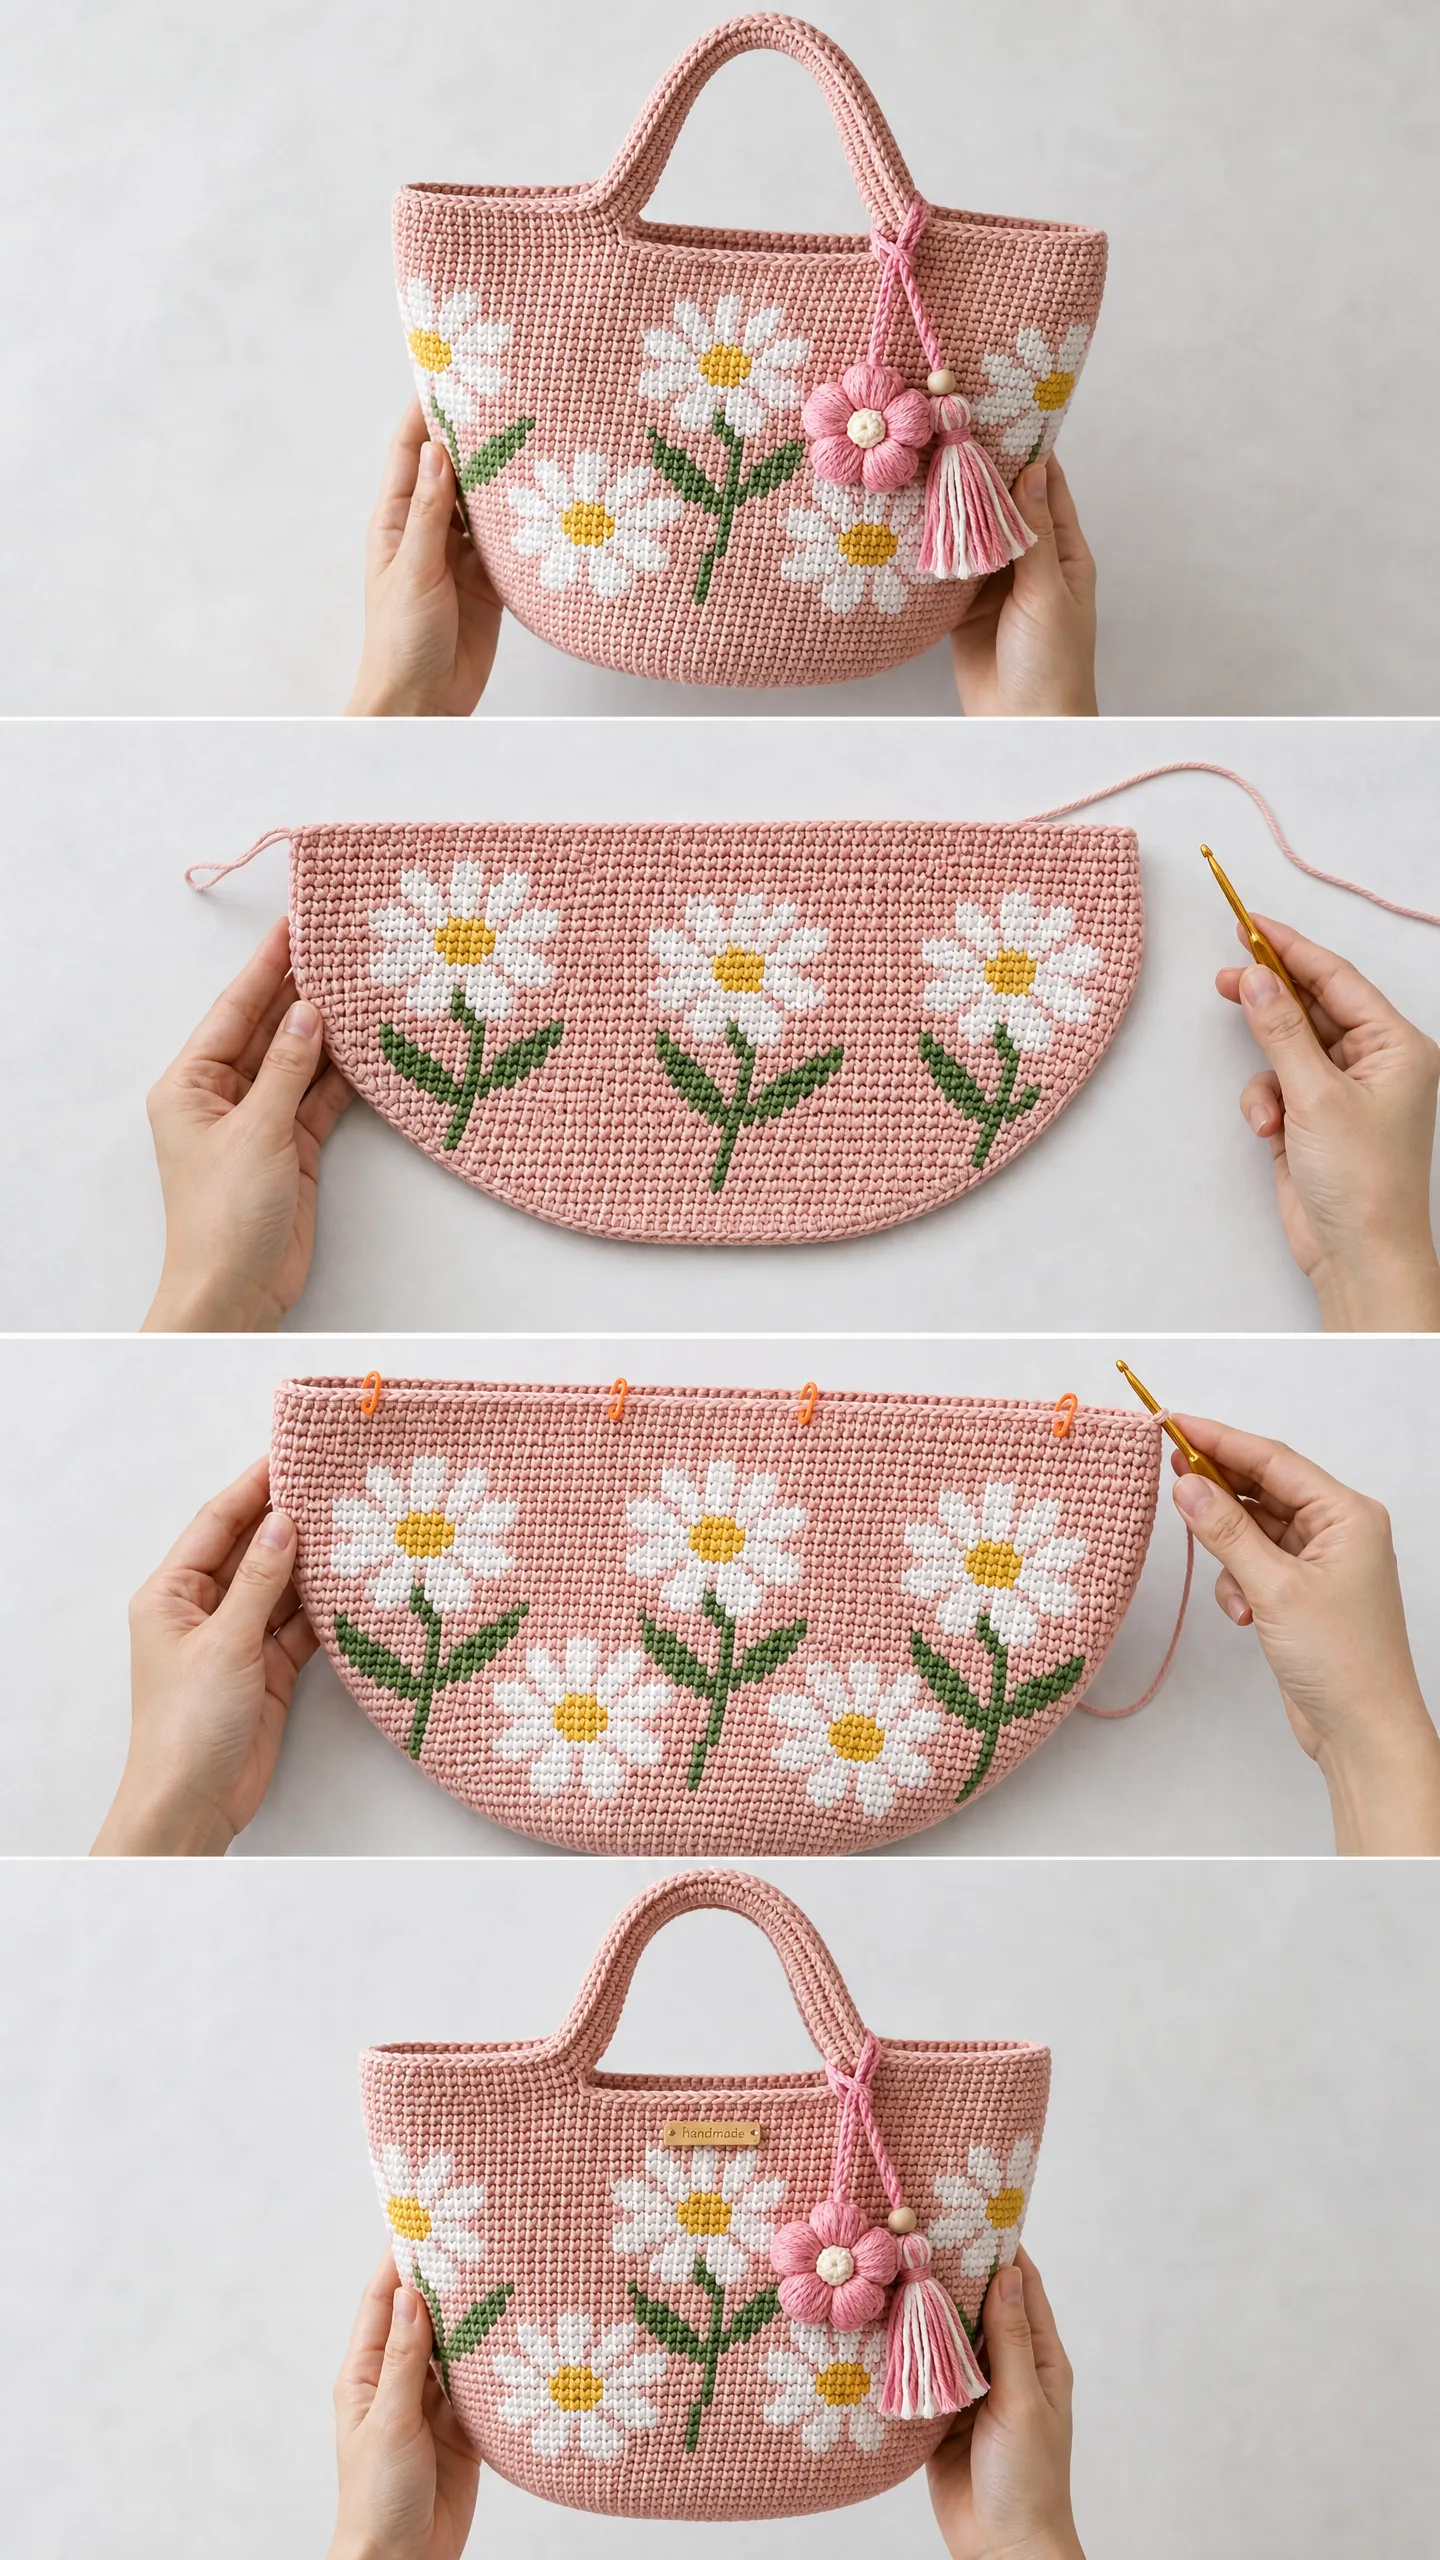
The base is an oval worked in joined, turned rounds.
Foundation Chain: Using MC, ch 19.
Round 1 (RS): Starting in second ch from hook, sc 17 across, work 3 sc in last ch (corner), rotate work and sc 16 back along the opposite side of foundation chain, work 2 sc in same ch as first sc (corner). Sl st to first sc to join. Ch 1, turn. (38 sc)
Round 2: Sc 17, work 2 sc in each of next 3 sts (corner), sc 15, work 2 sc in each of next 3 sts (corner), sl st to first sc. Ch 1, turn. (44 sc)
Round 3: Sc 17, (sc, inc) 3 times (corner), sc 15, (sc, inc) 3 times (corner), sl st to first sc. Ch 1, turn. (50 sc)
Round 4: Sc 17, (sc 2, inc) 3 times (corner), sc 15, (sc 2, inc) 3 times (corner), sl st to first sc. Ch 1, turn. (56 sc)
Round 5: Sc 17, (sc 3, inc) 3 times (corner), sc 15, (sc 3, inc) 3 times (corner), sl st to first sc. Ch 1, turn. (62 sc)
Round 6: Sc 17, (sc 4, inc) 3 times (corner), sc 15, (sc 4, inc) 3 times (corner), sl st to first sc. Ch 1, turn. (68 sc)
Round 7: Sc 17, (sc 5, inc) 3 times (corner), sc 15, (sc 5, inc) 3 times (corner), sl st to first sc. Do not turn. (74 sc)
Your completed base should measure approximately 7 inches long by 4.5 inches wide.
Bag Body
Transition Round: Do not join or turn. Begin working in continuous rounds. Place a marker in your first stitch and move it up each round. The right side faces outward.
Round 1: Sc in each sc around, working into the back loop only of each stitch. (74 sc)
Working in BLO creates that crisp ledge between the base and sides.
Rounds 2 through 5: Sc in each sc around in both loops. (74 sc each round)
Round 6: Continue in MC. Begin carrying CA, CB, and CC inside your stitches to prepare for colorwork. (74 sc)
Colorwork Rounds (Daisy Motifs)
The motif repeats every 37 stitches, giving you daisies on both front and back. Each round is written as color runs. The slash (/) separates front and back repeats.
Round 7: MC 5, W 5, MC 3, W 5, MC 3, W 5, MC 11 / MC 5, W 5, MC 3, W 5, MC 3, W 5, MC 11 (74 sc)
Round 8: MC 3, W 7, MC 1, W 7, MC 1, W 7, MC 11 / same sequence (74 sc)
Round 9: MC 2, W 8, MC 1, W 7, MC 1, W 8, MC 10 / same sequence (74 sc)
Round 10: MC 2, W 3, Y 3, W 3, MC 1, W 3, Y 3, W 3, MC 1, W 3, Y 3, W 3, MC 9 / same sequence (74 sc)
Round 11: MC 2, W 2, Y 3, W 2, MC 1, W 2, Y 3, W 2, MC 1, W 2, Y 3, W 2, MC 12 / same sequence (74 sc)
Round 12: MC 2, W 3, Y 3, W 3, MC 1, W 3, Y 3, W 3, MC 1, W 3, Y 3, W 3, MC 9 / same sequence (74 sc)
Round 13: MC 2, W 8, MC 1, W 7, MC 1, W 8, MC 10 / same sequence (74 sc)
Round 14: MC 3, W 7, MC 1, W 7, MC 1, W 7, MC 11 / same sequence (74 sc)
Round 15: MC 5, W 5, MC 3, W 5, MC 3, W 5, MC 11 / same sequence (74 sc)
Round 16: MC 7, W 3, MC 5, W 3, MC 5, W 3, MC 11 / same sequence (74 sc)
Round 17: MC 7, W 1, G 1, W 1, MC 5, W 1, G 1, W 1, MC 5, W 1, G 1, W 1, MC 11 / same sequence (74 sc)
Round 18: MC 6, G 3, MC 5, G 3, MC 5, G 3, MC 12 / same sequence (74 sc)
Round 19: MC 6, G 1, MC 1, G 1, MC 5, G 1, MC 1, G 1, MC 5, G 1, MC 1, G 1, MC 12 / same sequence (74 sc)
Round 20: MC 37 / MC 37 (74 sc, all MC)
Round 21: MC 5, W 3, MC 7, W 3, MC 7, W 3, MC 9 / same sequence (74 sc)
Round 22: MC 4, W 5, MC 5, W 5, MC 5, W 5, MC 8 / same sequence (74 sc)
Round 23: MC 3, W 7, MC 3, W 7, MC 3, W 7, MC 7 / same sequence (74 sc)
Round 24: MC 3, W 3, Y 3, W 3, MC 1, W 3, Y 3, W 3, MC 1, W 3, Y 3, W 3, MC 9 / same sequence (74 sc)
Round 25: MC 3, W 7, MC 3, W 7, MC 3, W 7, MC 7 / same sequence (74 sc)
Round 26: MC 4, W 5, MC 5, W 5, MC 5, W 5, MC 8 / same sequence (74 sc)
Round 27: MC 37 / MC 37 (74 sc, all MC)
Your bag body should now measure 6 to 7 inches tall from the BLO round.
Upper Body
Rounds 28 through 33: Sc in each sc around in MC. (74 sc each round)
Top Edge
Round 34: Sc in each sc around. Sl st to first sc to join. (74 sc)
Round 35: Ch 1, sc in each sc around, sl st to first sc to join. Fasten off and weave in ends. (74 sc)
Total bag height should be approximately 9 inches from base to rim.
Handles (Make 2)
Foundation Chain: Using MC, ch 7.
Row 1: Sc in second ch from hook and in each ch across. Ch 1, turn. (6 sc)
Rows 2 through 60: Sc in each sc across. Ch 1, turn. (6 sc each row)
Row 61: Sc in each sc across. Fasten off, leaving a 12 inch tail. (6 sc)
Each handle measures approximately 12 inches long and 1.25 inches wide.
Optional reinforcement: Fold handle lengthwise and whipstitch the long edges together for double thickness.
Attachment: Position each handle centered on its panel, with ends about 2.5 inches from each side edge and 1 round below the rim. The handle ends should overlap the inside by about 1.5 inches. Sew securely with a rectangle of stitches.
Flower Charm and Tassel
For the flower:
Using MC, make a magic ring. Ch 1, work 6 sc into ring, pull closed, sl st to first sc. (6 sc)
Ch 1, work 2 sc in each sc around, sl st to first sc. (12 sc)
(Ch 3, sl st in same st, sl st in next st) 6 times. Fasten off. (6 petals)
Sew a small puff of CA yarn to the center.
For the tassel: Cut 24 strands each of MC and CA, 10 inches long. Fold in half, attach below the flower, thread wooden beads onto the strands, wrap to create the tassel head, and trim evenly.
Make a twisted cord to attach the charm to your handle.
Finishing
Weave in all your ends carefully, burying them through the back of your colorwork stitches.
For blocking, soak the bag in cool water with a little gentle soap. Press out excess water with a towel (do not wring). Shape over a bowl or bucket and let dry completely.
If you want extra base stability, cut a piece of plastic canvas to fit and insert it after blocking.
I hope you love making this crochet tote pattern as much as I loved designing it. Those daisies really do pop against the blush pink background, and the finished bag is sturdy enough for everyday use.
If you make one, I would absolutely love to see it. Tag me on Instagram or share a photo in my Facebook group. And if you want to come back to this pattern later, go ahead and save it to your Pinterest boards so it is easy to find. Drop a comment below if you have questions or just want to share your progress. Happy crocheting!
You Might Also Like
- Ocean Wave Crochet Crop Top and Fringe Pants Pattern
- Watermelon Slice Couple Amigurumi Free Crochet Pattern
- Dusty Rose Granny Square Summer Dress Free Crochet Pattern
- Dusty Rose Pink Mini Backpack Free Crochet Pattern