
A sturdy, cheerful tote that holds everything from farmers market veggies to library books. That is what this sunflower granny square market bag delivers. The construction uses puff stitches for dimensional petals, a join-as-you-go method for seamless assembly, and DK weight cotton that will hold up to years of use.
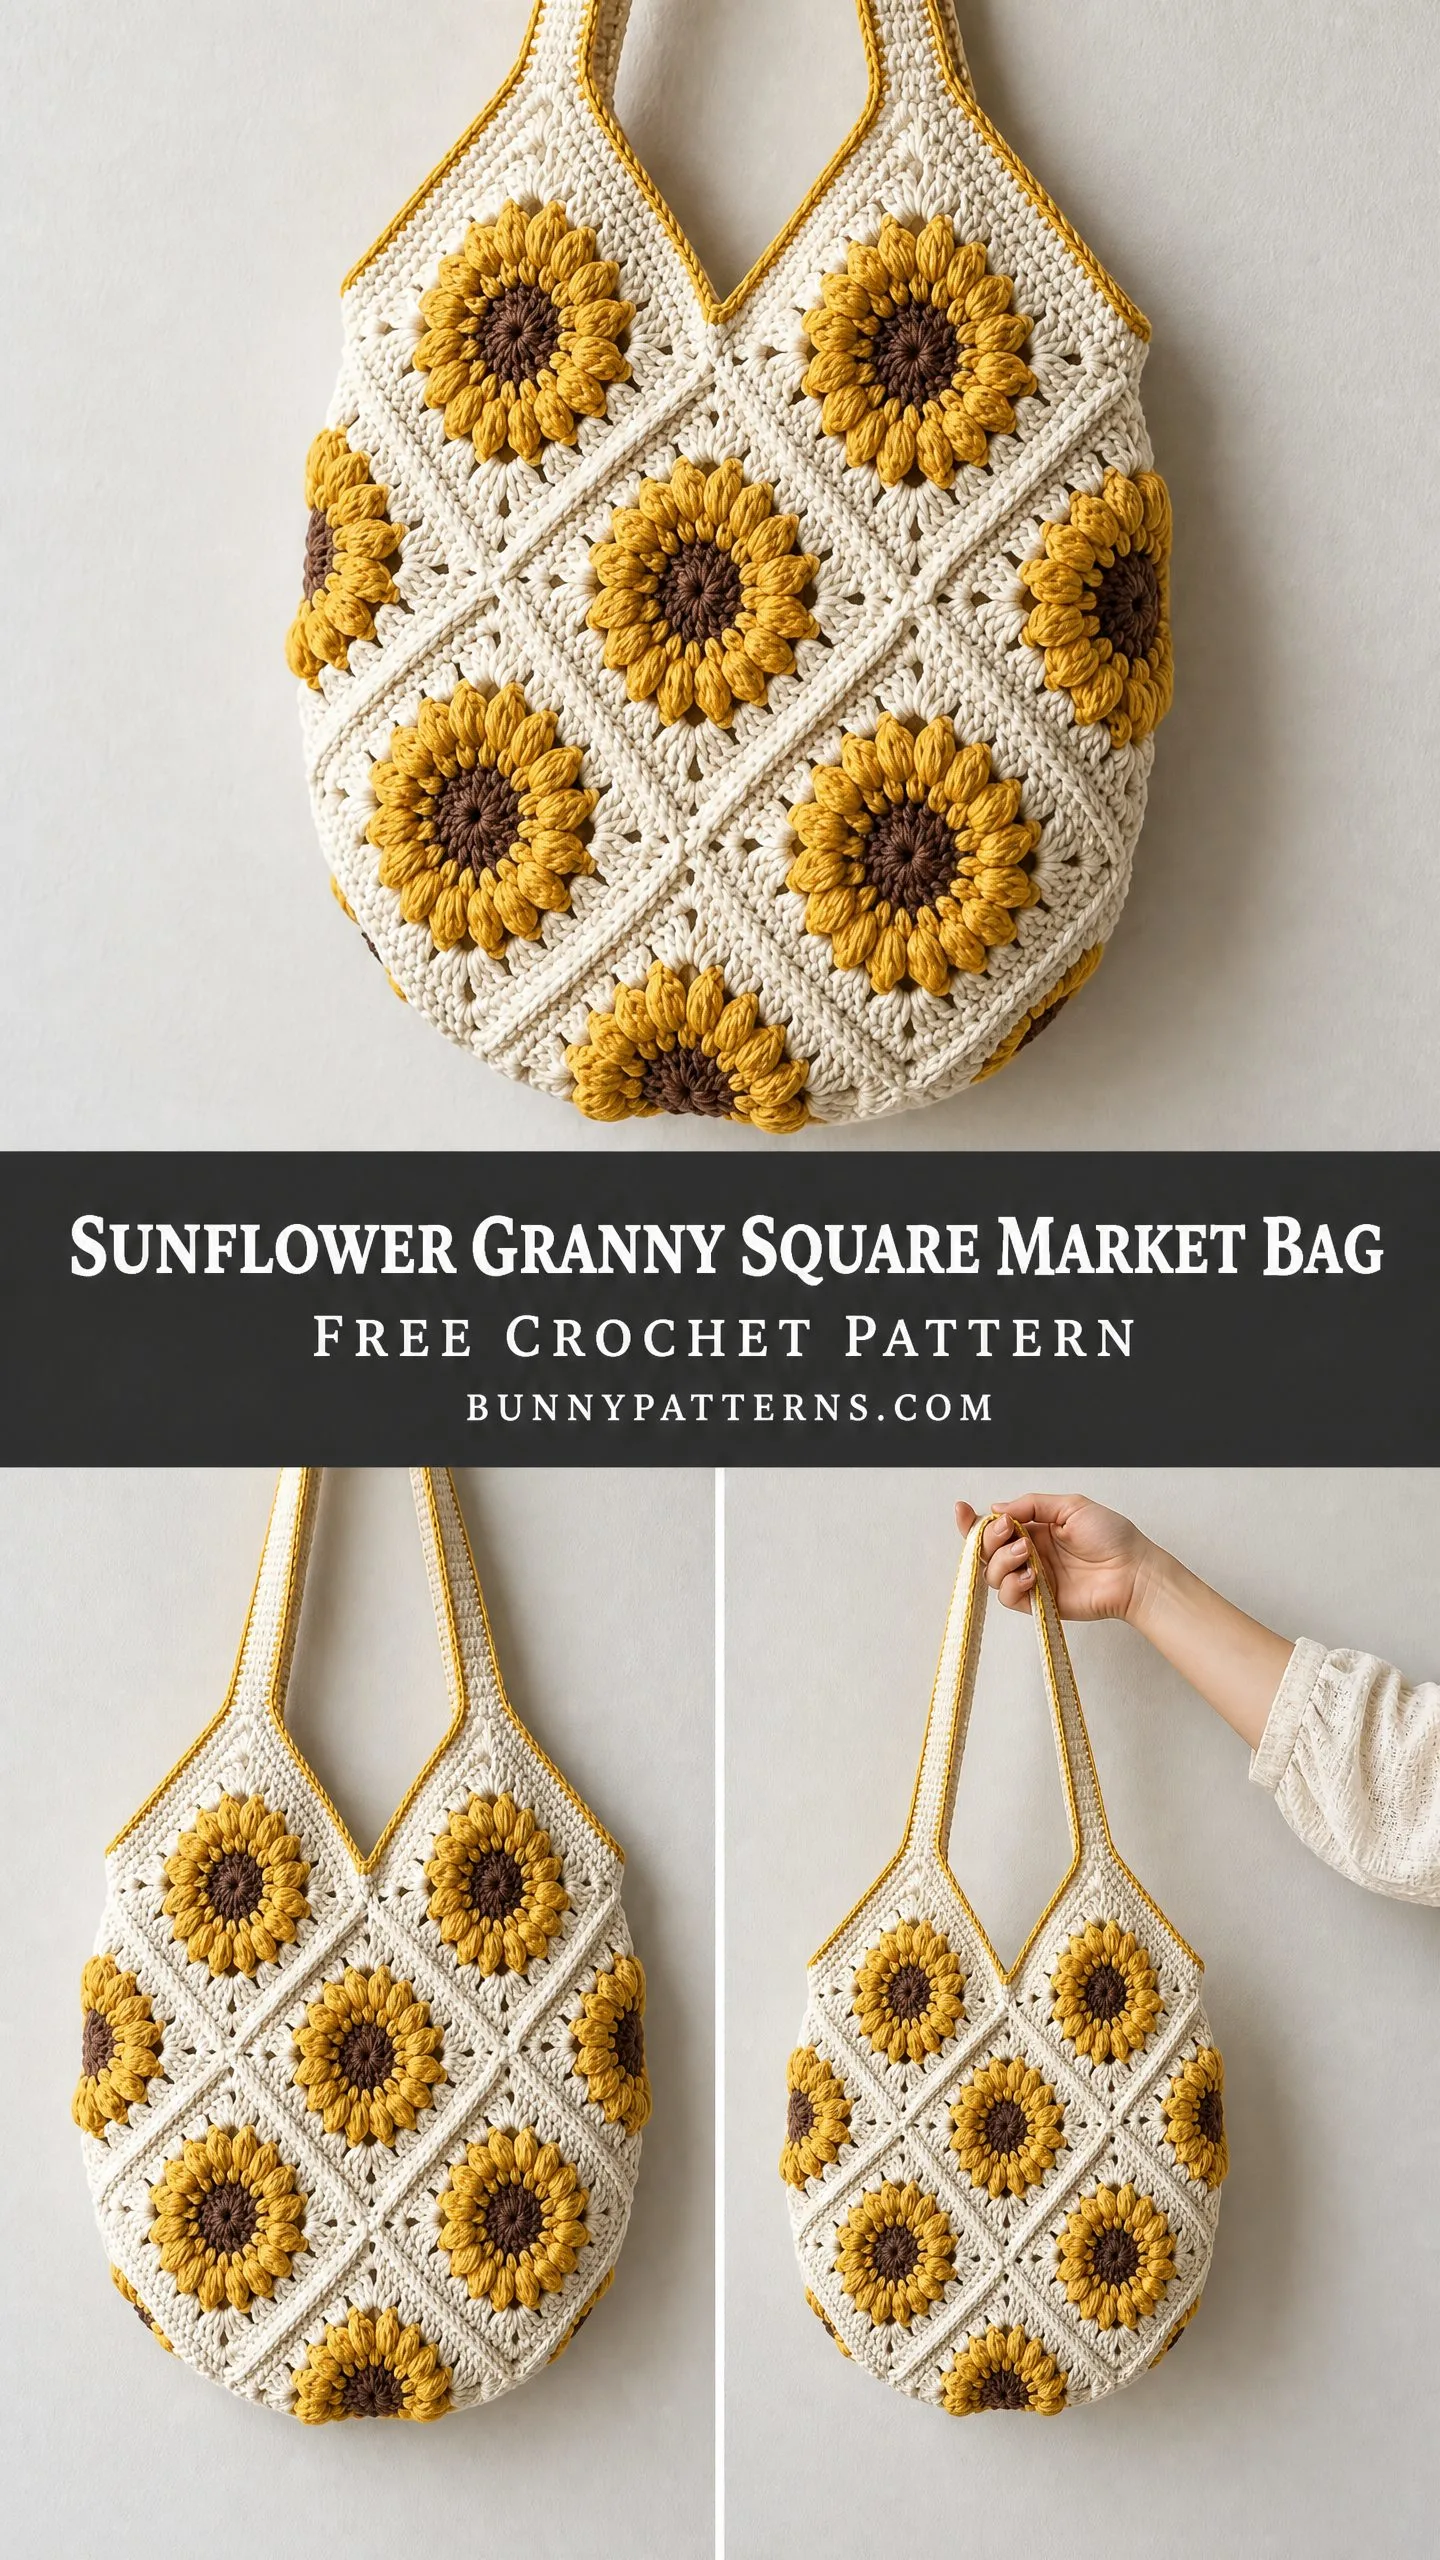
This pattern works up beautifully for intermediate crocheters who have completed a few granny square projects. The 18 squares come together faster than you might expect, and the diamond orientation creates that lovely rounded silhouette without any complicated shaping. Each square takes roughly 45 to 60 minutes depending on your experience level.
Whether you are making this for yourself, gifting it to a sunflower-loving friend, or donating to a charity auction, this bag makes a statement. The golden petals pop against the cream background, and the fully reversible design means both sides look equally gorgeous.
Why You Will Love This Pattern
This market bag combines function with serious style. The cotton yarn creates a fabric that is sturdy enough to carry heavy groceries but soft enough to fold into your purse when not in use. The dimensional puff stitch sunflowers add texture you can feel, and the cream background keeps everything looking fresh and summery.
The join-as-you-go technique means minimal sewing at the end. You will attach each square during the final round rather than stitching dozens of seams later. Trust me, your future self will thank you for this.
The rounded bottom happens naturally from the diamond arrangement of the squares. No tricky shaping or complicated construction required.
Skill Level
Intermediate. This pattern requires comfort with working in the round, creating puff stitches, joining granny squares as you go, and picking up stitches for straps. If you have completed a few granny square projects and feel confident with your tension control, you will find this achievable with patience.
Finished Measurements
These measurements reflect a relaxed, lightly blocked cotton fabric. Your actual size will vary with yarn weight and personal tension.
Materials Needed
Yarn
You will need DK weight cotton yarn in three colors:
Recommended Yarn Options
Lion Brand 24/7 Cotton in Goldenrod (Color A), Cafe au Lait (Color B), and Ecru (Color C) works beautifully. This mercerized cotton holds stitch definition well and is machine washable.
Paintbox Yarns Simply DK Cotton in Mustard Yellow, Soft Fudge, and Paper White is smooth, affordable, and blocks well.
Scheepjes Catona held doubled in Primrose (Color A), Hazelnut (Color B), and Linen (Color C) creates a DK weight fabric with excellent stitch definition and a slight sheen.
Substitution note: Use any smooth DK weight cotton or cotton blend. Avoid fuzzy or textured yarns as they will obscure the puff stitch detail in the petals.
Hook
US size G-6 (4.0 mm) crochet hook, or size needed to obtain gauge
Notions
Gauge
One completed sunflower granny square after Rounds 1 through 5, blocked, should measure 4.25 inches x 4.25 inches (10.8 cm x 10.8 cm).
Alternatively: 16 single crochet (sc) x 20 rows equals 4 inches (10 cm) with Color C and G-6 hook.
Gauge matters here. Each square’s finished size directly determines your final bag dimensions. Larger squares mean a larger bag. Smaller squares mean a more compact bag. Take time to swatch.
Abbreviations (US Terms)
Before we begin, let me define every stitch you will encounter:
Special Stitches
Puff Stitch (ps)
This creates the dimensional sunflower petals. Here is how to work it:
1. Yarn over, insert hook into the indicated stitch or space.
2. Yarn over, pull up a loop to approximately the height of a double crochet. You now have 3 loops on the hook.
3. Yarn over, insert hook into the same stitch again.
4. Yarn over, pull up a loop to the same height. You now have 5 loops on the hook.
5. Yarn over, insert hook into the same stitch a third time.
6. Yarn over, pull up a loop to the same height. You now have 7 loops on the hook.
7. Yarn over and draw through all 7 loops on the hook.
8. Chain 1 to close and secure the puff stitch. This closing chain does not count as a stitch.
Tip: The puff stitch should sit up firmly on the right side of the work. If yours lies flat, try pulling the loops up higher in steps 2, 4, and 6.
Join-As-You-Go (JAYG) Corner Join
This method attaches each new square to its neighbors during Round 5:
1. Work up to the corner where you would normally make a ch-2 corner space.
2. Instead of ch 2, chain 1.
3. Insert hook from front to back into the corresponding corner ch-2 space of the neighboring square.
4. Yarn over and pull up a loop.
5. Chain 1 to complete the joined corner.
6. For side joins between corners, replace the ch-1 between dc groups with: insert hook into the corresponding ch-1 space of the neighboring square from front to back, yo, pull through, and continue.
Standing Double Crochet
Begin with a slip knot on hook. Yarn over, insert hook into indicated stitch, yarn over, pull up a loop, yarn over, pull through 2 loops, yarn over, pull through 2 loops. This replaces the ch-3 turning chain for a neater join.
Pattern Notes Before You Begin
1. The bag uses 18 sunflower granny squares total: 9 for the front panel and 9 for the back panel.
2. Each panel is a 3×3 grid oriented on the diagonal (diamond orientation), which creates the rounded appearance.
3. Squares are joined using JAYG on Round 5. Work Rounds 1 through 4 of all 18 squares first, then join them into panels on Round 5.
4. After both panels are joined, seam them together along the bottom and side edges.
5. Color A is used for petals and straps. Color B is used only for the sunflower center. Color C is used for outer rounds and joining.
6. When fastening off between color changes, leave a 6-inch tail for weaving in. Do not carry yarn across the wrong side.
7. All rounds are worked with the right side facing unless stated otherwise.
Sunflower Granny Square Instructions
Make 18 squares total (9 for front, 9 for back).
Round 1 (Color B, Center)
Make a magic ring (adjustable loop).
Ch 3 (counts as first dc here and throughout).
Work 11 dc into the ring. Pull ring closed snugly.
Sl st to top of beg ch-3 to join.
(12 dc)
Round 2 (Color A, Inner Petals)
Join Color A with a sl st to any st.
Ch 1.
Work 1 ps in first st, ch 1.
Work 1 ps in next st, ch 1.
Rep around all 12 sts, working 1 ps and ch 1 in each st.
Sl st to top of first ps to join.
Fasten off Color A.
(12 puff stitches, 12 ch-1 spaces)
Round 3 (Color A, Outer Petals)
Join Color A with sl st to any ch-1 sp between puff stitches.
Ch 3 (counts as dc).
Work 2 dc in same ch-1 sp.
Work 3 dc in each ch-1 sp around (12 ch-1 spaces total).
Sl st to top of beg ch-3 to join.
Fasten off Color A.
(36 dc)
Round 4 (Color C, First Square Round)
Join Color C with a sl st to the 2nd dc of any group of 3 (center dc of a potential corner).
Ch 3 (counts as dc).
Ch 2. (Corner ch-2 sp made.)
Dc in same st. (1 dc, ch-2, 1 dc = corner complete.)
Sk 1 dc.
Dc in next dc. Ch 1. Sk 1 dc. Dc in next dc. Ch 1. Sk 1 dc. Dc in next dc. (3 dc with 2 ch-1 sps between them = one side made.)
Sk 1 dc.
In next dc: dc, ch 2, dc. (Corner made.)
Sk 1 dc.
Dc in next dc. Ch 1. Sk 1 dc. Dc in next dc. Ch 1. Sk 1 dc. Dc in next dc. (Side made.)
Sk 1 dc.
In next dc: dc, ch 2, dc. (Corner made.)
Sk 1 dc.
Dc in next dc. Ch 1. Sk 1 dc. Dc in next dc. Ch 1. Sk 1 dc. Dc in next dc. (Side made.)
Sk 1 dc.
In next dc: dc, ch 2, dc. (Corner made.)
Sk 1 dc.
Dc in next dc. Ch 1. Sk 1 dc. Dc in next dc. Ch 1. Sk 1 dc. Dc in next dc. (Side made.)
Sk 1 dc.
Sl st to top of beg ch-3 to join.
Fasten off Color C.
(20 dc, 4 ch-2 corner spaces, 8 ch-1 spaces)
Round 5 (Color C, Outer Square Round / Joining Round)
For the first square in each panel (no joins yet):
Join Color C with sl st into any corner ch-2 sp.
Ch 3 (counts as dc).
Dc, ch 2, dc in same corner sp. (Corner made.)
Ch 1. Dc in next dc. Ch 1. Dc in ch-1 sp. Ch 1. Dc in next dc. Ch 1. Dc in next dc. Ch 1. Dc in ch-1 sp. Ch 1. Dc in next dc. Ch 1. (Side made.)
In corner ch-2 sp: dc, ch 2, dc. (Corner.)
Rep side and corner pattern for all 4 sides.
Sl st to top of beg ch-3 to join. Fasten off Color C.
(24 dc, 4 ch-2 corner sps, 20 ch-1 side sps)
For subsequent squares: Use the JAYG method at shared edges, replacing ch-2 corner spaces and ch-1 side spaces on shared edges with the sl st join into the corresponding space of the adjacent square.
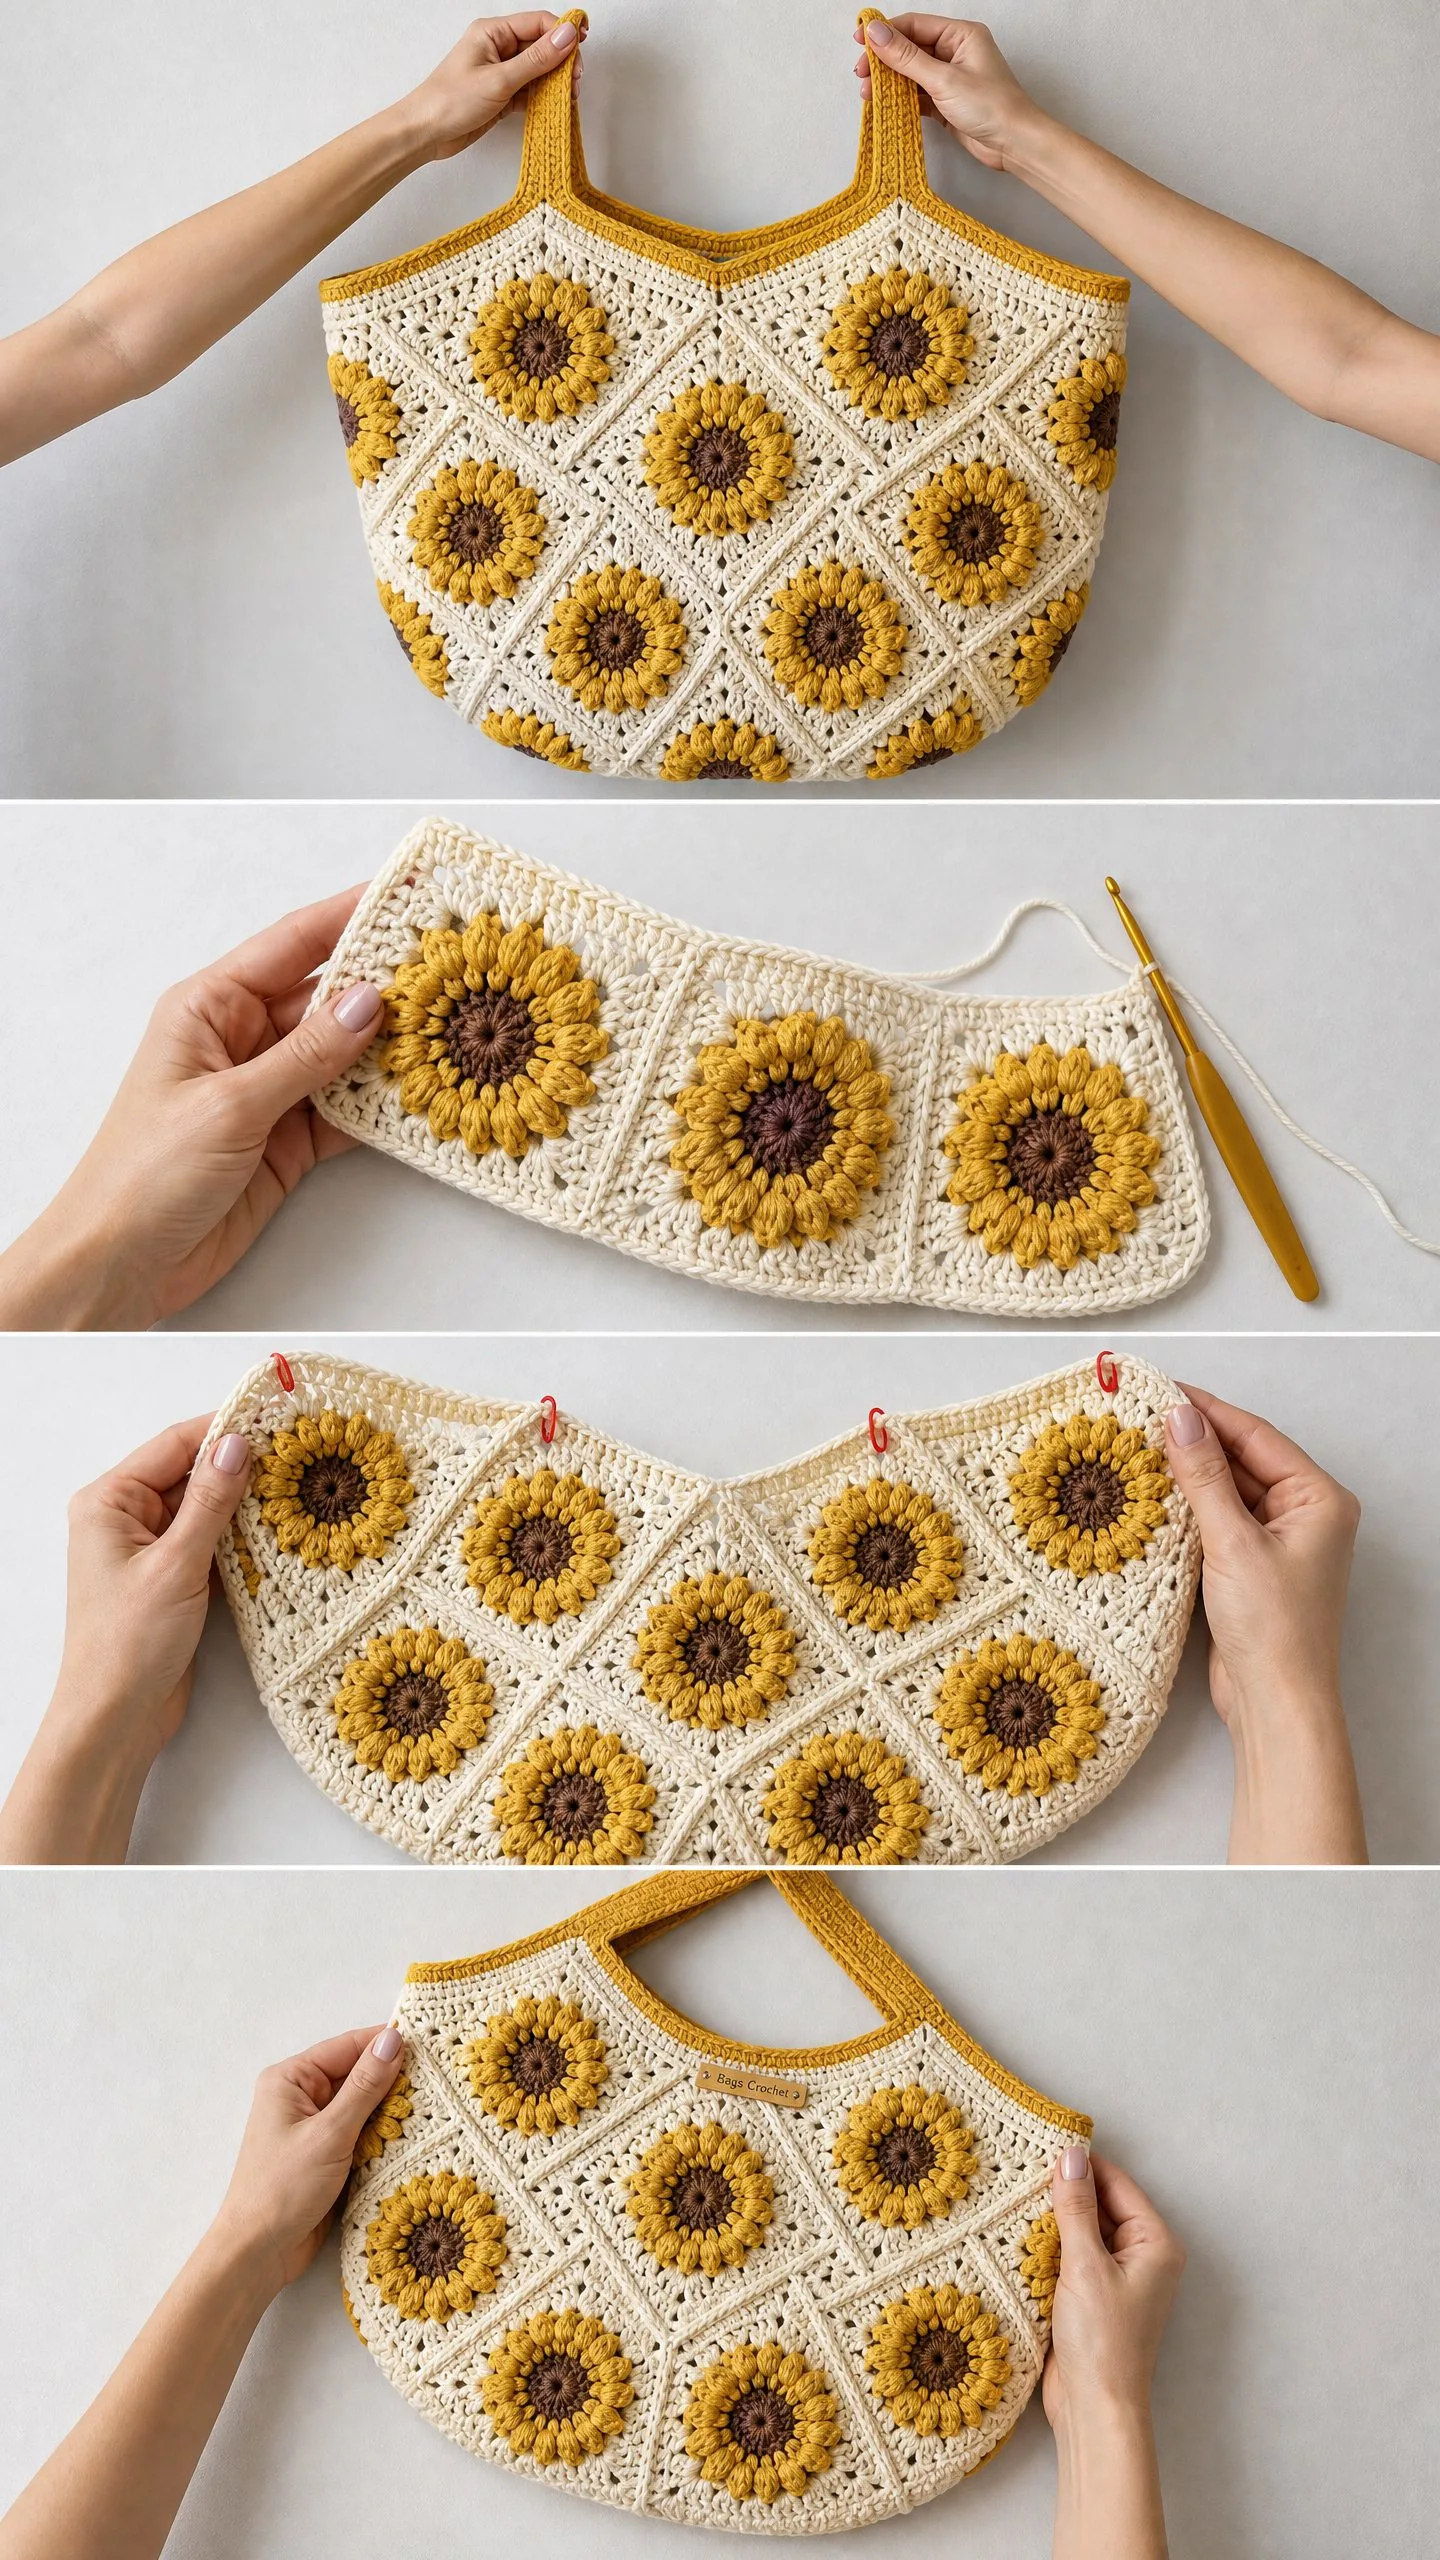
Panel Assembly Using JAYG
Each panel is 3 squares wide and 3 squares tall, oriented on the diagonal.
Row 1 of panel: Work 1 square with no joins (Square 1, top center of panel).
Row 2 of panel: Work 2 squares (Squares 2 and 3), joining Square 2 to the lower-right edge of Square 1 and Square 3 to the lower-left edge of Square 1.
Row 3 of panel: Work 3 squares (Squares 4, 5, 6). Square 4 joins to the lower-right edge of Square 2. Square 5 joins to the lower-right of Square 3 and the lower-left of Square 2. Square 6 joins to the lower-left of Square 3.
Row 4 of panel: Work 2 squares (Squares 7 and 8). Square 7 joins to the lower-right of Square 4 and lower-left of Square 5. Square 8 joins to the lower-right of Square 5 and lower-left of Square 6.
Row 5 of panel: Work 1 square (Square 9, bottom center). Joins to both Square 7 and Square 8.
The result is a 9-square diamond-shaped panel with a pointed top, two square-corner sides, and a pointed bottom.
Make 2 identical panels.
Checkpoint 1
Each completed panel should measure approximately 12.75 inches (32.4 cm) from the top point to the bottom point and approximately 12.75 inches (32.4 cm) from side point to side point.
Joining the Panels
Hold both panels with right sides facing each other.
Using Color C and a yarn needle or hook, whipstitch or sl st through both layers along the bottom V-shape edge. This includes the lower 4 joining seams that form the lower half of the diamond, from the bottom point up both sides to the widest horizontal midline.
Do not seam the upper half of the panels. The upper half forms the open top of the bag.
Turn right side out.
Checkpoint 2
The bag body should measure approximately 13 inches (33 cm) wide at the opening and 12 inches (30.5 cm) tall from the bottom point to the top edge.
Top Edging
Join Color A with sl st to any stitch along the top opening edge of the bag.
Ch 1.
Work 1 sc in each dc, 1 sc in each ch-1 sp, and 2 sc in each ch-2 corner sp around the full top opening. Work through both layers only at the two side-point corners where front and back meet.
Sl st to first sc to join. Fasten off Color A.
Approximate stitch count around the top opening: 84 sc (this will vary slightly depending on your square stitch count).
Strap Construction
The bag has 2 straps that extend from each side of the top opening, meeting at the top to form a single shoulder loop.
Identify the center 10 sc of the front top edge and the center 10 sc of the back top edge. These areas will NOT have a strap attached, forming the open mouth of the bag.
Left Strap
Locate the sc that sits approximately 10 sts to the left of the center front top edge. Join Color A here.
Row 1 (RS): Ch 1. Sc in same st and in each of the next 9 sc. Turn.
(10 sc)
Row 2 (WS): Ch 1. Sc in each sc across. Turn.
(10 sc)
Continue working even in sc (ch 1, sc across, turn) until the strap measures 22 inches (56 cm) from the top edge of the bag body, or desired strap length.
Joining Row: Hold the strap end to the corresponding position on the back top edge (directly behind the starting point). Working through both the last strap row and the 10 sc of the back top edge simultaneously, sl st through each pair of sts across (10 sl sts) to attach the strap end to the back of the bag. Fasten off. Weave in end.
Right Strap
Locate the sc that sits approximately 10 sts to the right of the center front top edge. Work identically to the left strap, beginning on the front right and attaching the end to the back right.
Checkpoint 3
Each strap should lie flat without twisting and fall symmetrically from front to back. The bag opening should be approximately 10 sts wide across the front and back top edges between the two strap bases.
Finishing and Blocking
Weave in all ends securely using a yarn needle, working the tails back through at least 1 inch (2.5 cm) of stitches in two directions to prevent unraveling.
Wet blocking is strongly recommended. Soak the completed bag in cool water for 10 to 15 minutes until fully saturated. Gently press out excess water without wringing. Lay flat on a blocking board or dry towel. Pin the corners and gently stretch the bottom point downward and the side points outward to their final dimensions. Allow to dry completely (12 to 24 hours) before removing pins.
Gently coax the puff stitches to the right side with your fingers while the bag is damp.
Care Instructions
Machine wash on a gentle or delicate cycle in cool water. Place the bag inside a mesh laundry bag to protect the strap joins and puff stitches during washing. Lay flat to dry. Do not tumble dry, iron, or dry clean. Reshape while damp if needed.
Size Customization Tips
To make the bag wider: Add more squares per row. A 4-square-wide panel (16 squares per panel, 32 total) creates a bag approximately 17 inches (43 cm) wide. Increase yarn quantities by approximately 30 percent.
To make the bag taller: Add more rows of squares. A 5-row-tall panel adds approximately 4 inches (10 cm) to the bag height.
To adjust strap length: Work more or fewer even rows. Add or subtract about 10 rows at a time.
To make smaller squares: Use fingering weight yarn and a US size B-1 to C-2 (2.25 to 2.75 mm) hook. Squares will measure approximately 2.5 inches (6.4 cm).
To make larger squares: Use worsted weight cotton and a US size I-9 (5.5 mm) hook. Squares will measure approximately 5.5 inches (14 cm), and only 12 squares total may be needed.
Troubleshooting Common Issues
Puff stitches lying flat: Pull your loops up higher when creating each puff. They should reach the height of a double crochet before you draw through all loops.
Squares not matching in size: Check your tension. Even small differences in how tightly you work will affect your gauge. Block your first square and measure before making all 18.
Panels not laying flat: This usually resolves with blocking. If your panels are cupping or ruffling severely, your Round 5 may be too tight. Try going up a hook size just for the outer round.
Joining looks uneven: Take your time with the JAYG method. Use stitch markers to hold squares in alignment before you start joining.
Time Estimate
Plan for approximately 15 to 22 hours total, including all squares, joining, edging, and strap construction. Each sunflower square takes roughly 45 to 60 minutes. Many crafters find it helpful to break this into sessions, completing all the centers one day and all the petal rounds another.
Thank you so much for choosing this sunflower granny square market bag pattern. I hope you love making it as much as I enjoyed designing it. These sunny squares bring me so much joy every time I see them, and I think they will brighten your day too.
If you make this bag, I would absolutely love to see it. Tag me on Instagram or share a photo in our Facebook group. Seeing your finished projects is genuinely the best part of sharing patterns.
Save this crochet tutorial to your Pinterest boards so you can find it when you are ready to start stitching. And please drop a comment below if you make this sunflower market bag. I read every single one and love hearing about your projects.
You Might Also Like
- Coral Sunset Lacy Tank Top Free Crochet Pattern
- Blush Pink Rose Garden Bracelet Free Crochet Pattern
- Mustard Yellow Boho Tote with Brown Leather Tassels Pattern
- Mint and Peach Baby Dress Free Crochet Pattern