
I’ve been calling these my "Bohemian Garden Sandals" ever since I sketched the first version in a coffee-stained notebook about three summers ago. Back then, I was obsessed with the idea of creating wearable crochet footwear that actually looked like something you’d find in a boutique, not a craft fair reject bin. I made the original pair for my sister’s beach wedding, and she still talks about how many compliments she got. It took me a few more seasons of tweaking the motif placement and perfecting the ankle strap construction before I felt ready to share this pattern with you. I’m genuinely proud of how these turned out, and I think you’re going to love making them just as much as I loved designing them.

About These Crochet Gladiator Sandals
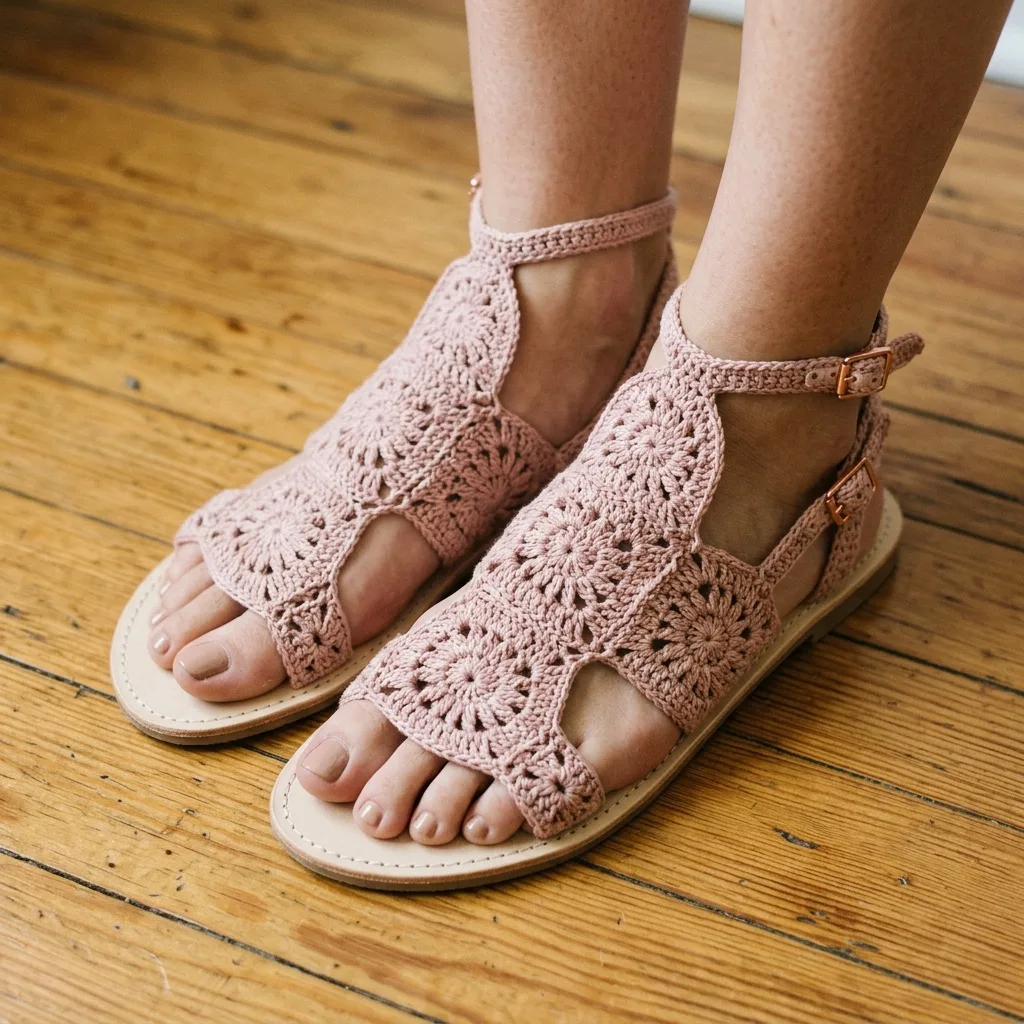
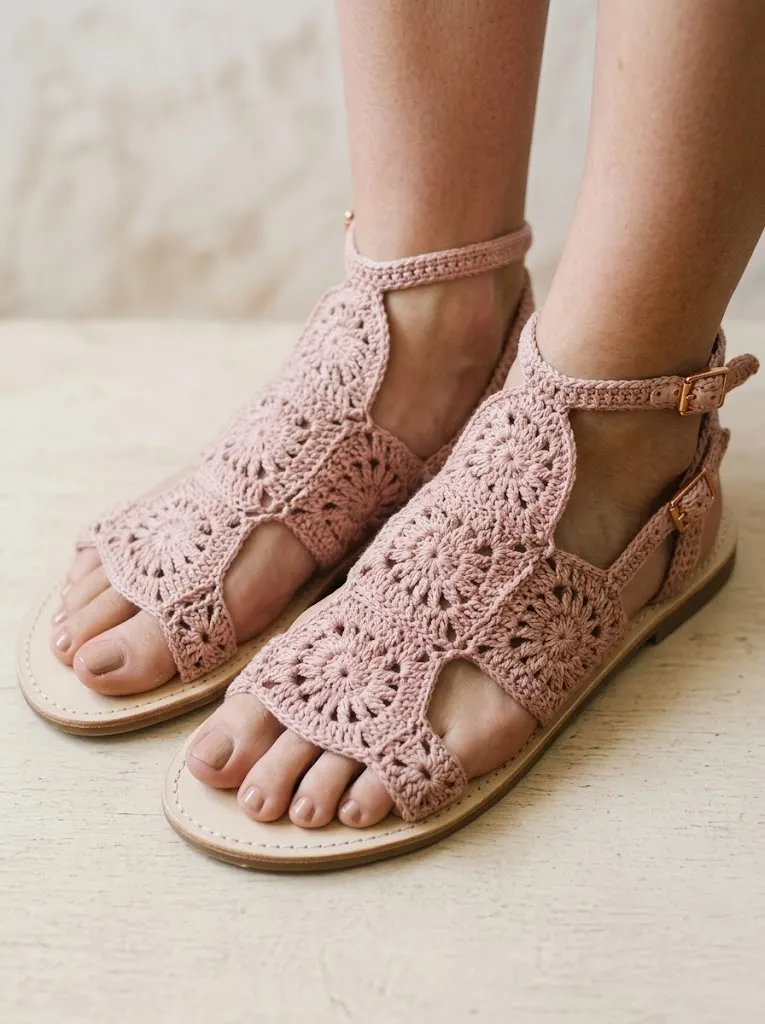
These blush pink floral crochet gladiator sandals combine delicate floral motifs with a structured gladiator silhouette. The result is a stunning pair of summer sandals that look far more complicated than they actually are. You’ll create individual flower squares, join them strategically, then attach everything to pre-made sandal soles with adjustable buckle straps.
The construction uses a join-as-you-go method for the motifs, which means minimal seaming at the end. Each floral square features a center medallion that radiates outward with petal-like shells. When placed together, they create that gorgeous scalloped edge you see along the top of the sandal.
Don’t let the intricate appearance intimidate you. If you can make a basic granny square, you can absolutely make these sandals. I’ll walk you through every single step.
Skill Level
Intermediate
This crochet pattern requires comfort with working in the round, joining motifs, and attaching crocheted pieces to non-fabric materials. However, I’ve broken everything down into manageable chunks. If you’re an adventurous beginner who has completed a few projects, you can definitely tackle these with patience.
Finished Measurements
Each sandal upper fits a standard women’s size 7-8 US sandal sole. The pattern includes notes for adjusting to smaller or larger sizes by adding or removing motifs.
Materials Needed
Yarn:
Hook:
Notions:
Gauge
One completed floral motif should measure 2 inches (5 cm) in diameter after blocking.
Gauge matters here because your motifs need to fit together properly and cover the sandal sole correctly. Make one test motif before starting. If it’s too large, go down a hook size. If it’s too small, go up a hook size.
Abbreviations and Stitch Definitions
Let me walk you through every stitch you’ll need. I’ll define each one completely so there’s no guessing.
ch = chain: Yarn over, pull through loop on hook. This creates the foundation for most crochet work.
sl st = slip stitch: Insert hook into stitch, yarn over, pull through both the stitch and the loop on your hook in one motion. Used for joining and moving across stitches invisibly.
sc = single crochet: Insert hook into stitch, yarn over and pull up a loop (2 loops on hook), yarn over and pull through both loops. The shortest and tightest basic stitch.
hdc = half double crochet: Yarn over, insert hook into stitch, yarn over and pull up a loop (3 loops on hook), yarn over and pull through all 3 loops. Slightly taller than single crochet.
dc = double crochet: Yarn over, insert hook into stitch, yarn over and pull up a loop (3 loops on hook), yarn over and pull through 2 loops (2 loops remain), yarn over and pull through remaining 2 loops. A tall, versatile stitch.
tr = treble crochet: Yarn over twice, insert hook into stitch, yarn over and pull up a loop (4 loops on hook), [yarn over, pull through 2 loops] 3 times. The tallest stitch used in this pattern.
shell = a group of stitches worked into the same stitch or space, creating a fan shape. In this pattern, shells are typically 5 dc in the same space.
magic ring = an adjustable starting loop that can be pulled tight to close the center hole completely. Also called magic circle or adjustable ring.
Special Techniques
Magic Ring
If you’ve never made a magic ring, here’s how: Wrap yarn around your fingers to form a loop with the tail behind. Insert your hook through the loop, yarn over with the working yarn, and pull up a loop. Chain 1 to secure, then work your first round stitches into that ring. When finished, pull the tail to close the center hole tightly.
Join-As-You-Go
Instead of making all motifs separately and sewing them together, you’ll connect each new motif to the previous ones during the final round. This creates a stronger join and saves time.
Pattern Instructions
Floral Motif (Make 10 for Each Sandal)
You’ll need 20 total motifs for both sandals. Each motif creates one "petal" section of the sandal upper.
Round 1: Make a magic ring. Ch 3 (counts as first dc throughout), work 11 dc into the ring. Sl st to top of ch-3 to join. Pull magic ring closed. (12 dc)
Round 2: Ch 3, dc in same stitch as join. Work 2 dc in each stitch around. Sl st to top of ch-3 to join. (24 dc)
Round 3: Ch 1, sc in same stitch. *Ch 3, skip 2 dc, sc in next dc.* Repeat from * to * around, ending with ch 3, sl st to first sc. You should have 8 ch-3 spaces. (8 ch-3 spaces)
Round 4: Sl st into first ch-3 space. Ch 3, work 4 dc in same space (first shell made). *Work 5 dc in next ch-3 space (shell made).* Repeat from * to * in each remaining ch-3 space. Sl st to top of ch-3 to join. (8 shells, 40 dc total)
Fasten off, leaving a 6-inch tail for weaving.
Joining Motifs
The sandal upper consists of motifs arranged in a specific configuration. Think of it as building blocks.
Toe Band: 2 motifs joined side by side horizontally
Middle Section: 4 motifs arranged in a 2×2 square, joined to the toe band
Upper Section: 4 motifs arranged in a curved pattern to create the gladiator look
How to Join During Round 4
When making your second motif and beyond, you’ll join to adjacent motifs during Round 4 instead of completing shells independently.
Work the shell until you reach the joining point. Complete 2 dc of your shell, then remove hook from loop. Insert hook through the center dc of the corresponding shell on the adjacent motif (from front to back), pick up your dropped loop, and pull through. Complete the remaining 2 dc of your shell. Continue working shells until the next joining point.
For corner joins where multiple motifs meet, you’ll join through multiple motifs at once. This sounds complicated, but once you do it, you’ll see how intuitive it becomes.
Toe Band Assembly
Join 2 motifs side by side using the joining method above. You’ll join through 2 adjacent shells where the motifs touch, leaving 6 shells unjoined on each motif for the outer edges.
Middle Section Assembly
Create a 2×2 square of 4 motifs. Join each motif to its neighbors through 2 shells on each adjoining side. Then join the top of this square to the bottom of your toe band. You’re essentially building upward from the toes.
Upper Section Assembly
The remaining 4 motifs create the gladiator height and curved silhouette. Arrange them in a gentle arc, joining where they touch. This section attaches to the top of the middle section.
Place your joined motif piece on top of your sandal sole to check positioning before moving forward. The toe band should sit just behind where your toes begin, with the upper section curving up toward the ankle.
Ankle Strap (Make 2)
The crocheted ankle strap extends from each side of the sandal upper and loops through the buckle hardware on your pre-made sole.
Row 1: Ch 6. Sc in second ch from hook, sc in each remaining ch. Turn. (5 sc)
Rows 2-45: Ch 1, sc in each sc across. Turn. (5 sc)
This creates a strap approximately 9 inches long. Adjust length by adding or removing rows.
Fasten off, leaving a long tail.
Attaching the Upper to the Sole
This is where your sandals really come together.
Step 1: Position your joined motif piece on top of the sandal sole. The toe band should curve around the front, and the upper section should arc toward the ankle area.
Step 2: Using your leather punch or awl, create small holes around the edge of the sole approximately every half inch where you’ll attach the crochet. If your soles came pre-punched, even better.
Step 3: Thread your tapestry needle with strong thread or waxed cord. Whip stitch the outer edge of your crochet piece to the sole, going through both the punched holes and the edge stitches of your motifs.
Step 4: Attach one end of each ankle strap to the sides of the upper section where it meets the middle section. Secure firmly with whip stitches.
Step 5: Thread the other end of each ankle strap through the buckle hardware on your pre-made sole. Fold under and stitch to secure, or leave loose for adjustability.
Finishing
Weave in all yarn ends using your tapestry needle. Weave each tail through at least 2 inches of stitches, going back and forth to lock it in place.
Blocking: Lightly dampen your completed sandals and stuff the toe area with tissue paper to help the motifs hold their shape while drying. This step isn’t mandatory, but it gives a more polished look.
Tips for Success
Cotton yarn is non-negotiable. Acrylic will stretch out and lose shape within a few wears. Cotton holds up beautifully and actually softens with wear while maintaining structure.
Test your joins before committing. After making your first two motifs and joining them, lay them on your sandal sole to make sure the sizing works. This is much easier to adjust early than after you’ve made all 20 motifs.
Don’t skip the blocking. Even a light steam blocking helps your shells puff out evenly and makes the whole piece look more professional.
Pre-made soles save so much time. You can find sandal soles with hardware already attached at craft stores, leather supply shops, or online. Some even come with punched holes. These are worth every penny for a cleaner finished look.
Customization Ideas
Color variations: Try white for a bridal look, tan for a natural vibe, or navy for something unexpected.
Add beads: Thread small wooden or glass beads onto your yarn before starting. Work them into the center of each motif during Round 1 for extra sparkle.
Modify height: Add more motifs to the upper section for a taller gladiator style, or remove motifs for a simpler t-strap sandal look.
Different sole styles: This pattern works with flip flop soles, espadrille platforms, or even rubber-soled sandal blanks.
Care Instructions
Hand wash your crochet sandals in cool water with mild soap. Gently squeeze out excess water without wringing. Reshape and lay flat to dry away from direct sunlight. The leather or faux leather soles should be wiped clean with a damp cloth.
Store your sandals stuffed with tissue paper to help them maintain their shape between wears.
Thank you so much for choosing this crochet gladiator sandals pattern for your next project. I genuinely can’t wait to see how yours turn out. If you make a pair, please tag me on Instagram or share in my Facebook group. Your creations always make my day brighter.
If this pattern inspired you, go ahead and save it to your Pinterest boards so you can find it when sandal season rolls around. And please leave a comment below if you give these a try. I’d love to hear which color you chose and how the fit turned out for you!
You Might Also Like
- Ocean Wave Hexagon Throw Free Crochet Pattern
- Sky Blue Dragon Amigurumi Plush Free Crochet Pattern
- Pastel Pink Dragon Amigurumi Plush Free Crochet Pattern
- Coral Peach Tie Front Crochet Cardigan Free Pattern