
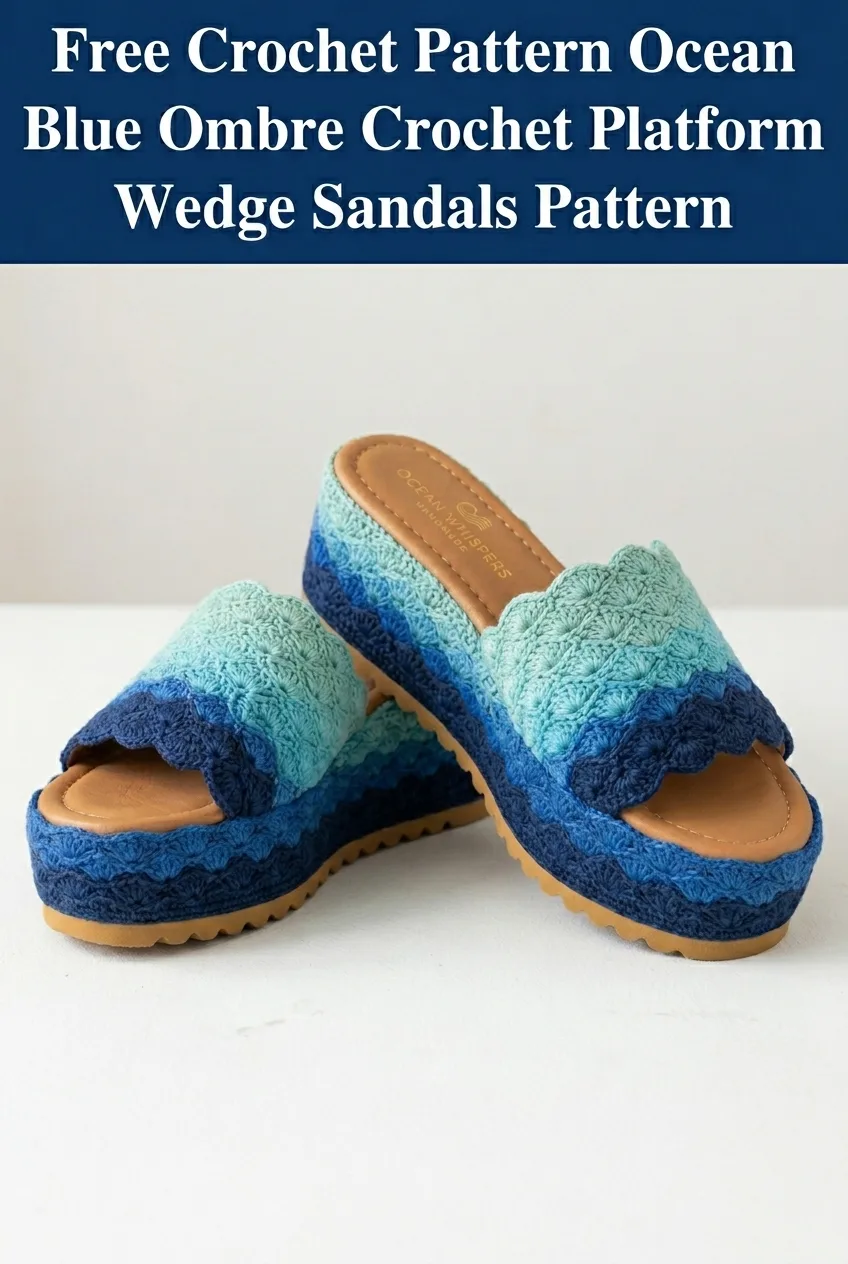
Looking for a statement summer accessory that keeps your feet cool while showing off your crochet skills? These ocean blue ombre platform wedge sandals combine the shell stitch (also called fan stitch) with a gorgeous gradient of blues ranging from deep navy to soft aqua. The finished sandals make stunning gifts for beach lovers, vacation enthusiasts, or anyone who appreciates handmade footwear. This intermediate crochet pattern works up in sections that you attach to a pre-made platform sole, and the repeating shell pattern creates beautiful wave-like texture that truly captures ocean vibes.
Why You Will Love This Crochet Sandals Pattern
I designed this crochet platform wedge sandals pattern to be both eye-catching and practical. The shell stitch creates a slightly open, breathable fabric perfect for warm weather. Working in stripes means you get natural color breaks, which makes this project feel like it moves quickly even though the construction requires attention to detail.
The ombre effect happens naturally as you change colors every few rows. No complicated colorwork techniques here. Just simple color changes that create a professional gradient look.
Quick Pattern Facts:
Materials Needed for Your Crochet Wedge Sandals
Before you start crocheting, gather all your supplies. Having everything ready makes the process smoother and more enjoyable.
Yarn:
I recommend 100% cotton or a cotton/acrylic blend for durability and washability. Mercerized cotton gives a lovely sheen that photographs beautifully.
Tools:
About the Platform Soles:
This pattern requires pre-made platform wedge soles. Look for soles with holes punched around the perimeter, specifically designed for crochet or macrame projects. The soles in the sample have a tan leather insole with a rubber grip bottom. You can find these at craft supply stores or online marketplaces by searching for "crochet sandal soles" or "DIY sandal platforms."
Stitch Glossary and Abbreviations
Let me walk you through every stitch used in this crochet tutorial. If you are newer to crochet, read through these definitions before starting.
Chain (ch): The foundation stitch. Yarn over, pull through the loop on your hook. This creates one chain.
Single Crochet (sc): Insert hook into stitch, yarn over and pull up a loop (2 loops on hook), yarn over and pull through both loops. This creates a short, dense stitch.
Double Crochet (dc): Yarn over, insert hook into stitch, yarn over and pull up a loop (3 loops on hook), yarn over and pull through 2 loops (2 loops remain), yarn over and pull through remaining 2 loops. This creates a taller stitch about twice the height of single crochet.
Shell Stitch: A group of 5 double crochet stitches worked into the same stitch or space. This creates a fan-shaped cluster. In this pattern, shells are worked into the center dc of shells from the previous row.
Skip (sk): Pass over the indicated number of stitches without working into them.
Slip Stitch (sl st): Insert hook into stitch, yarn over and pull through both the stitch and the loop on your hook in one motion. Used for joining rounds or creating nearly invisible stitches.
Gauge Information
Gauge matters for wearable items like sandals. Your upper straps need to fit properly across your foot.
Gauge: One shell repeat (5 dc) = approximately 1.5 inches wide. 4 rows of shell pattern = approximately 2 inches tall.
Work a small swatch before starting. If your shells are too large, go down a hook size. If they are too small, go up a hook size.
Understanding the Construction
Before diving into the step by step instructions, let me explain how these crochet sandals come together. This helps you visualize the finished project.
The sandals have two crocheted components:
1. The Upper Strap: A wide band that goes across the top of your foot
2. The Platform Wrap: A strip that wraps around the entire perimeter of the sole
Both pieces use the shell stitch pattern in an ombre gradient. You crochet them flat, then attach them to the pre-made soles using the punched holes and strong adhesive.
Crochet Pattern Instructions
Part One: The Upper Strap (Make 2)
The upper strap creates the beautiful wave-like band that sits across the top of your foot. Each strap uses all four colors in the ombre sequence.
With Color A (Navy), ch 47.
Row 1: Sc in 2nd ch from hook and in each ch across. (46 sc)
Row 2: Ch 3 (counts as dc here and throughout), turn. Dc in same st, sk 2 sts, *5 dc in next st (shell made), sk 2 sts*. Repeat from * across to last st, 2 dc in last st. (7 shells plus 2 half-shells at edges)
Row 3: Ch 3, turn. 2 dc in first dc, *shell in center dc of next shell*. Repeat from * across, 3 dc in top of turning ch. (7 shells plus half-shells)
Row 4: Repeat Row 3. Fasten off Color A.
Rows 5-6: Join Color B (Royal Blue) in first st with sl st, ch 3. Continue shell pattern as established. Fasten off Color B at end of Row 6.
Rows 7-8: Join Color C (Ocean Blue). Continue shell pattern. Fasten off Color C at end of Row 8.
Rows 9-11: Join Color D (Aqua). Continue shell pattern for 3 rows. Do not fasten off.
Edging Round: Ch 1, do not turn. Work sc evenly around entire strap. Work 3 sc in each corner to help the piece lie flat. Join with sl st to first sc. Fasten off and weave in ends.
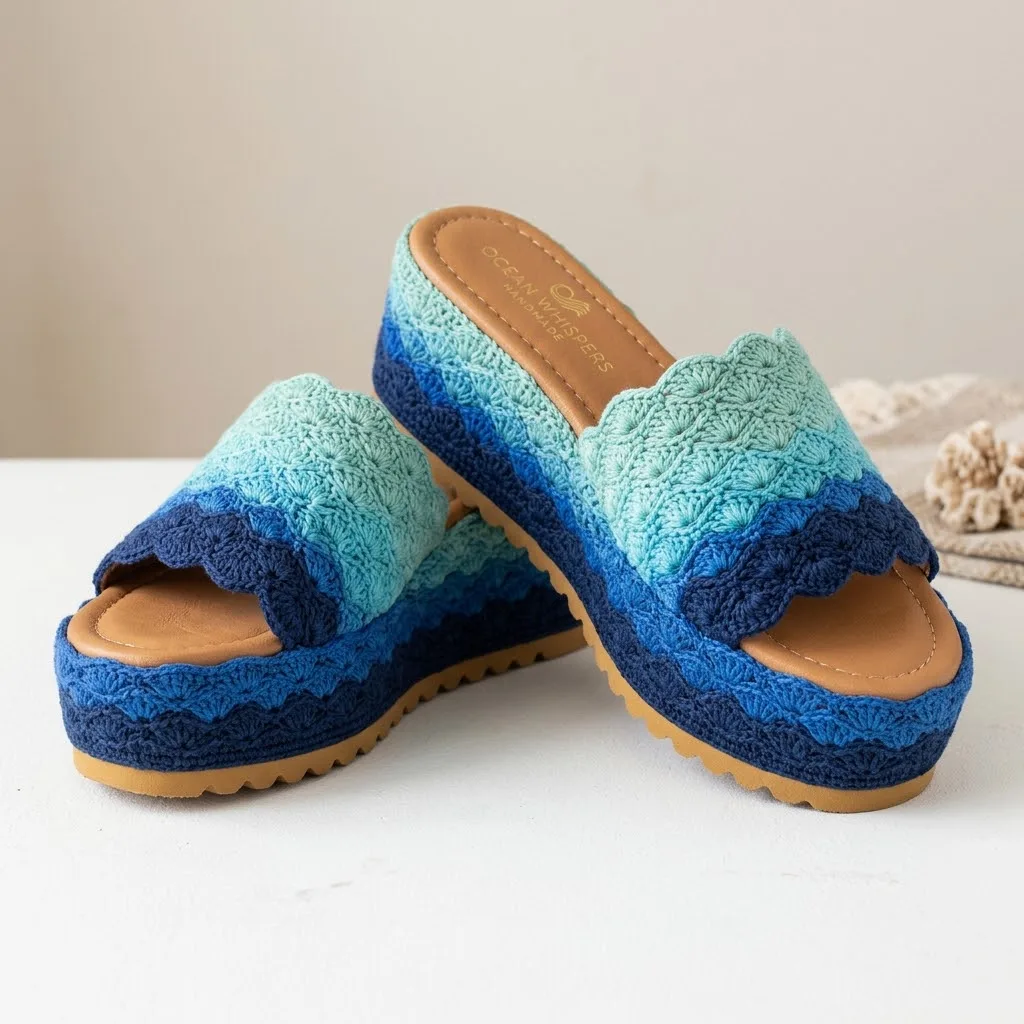
Your finished upper strap should measure approximately 8 inches wide and 4 inches tall. The scalloped edges from the shell stitch create a lovely wave effect.
Part Two: The Platform Wrap (Make 2)
This piece wraps around the entire edge of your platform sole, covering the sides and creating that gorgeous layered ocean wave effect.
Measure your sole perimeter first. Most women’s size 7-8 soles measure approximately 22-24 inches around. Adjust your starting chain as needed.
With Color A (Navy), ch 140 (or appropriate multiple of 6 plus 2 for your sole).
Row 1: Sc in 2nd ch from hook and in each ch across. (139 sc)
Row 2: Ch 3, turn. Dc in same st, sk 2 sts, *shell in next st, sk 2 sts*. Repeat from * across to last st, 2 dc in last st.
Row 3: Ch 3, turn. 2 dc in first dc, *shell in center dc of next shell*. Repeat from * across, 3 dc in top of turning ch.
Rows 4-5: Continue shell pattern. Fasten off Color A at end of Row 5.
Rows 6-7: Join Color B. Continue shell pattern. Fasten off.
Rows 8-9: Join Color C. Continue shell pattern. Fasten off.
Row 10: Join Color D. Work one row of shell pattern. Fasten off.
Your platform wrap should measure approximately 22-24 inches long and 3.5 inches tall.
Assembly Instructions
Now comes the fun part. Bringing all the pieces together transforms your crocheted strips into actual wearable sandals.
Step 1: Attach the Platform Wrap
Lay your platform sole flat with the insole facing up. Starting at the back heel area, use your tapestry needle and matching yarn to whip stitch the bottom edge of the platform wrap to the punched holes around the sole perimeter.
Work slowly and keep your stitches even. The wrap should cover the entire side of the platform from bottom to top.
Apply fabric adhesive along the inside edge where the wrap meets the insole for extra security. Let dry completely before handling.
Step 2: Position the Upper Strap
The upper strap attaches at an angle across the front portion of the sandal. Place the strap with the Color A (navy) edge at the bottom, closer to the toe area, and the Color D (aqua) edge at the top.
Pin or clip the strap in place to check positioning before attaching permanently. The strap should sit comfortably across where your foot naturally bends.
Step 3: Secure the Upper Strap
Using matching thread or yarn and your tapestry needle, stitch the bottom edge of the upper strap to the platform wrap where they overlap. The shell patterns should nest together nicely.
Apply fabric adhesive along all attachment points. Allow 24 hours to cure completely before wearing.
Sizing Adjustments
For smaller sizes (US 5-6): Reduce starting chain by 12 stitches for the platform wrap. Reduce upper strap starting chain to 41 stitches.
For larger sizes (US 9-10): Add 12 stitches to the platform wrap starting chain. Increase upper strap starting chain to 53 stitches.
Always measure your actual soles and adjust accordingly. The beauty of handmade items is customization.
Care Instructions
Cotton yarn is machine washable, but the platform soles may not be. I recommend spot cleaning the crocheted portions with a damp cloth and mild soap. Allow to air dry completely before wearing.
Store your sandals stuffed with tissue paper to help them maintain their shape.
Troubleshooting Common Issues
Shells look uneven: Check that you are always working into the center dc of each shell below. Placing a stitch marker in the center stitch can help.
Strap too tight or loose: Adjust your starting chain count. Add or subtract stitches in multiples of 6 to maintain the shell pattern repeat.
Colors pooling oddly: DK weight cotton should give consistent color throughout. If you notice pooling, try alternating skeins every few rows.
Wrap does not fit sole: Measure twice before attaching. The wrap should fit snugly without stretching or bunching.

Final Thoughts on This Crochet Platform Sandals Pattern
These ocean blue ombre crochet platform wedge sandals combine beginner friendly shell stitches with intermediate construction techniques. The finished sandals make a serious style statement and prove that crochet can be both beautiful and functional.
I love how the gradient moves from deep ocean navy up through lighter blues to that soft aqua top edge. It really does look like waves cresting on a beach.
Thank you so much for choosing this pattern for your next crochet project. I genuinely hope you love making these sandals as much as I enjoyed designing them. If you complete a pair, I would absolutely love to see them. Tag me on Instagram or share in my Facebook group. Your makes always brighten my day.
If this pattern caught your eye, save it to your Pinterest boards so you can find it when you are ready to start. And please leave a comment below if you make these sandals. I read every single one and love hearing about your color choices and any tweaks you make along the way. Happy crocheting!
You Might Also Like
- Lavender Purple Drawstring Bucket Bag Free Crochet Pattern
- Midnight Blue Floral Bell Sleeve Top Free Crochet Pattern
- Rainbow Pastel Snake Plushie Free Crochet Pattern
- Dusty Rose Mesh Crochet Sneaker Boots Free Pattern