
You know that gorgeous skein of dusty rose DK yarn you have been saving for something special? This is the project. Pull it out of your stash because this heirloom-quality baby dress is worth every yard.
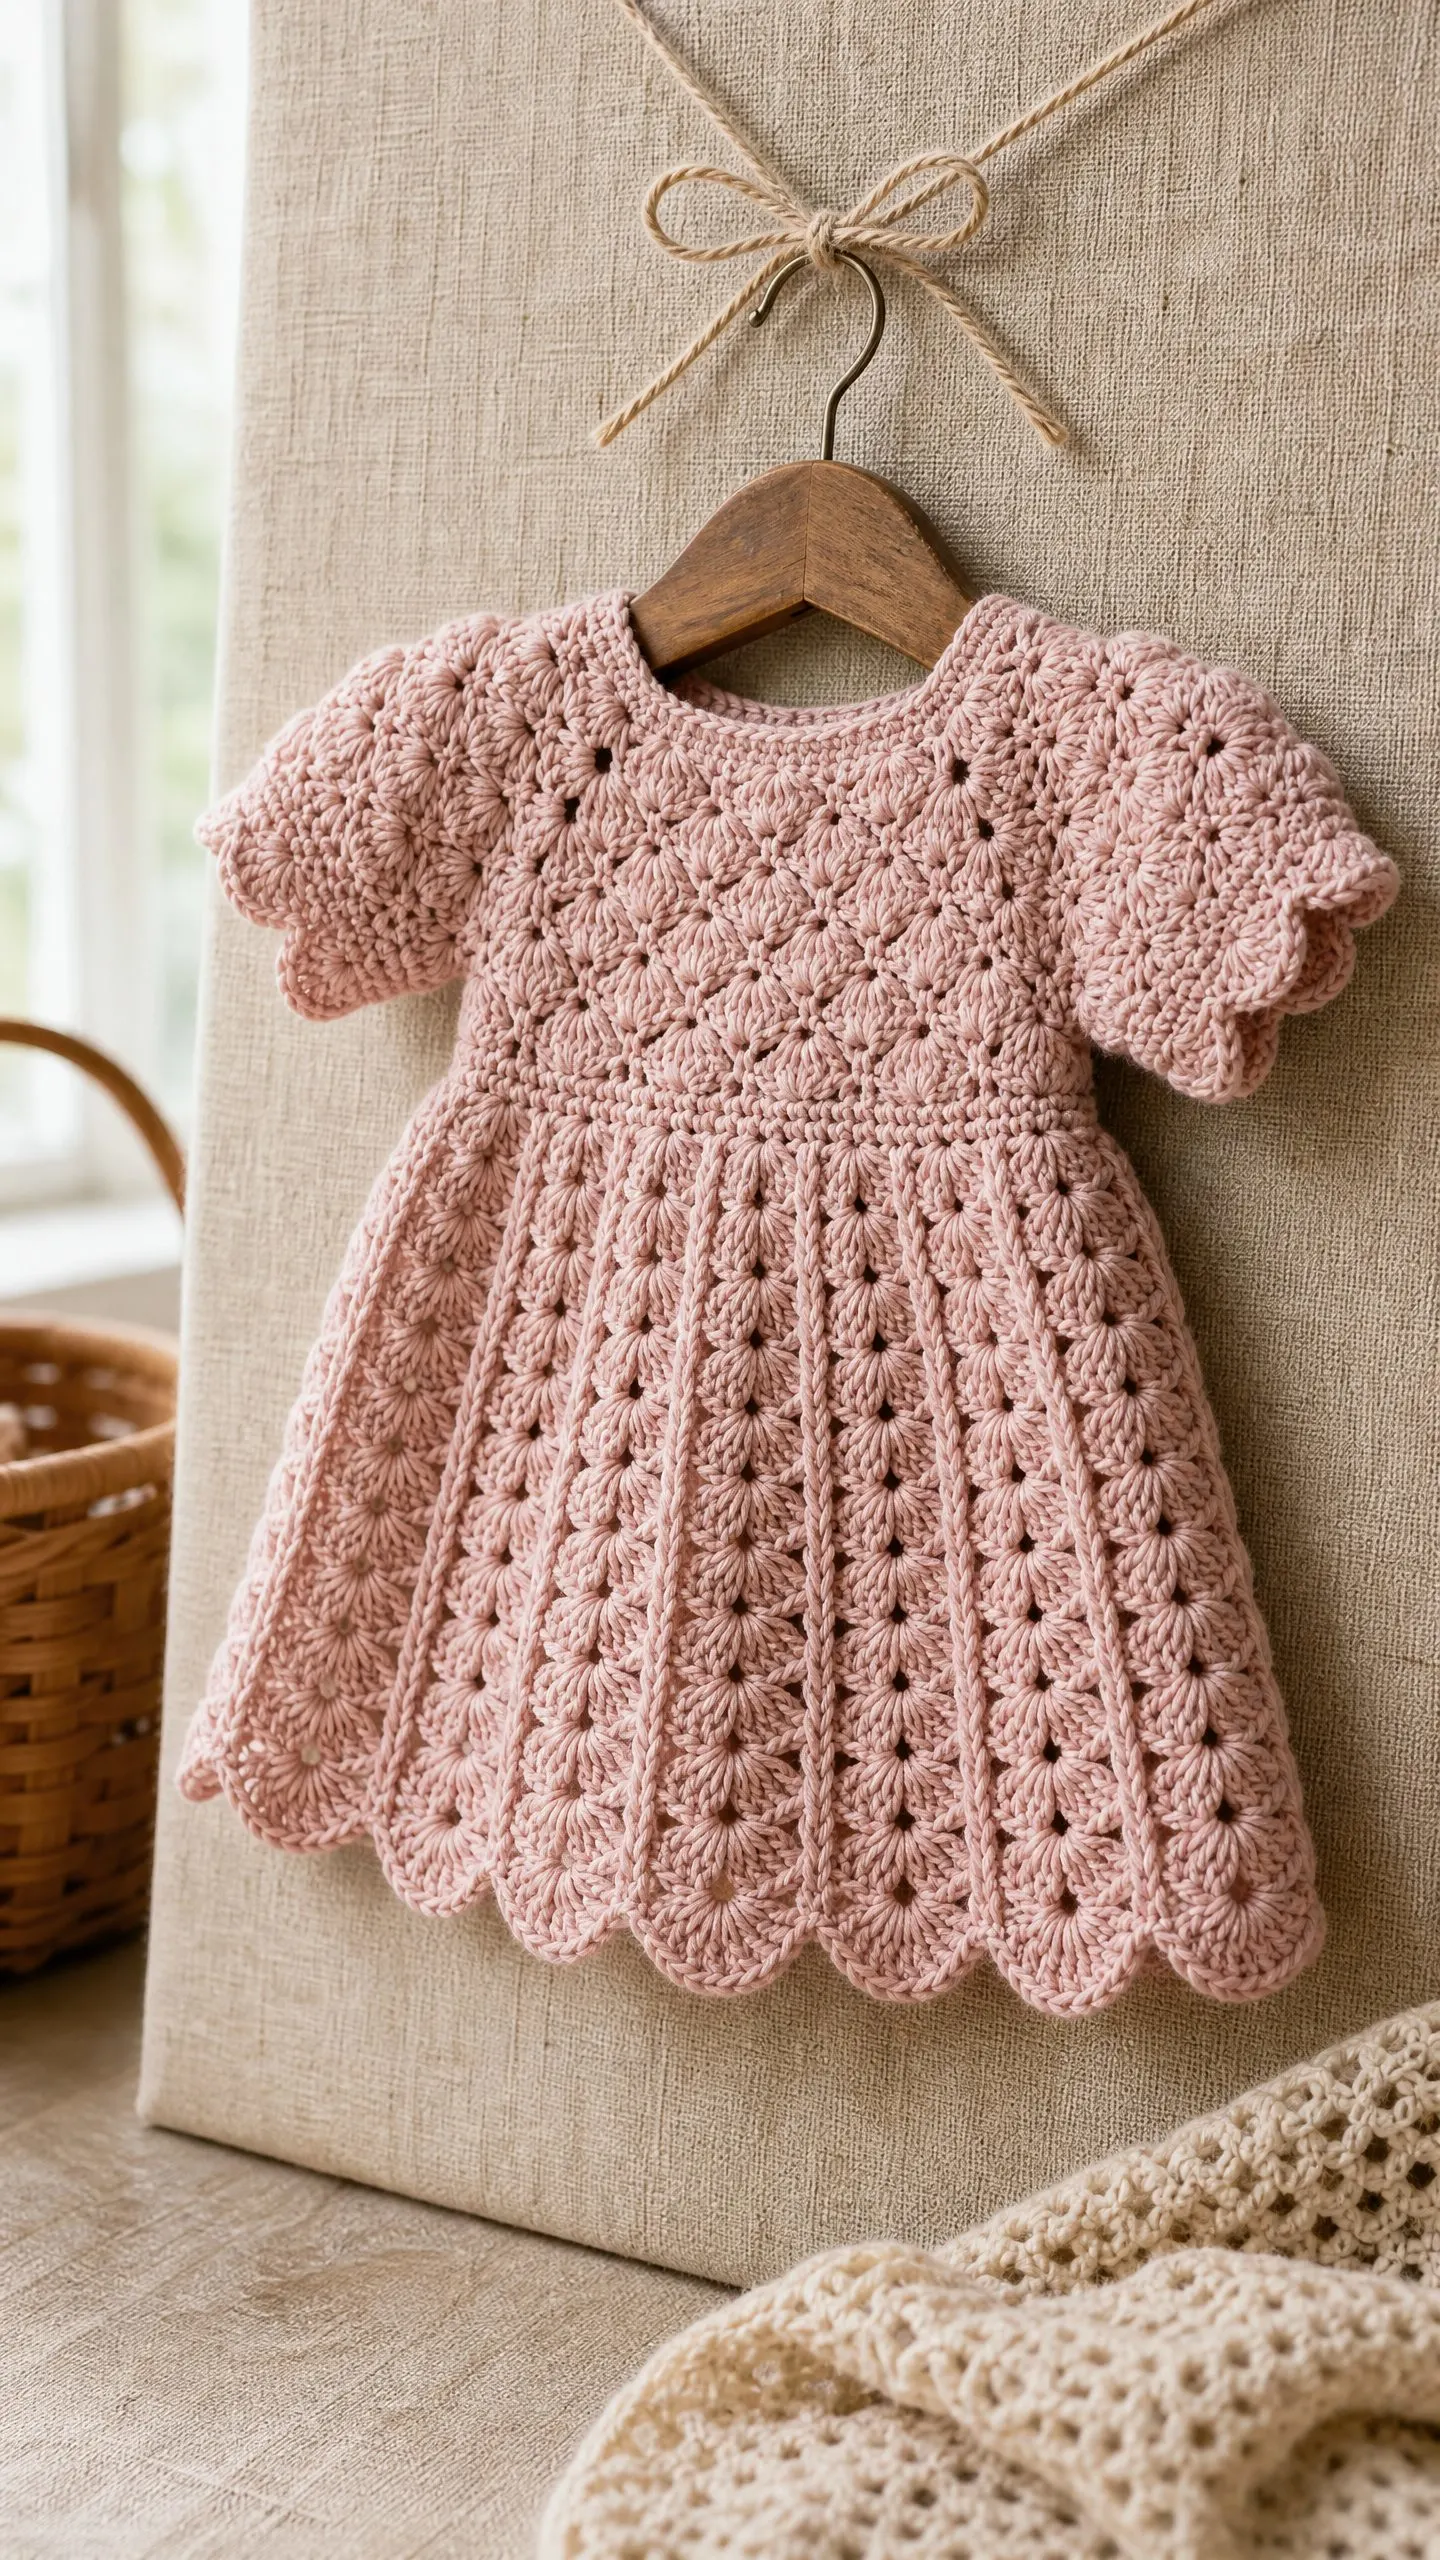
The construction here is genuinely interesting. You will work a round yoke from the top down with interlocking shell stitches that create a diagonal diamond pattern. Then the skirt flares out in vertical shell columns, and short flutter sleeves get picked up at the armholes. Every edge finishes with the same scalloped border, which ties the whole piece together beautifully.
I will be honest with you about the skill level. This is an intermediate project. You need to be comfortable with joined rounds, working into chain spaces, and maintaining stitch counts through shaping. But if you have made a few garments before and you pay attention to the placement of your shells, you can absolutely do this. The stitches themselves are basic. The magic is in how they are arranged.
Why This Baby Dress Pattern Works So Well
This dress hits all the right notes for a keepsake baby garment. The shell stitch creates that classic vintage look without being fussy. The top-down construction means no seaming except for an optional button closure at the back neckline. And the single color in dusty blush or rose keeps the focus on the beautiful stitch texture.
The fitted yoke fans outward naturally from the neckline using a diamond-grid shell arrangement. At the underarm, you simply set aside the sleeve stitches and continue the body downward. The skirt increases in three stages to create that gorgeous A-line flare you see in the finished piece. Those flutter sleeves? Just two rounds plus a scallop edging. Simple but so effective.
Everything about this design screams heirloom quality. It is the kind of dress that gets packed away carefully and passed down to the next baby in the family.
Materials You Will Need
Yarn: DK weight (CYCA 3 Light), approximately 300 to 350 yards (275 to 320 meters) in a single dusty blush or rose color.
Hook: US size E-4 (3.5 mm) for the yoke and sleeves. You can use a US size F-5 (3.75 mm) for the skirt if you want a slightly softer drape, or stick with the E-4 throughout for consistency.
Notions:
Yarn Suggestions
Paintbox Yarns Simply DK is my top pick. It is 100% acrylic, machine washable, affordable, and comes in beautiful blush tones. You will need approximately 3 balls. Look for the Blush Pink or Dusty Rose colorways.
Scheepjes Catona works beautifully if you want a more heirloom cotton look. It gives excellent stitch definition with a slight sheen. Hold two strands together to work at DK gauge. The Old Rose or Powder Pink colors are perfect.
Lion Brand Pound of Love is another great option. It is extremely soft, budget-friendly, and hypoallergenic for babies. One skein gives you more than enough yarn. The Blossom color is lovely.
Choose a yarn that is gentle against baby skin and preferably machine washable. Avoid hairy or textured yarns that will obscure the shell stitch definition. A smooth, plied yarn produces the best results.
Finished Size
This pattern is written for size 3 to 6 months.
Size customization notes are included at the end of the pattern.
Gauge
With US E-4 (3.5 mm) hook in shell stitch pattern:
One shell repeat (chain-2 space, 5 double crochets, chain-2 space, 1 single crochet) equals approximately 1.5 inches (3.8 cm) wide. Four rows of shell pattern equal approximately 1.5 inches (3.8 cm) tall.
To make a gauge swatch: Chain 24. Row 1: single crochet in 2nd chain from hook, skip 2 chains, 5 double crochets in next chain (shell made), skip 2 chains, single crochet in next chain. Repeat from the beginning to the end. Continue in shell pattern for 8 rows. Block your swatch before measuring. Adjust hook size as needed.
Gauge is essential for a well-fitting garment. Please do not skip the gauge swatch.
Abbreviations and Stitch Definitions
Let me walk you through all the abbreviations and special stitches you will encounter.
Basic Abbreviations:
Special Stitches
Shell Stitch (shell): Work 5 dc all into the same stitch or space. This creates a fan-like cluster. Each shell counts as 5 stitches but is treated as one motif unit. So when you see "work shell" in the pattern, you are working 5 dc into one spot.
Single Shell (small-shell): Work 3 dc all into the same stitch or space. This is used in sleeve edging and transitional rows.
Scallop Edging: This is worked as a finishing round. Slip stitch into first stitch, chain 1, then work as follows: skip 2 stitches, 5 dc into next stitch (shell), skip 2 stitches, slip stitch into next stitch. Repeat around. Join with slip stitch to first slip stitch.
V-Stitch (v-st): Work 1 dc, chain 2, 1 dc all into the same stitch or space. This is used in the yoke diamond grid as a linking stitch between shells.
Picot (optional embellishment): Chain 3, slip stitch into first chain made. You can add this to the scallop edge if you want extra decoration.
Pattern Notes Before You Begin
Read through these notes before starting. They will save you confusion later.
1. The yoke is worked in joined rounds from the neckline downward. Each round is joined with a slip stitch and a turning chain is worked to begin the next round. The right side faces outward throughout.
2. When counting stitches in shell pattern rounds, count each shell as 1 motif unit and each connecting sc as 1 stitch. Total motif count is more useful than raw stitch count in shell construction.
3. Place stitch markers at the four yoke section dividers: right front, left front, right back, left back. Move markers up each round.
4. Chain-2 spaces in the yoke act as corners and increase points. Work into these spaces as instructed, not into the chains individually.
5. Block the finished dress before adding closures. Cotton yarns benefit from wet blocking. Acrylic yarns respond well to steam blocking with a cloth barrier.
Instructions
Neckline Foundation
Chain 66. Being careful not to twist, slip stitch into the first chain to form a ring.
Rnd 1 (RS): Ch 3 (counts as first dc throughout), work 4 dc into same ch as join (first shell made), sk 2 ch, sc in next ch, sk 2 ch; continue as follows: 5 dc into next ch (shell), sk 2 ch, sc in next ch, sk 2 ch; repeat from last bracket 9 more times total. You will work 11 shells and 11 sc around the neckline ring. Join with sl st to top of beginning ch-3.
(11 shells, 11 sc = 66 working stitches in groups)
Each repeat unit is 6 chains: skip 2, sc in 1, skip 2, shell in 1. That equals 6 chains per unit times 11 units, which equals 66 chains. Your foundation ring is correct.
Rnd 2: Sl st across to center dc of first shell (3 sl st to reach center), ch 1, sc in center dc of shell, ch 2, 5 dc into next sc (shell), ch 2, sc into center dc of next shell; repeat around, ending with ch 2, 5 dc into last sc, ch 2, join with sl st to first sc.
(11 shells, 11 sc)
In Round 2 the shells and sc swap positions. The sc now sits above the shell center and the new shell sits above the previous sc. This creates the interlocking diamond lattice visible in the yoke.
Yoke Increase Placement
Place 4 markers dividing the 11 shells into sections approximately as follows: right front (3 shells), right sleeve (2 shells), back (3 shells), left sleeve (2 shells), left front (1 shell at join point). At this scale the front and back differ slightly, but shaping will even out by Round 6.
Rnd 3 (increase round): Work as Rnd 2 but at each of the 4 corner sc positions (at the 4 markers), instead of working 5 dc into that sc, work (5 dc, ch 2, 5 dc) into that sc. This adds one shell at each corner, which equals 4 additional shells.
(15 shells, 15 sc)
Rnd 4: Work as Rnd 2 (swap positions, no increases), working sc into each shell center and shell into each sc.
(15 shells, 15 sc)
Rnd 5 (increase round): At the same 4 corner sc positions (the sc that sits above the ch-2 corner from Rnd 3), work (5 dc, ch 2, 5 dc). All other sc positions receive a single shell as normal.
(19 shells, 19 sc)
Rnd 6: Work even, no increases.
(19 shells, 19 sc)
Rnd 7 (increase round): Repeat increase at 4 corners.
(23 shells, 23 sc)
Rnd 8: Work even.
(23 shells, 23 sc)
CHECKPOINT: After Round 8, the yoke should measure approximately 3 inches (7.5 cm) from the neckline edge. The piece should be a flat disc with gentle fullness.
Dividing Yoke for Body and Sleeves
Rnd 9 (division round): This round separates the sleeve sections from the body.
Identify the shell arrangement by section after Round 8:
The key count is that approximately 6 shells per sleeve are set aside, and the remaining approximately 17 shells form the body.
Division method:
Work in shell pattern across right back section (5 shells, 4 sc between them). At the underarm point, ch 4 (this creates the underarm bridge), skip all right sleeve shells (4 shells, skip across them entirely), rejoin with sc into the first sc after the last sleeve shell on the front. Continue working the front section in shell pattern (9 shells across front). Ch 4 at the left underarm point, skip all left sleeve shells (4 shells), rejoin with sc into the first sc of the left back section. Complete the back. Join.
After division the body has: 14 shells across front and back combined, plus 2 ch-4 bridges at each underarm.
Rnd 10 (first skirt round): Work shell into center of each bridge ch-4 at underarms (treating ch-4 as a large sc anchor: work 5 dc into the 2nd ch of the ch-4 bridge), and continue shell pattern over remaining body shells. Work connecting sc between each shell as established. This adds 2 shells at the underarms.
(16 shells, 16 sc)
CHECKPOINT: After Round 10, the body circumference should measure approximately 16 inches (40.5 cm). This is the chest measurement. If it differs by more than half an inch, check your gauge.
Skirt
The skirt continues from the body in joined rounds, maintaining the shell-and-sc pattern. The skirt increases in width by adding shells at the beginning of increase rounds to create the flared silhouette.
Rnd 11: Work even.
(16 shells, 16 sc)
Rnd 12: Work even.
(16 shells, 16 sc)
Rnd 13 (skirt increase round): At every other sc (8 sc positions evenly spaced), work (5 dc, ch 2, 5 dc) instead of a single shell. This adds 8 additional shells.
(24 shells, 24 sc)
Rnd 14: Work even.
(24 shells, 24 sc)
Rnd 15: Work even.
(24 shells, 24 sc)
Rnd 16 (skirt increase round): At every 3rd sc position (8 positions evenly spaced), work (5 dc, ch 2, 5 dc) to add 8 more shells.
(32 shells, 32 sc)
Rnd 17: Work even.
(32 shells, 32 sc)
Rnd 18: Work even.
(32 shells, 32 sc)
Rnd 19 (skirt increase round): At every 4th sc position (8 positions evenly spaced), work (5 dc, ch 2, 5 dc) to add 8 more shells.
(40 shells, 40 sc)
Rnd 20: Work even.
(40 shells, 40 sc)
Rnd 21: Work even.
(40 shells, 40 sc)
Rnd 22: Work even.
(40 shells, 40 sc)
Rnd 23: Work even.
(40 shells, 40 sc)
CHECKPOINT: After Round 23 the skirt should measure approximately 5 inches (12.7 cm) from the underarm divide. The total dress length from shoulder should be approximately 10.5 to 11 inches (26.5 to 28 cm) at this point.
Hem Scallop Edging
Rnd 24 (hem edging): Do not fasten off after Rnd 23. Work the scallop edging as follows:
Sl st into first sc of round, ch 1. Working around the hem: skip 2 dc of shell (the first 2 dc), sl st into 3rd (center) dc of shell, ch 1, skip 2 dc (last 2 dc of shell), work (sc, ch 2, sc) into the linking sc between shells (this forms the scallop valley), then 5 dc into center dc of next shell (scallop peak). Repeat the (sc, ch 2, sc) into each valley sc and 5 dc into each shell center all the way around.
Alternative simplified scallop Rnd 24: Sl st to first st, ch 1. Into each linking sc work 1 sc. Into each shell center work 5 dc. Join.
(40 scallop peaks of 5 dc, 40 sc in valleys)
Join with sl st to first sc. Fasten off. Weave in end.
Sleeves
Return to one set of held sleeve stitches. With RS facing, join yarn with sl st to the first shell of the sleeve section at the underarm join point.
Each sleeve has 4 shells set aside, plus access to the ch-4 underarm bridge.
Sleeve Rnd 1: Work shell pattern across the 4 sleeve shells (work sc into center of each shell and shell into each sc, as established in yoke). At the underarm bridge, work 1 sc into the 2nd ch of the ch-4 bridge (the sc here connects the sleeve round). Join.
(4 shells, 5 sc total)
Sleeve Rnd 2: Work even.
(4 shells, 4 sc)
Sleeve Edging Rnd 3: Work scallop edging as for hem: sl st into first st, ch 1; 5 dc into each shell center, sc into each connecting sc. Join. Fasten off.
(4 scallop peaks, 4 sc)
Repeat for second sleeve.
Neckline Edging
Join yarn with sl st to any stitch of the foundation neckline edge. Work with RS facing.
Neckline Rnd 1: Ch 1, sc evenly around neckline, working approximately 1 sc per chain along the foundation. Total neckline sc should equal 66 sc to match the foundation chain.
(66 sc)
Neckline Rnd 2: Work scallop edging: ch 1, (sk 2 sc, 5 dc into next sc, sk 2 sc, sl st into next sc); repeat around. You will complete 11 scallops (since 66 divided by 6 equals 11 repeats). Join. Fasten off.
(11 scallop peaks)
CHECKPOINT: At this point the dress should be complete except for blocking and any optional closures. Total dress length should be approximately 13 inches (33 cm) from the neckline scallop peak to the hem scallop peak.
Finishing and Blocking
Weave in all yarn ends securely using a yarn needle, working ends into the back loops of stitches or through the cores of shell clusters.
Wet blocking method (recommended for cotton): Submerge the dress in cool water, gently squeeze out excess, roll in a clean towel to remove most moisture, then lay flat on a blocking mat. Pin the hem scallops outward and downward to open the shell fans. Pin sleeve scallops open. Allow to dry completely.
Steam blocking method (for acrylic): Lay the dress flat on a blocking mat. Hold a steam iron several inches above the surface and steam without pressing. Gently pin and shape while damp. Allow to cool and dry before unpinning.
Optional button closure: If a back opening is desired, work a button loop on the left back neckline edge as follows: join yarn at the left back neckline, ch 1, sc along the back edge for 1.5 inches, ch 5, sl st into the sc below to form a loop, sc back down the remaining edge. Sew a corresponding button to the right back neckline edge. Repeat for additional buttons if desired.
Size Customization Tips
To size up to 6 to 12 months: Add 2 additional increase rounds in the yoke (Rounds 9 and 10 of yoke before division) to add 8 more shells, increasing the chest circumference by approximately 2.5 to 3 inches. Add 2 to 3 additional even rounds to the skirt before the hem edging to increase length. You will need approximately 50 to 75 additional yards of yarn.
To size up to 12 to 18 months: Increase the starting neckline chain to 72 stitches (12 shell repeat units of 6 chains each), then work 2 additional yoke increase rounds, and increase the skirt by 4 to 5 additional even rounds. Additional yarn needed: approximately 100 yards.
To size down to newborn: Reduce the starting chain to 54 stitches (9 units of 6 chains). Work only 2 increase rounds in the yoke before dividing for sleeves. Reduce skirt by 2 rounds. The overall circumference will be approximately 13 to 14 inches.
Care Instructions for the Finished Dress
Hand wash in cool water with mild detergent. Do not wring. Roll in a clean towel to remove excess water. Lay flat to dry. Do not tumble dry. Do not bleach. If using a machine-washable yarn as listed in the suggestions, a gentle machine cycle in a mesh laundry bag is acceptable. Press with a cool iron on reverse side if needed, using a pressing cloth.
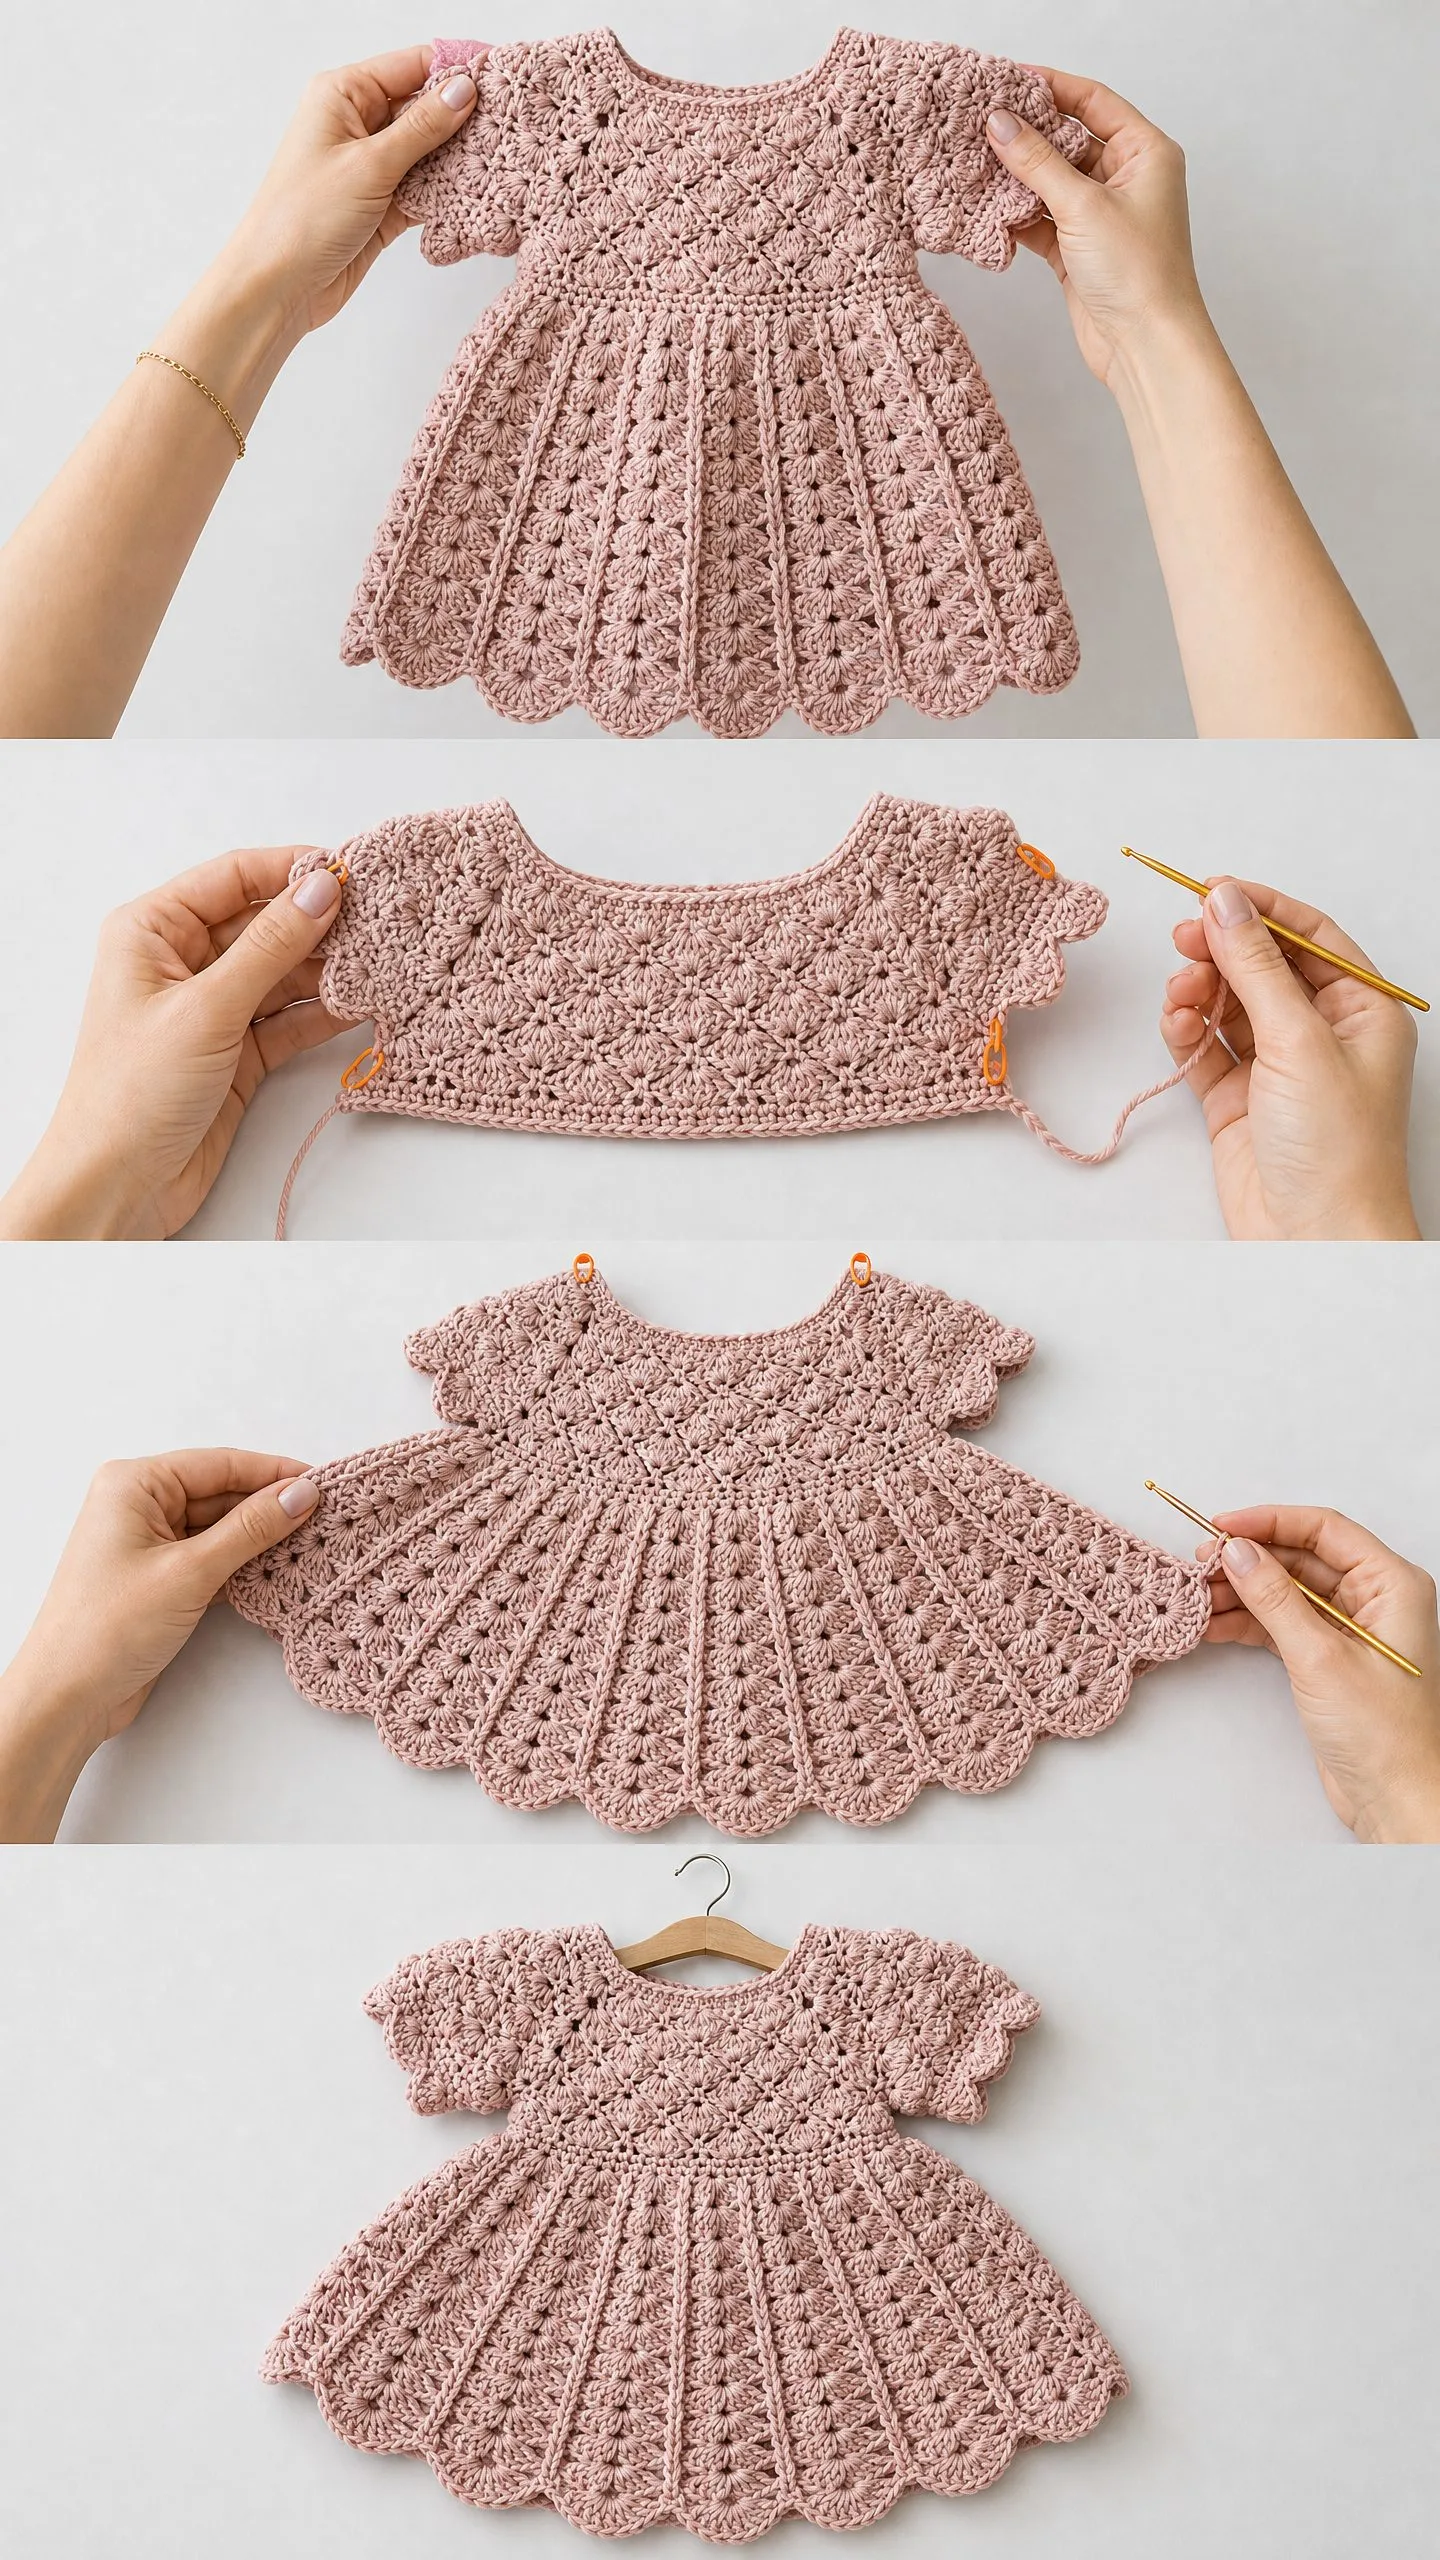
You Did It!
Thank you so much for making this beautiful shell baby dress with me. I hope the step-by-step crochet tutorial helped you feel confident working through the yoke shaping and skirt increases. This really is a special project, and I know whoever receives it will treasure it for years.
If you make this blush pink shell baby dress crochet pattern, I would absolutely love to see your finished piece. Tag me on Instagram or share a photo in my Facebook group. Seeing your creations is honestly the best part of sharing patterns.
Go ahead and pin this pattern to your favorite Pinterest board so you can find it easily when you are ready to start. And if you have any questions or just want to share how yours turned out, drop a comment below. I read every single one and I am always here to help.
You Might Also Like
- Sage Green Flutter Sleeve Baby Dress Free Crochet Pattern
- Coral Reef Charm Bracelet Free Crochet Pattern
- Wildflower Meadow Crochet Pot Free Crochet Pattern
- Sage Green Floral Bucket Bag Free Crochet Pattern