
Let me guess. You took one look at this gorgeous two-piece set and thought, "There is no way I can make that." Those cascading ruffles, that delicate lace texture, those perfect scalloped edges. It looks like something straight out of a boutique window, right?
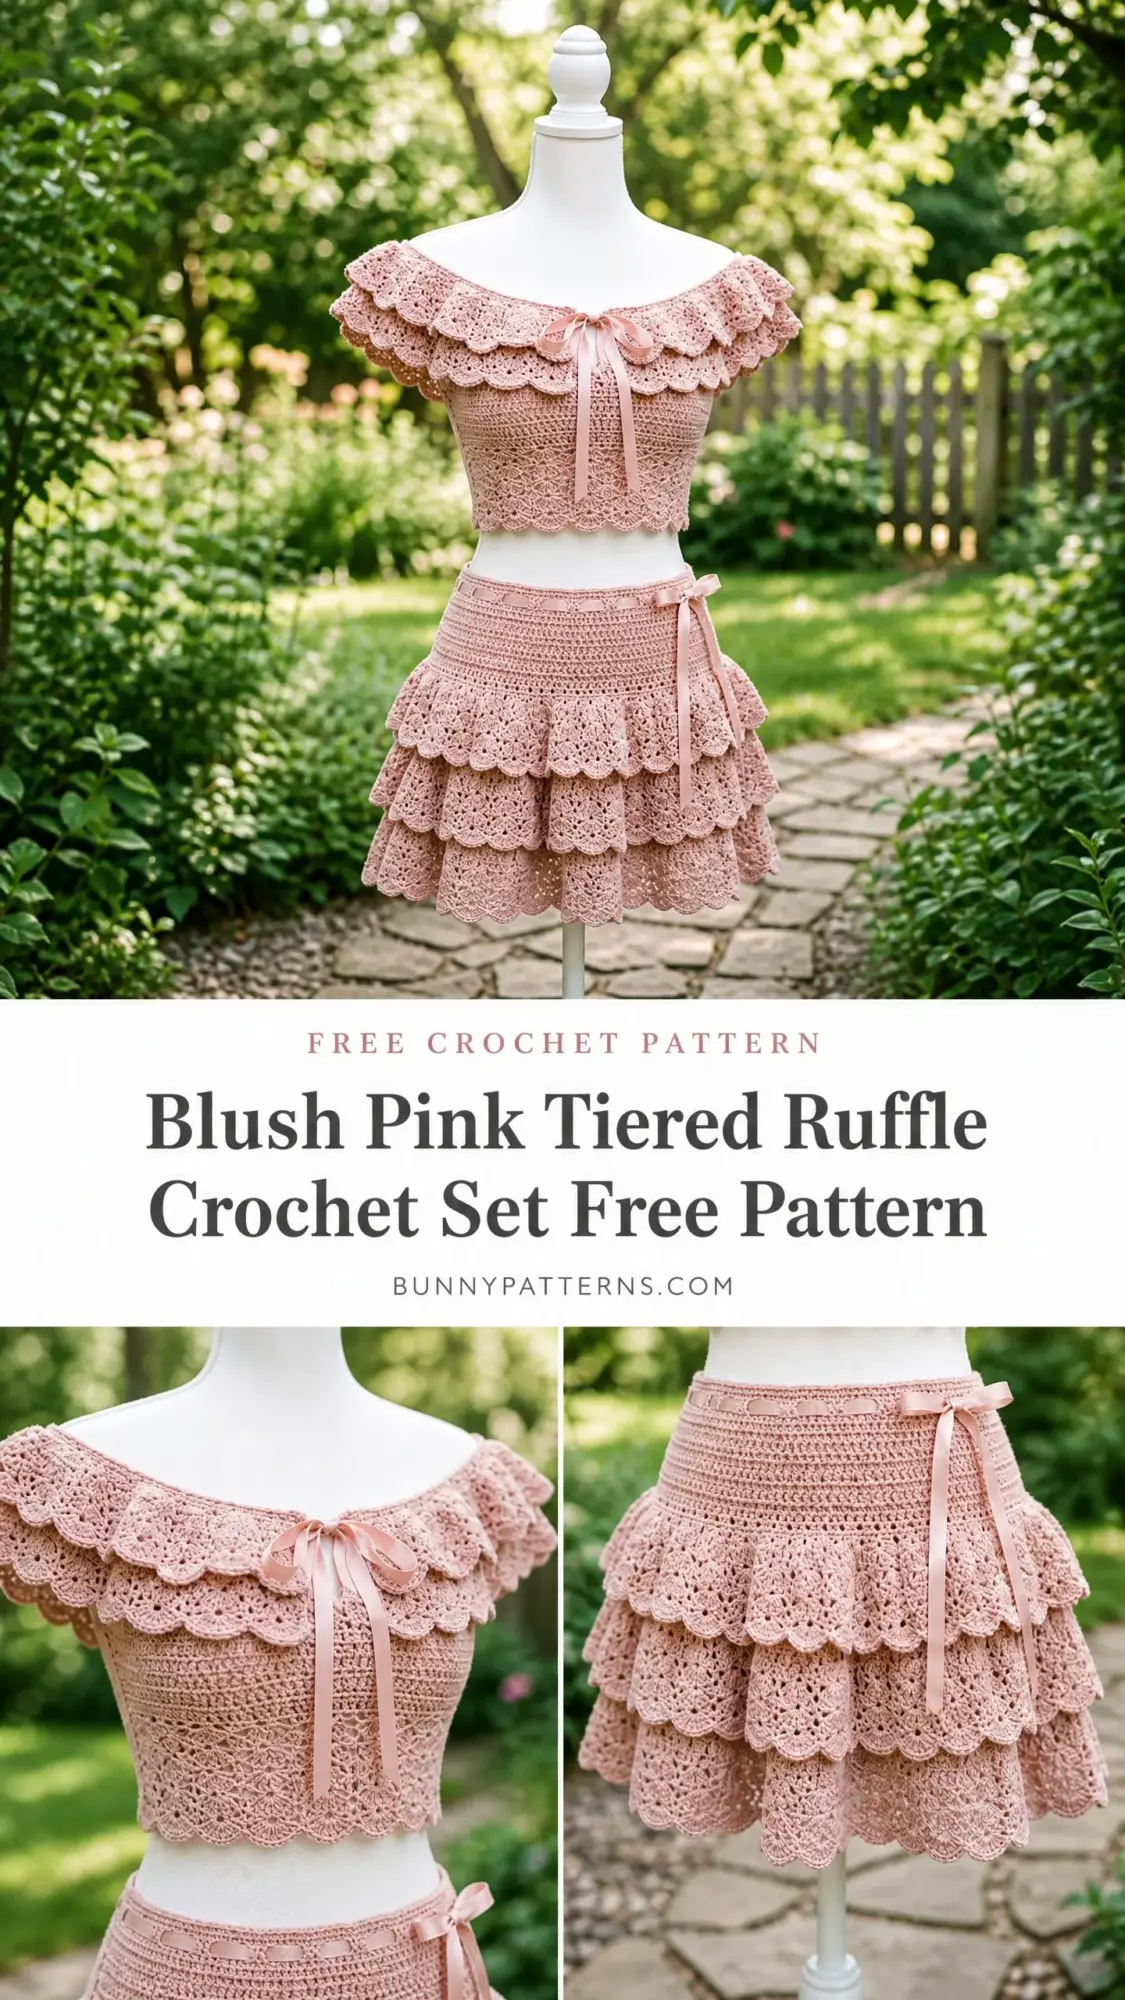
Here is the truth. This entire set is built on one simple stitch repeat. The shell stitch. If you can work five double crochets into the same spot, you can absolutely make this. The ruffles are not complicated construction magic. They are just the same shell pattern worked into doubled stitches. That is it. The fancy appearance comes from repetition and layering, not advanced techniques.
Whether you are an ambitious beginner ready to level up or an experienced crocheter looking for your next statement piece, this pattern breaks everything down step by step. I will walk you through every single round, every stitch count, and every tricky transition. By the end, you will have a stunning coordinated outfit that looks far more difficult than it actually is.
What You Are Making
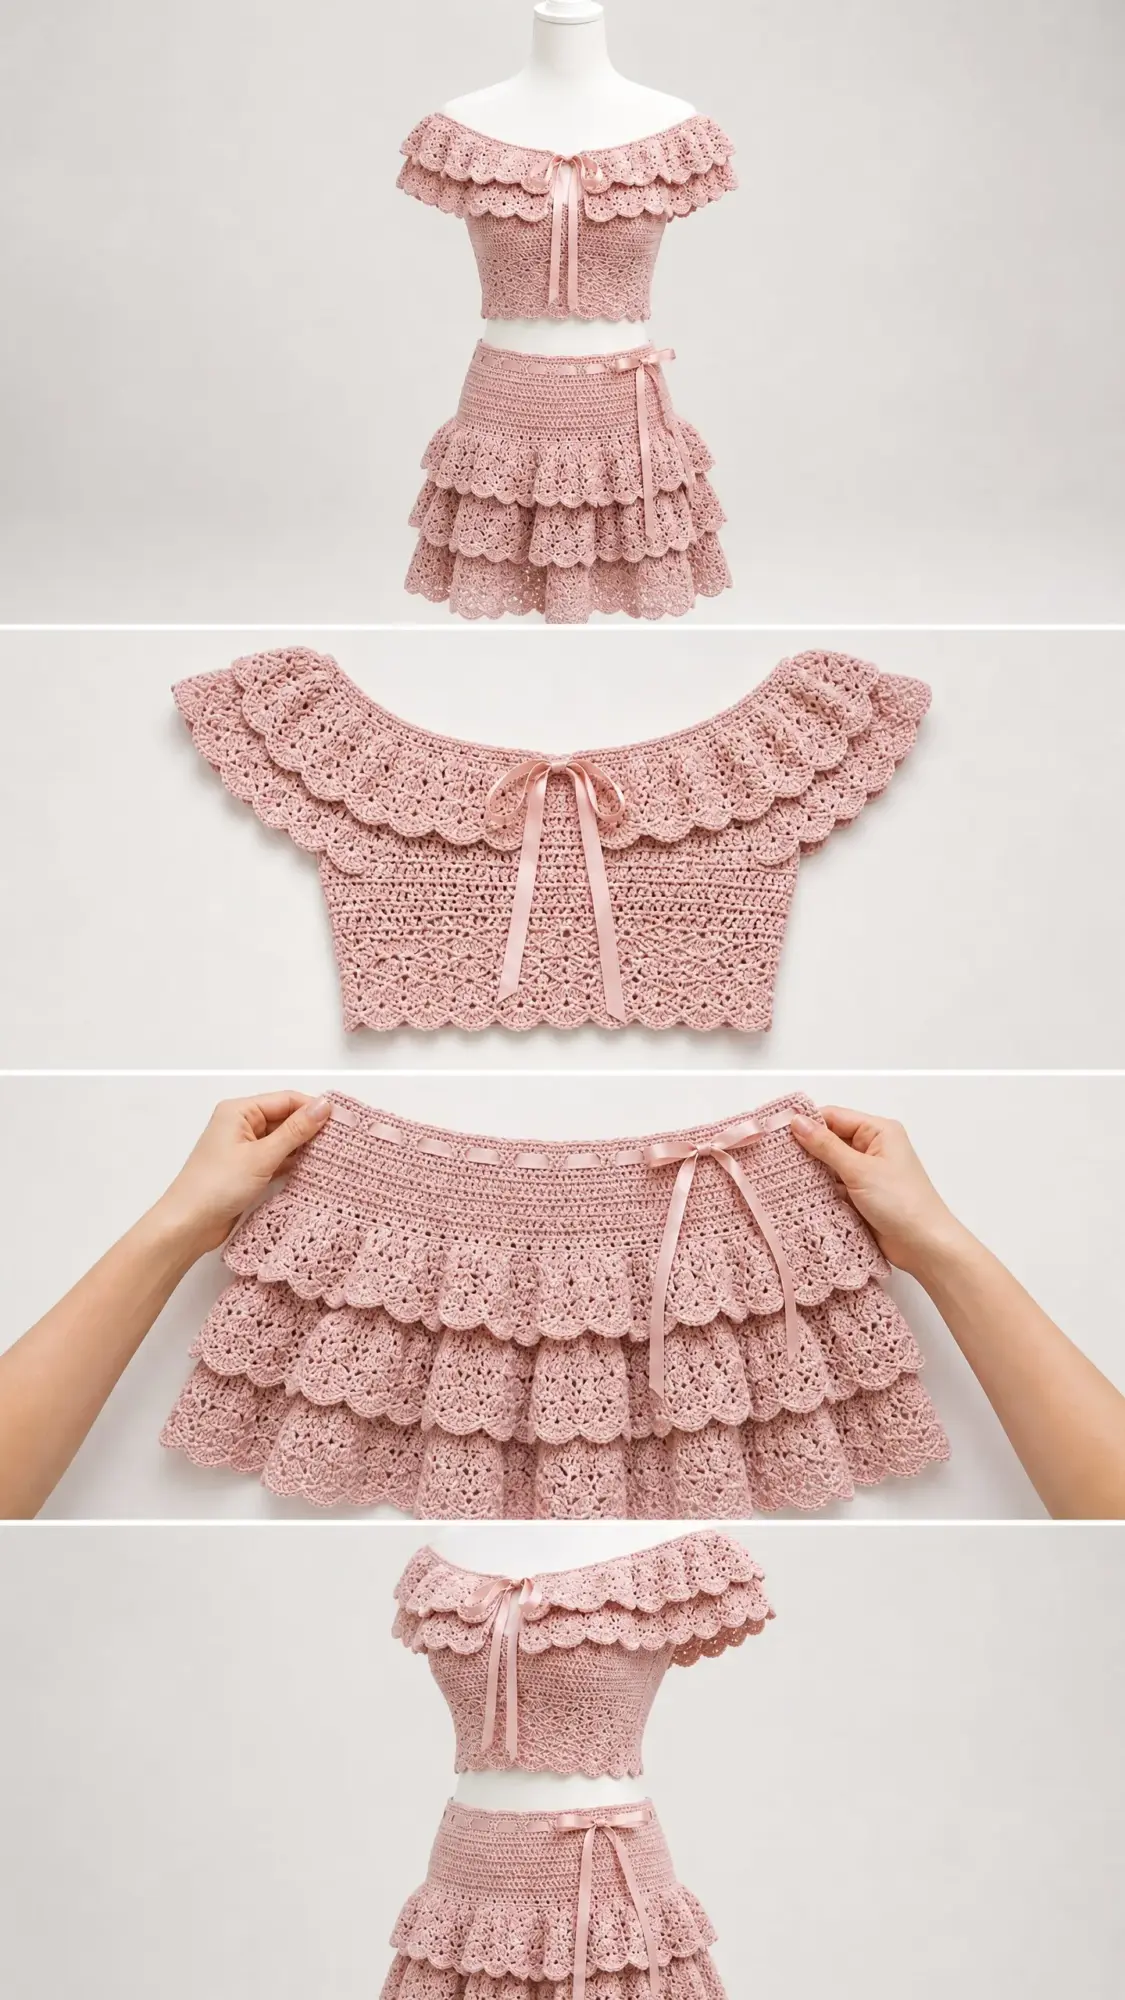
This blush pink tiered ruffle crochet set consists of two separate pieces that create a perfectly coordinated outfit. The crop top features a fitted body with an off-the-shoulder ruffled collar, a satin ribbon tie at the center front, and a scalloped hem. The mini skirt has a comfortable fitted waistband followed by three cascading tiers of ruffles, each one wider and longer than the one above it.
Both pieces use the exact same shell-and-picot lace stitch throughout. This creates a unified look that is absolutely perfect for summer events, beach vacations, or any occasion where you want to turn heads.
The finished crop top fits a 32 to 36 inch bust with approximately 6 inches of length from underarm to hem. The collar ruffle adds another 3 inches of beautiful draped fabric across the shoulders.
The mini skirt fits a 26 to 30 inch waist and measures approximately 13 inches from waistband to the bottom hem. At the widest ruffle tier, the hip circumference reaches 44 to 48 inches for that perfect flowy movement.
Skill Level
I would rate this pattern as advanced beginner to intermediate. The shell stitch itself is straightforward. What makes this project more challenging is working seamlessly in the round, managing the tier increases on the skirt, and maintaining consistent tension throughout the lace sections.
If you have never crocheted in the round before, I would suggest practicing on a simple hat or cowl first. But if you have made a few projects in joined rounds and feel comfortable counting your stitches, you are ready for this.
Time Estimate
Be prepared to spend some quality time with this project. The crop top takes approximately 12 to 18 hours. The mini skirt takes 15 to 22 hours. Your total time investment for the complete set runs between 27 and 40 hours depending on your experience level and crocheting speed.
I recommend breaking this into manageable sessions. The crop top body, the collar ruffle, and the finishing are natural stopping points. For the skirt, complete the waistband and body first, then tackle each tier as its own mini project.
Materials You Will Need
Yarn:
You need approximately 800 yards total for both pieces. The crop top requires 350 yards and the mini skirt needs 450 yards. Use DK weight yarn (also labeled as CYCA 3 or Light weight).
Recommended Yarn Options:
1. Paintbox Yarns Simply DK in Dusty Rose or Blush Pink. This budget-friendly 100% acrylic option gives excellent stitch definition and is machine washable.
2. Drops Safran in Old Rose. This 100% Egyptian cotton provides beautiful drape with a soft matte finish.
3. Lion Brand Comfy Cotton Blend in Rose Quartz. The cotton and micromodal blend offers exceptional drape ideal for warm weather.
Hook:
US size E-4 / 3.5 mm crochet hook
Notions:
Gauge
Getting gauge right is critical for proper fit. With your E-4 hook and DK yarn, after blocking you should get:
Shell pattern gauge: One shell repeat (5 double crochets plus 1 chain-1 space) equals 1.25 inches wide. Six rows of shell pattern equals 3 inches tall.
Single crochet gauge (for waistband): 18 single crochets by 22 rows equals a 4 inch square.
Always make a swatch, wash it, and block it before starting. Cotton yarns can relax by up to 10 percent after wet blocking.
Abbreviations and Special Stitches
Let me define every stitch and abbreviation you will encounter:
ch = chain. Wrap yarn over hook and pull through the loop on your hook.
sl st = slip stitch. Insert hook into stitch, yarn over, pull through both the stitch and the loop on hook in one motion.
sc = single crochet. Insert hook into stitch, yarn over, pull up a loop (2 loops on hook), yarn over, pull through both loops.
dc = double crochet. Yarn over, insert hook into stitch, yarn over, pull up a loop (3 loops on hook), yarn over, pull through 2 loops, yarn over, pull through remaining 2 loops.
sk = skip. Pass over the indicated number of stitches without working into them.
st(s) = stitch(es)
rnd = round
sp = space
Shell Stitch: Work 5 double crochets all into the same stitch or chain space. This creates a fan-shaped cluster that forms the primary lace texture.
Picot: Chain 3, then slip stitch into the first chain of the chain-3 you just made. This creates a small decorative loop.
Shell with Picot (Sh-P): Work 2 double crochets into the designated stitch, work 1 picot (chain 3, slip stitch into first chain), then work 3 more double crochets into the same stitch. You end up with 5 double crochets total with a picot between the 2nd and 3rd dc.
Eyelet Row: For ribbon threading. Work as follows: sc 1, (ch 1, sk 1 st, sc 1) repeat across. This creates evenly spaced holes for the ribbon.
Important Pattern Notes
Before you begin, keep these points in mind:
1. Both pieces are worked in the round with joined rounds. The right side always faces you. Do not turn unless specifically instructed.
2. The chain-2 at the beginning of double crochet rounds does not count as a stitch. Place a stitch marker in the first true double crochet of each round to avoid losing your place.
3. All double crochet rounds are joined with a slip stitch to the first double crochet, not to the chain-2.
4. For ruffles and tiers, stitches are doubled or tripled in setup rounds to create the gathered effect.
Crop Top Instructions
Body (Worked in the Round from Hem to Underarm)
Foundation Chain:
Ch 170. Being careful not to twist, join with a slip stitch to the first chain to form a ring.
Round 1 (setup): Ch 1, sc in each ch around. Join with sl st to first sc. (170 sc)
Round 2 (eyelet round for hem ribbon): Ch 1, sc 1, (ch 1, sk 1, sc 1) 84 times, ch 1, sk 1. Join with sl st to first sc. (85 sc + 85 ch-1 sps = 170 st positions)
Round 3: Ch 1, sc 1 in each sc and 1 sc in each ch-1 sp around. Join with sl st to first sc. (170 sc)
Round 4 (begin shell pattern): Ch 2 (does not count as st), dc in first st, sk 2 sts, sc in next st, sk 2 sts, (shell of 5 dc in next st, sk 2 sts, sc in next st, sk 2 sts) 27 times, 4 dc in first st of round (to complete the first shell begun at beg of rnd). Join with sl st to first dc. (28 shells, 28 sc)
Note: The first shell is split. You work 2 dc at the beginning and add 3 dc at the end to complete 5 dc total, keeping the round seamless.
Rounds 5 through 12: Repeat Round 4 eight more times. No stitch count changes. Each round has 28 shells of 5 dc and 28 sc.
After Round 12, your body section should measure approximately 4.5 inches from the cast-on edge.
Armhole Shaping
The body divides as follows:
Place markers at st 1 (beg of front), st 85 (first underarm sc), st 86 (beg of back), and st 170 (second underarm sc).
Round 13 (divide for front and back): Work shell pattern across front 84 sts only (14 shells, 13 sc between, plus beginning and ending sc), ch 1, turn.
Front Panel (Worked Back and Forth)
Row 13a: Ch 2, work shell pattern across 84 sts. Turn. (14 shells, 13 sc between shells = 84 sts)
Rows 14 through 16: Repeat Row 13a. No shaping. (84 sts each row)
Row 17 (neckline setup): Work shell pattern across first 5 shell repeats (30 sts), sc 1, ch 3 for neckline opening, sk center 24 sts (4 shell repeats), sc 1, work shell pattern across rem 5 shell repeats (30 sts). Turn.
Rows 18 through 20: Work shell pattern across both shoulder sections separately, joining yarn at second section for each row. No further shaping. (5 shells each shoulder section, 30 sts each)
Fasten off front panel.
Back Panel (Worked Back and Forth)
Rejoin yarn at st 86 (first st of back section).
Rows 13b through 20: Work exactly as front panel rows 13a through 20. Back neckline is also opened on Row 17 to match.
Fasten off back panel.
Join Shoulders
Using a slip stitch seam or mattress stitch, join the front and back shoulder sections on each side. You have 5 shell repeats on each shoulder to match.
Hem Scallop Edging
Turn the piece upside down and work along the foundation chain edge.
Round 1: Join yarn to any st of the foundation chain. Ch 1, sc in each ch around. (170 sc)
Round 2 (scallop): Ch 1, (sl st in first sc, sk 2 sc, Sh-P in next sc, sk 2 sc) 28 times, sl st to close. Fasten off.
Collar Ruffle
The collar ruffle is worked along the top edge of the joined body, picking up stitches around the entire neckline opening.
Pick-up Round: Join yarn at right shoulder seam. Ch 1, sc evenly around entire top opening. Target stitch count: 120 sc. Place marker. Join with sl st to first sc. (120 sc)
Ruffle Increase Round: Ch 1, (2 sc in each st) around. Join with sl st to first sc. (240 sc)
Ruffle Round 1 (shell setup): Ch 2, (shell of 5 dc in next st, sk 2, sc in next st, sk 2) 40 times. Join with sl st to first dc. (40 shells, 40 sc = 240 sts)
Ruffle Rounds 2 through 4: Repeat Ruffle Round 1. (40 shells, 40 sc each round)
Ruffle Final Round (scallop with picot): Ch 1, (sl st to sc between shells, Sh-P in center dc of next shell) 40 times. Join, fasten off.
Ribbon Tie: Cut a 24-inch length of satin ribbon. Thread from right side through the eyelet round at Round 2 of the body, beginning and ending at center front. Tie in a bow.
Mini Skirt Instructions
Waistband (Worked in the Round)
Foundation Chain: Ch 120. Join with sl st to first ch, being careful not to twist.
Round 1: Ch 1, sc in each ch around. Join with sl st to first sc. (120 sc)
Rounds 2 through 4: Ch 1, sc in each sc around. Join with sl st to first sc. (120 sc each round)
Round 5 (eyelet round for waist ribbon): Ch 1, sc 1, (ch 1, sk 1, sc 1) 59 times, ch 1, sk last st. Join with sl st to first sc. (60 sc + 60 ch-1 sps = 120 st positions)
Round 6: Ch 1, sc in each sc and sc in each ch-1 sp around. Join with sl st to first sc. (120 sc)
Rounds 7 and 8: Ch 1, sc in each sc around. Join with sl st to first sc. (120 sc)
Your waistband should measure approximately 1.5 inches tall.
Skirt Body
Round 9 (hip increase): Ch 1, (sc 4, 2 sc in next sc) 24 times. Join with sl st to first sc. (144 sc)
Round 10 (shell pattern begins): Ch 2, (shell of 5 dc in next st, sk 2, sc in next st, sk 2) 24 times. Join with sl st to first dc. (24 shells, 24 sc = 144 sts)
Rounds 11 through 14: Repeat Round 10. (24 shells, 24 sc each round)
Tier 1 Transition
Round 15 (tier 1 setup): Ch 1, (2 sc in each st) around. Join with sl st to first sc. (288 sc)
Tier 1
Round 16: Ch 2, (shell of 5 dc in next st, sk 2, sc in next st, sk 2) 48 times. Join with sl st to first dc. (48 shells, 48 sc = 288 sts)
Rounds 17 through 19: Repeat Round 16. (48 shells, 48 sc each round)
Round 20 (scallop edging for Tier 1): Ch 1, (sl st between shells, Sh-P in center dc of shell) 48 times. Join with sl st. Do not fasten off.
Slip stitch back up to attach Tier 2 at the stitch level of Round 12.
Tier 2 Transition
Round 21: Working into the front loops only of Round 12, join yarn. Ch 1, sc in each st. (144 sc)
Round 22 (increase for Tier 2): Ch 1, (sc 1, 2 sc in next st) 72 times. Join with sl st to first sc. (216 sc)
Round 23: Ch 2, (shell of 5 dc in next st, sk 2, sc in next st, sk 2) 36 times. Join with sl st to first dc. (36 shells, 36 sc = 216 sts)
Rounds 24 through 27: Repeat Round 23. (36 shells, 36 sc each round)
Round 28 (scallop edging for Tier 2): Ch 1, (sl st between shells, Sh-P in center dc of shell) 36 times. Join with sl st. Do not fasten off.
Tier 3 Transition
Round 29: Working into the front loops only of Round 10, join yarn. Ch 1, sc in each visible st. (144 sc)
Round 30 (increase for Tier 3): Ch 1, (2 sc in each st) around. Join with sl st to first sc. (288 sc)
Round 31: Ch 2, (shell of 5 dc in next st, sk 2, sc in next st, sk 2) 48 times. Join with sl st to first dc. (48 shells, 48 sc = 288 sts)
Rounds 32 through 37: Repeat Round 31. (48 shells, 48 sc each round)
Round 38 (final scallop hem): Ch 1, (sl st between shells, Sh-P in center dc of shell) 48 times. Join with sl st. Fasten off.
Ribbon: Cut a 30-inch length of satin ribbon. Thread through Round 5 of the waistband, beginning and ending at center front. Tie in a bow.
Blocking and Finishing
Weave in all ends securely using your tapestry needle. Work through the backs of stitches in multiple directions for durability.
Wet blocking is strongly recommended. Submerge each piece in cool water for 20 minutes. Gently press out excess water by rolling in a clean towel. Do not wring. Pin each piece to your blocking mat, using pins to open each shell and picot fully. Allow to dry completely before unpinning.
For acrylic yarn, steam blocking works well. Hold a steam iron 1 inch above the surface and steam thoroughly without pressing directly onto the fabric.
Care Instructions
Hand wash in cool water with gentle detergent. Do not wring. Lay flat to dry away from direct sunlight. Do not tumble dry or bleach. Store flat or rolled to prevent creasing at the ruffle seams.
Final Thoughts on This Crochet Set Pattern
I hope this step by step crochet tutorial has shown you that this beautiful tiered ruffle set is absolutely within your reach. Yes, it takes time. Yes, you need to count your stitches carefully. But every single technique here builds on basics you already know or can learn quickly.
The shell stitch does all the heavy lifting. The ruffles come from simple increases. The scalloped edges are just picots added to your shells. When you break it down, this is really just the same few moves repeated with intention and care.
Thank you so much for choosing this pattern for your next project. I cannot wait to see your finished sets! Tag me on Instagram or share in our Facebook group so I can admire your work.
If this blush pink tiered ruffle crochet set is calling your name but you are not quite ready to start today, pin this pattern to your Pinterest boards so you can find it easily when the time is right. And once you finish your set, please come back and leave a comment below. I love hearing about your crochet adventures and seeing how this pattern works up in different colors and yarns!
You Might Also Like
- Pastel Rainbow Shell Stitch Bodysuit Free Pattern
- Dusty Rose Spiral Flap Backpack Free Crochet Pattern
- Dusty Rose Grid Mesh Romper Free Crochet Pattern
- Lavender Dream Tiered Baby Dress Free Crochet Pattern