
A crochet bucket bag in cream and dusty blue, with a soft drawstring top and a long cord strap, is small enough to carry daily and pretty enough to make you slow down while you stitch it.
The Crochet Bucket Bag
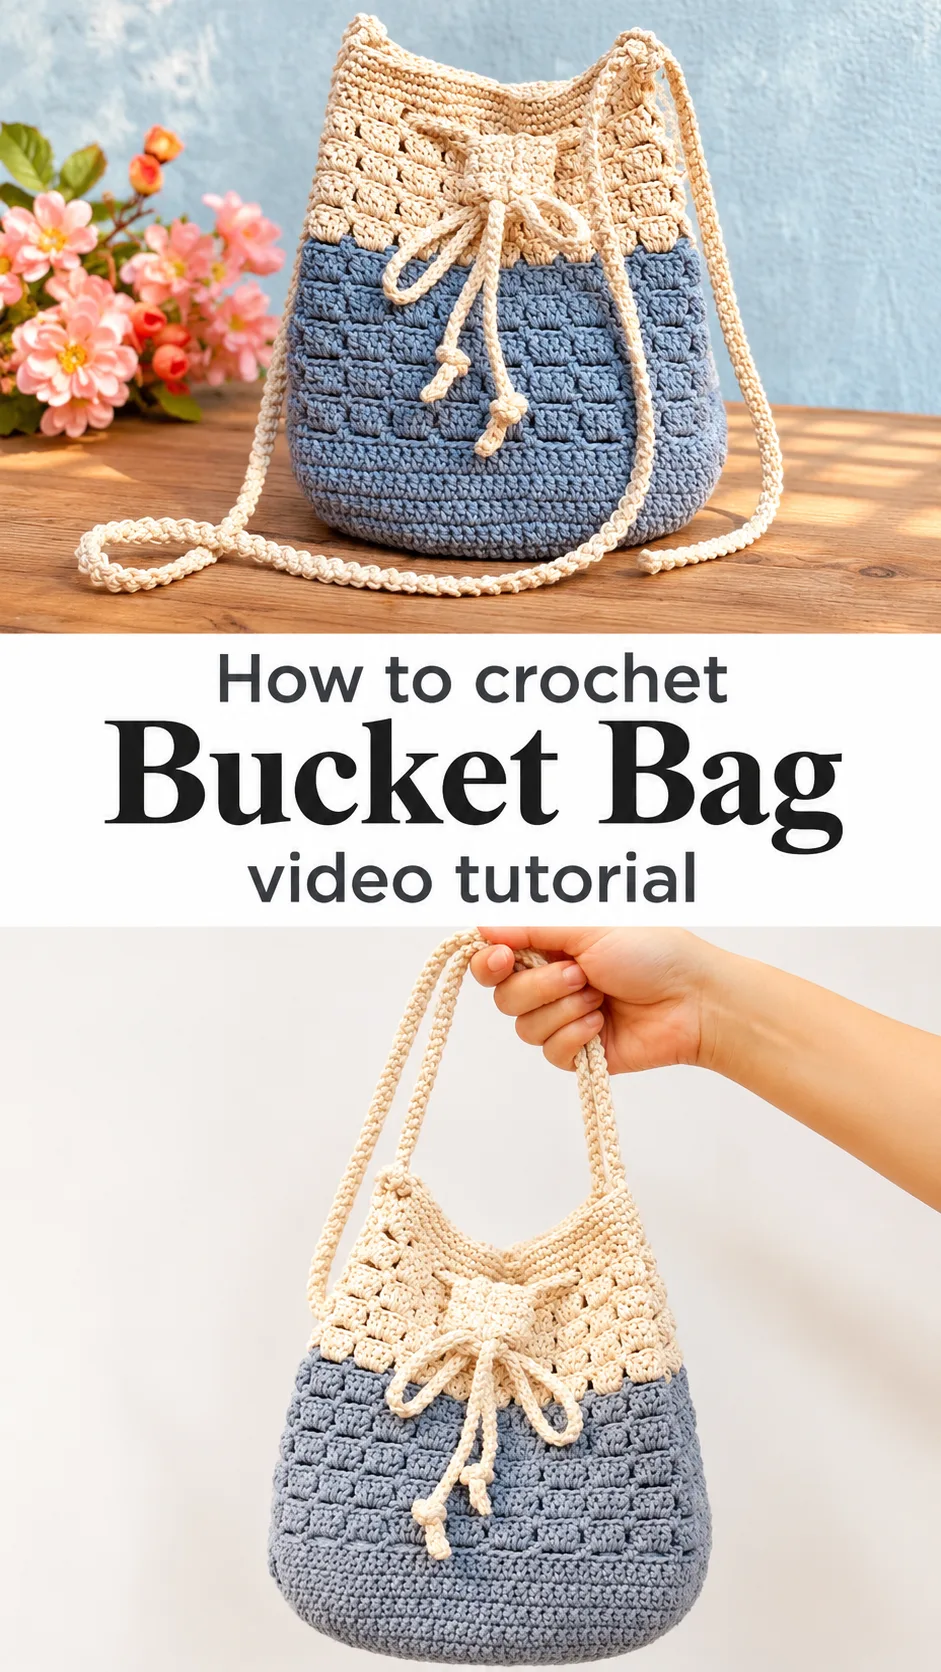
This crochet bucket bag is a rounded pouch with a gently flared body and a gathered top. The lower half is worked in dusty blue and the upper half in warm cream, so the colour change reads like a horizon line across the bag. A textured block pattern of short stitch clusters runs through both colours, set between plain bands of tight single crochet. The drawstring cord threads through the top and ties in a loose bow at the front, finished with small knots on the tails. A long braided-style strap loops from the top edge for shoulder or crossbody wear. It suits market mornings, café afternoons and travel days when you want your phone, keys and wallet close at hand.
Because the shape is simple, the bag works as a first project in colour blocking. It also makes a fine gift, since the two-tone palette feels fresh without being loud. Making it builds comfort with textured stitches and a neat, firm gauge.
Bucket Bag Related Posts:
- Crochet Cable Turtleneck Top: A Bold and Chic Statement
- Crochet Waffle Blanket: A Soft and Timeless Classic
- Crochet Granny Square Pouches: A Charming Handmade Trio
- Crochet Teddy Bear Bag: A Sweet and Charming Keepsake
Materials
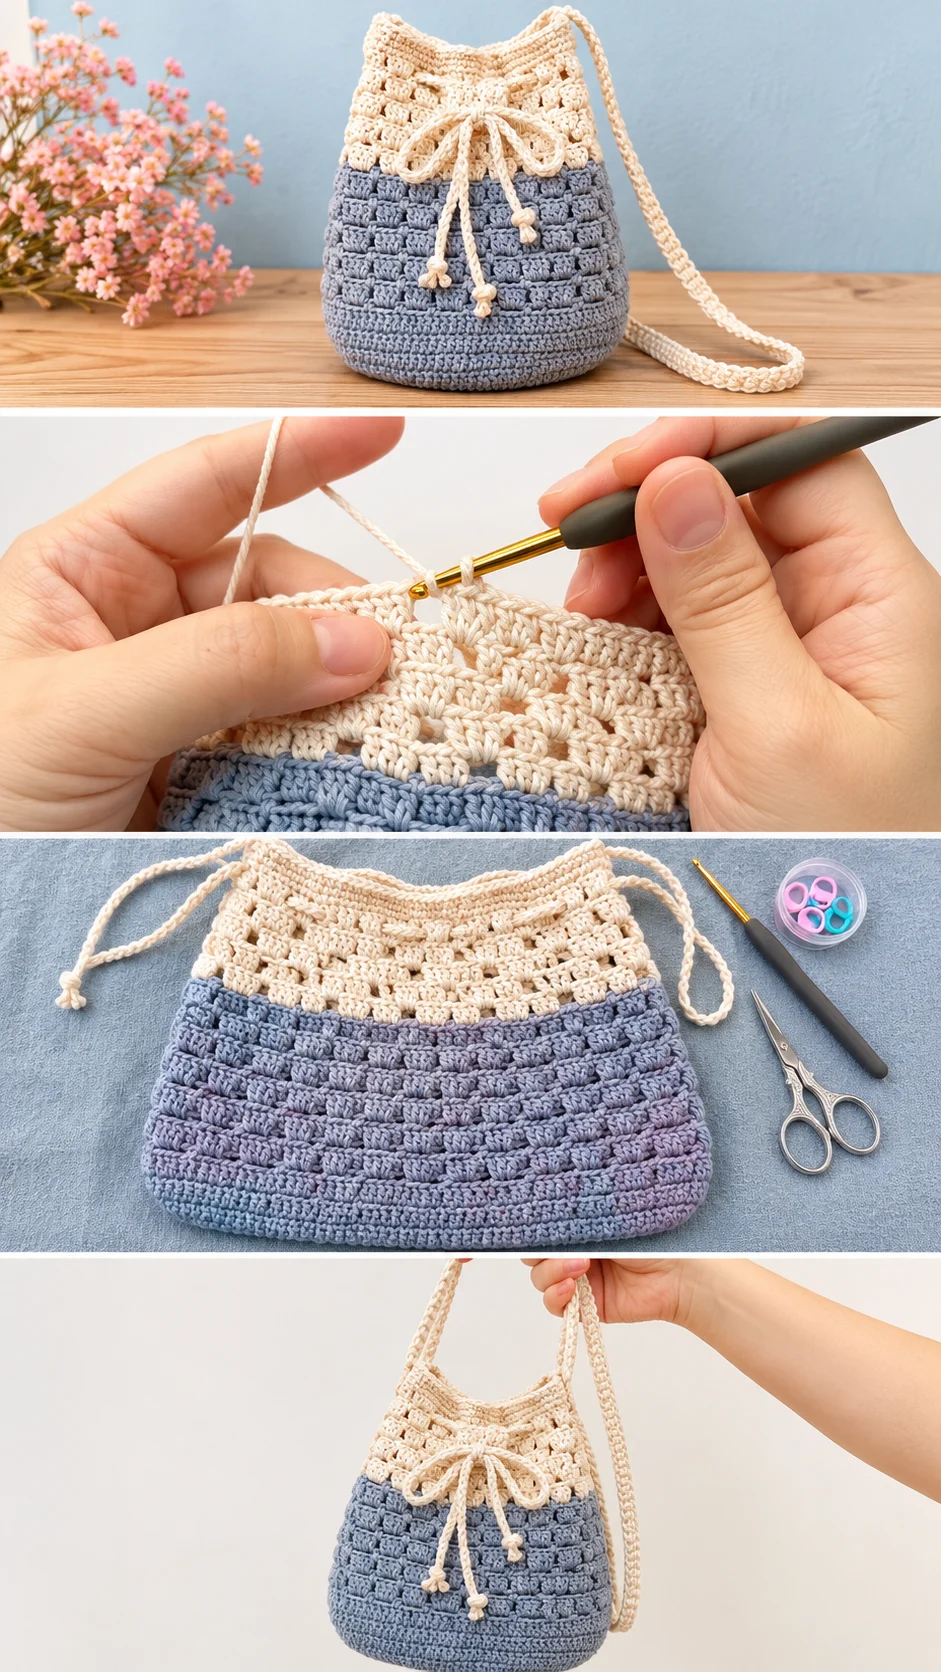
For a crochet bucket bag like this one, choose a smooth mercerized or tightly spun cotton in two colours: a dusty blue and a cream or oatmeal. Cotton has a slight sheen, holds stitch definition well and gives the structure a bag needs. The hook visible in the tutorial is a 3.0 mm, which suggests a fingering to sport weight cotton worked tightly, though your yarn label and gauge should guide the final choice. A smaller hook than the label recommends makes the fabric dense enough to stand up on its own. You will also need stitch markers to track the start of each round, a yarn needle for weaving in ends and tying off the cord, and sharp scissors. A lining is optional, but a simple cotton fabric lining helps protect keys and stops small items from poking through the textured stitches.
Understanding the Structure
The bag appears to be worked in the round from the base upward, which keeps seams out of the picture entirely. The bottom is a flat oval or circle that grows outward before the sides rise, giving that soft bucket belly. Once the base is the right size, the walls are built round after round with no further increases, apart from gentle shaping to keep the flare.
The top section is where the bag changes character. After the cream colour begins, the stitch pattern continues, then a few plain rounds form a tidy band near the opening. This band is where the drawstring cord travels through, so it needs a row of spaces or a pattern gap to thread through.
Three separate parts come together: the body, the drawstring cord, and the shoulder strap. Each is made independently, which means you can adjust cord length or strap drop without touching the bag itself. Make the body first, since you will want to test the drawstring against the finished opening.
The marker matters in the round. Mark the first stitch of every round and move the marker up as you go. A single missed stitch at the start shifts the whole block pattern and shows up as a diagonal slant in the clusters.
Best Stitches for a Sturdy Bag
The fabric here mixes two textures. Plain single crochet rounds form firm bands at the base and between pattern repeats, while the block pattern adds a raised, brick-like rhythm. Those clustered stitches sit in staggered rows, with small gaps between them that give the surface a woven look.
Single crochet is the workhorse of bag making because it creates a tight, low-stretch fabric. The clusters add visual interest without making the bag floppy, as long as the tension stays snug. If your fabric feels loose, drop down half a hook size rather than adding more rounds.
The base deserves the densest stitching. A bag that bulges downward when filled usually has a loose bottom, so work the base very firmly and consider a second layer of single crochet or a cardboard-and-fabric insert if you plan to carry heavier items.
If the walls start to curve inward like a vase, the increases at the base were too few. If they flare like a bell, there were too many. Lay the work flat after the first few wall rounds and check that the sides rise nearly straight with only a slight outward lean.
Keeping the Colour Change Clean
The switch from blue to cream is the most visible moment on the bag. Change colour during the last yarn-over of the final stitch in the round, so the new shade starts cleanly rather than leaving a blue speck at the join.
Carry the cream yarn loosely at first and weave the tails in along the inside of the colour band rather than across it. Dark and light tails woven together can show through, so keep the blue ends running through blue stitches and the cream ends through cream.
Drawstring and Strap: The Details That Finish the Look
The drawstring is a slim crocheted cord that threads around the opening and emerges at the front. It ties into a loose bow, with each tail ending in a small knot that keeps it from slipping back through the fabric. The same cream yarn as the top band is used, so the cord blends with the upper half.
The strap is a longer cord in the same cream, long enough to sit across the body in the first photo and to hang as a short handle when doubled. The surface looks slightly twisted or braided, which adds strength and keeps the strap from stretching under weight. Cotton cord can grow over time, so work it tightly and avoid making it much longer than you need.
Attach the strap ends to the inside of the top band with firm stitching, passing the yarn needle through several rounds so the load spreads across the fabric. A strap sewn to a single stitch will pull a hole in the bag within weeks. If the strap twists as you work, let the cord hang freely every few inches and it will relax.
For a cleaner drawstring, thread it before tying the knots, then check that the bow gathers the opening evenly. If one side bunches, slide the cord around the top until the gathers sit in balance. If the knots keep pulling through, make them bulkier by folding the tail once before knotting.
How to Style a Crochet Bucket Bag
In the photos the bag is worn as a shoulder bag with the strap doubled and held in one hand, and shown on a wooden table with the long strap trailing. The cream and dusty blue palette pairs well with soft neutrals, so it feels at home with a white linen shirt and light denim.
For a warmer outfit, try it with a rust or terracotta dress, where the cool blue acts as a calm contrast. In winter, the cream top will brighten a charcoal coat. As a crossbody, the long strap lets the bag sit at hip height, which keeps your hands free at markets and on travel days.
The drawstring closure is not as secure as a zip, so keep a small zipped pouch inside for cash, cards and keys. That also stops loose items from catching on the stitch gaps.
Choosing the Best Yarn and Colours
Mercerized cotton gives the cleanest stitch definition and a slight shine, and it holds its shape well. Cotton blends with a little acrylic are lighter and bounce back after being carried, though they can look less crisp. Avoid soft, loosely spun yarns such as brushed wool, since they sag under weight and hide the block texture.
The palette in the photos is dusty blue with warm cream. Other combinations that keep the same calm balance include sage green with oatmeal, dusty rose with ivory, or charcoal with sand. Keep one light shade for the top and one mid-tone for the base, since a dark top would make the drawstring cord and strap hard to spot against it.
Buy enough of each colour in the same dye lot. Cotton shifts slightly between batches, and a mismatch is most visible on a large, smooth area like the base.
Tips for a Neat Finish
Weave in ends as you go, especially at the colour change. Doing it later means working around a stiff, filled bag, which is awkward and tends to leave loose ends poking out.
Block lightly. A gentle steam over the stitches relaxes the fabric without making it limp. If the base curls, press it flat with a damp cloth and let it dry, shaping the bag over a bowl or box to hold the bucket form.
If the finished top will not gather evenly, the opening may have too many stitches for the cord length. Pull the cord tight and check where the fabric bunches, then adjust the bow placement rather than frogging the rounds.
Following the Tutorial
The video shows each stage in close-up, including a moment where single crochet is worked into every stitch to build the band beneath the pattern. Pause there and watch how the hook enters the stitch and how the loop is pulled through, since a consistent technique gives an even band.
Watch the block pattern closely the first time through. The tutorial makes the staggered placement of the clusters clear, and replaying that section will save you from a misaligned round. Keep your marker handy and pause whenever the pattern repeats change.
Work in a sensible order: base, walls, colour change, top band, then cord and strap. Making the drawstring last lets you fit it to the real opening, and the strap can be tested for length against your own shoulder before it is sewn on.
A Soft Handmade Companion
This crochet bucket bag is a two-tone pouch with a textured block pattern, a gathered top and a long cord strap. It gives you a practical everyday carrier and a good lesson in tension and colour work.
Four things decide how well it turns out: a tight gauge, a firmly worked base, a clean colour change and a strap anchored through several rounds. Get those right and the bag keeps its shape for years.
Cream on blue, ready to carry.
Follow us on Pinterest and subscribe to the Newsletter so you don’t miss a thing!
Tutorial and photos of this bucket bag by: August Craft & Crochet.