
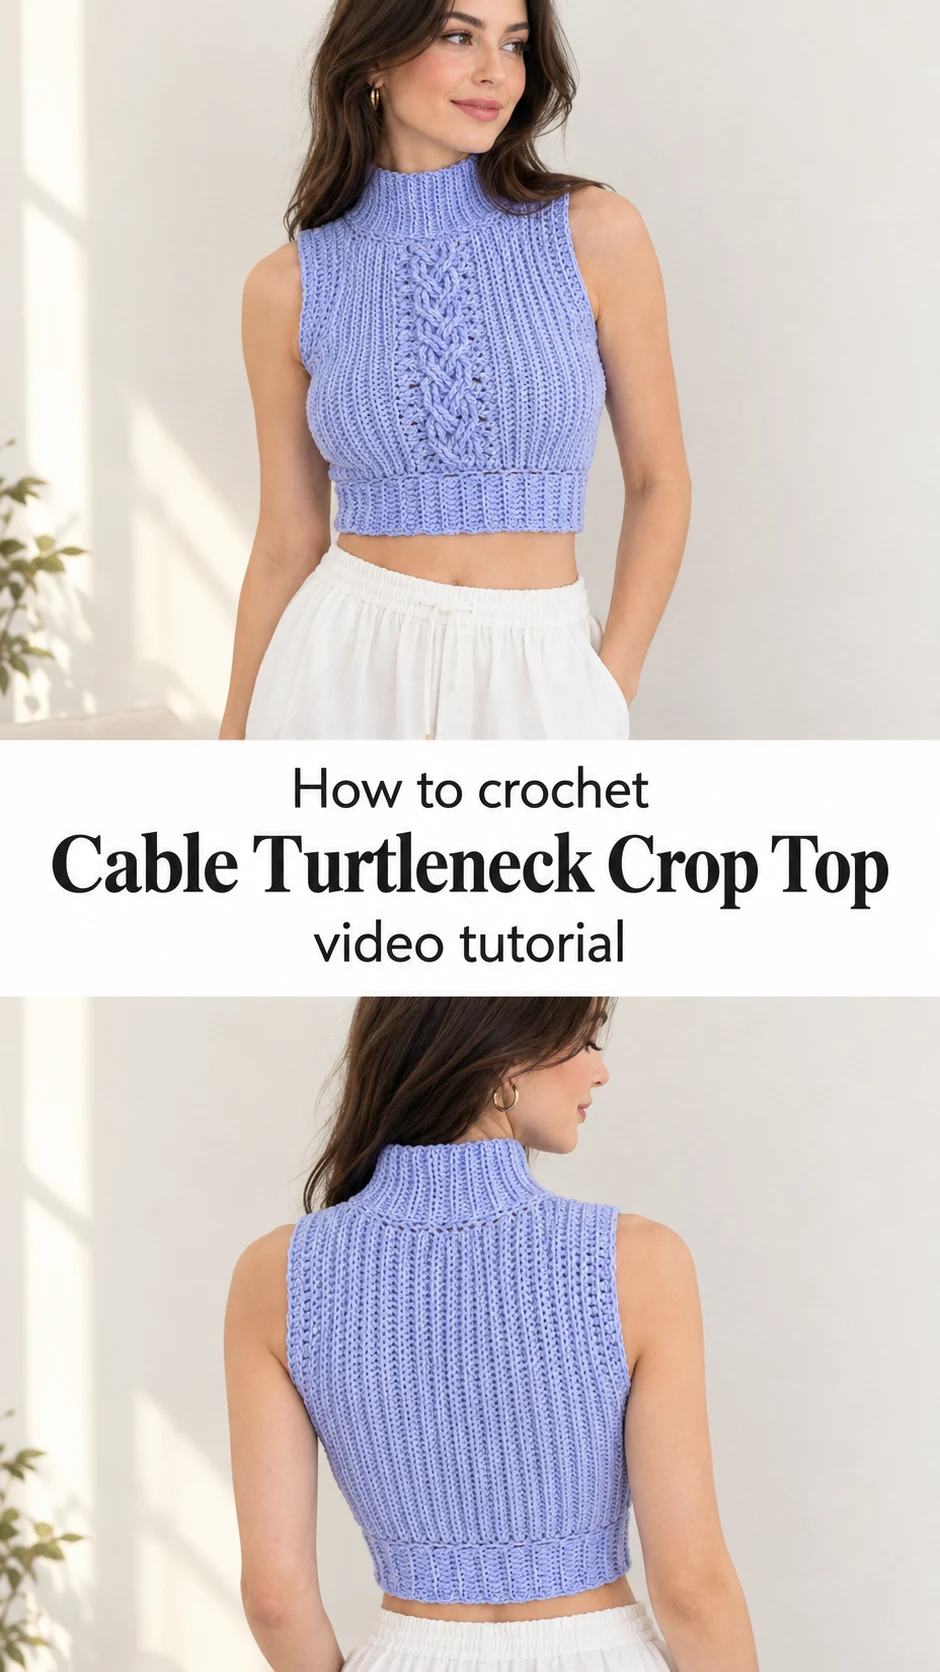
This crochet cable turtleneck crop top pairs a snug ribbed body with a single braided cable running down the centre, finished with a fold-over mock neck that feels as polished as a knitted piece.
The Crochet Cable Turtleneck Crop Top
The crochet cable turtleneck crop top is a sleeveless, cropped layer in a soft periwinkle lilac. Its body is worked in a dense, vertical rib that looks remarkably like knitting. One slim braided cable rises from the waistband to the chest and gives the whole front its focus. A deeper ribbed band sits at the hem, and a high, close-fitting neck finishes the top. The back is plain ribbing with a gently shaped neckline, so the cable stays the only decoration. The silhouette is neat and body-skimming, and it sits at the natural waist. It works as a spring layer under an open cardigan, as a summer top with high-rise trousers, or as a cool-weather base under a jacket.
Part cosy, part sleek, the top suits makers who like texture more than colour changes. It also makes a handsome gift for anyone who loves a minimalist wardrobe. Making it teaches ribbing, cables and neckline shaping in a single project.
Crop Top Related Posts:
- Crochet Cat Beanie: A Charming Winter Essential
- Crochet Tunisian Blanket: A Timeless Woven Treasure
- Crochet Ripple Blanket: A Soft and Timeless Treasure
- Crochet Floral Table Runner: An Elegant Home Accent
Materials
For a crochet cable turtleneck crop top, choose a smooth, medium-weight yarn with a little body, such as a cotton blend or a soft acrylic with a firm twist. The fabric in the photos holds crisp ribs and clear cable definition, so a yarn with a round, plied structure will show the stitches better than a fuzzy or brushed one. Pick a hook that is about half a size smaller than the yarn label suggests. A tighter fabric keeps the rib springy and stops the cropped body from stretching out at the waist. You will also need stitch markers to track the cable panel, a tapestry needle for seams and ends, and a tape measure to check your bust and crop length. Keep a spare skein in the same dye lot, because the neck and hem bands use more yarn than they appear to.
Understanding the Ribbed Fabric
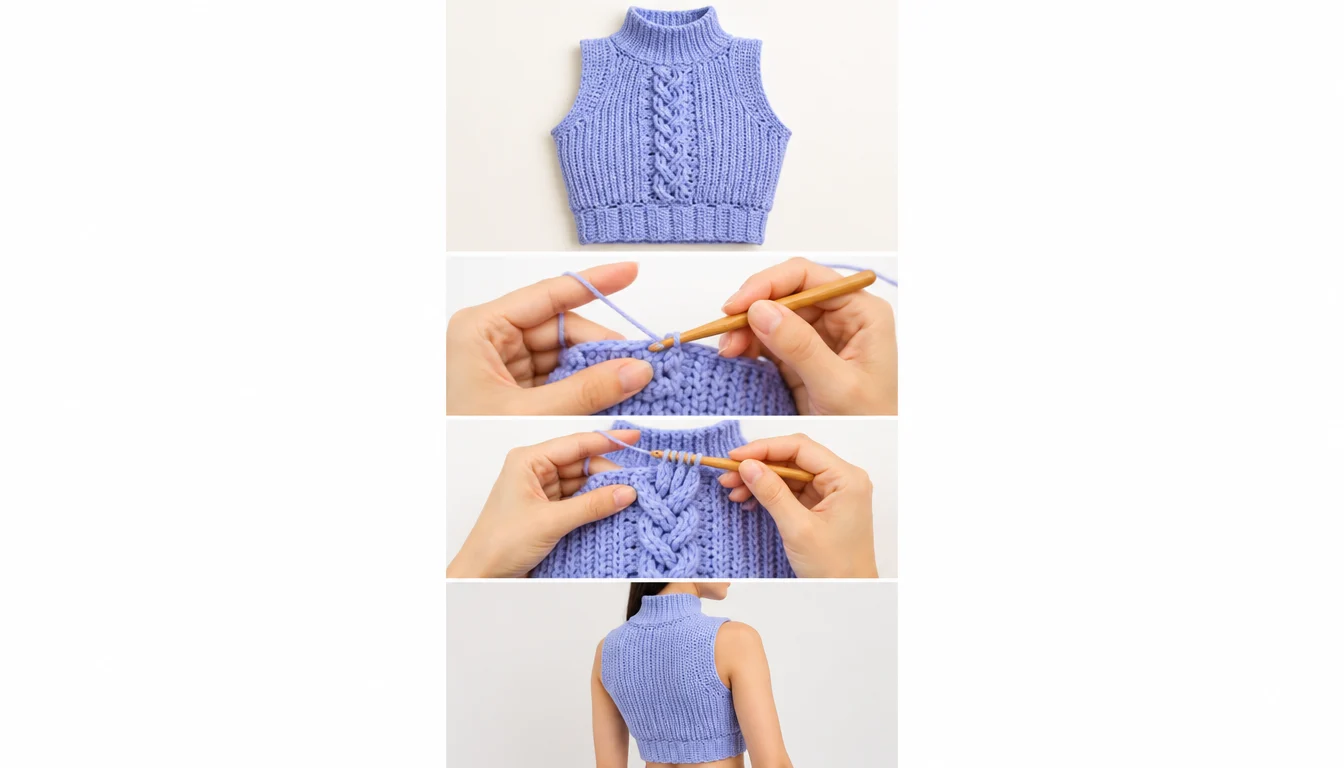
The vertical ribs are the foundation of this top. They look like knit ribbing, and in crochet they usually come from working into the back loop or back bump of a stitch, row after row, so the fabric builds the stretch you see.
Ribbing gives the top its fit. Because the fabric pulls inward, it hugs the ribcage and then relaxes over the bust, which is why the piece looks tailored without any darts. A looser tension loses that effect quickly and leaves the body wide and floppy.
If your swatch feels stiff and board-like, go up half a hook size. If it grows wide and sags when you hold it up, go down half a size. Test the swatch by pinning it to your torso and checking that it stretches slightly rather than strains.
Cable Panel: The Detail That Defines the Top
The braided cable running up the centre is the signature of this design. It looks like a three-strand plait with small openings between the crossings, which means it is built from raised, crossed stitches rather than simply embroidered on top.
Cables in crochet need patience because each crossing pulls the fabric slightly. Mark the cable columns with stitch markers so you can see where each crossing begins, and keep your tension steady on the crossed stitches. Tight crossings make the panel pucker and pull the front shorter than the back.
Watch the video closely at the crossing steps. Pause on the hand position, replay the way the hook passes in front of or behind the neighbouring stitches, and check your work against the screen after each repeat. A mistake in one crossing is easy to spot early and hard to fix several rows later.
Shape and Construction
The top is made in a few simple parts: a ribbed hem band, a front, a back, and a turtleneck. The front and back share the same ribbed texture, while the front carries the cable. The photos show a visible seam line along the shoulders and sides, which suggests the pieces are joined after they are worked.
The neckline rises straight into a funnel-shaped collar, and the back neck dips slightly before the collar begins. The armholes are cut deep and cleanly, with no sleeve cap and no extra edging. This is what gives the top its sleek, sleeveless profile.
The hem band is wider than the body ribbing and looks as though it is worked sideways, with its ribs running vertically along the waist. That choice gives a firm edge that stops the cropped hem from curling or flaring. A scalloped bottom edge adds a small decorative touch.
Choosing the Best Yarn for This Top
A cotton or cotton-blend yarn gives the cleanest rib and the most defined cable, and it handles warm weather well. The drawback is weight: cotton has little elasticity, so check your fit carefully. A soft acrylic or wool-acrylic blend has more spring and forgives small sizing errors, though it may feel warmer.
Avoid very fluffy or mohair-style yarns. They hide the stitch definition, and the cable would turn into a soft blur. Also avoid slippery rayon-style yarns with no twist, since they stretch under their own weight and leave the cropped body drooping.
The periwinkle colour in the photos shows the cable shadows beautifully. Pale pastels, soft greys, cream and sage green would all keep the texture visible. Very dark colours, like black or navy, tend to bury the cable and make the stitches harder to read as you work.
Fit and Measuring
Because the top is snug and cropped, fit matters more than in a loose layer. Measure your bust, your underbust and the distance from your shoulder to the point where you want the hem to sit. The top in the photos ends at the natural waist, so crop length is a personal choice.
Ribbing has built-in stretch, which allows a little negative ease. Aim for a finished size slightly smaller than your bust measurement so the fabric stays close to the body. If the piece is the same size or larger, it will look baggy and lose the sleek line.
Check the length before you start the neck. If the body is too short, the collar will pull the front upward. If it is too long, the top loses its cropped charm. Try the pieces against your body, pinned at the shoulders, before you commit to the final seams.
Assembling the Pieces
Seams in ribbed crochet should be flat and quiet. Use mattress stitch where you can, because it joins the rows edge to edge with almost no bulk. Work it with the same yarn, and match the rib columns across the seam so the pattern reads as continuous.
Start with the shoulders, then add the collar, then close the sides. Joining the shoulders first lets you try the top on before the neck is attached, and it gives you a chance to adjust the neck opening. Sewing the sides last means the armholes stay open and easy to reach.
If the shoulder seam puckers, undo it and rejoin with a looser sewing tension. If the collar flares outward instead of standing up, the neck stitches are too loose, so rework the last few rows with a smaller hook.
How to Style a Crochet Cable Turtleneck Crop Top
In the photos, the top is layered under an oversized white open-knit cardigan and paired with high-rise, drawstring crochet trousers in oatmeal. The tones sit softly together, and the cropped hem meets the waistband without a gap.
For a warmer outfit, wear it over a thin long-sleeve tee in white or cream, which shows at the wrists and hem. For summer, pair it with a flowing linen skirt or wide-leg trousers in a neutral shade. For evening, try high-waisted tailored trousers and a slim belt for a clean, modern look.
Keep the bottom half high-waisted. A cropped top with a low waistband breaks the proportion and hides the careful shaping at the hem.
Tips for a Neat Finish
Weave in your ends along the rib columns rather than across them, so they disappear into the grooves. Trim only after blocking, because ribbed fabric can relax and loosen a woven tail.
Block the pieces gently before sewing. Pin each piece to the target measurements, mist with water, and let it dry flat. Avoid hard pressing, which flattens the ribs and the cable relief. Steam from a distance is enough to even out the stitches.
If the collar rolls the wrong way, fold it into position and press lightly with steam, then let it dry in that shape. If the hem band curls up, add a row of slip stitch along the bottom edge to firm it.
Caring for Your Top
Wash by hand in cool water with mild soap, press out the water without wringing, and dry flat on a towel. Wringing stretches the ribs and distorts the cable. Hanging the top while wet pulls the length and loosens the waist.
Fold the top for storage rather than hanging it. Hangers leave shoulder bumps in ribbed fabric, and gravity slowly lengthens the body.
A Handmade Wardrobe Favourite
This crochet cable turtleneck crop top is a quiet, structured piece that looks far more complicated than it feels once the rhythm settles in. Its success rests on four things: a firm tension, a yarn with clear stitch definition, careful cable crossings and tidy seams.
Get those right, and you will have a top you can wear in every season.
Video tutorial for the crochet cable turtleneck crop top by TCDDIY.
VIDEO
Follow us on Pinterest and subscribe to the Newsletter so you don’t miss a thing!
Tutorial and photos of this cable turtleneck crop top by: TCDDIY.