
A crochet rope basket in saturated red, worked in a dense, nubby stitch that feels as good under the fingers as it looks on a shelf, and sturdy enough to hold its shape.
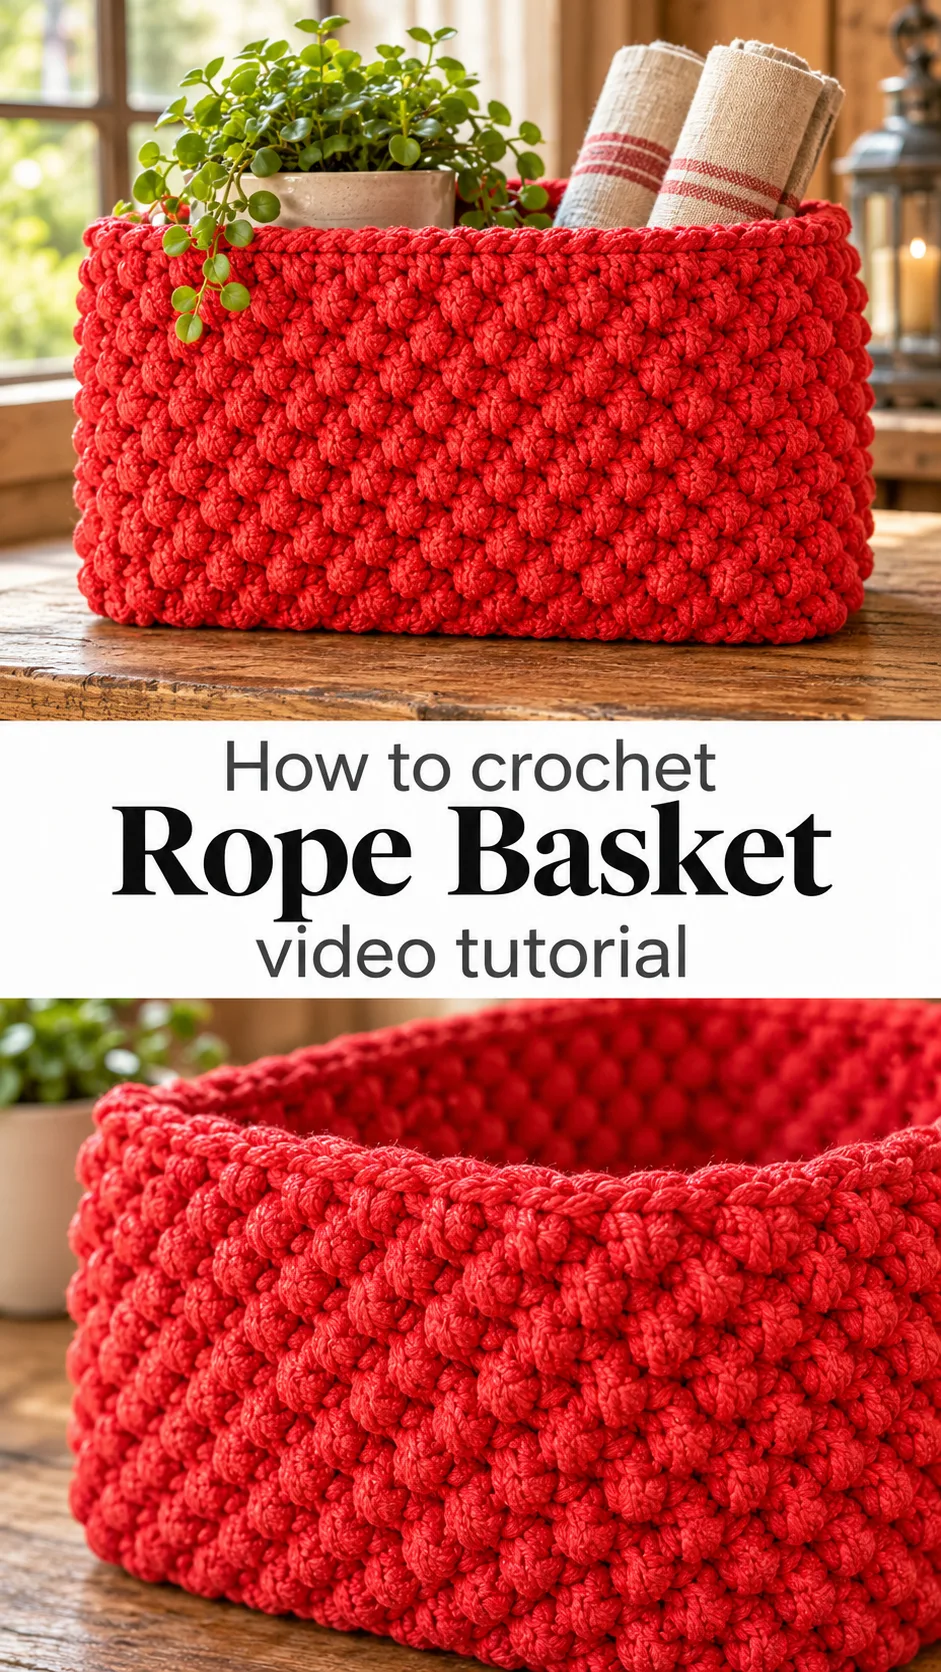
The Crochet Rope Basket
The crochet rope basket is a firm, sculptural container worked in a vivid cherry red. Its fabric is covered in small raised bumps that run in neat vertical lines, almost like tiny teardrops standing side by side. The stitches are tight and close, so there are no gaps. The yarn has a slight sheen, and the colour catches light beautifully. A neat, flat edge runs along the top rim. Nothing about it looks floppy. It looks like a piece that stands on its own, even when empty. That makes it ideal for entryway tables, bathroom shelves, toy corners and craft rooms. It also brings a strong pop of colour to a neutral space. Few small projects give this much impact for so little yarn.
Think of it as a quick win with real character. The texture does the decorating for you, so no appliqué or trim is needed. It makes a lovely gift filled with soaps, candles or a skein of yarn. It also teaches you how a simple stitch repeat can turn into a rich surface. Keep it simple, and let the colour speak.
Rope Basket Related Posts:
- Crochet Cottage Mug Rug: A Charming Boho Accent
- Crochet Daisy Tote Bag: A Charming Everyday Essential
- Crochet Strawberry Pouch: A Sweet and Charming Accessory
- Crochet Floral Tablecloth: A Timeless Handmade Treasure
Materials
For a crochet rope basket like this one, choose a smooth, slightly glossy cord or polyester-blend yarn with a round, tightly twisted structure. The fabric in the photos looks dense and crisp, which points to a yarn with little stretch. Cotton cord gives a similar firm result with a softer, matte finish, while very fuzzy yarn would hide the raised bumps that define the design. Pair it with a hook that is a size or two smaller than the label suggests, usually somewhere between 3 and 4 mm for a fine cord, because tight stitches are what keep the walls upright. A metal hook, like the golden one in the tutorial, glides easily through dense fabric. You will also need a tapestry needle for weaving in ends, a stitch marker to track the rounds, and scissors. If you want extra stiffness, a piece of plastic canvas or a firm cardboard circle can sit inside the base.
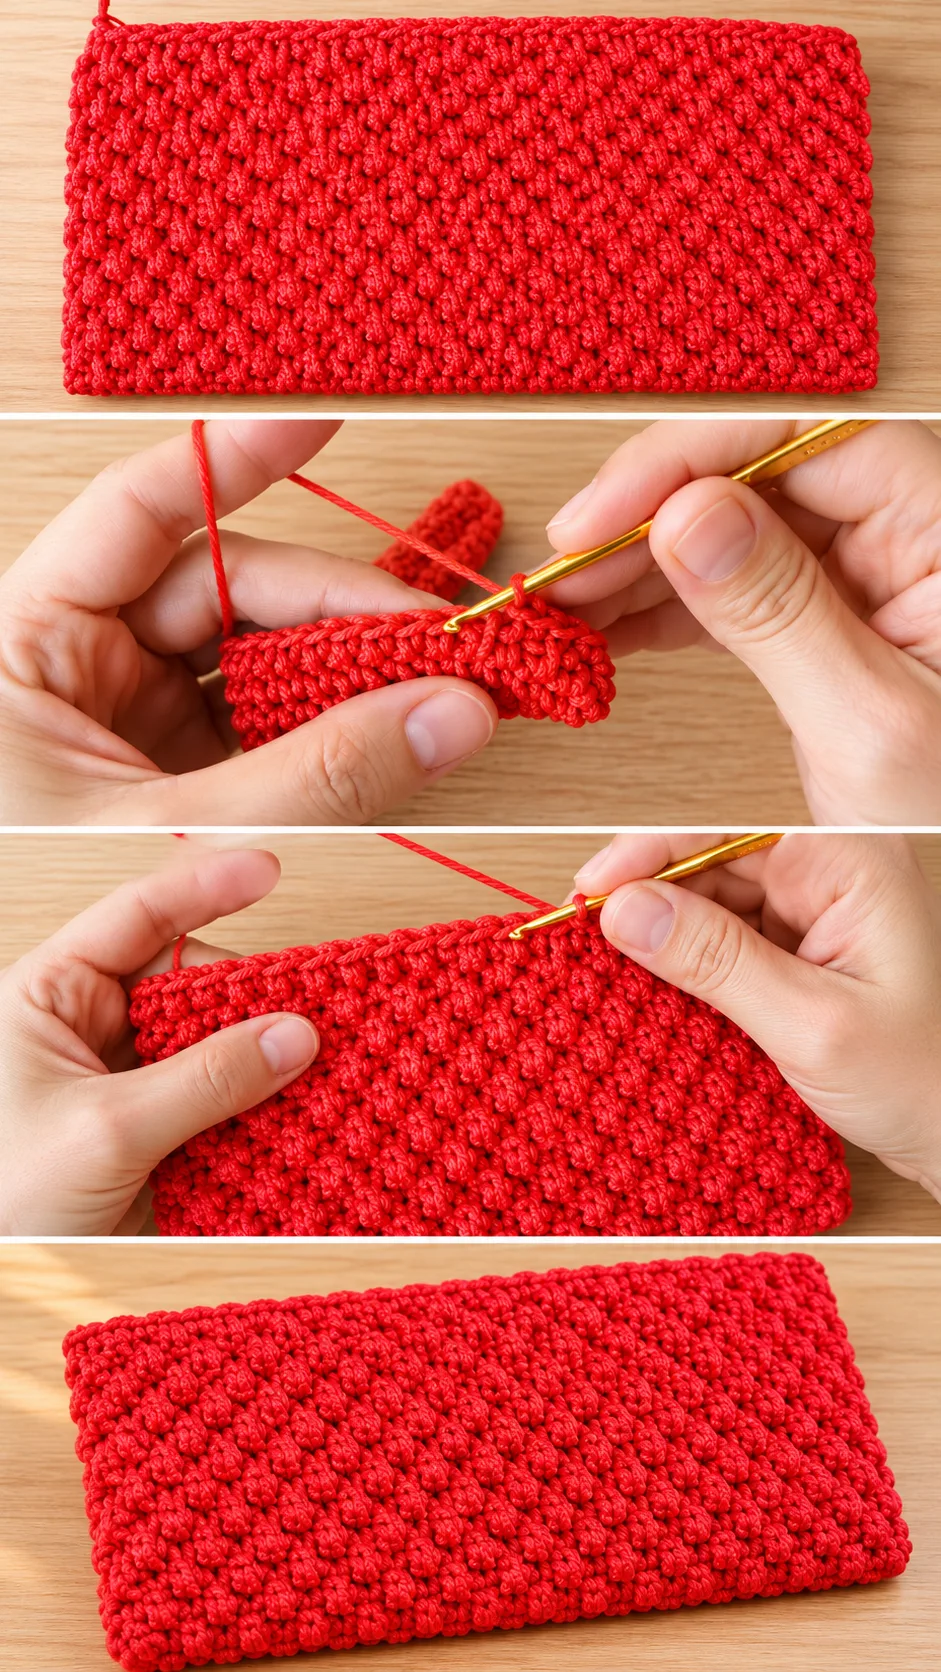
Understanding the Structure
The basket is built from the bottom up. A flat base is worked first, then the sides rise directly from its edge, with no seams to sew. The rim in the photos is straight and tidy, which tells you the sides are worked without shaping once the walls begin.
The piece is worked in rows of one repeating stitch, and each row is joined or turned in a consistent way. The bumps line up in columns, which is a sign that every stitch is placed in the same relative spot on the row below. That alignment is what gives the fabric its ordered, woven look.
Because the wall is made of a single stitch repeat, the shape depends on the base. A round base gives a round basket, and an oval or rectangular base gives a longer one. The red sample shows a flat, wide panel, so rectangular or oval baskets are just as possible with this fabric.
Watch the first minutes of the video closely to see how the base is started and how the sides begin to rise. Pause when the work turns from flat to upright, because that is the moment most makers lose their shape.
The Stitch That Builds the Texture
Raised Bumps in Neat Columns
The surface looks like a textured single crochet variation, where the hook enters a different place than usual so that each stitch leans slightly and pops forward. In the close-up, the hook is inserted into the work at the front of the stitch, just under the top loops. That small change in placement creates the nubby pattern.
The result is a thick, dense fabric with real body. It has more structure than plain single crochet, and it resists stretching. That is exactly what a basket needs, since a floppy wall would collapse the moment you put something inside.
Keep your tension even. If some stitches are tight and others loose, the bumps will wobble out of their columns and the surface will look uneven. Hold the yarn the same way every time, and check the fabric every few rounds.
If the fabric feels too soft, drop down a hook size. If it feels like cardboard and your hand aches, go up half a size. Firm should not mean painful to work.
Choosing the Best Yarn for a Sturdy Basket
Cord-style yarns are the safest choice. They are round, strong and hard-wearing, and they keep the raised bumps crisp. A polyester or nylon blend gives the sheen visible in the photos and resists stains, which matters for a basket that will be handled often.
Cotton cord is the natural alternative. It looks calmer and more matte, it feels pleasant in the hand, and it takes washing well. The trade-off is that cotton can be slightly less springy, so use a smaller hook to compensate.
Avoid loosely plied, fluffy or brushed yarns. They blur the stitch definition, and the texture that makes this basket special simply disappears. Very thin thread is also a poor choice, because it needs far more stitches to reach any useful size and may not stand up on its own.
Red is bold, but the same stitch works in mustard, forest green, charcoal or natural cream. Pale shades give a calm, Scandinavian feel, while deep jewel tones look rich on a dark shelf.
How to Style a Crochet Rope Basket
A red basket is a statement, so give it a simple setting. On a pale wooden shelf, like the light grey wood in the photos, the colour glows. Fill it with folded hand towels in the bathroom or rolled blankets by the sofa.
In a child’s room, it works as a toy bin that looks more like decor than clutter. In a craft corner, it holds balls of yarn and keeps them clean. In an entryway, it catches keys, gloves and scarves.
For gifting, line it with tissue and add a small plant, a jar candle and a bar of soap. Because it is firm, it protects whatever sits inside it.
Group two or three baskets in different sizes for a layered look. Keep the colour the same and vary the height, and the set will look planned and polished.
Tips for a Neat, Upright Finish
Weave in ends along the inside wall, following the direction of the stitches for several centimetres. In dense fabric like this, ends hide well, but they can poke through the raised bumps if you weave them across the columns.
If the walls lean outward, the base is probably too small for the rounds above it, or your tension loosened as you went. Work a few rounds more tightly and compare. If the rim ripples, you have added stitches by accident, so count a round and correct it.
If the basket feels too soft, spray the inside lightly with fabric stiffener or insert a cardboard circle under the base. Neither changes the look from outside, and both improve stability.
Finish the top edge with a neat, flat row like the one in the photos. A clean rim makes the whole piece look professional, so take your time on that last round.
Following the Tutorial
Start by watching the video once without the hook in your hand. Notice how the creator holds the yarn, where the hook enters each stitch and how the work is turned. Those small habits decide whether the bumps form correctly.
On your second viewing, work along and pause every few rows. Compare your fabric to the sample on screen. If your bumps are flatter or more scattered, rewatch the close-up of the hook placement.
Keep a stitch marker at the start of each round and check your count as you go. A small slip in the first rounds becomes a big problem by the time the walls are tall.
A Bold Handmade Keepsake
The crochet rope basket is a firm, textured container in a confident red, made with one repeating stitch and no sewing. It looks decorative and works hard.
Four things decide how well it turns out: a smooth, sturdy cord, a hook small enough to keep the fabric dense, even tension from the first row to the last, and a clean finish on the rim.
Make it once, and you will want another in every colour.
Follow us on Pinterest and subscribe to the Newsletter so you don’t miss a thing!
Tutorial and photos of this rope basket by: Chompu Handicrafts.