
The crochet sunburst tote bag turns a handful of colourful granny squares into a slouchy shoulder bag with a warm, retro glow. Each motif blooms with puffed rings, and a cream frame ties the whole thing together.
The Crochet Sunburst Tote Bag
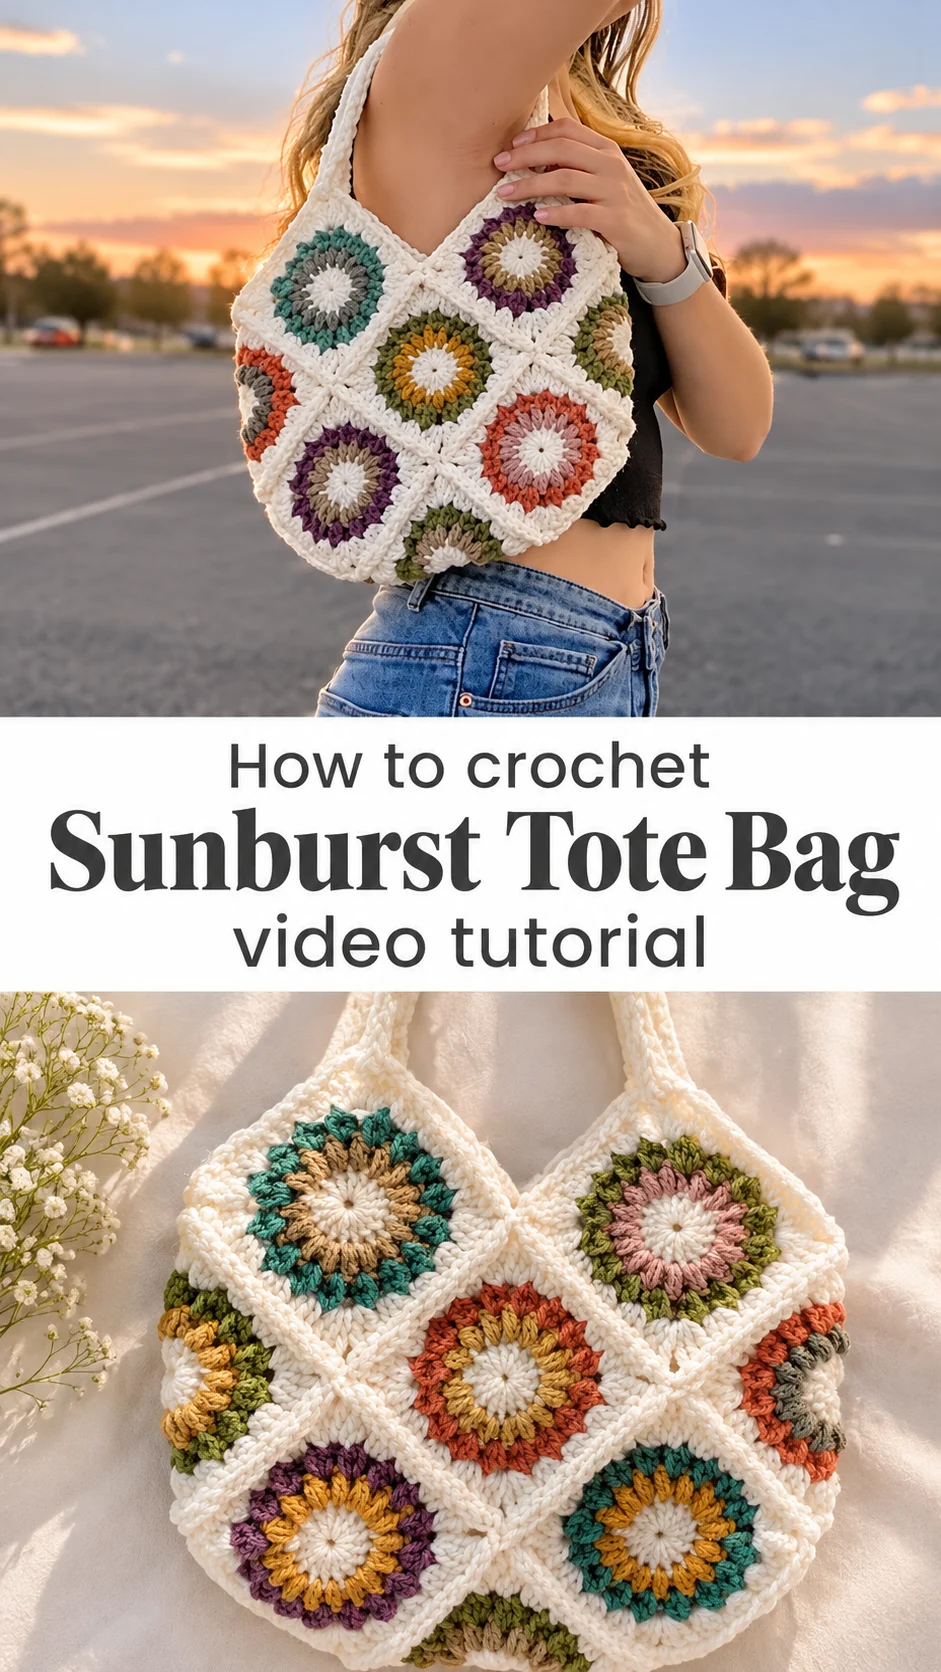
The crochet sunburst tote bag is built from joined granny squares, each with a round, flower-like centre set inside a square cream border. The centres are worked in puffy, clustered stitches that radiate outward like rays. Every square uses its own palette: teal and taupe, rust and olive, plum and mustard, moss green and mauve. The cream surround keeps the colour from feeling busy. The squares are set on the diagonal, so the bag takes on a soft diamond pattern and a gently rounded shape. Two slim cream straps rise from the top corners. It looks right with jeans and a fitted tee, at a weekend market, or on a late walk when the sky turns pink.
Think of it as a scrapbook of leftover yarn made useful. The bag can also serve as a gift, since no two squares need to match. And it teaches something real: how to make a motif, repeat it, and join the pieces so the seams look intentional. Finish a few squares and the rhythm settles in. That is when it becomes relaxing.
Tote Bag Related Posts:
- Crochet Yarn Eater Stitches: A Bold Creative Guide
- Crochet Textured Blanket: A Splendid Timeless Classic
- Crochet Doily Mat: A Vibrant Traditional Treasure
- Crochet Knotted Headband: A Chic Everyday Accessory
Materials
For a crochet sunburst tote bag, choose a smooth worsted weight cotton or cotton blend in cream for the centres, borders and straps, plus small amounts of six or more accent colours. The accents in this bag are muted and earthy: teal, rust, plum, mustard, olive and a dusty mauve. Cotton matters here because it holds the puffed stitches crisply and does not stretch under the weight of a wallet and keys the way a soft acrylic can. A hook around 4 to 5 mm is a sensible general range for worsted yarn, and going slightly smaller than the label suggests gives a denser fabric that keeps its shape. You will also need a yarn needle for weaving in ends, scissors, and stitch markers if you like to mark corners while joining. Lining is optional, but a simple fabric lining stops small items from poking through the gaps between stitches.
Understanding the Structure
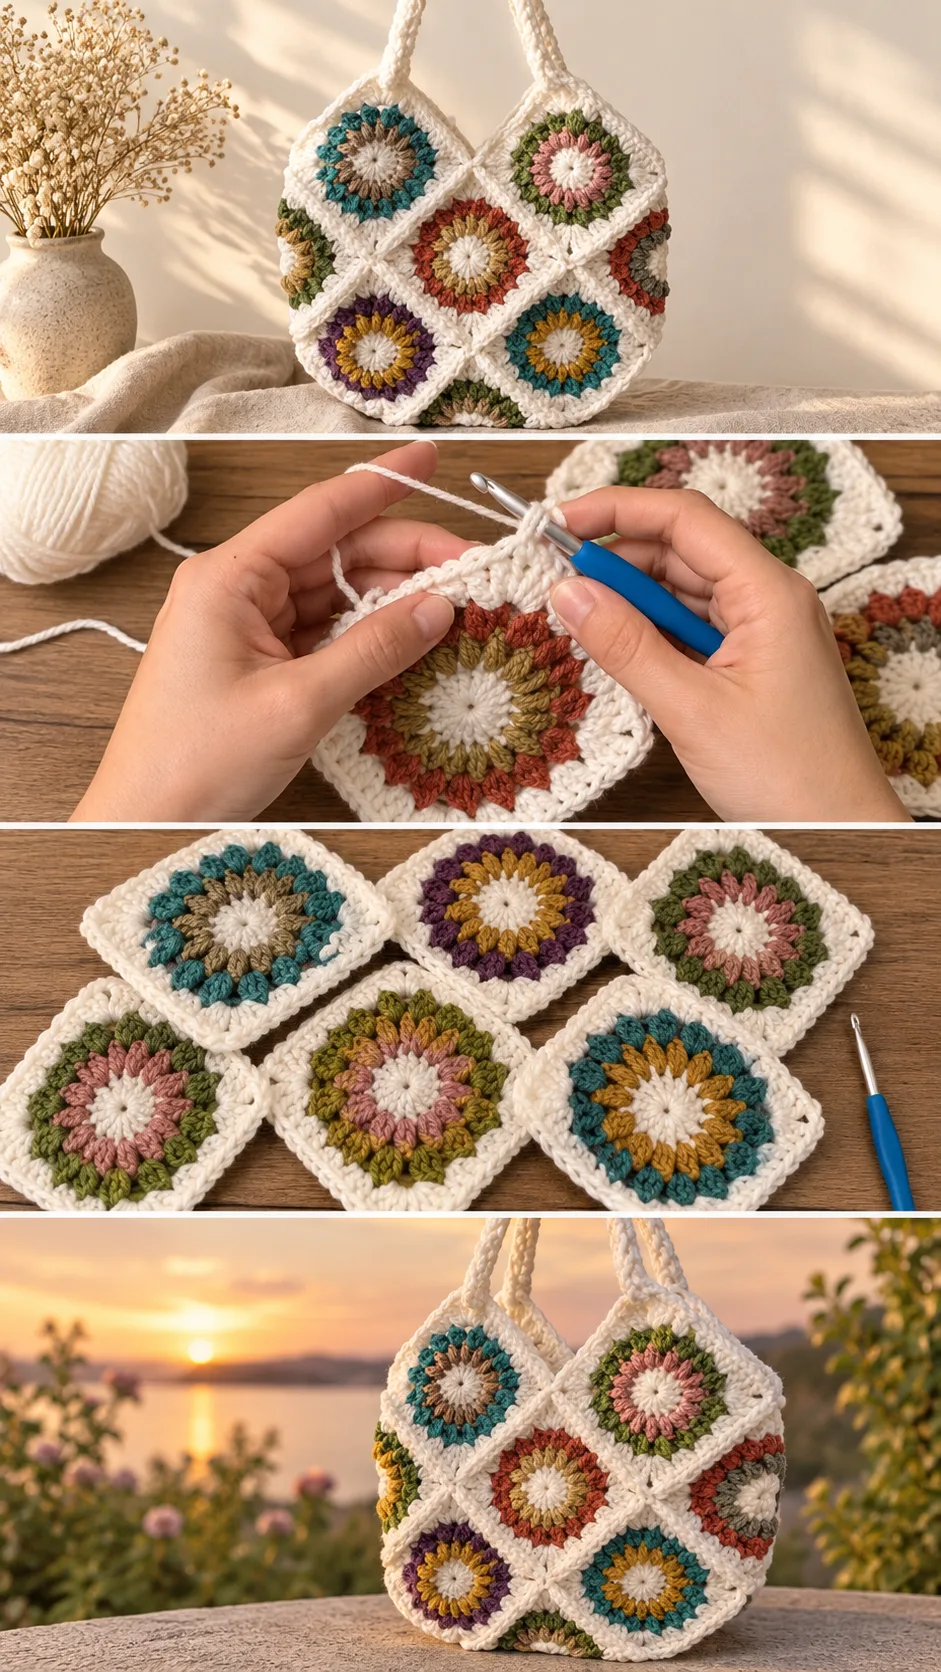
The bag is made of separate square motifs rather than one continuous piece. Each square starts at the centre with a small cream circle, then grows outward through rings of colour before the cream border squares it off. Because every motif is finished on its own, you can work on them in any order and carry a few in a project bag.
Once enough squares are ready, they are joined edge to edge. Set on the diagonal, they form a diamond grid, and the lower edge of the bag ends in a zigzag of points that the front and back panels share. Two columns of squares make each side, so the front and back mirror each other.
The straps are slim cream bands that rise from the upper corners of the top squares. They are narrow, so expect them to sit comfortably on the shoulder but to dig in if the bag is heavily loaded.
Sunburst Squares: The Detail That Defines the Bag
The signature of this design is the ring of puffed stitches around each cream centre. They stand up from the fabric and give every square a raised, tactile surface. In the finished bag, the rings are usually two bands of colour, one inside the other, such as mustard inside plum or taupe inside teal.
Pay attention to how the puffs are made in the video, and pause when the hook goes into the same spot repeatedly. Uneven loop heights are the usual culprit when a ring looks lumpy. Pull each loop up to a similar height before closing the stitch, and the ring will sit evenly.
If your squares start to cup or ruffle, the cause is typically a tension that tightens as the rounds grow. Loosen your grip on the border rounds, then block the squares flat so they all match before you join them.
Planning the Colour Order
Lay out your colour pairs before you begin. The bag works because each square has a clear dark and light relationship, such as deep teal with soft taupe. Avoid giving two neighbouring squares the same dominant colour, or the diamond grid loses its variety. If a palette feels too bright, swap one ring for a muted shade like olive or stone.
Choosing the Best Yarn for a Sturdy Tote
Mercerised or plain cotton is the safest choice. It gives clear stitch definition on the puffs and the weight a tote needs to hang well. A cotton and acrylic blend is lighter and a little softer, though it may stretch slightly with use. Pure acrylic is the option to avoid for this bag, since it tends to sag once the bag is loaded.
For colour, the photographed bag leans earthy, with cream as the frame. You could shift to a brighter summer palette of coral, sky blue and sunshine yellow, or go moody with burgundy, charcoal and forest green. Keep the cream or another light neutral for the borders, because it is what makes the motifs read as separate suns.
Joining the Squares
Joining is where the bag turns from a pile of motifs into a tote. In the video, the creator joins the squares by working along their edges with cream yarn, which creates the raised cream ridges visible between the motifs. Watch her hand position closely here and pause to see where the hook enters each stitch.
A sensible order is to join the squares into the front panel, then the back panel, then bring the two together along the sides and base. Keep the corners lined up, since a square that sits a little off will tilt the whole row.
If the seams pucker, you are likely pulling the joining yarn too tight. Relax your tension a little and try again. If a seam looks gappy, add a second pass or tighten your first stitches slightly.
How to Style a Crochet Sunburst Tote Bag
The most natural pairing is the one you can see: a fitted black top and light blue denim, where the cream and earthy colours stand out. The bag rests easily under the arm and keeps its slouchy shape without needing a rigid base.
For summer, carry it with a linen dress or a white shirt and shorts. The motifs add colour to neutral outfits without clashing. In cooler months, try it over a camel coat or an oatmeal sweater, where the rust and olive tones pick up the autumn palette.
It also suits practical days. A tote this size holds a book, a water bottle and a small purse, which makes it a good market or library bag. Heavy items are best avoided, because the open stitch gaps and slim straps are not made for hauling.
Tips for a Neat Finish
Weave in ends as you finish each square rather than saving them all for the end. A bag with this many colour changes can produce dozens of tails, and tackling them in batches keeps the job manageable. Weave each tail through stitches of the same colour so it does not show through the cream border.
Block the squares before joining. Pin them flat, mist lightly, and let them dry. Squares of identical size join more neatly and make the diamond layout line up.
Add a lining if you plan to carry small items. A simple cotton fabric lining stitched inside the opening stops lipsticks and coins from slipping through. If you skip it, line the bottom with a stiff insert or a pouch.
A Colourful Handmade Companion
The crochet sunburst tote bag is a joyful make: simple squares, repeated, then joined into something you will carry every day. Success depends on four things. Use a firm cotton yarn, keep your puff stitches even, block the squares to the same size, and join them with relaxed tension.
Put on the video, pause often, and let the sun rings pile up.
Video tutorial credit: follow the full crochet sunburst tote bag tutorial by its creator on YouTube.
Follow us on Pinterest and subscribe to the Newsletter so you don’t miss a thing!
Tutorial and photos of this sunburst tote bag by: VivCrochets.