A crochet square basket with a laser-cut wooden base is a small, sturdy keeper for jewelry, sewing notions or desk odds and ends. Soft turquoise cord meets pale birch and filigree, and the result feels both cozy and quietly refined.
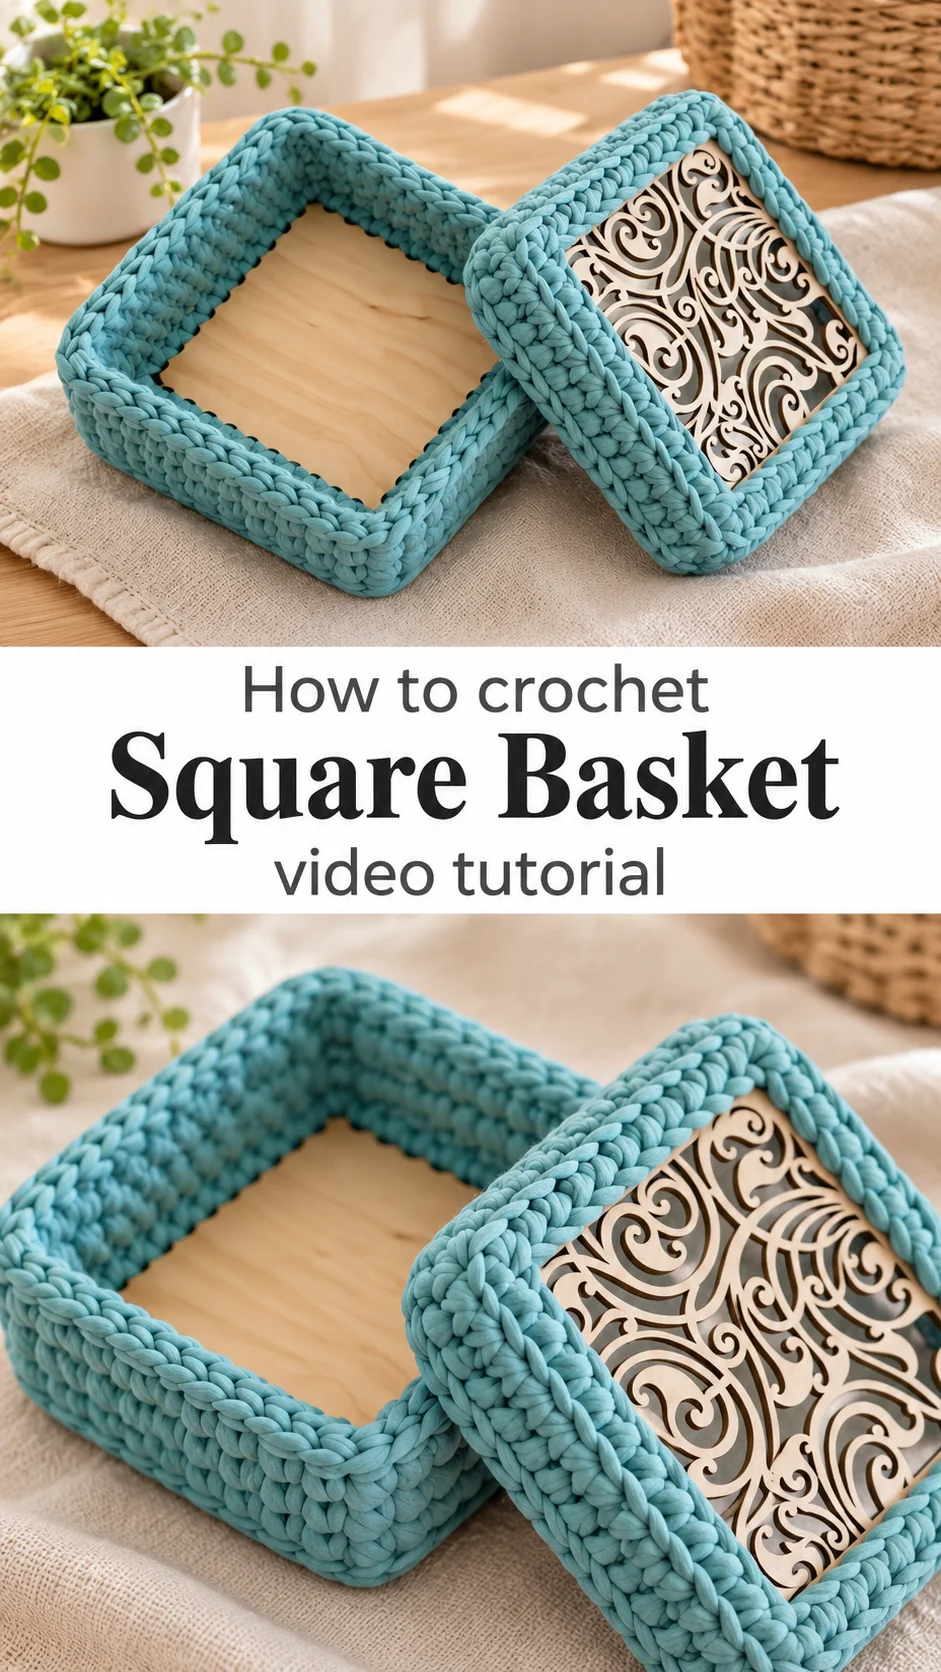
The Crochet Square Basket
This crochet square basket is built around a flat wooden base, and that base changes everything. Instead of a floppy bowl of yarn, you get a box with crisp corners and straight walls. The cord is worked in a soft aqua blue, thick and slightly flat, so every stitch stands out like a tiny braid. A matching lid carries a filigree panel of swirling cut-out wood, which lets a darker lining show through the pattern. The plain birch bottom of the basket itself is smooth and light. Together the two parts form a lidded box that looks lovely on a dresser, a shelf or a worktable. It is small enough to hold rings, hair ties, buttons or spare hooks. It is handsome enough to be a gift as it is.
Beyond storage, this project is a gentle introduction to crocheting onto a rigid foundation. Makers who have only worked from a magic ring or a chain will find it a fresh way to start. It also suits gift giving, since the colour can be changed to match any room. Quick, tactile, satisfying.
Square Basket Related Posts:
- Crochet Magic Ring: A Timeless Foundation Stitch
- Crochet Square Motif Runner: A Timeless Lace Classic
- Crochet Sweet Hearts: A Charming Handmade Accent
- Crochet Bikini Bottom: A Chic Summer Essential
Materials
For a crochet square basket like this one, you need a chunky t-shirt style cord or ribbon yarn, a metal hook sized generously for that cord, and two laser-cut wooden squares with a ring of small holes around the edge. One square is the solid birch base. The other is a decorative filigree panel for the lid. The holes are what you crochet into, so check that they are evenly spaced and smooth on the inside, because rough edges can fray cotton jersey cord. A metal hook glides through the cord better than a plastic one, which matters when the fabric is dense. Choose a cord with a little stretch, since it hugs the wood as the walls rise. A darker fabric or card backing behind the filigree lid makes the cut-out pattern read clearly, so keep a scrap of dark cloth or paper nearby. Add scissors and a blunt needle for the ends.
Understanding the Structure
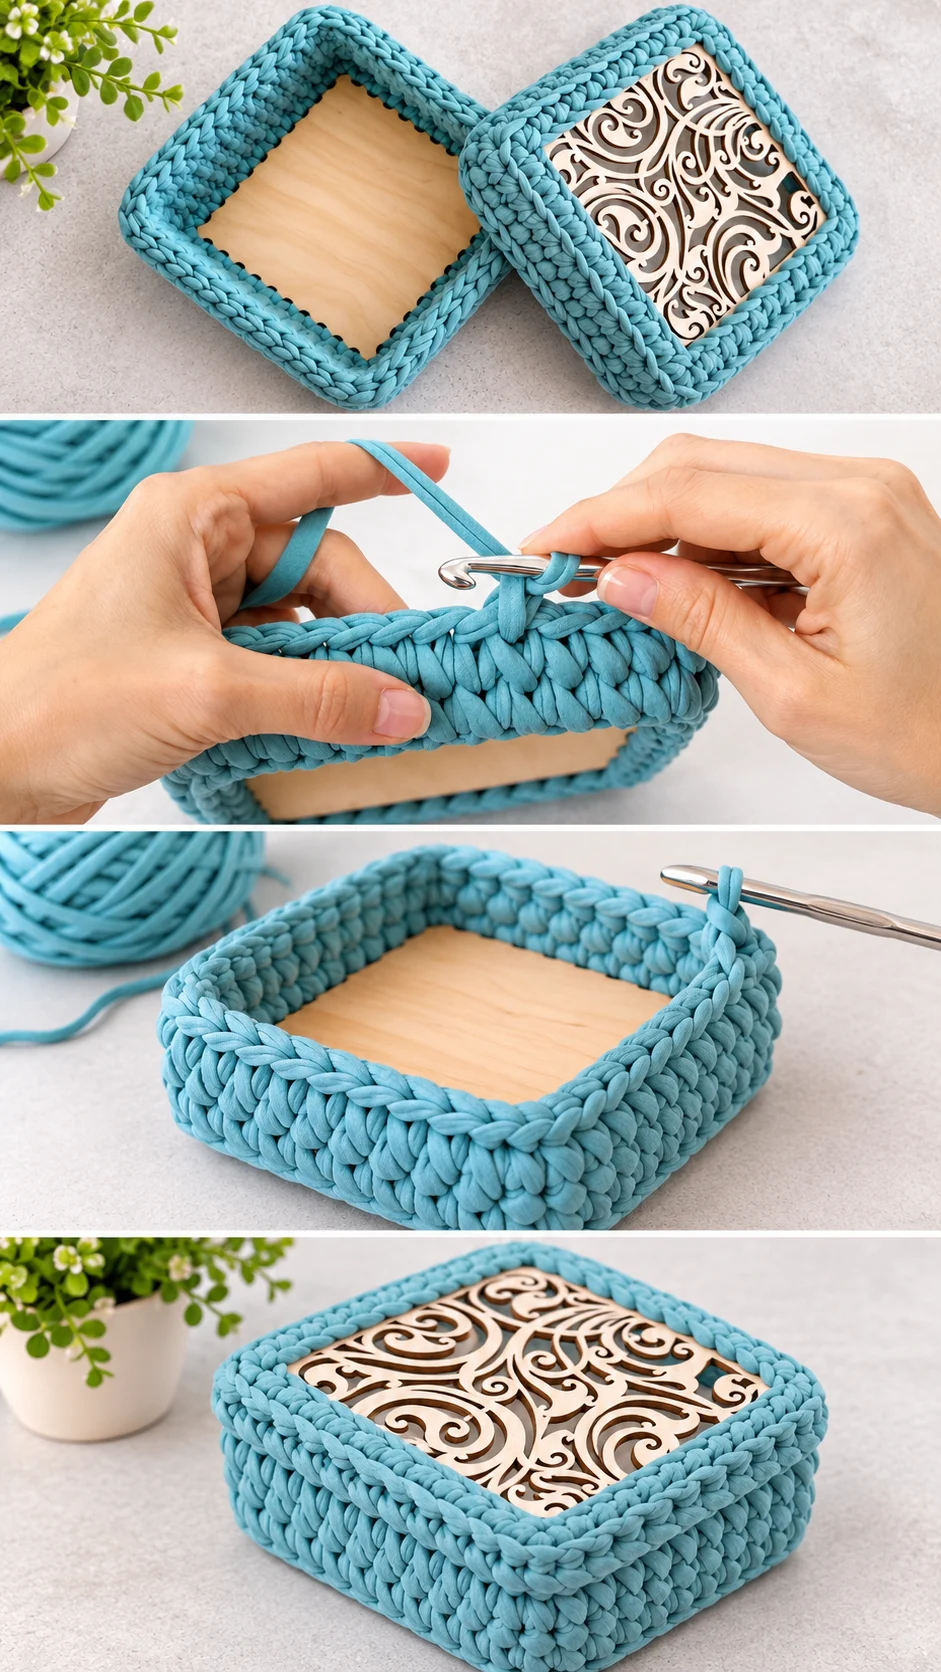
The basket is really two shallow trays that meet as a box. Each tray starts with a round of stitches worked through the holes in a wooden square, which anchors the cord to the board. From there the walls grow upward in the round, with the corners marked by extra stitches so the sides stay square instead of drifting into a circle.
The lid follows the same idea, but its frame is worked around the filigree panel and finished with a raised, braided-looking border. In the photos the lid sits slightly proud of the box, so it reads as a cap rather than a flat plate. That small overhang is what makes it easy to lift.
Watch how the corners are shaped in the video. Pause where the maker adds stitches at each corner, and replay it until the rhythm is clear. If the corners look pinched, you have too few stitches there. If they flare outward, you have too many.
Best Stitches for a Firm Wall
The wall fabric in the photos is dense and slightly slanted, with each stitch leaning in the same direction like a woven rope. That look comes from tight, compact stitches that leave no gaps, and it is what lets the sides stand on their own. Loose, open stitches would let the cord sag and show the contents.
Keep your tension a touch firmer than feels natural. Thick jersey cord is forgiving, but it relaxes after a few rounds. If the walls start to ripple or lean outward, go down half a hook size for the next few rounds and the shape will settle.
The top rim has a different texture, a raised braided edge that looks like a plait running around the border. It gives the box a finished lip and hides the last wall round. Work it with the same steady tension and it will lie flat.
Working Into the Wooden Base
The first round is the trickiest, because you stitch through small holes instead of into a loop of yarn. Fold the cord end slightly narrower if it will not pass through, and use the hook tip to coax each stitch rather than forcing it. Forcing leaves frayed fibres on the first round, which show later.
Count the holes before you begin and match your stitch placement to them, so that each corner lands exactly on a corner of the wood. If the pattern drifts off by even one hole, the corners will twist, and the only real fix is to undo the round and start it again.
The Filigree Lid: The Detail That Makes It
The lid is the signature of this basket. A pale wooden panel, cut into flowing scrolls and leaves, sits inside the crochet frame like a window. Behind it a darker layer shows through, so the pattern looks lifted and graphic. In one view the backing is grey-blue and in another it looks nearly black, which shows how much the choice of background changes the mood.
Your choice is the backing. Dark felt or card makes the scrollwork bold and dramatic. A softer shade, such as a deeper teal, gives a calmer, tone-on-tone look that echoes the cord. Avoid white, which makes the wood pattern vanish.
Glue or sew the backing in before closing the frame, since reaching in afterwards is awkward. Keep the glue thin so it does not seep through the cut-outs and leave shiny marks on the wood.
Choosing the Best Yarn for a Sturdy Basket
The basket in the photos looks worked in a flat jersey tube cord with a matte finish and a slightly rustic hand. That kind of cord is the best match, because it is thick enough to cover the wood quickly and firm enough to keep its shape. Cotton blend cords give a bit more stiffness, while recycled jersey gives more cushion and stretch.
Avoid slippery or very glossy cords. They look elegant on the ball but slide through the holes unevenly and loosen over time. Also avoid thin yarn held single. The walls would need many more rounds, and the box would feel limp.
For colour, the soft aqua here pairs beautifully with pale birch. Sage green, warm sand, dusty rose and charcoal all look good against the same wood. A darker cord hides fingerprints if the box will sit on a busy desk.
How to Style a Crochet Square Basket
On a pale surface, as in the photos, the aqua walls and light wood look calm and fresh. Place the box on a dresser with a small mirror, and it becomes a ring and earring keeper. Set it on a bedside table with the lid slightly ajar to show the wood tray inside.
In a craft room, it works well for sewing clips, stitch markers and small scissors. Use the lid as a flat landing spot for the project you are working on. The raised border keeps small items from rolling off.
As a gift, fill it with soaps, tea bags or a tiny plant, and tie the lid on with a ribbon. Make a pair in two colours and the set looks deliberate, like a matched collection.
Tips for Neat Finishing
Weave the cord ends into the inside of the walls, not the outside, so the surface stays clean. Thick cord hides ends well if you thread them back along a row of stitches for several inches. Trim after tugging gently, so nothing pulls loose.
If the box sits crooked, check whether the walls are the same height on all four sides. Uneven rounds at the corners are the usual cause. A damp cloth and a little gentle shaping can improve minor wobbles, but a wall that is truly uneven needs a few rounds redone.
If the lid fits too tightly, add one round of a looser stitch to the lid frame, or crochet it a size up. If it sits too loosely, tighten the rim round slightly. Test the fit after every round near the end, because lids are easier to adjust than to redo.
Wipe the wood with a dry cloth and spot clean the cord with a damp sponge. Do not soak the box, since water can warp the wood and loosen the glue.
A Handmade Box to Keep Close
This crochet square basket pairs soft cord with a precise wooden frame, and that contrast is its charm. The firm walls, the neat corners and the filigree lid are what decide whether it looks professional.
Match the stitch count to the holes, keep your tension steady, choose a cord with body and give the lid a backing that shows off the scrollwork. Pause the video at the first round and the corners, and the rest will follow.
Small, useful and pretty.
Follow us on Pinterest and subscribe to the Newsletter so you don’t miss a thing!
Tutorial and photos of this square basket by: Vasilya Knits – Вяжем крючком.