
Last spring, my best friend called me in a mild panic. Her sister’s baby shower was in three weeks, and she wanted to give something handmade but had no idea where to start. I told her to come over with coffee, and we would figure it out together.
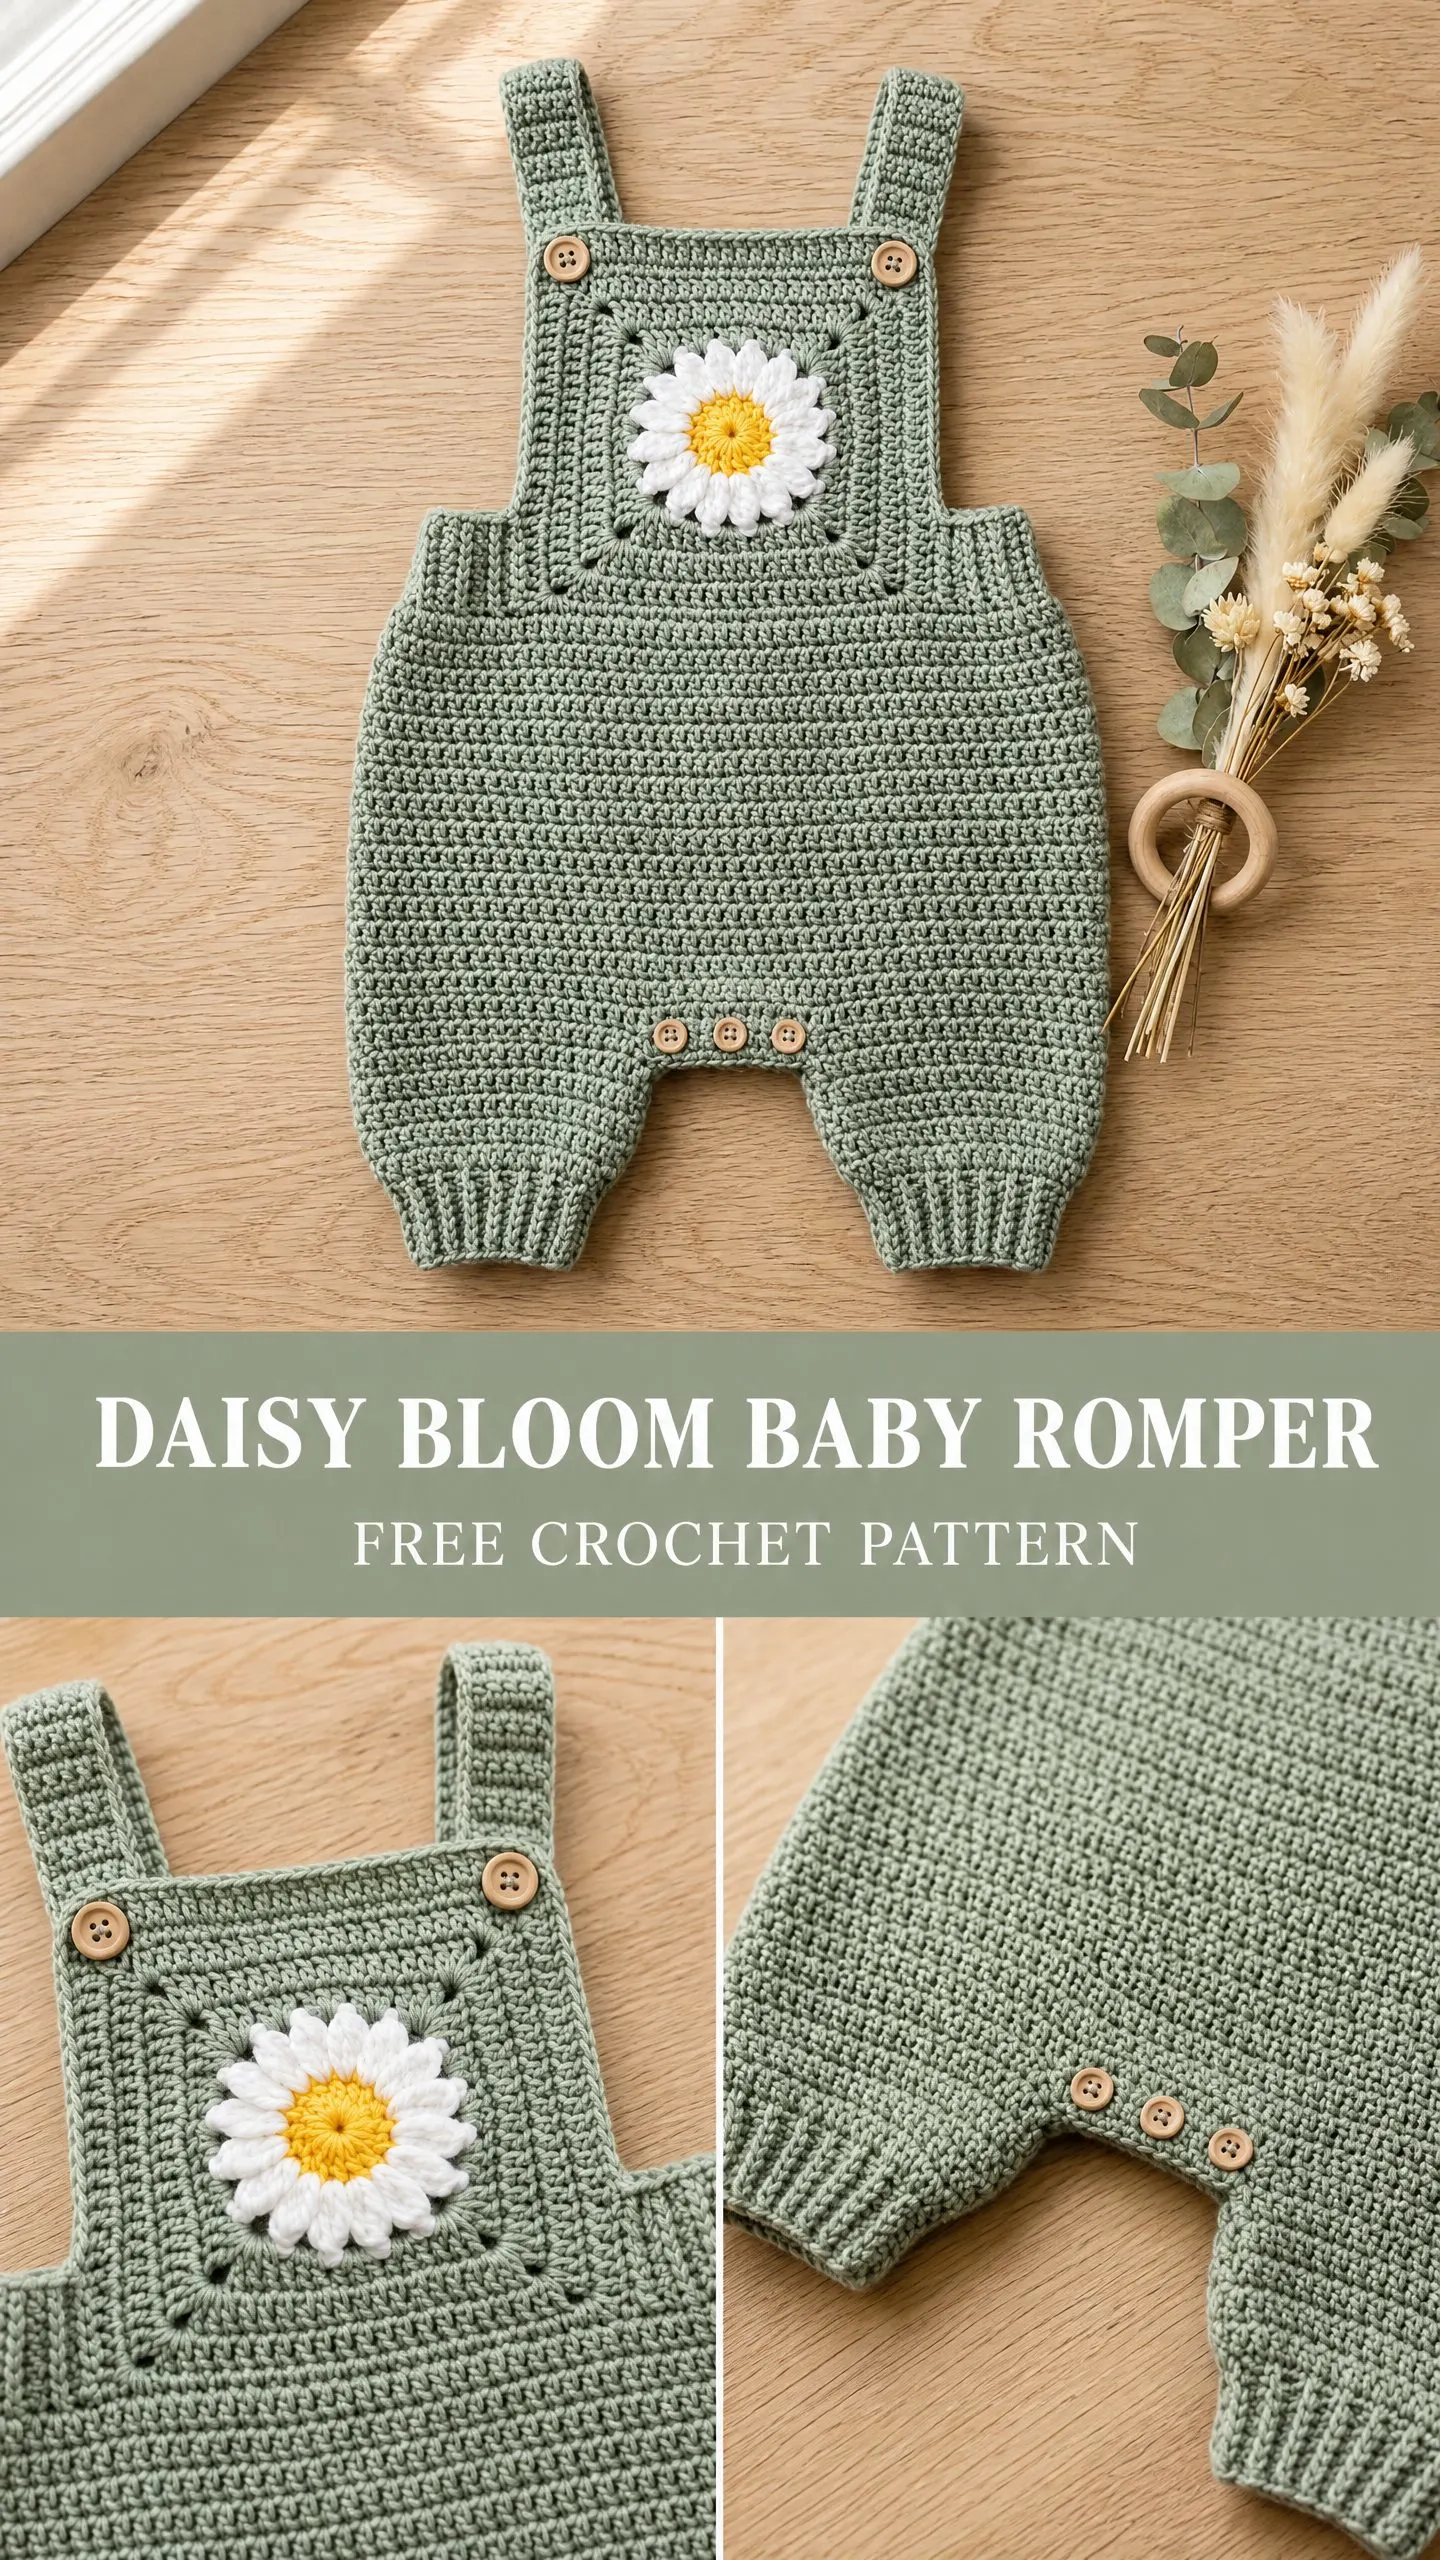
That afternoon, sketching ideas at my kitchen table, we landed on the perfect project: a little romper with a daisy on the front. Something sweet but not fussy. Something that looked impressive but would actually come together in a reasonable amount of time. Something that would make a new mom smile every single time she dressed her baby.
This Daisy Bloom Baby Romper pattern is the result of that afternoon brainstorming session, refined over multiple test makes. It has become one of my absolute favorite baby gifts to give, and I think you are going to love making it too.
Why This Crochet Pattern Works So Well
The construction of this baby romper is smarter than it looks. You work two flat leg panels first, join them at the crotch with a simple chain bridge, then continue upward in the round for the body. No complicated seaming until the very end. The bib and back yoke are worked flat after you divide, and the charming daisy granny square gets sewn on as an applique. This means even if you have never made a garment before, you can absolutely tackle this project.
The finished piece fits babies 3 to 6 months old, with customization tips included for sizing up or down. Half double crochet (hdc) forms the main fabric, giving you a dense but slightly stretchy texture that holds its shape beautifully in cotton yarn. The ribbed leg cuffs add a professional touch without requiring advanced skills.
Skill Level and Time Estimate
I rate this pattern as intermediate. You should be comfortable working in the round, working flat pieces separately, basic seaming, and following a granny square pattern. If you have completed a few projects beyond simple scarves or dishcloths, you are ready for this.
Expect to spend approximately 8 to 14 hours on this romper, depending on your pace. The daisy motif and button attachment add a bit of extra finishing time, but nothing overwhelming. I usually spread this project over a weekend of casual crocheting.
Materials You Will Need
Gather these supplies before you start:
Yarn:
Recommended Yarn Options:
Cotton yarn is essential here. It holds structure better than acrylic for a fitted garment like this, and it washes beautifully for baby items.
Hooks:
Additional Supplies:
Gauge
This part matters more than you might think for a fitted garment. With MC and your J-10 hook, work a swatch in half double crochet rows.
Target gauge: 14 stitches and 10 rows = 4 inches / 10 cm
Make a swatch of at least 20 stitches and 14 rows. Block it, let it dry completely, then measure. Even being off by half a stitch per inch will create noticeable size differences in a small baby garment. Adjust your hook size up or down as needed.
Finished Measurements
Abbreviations and Stitch Definitions
Let me walk you through every abbreviation you will encounter. If you are newer to pattern reading, bookmark this section.
Pattern Notes Before You Begin
A few important things to keep in mind as you work:
1. The turning chain at the beginning of each flat row counts as the first hdc throughout this pattern.
2. When working the body in the round, the chain 1 at the start of each round does NOT count as a stitch.
3. Place stitch markers at the beginning of each round and at center front and center back to help track your place.
4. Keep your tension consistent but not too tight. The fabric needs gentle stretch for diaper comfort.
5. The daisy motif is sewn on top of the finished bib as an applique. You do not work it into the bib fabric.
Step by Step Crochet Pattern Instructions
Right Leg
Foundation: With MC and J-10 hook, ch 27. Hdc in 3rd ch from hook and in each ch across. (25 hdc)
The skipped 2 chains at the start count as your first turning chain. From Row 2 onward, chain 2 and turn.
Row 1: Ch 2, turn. Hdc in each st across. (25 hdc)
Rows 2 through 10: Ch 2, turn. Hdc in each st across. (25 hdc)
Your leg tube before the cuff should measure approximately 4 inches / 10 cm tall.
Set this piece aside but do not fasten off. Leave your working yarn attached.
Left Leg
Foundation: With MC and J-10 hook, ch 27. Hdc in 3rd ch from hook and in each ch across. (25 hdc)
Rows 1 through 10: Ch 2, turn. Hdc in each st across. (25 hdc)
Do not fasten off. You will join the legs next.
Joining the Legs and Working the Body
With your working yarn still attached to the left leg and the right side facing you:
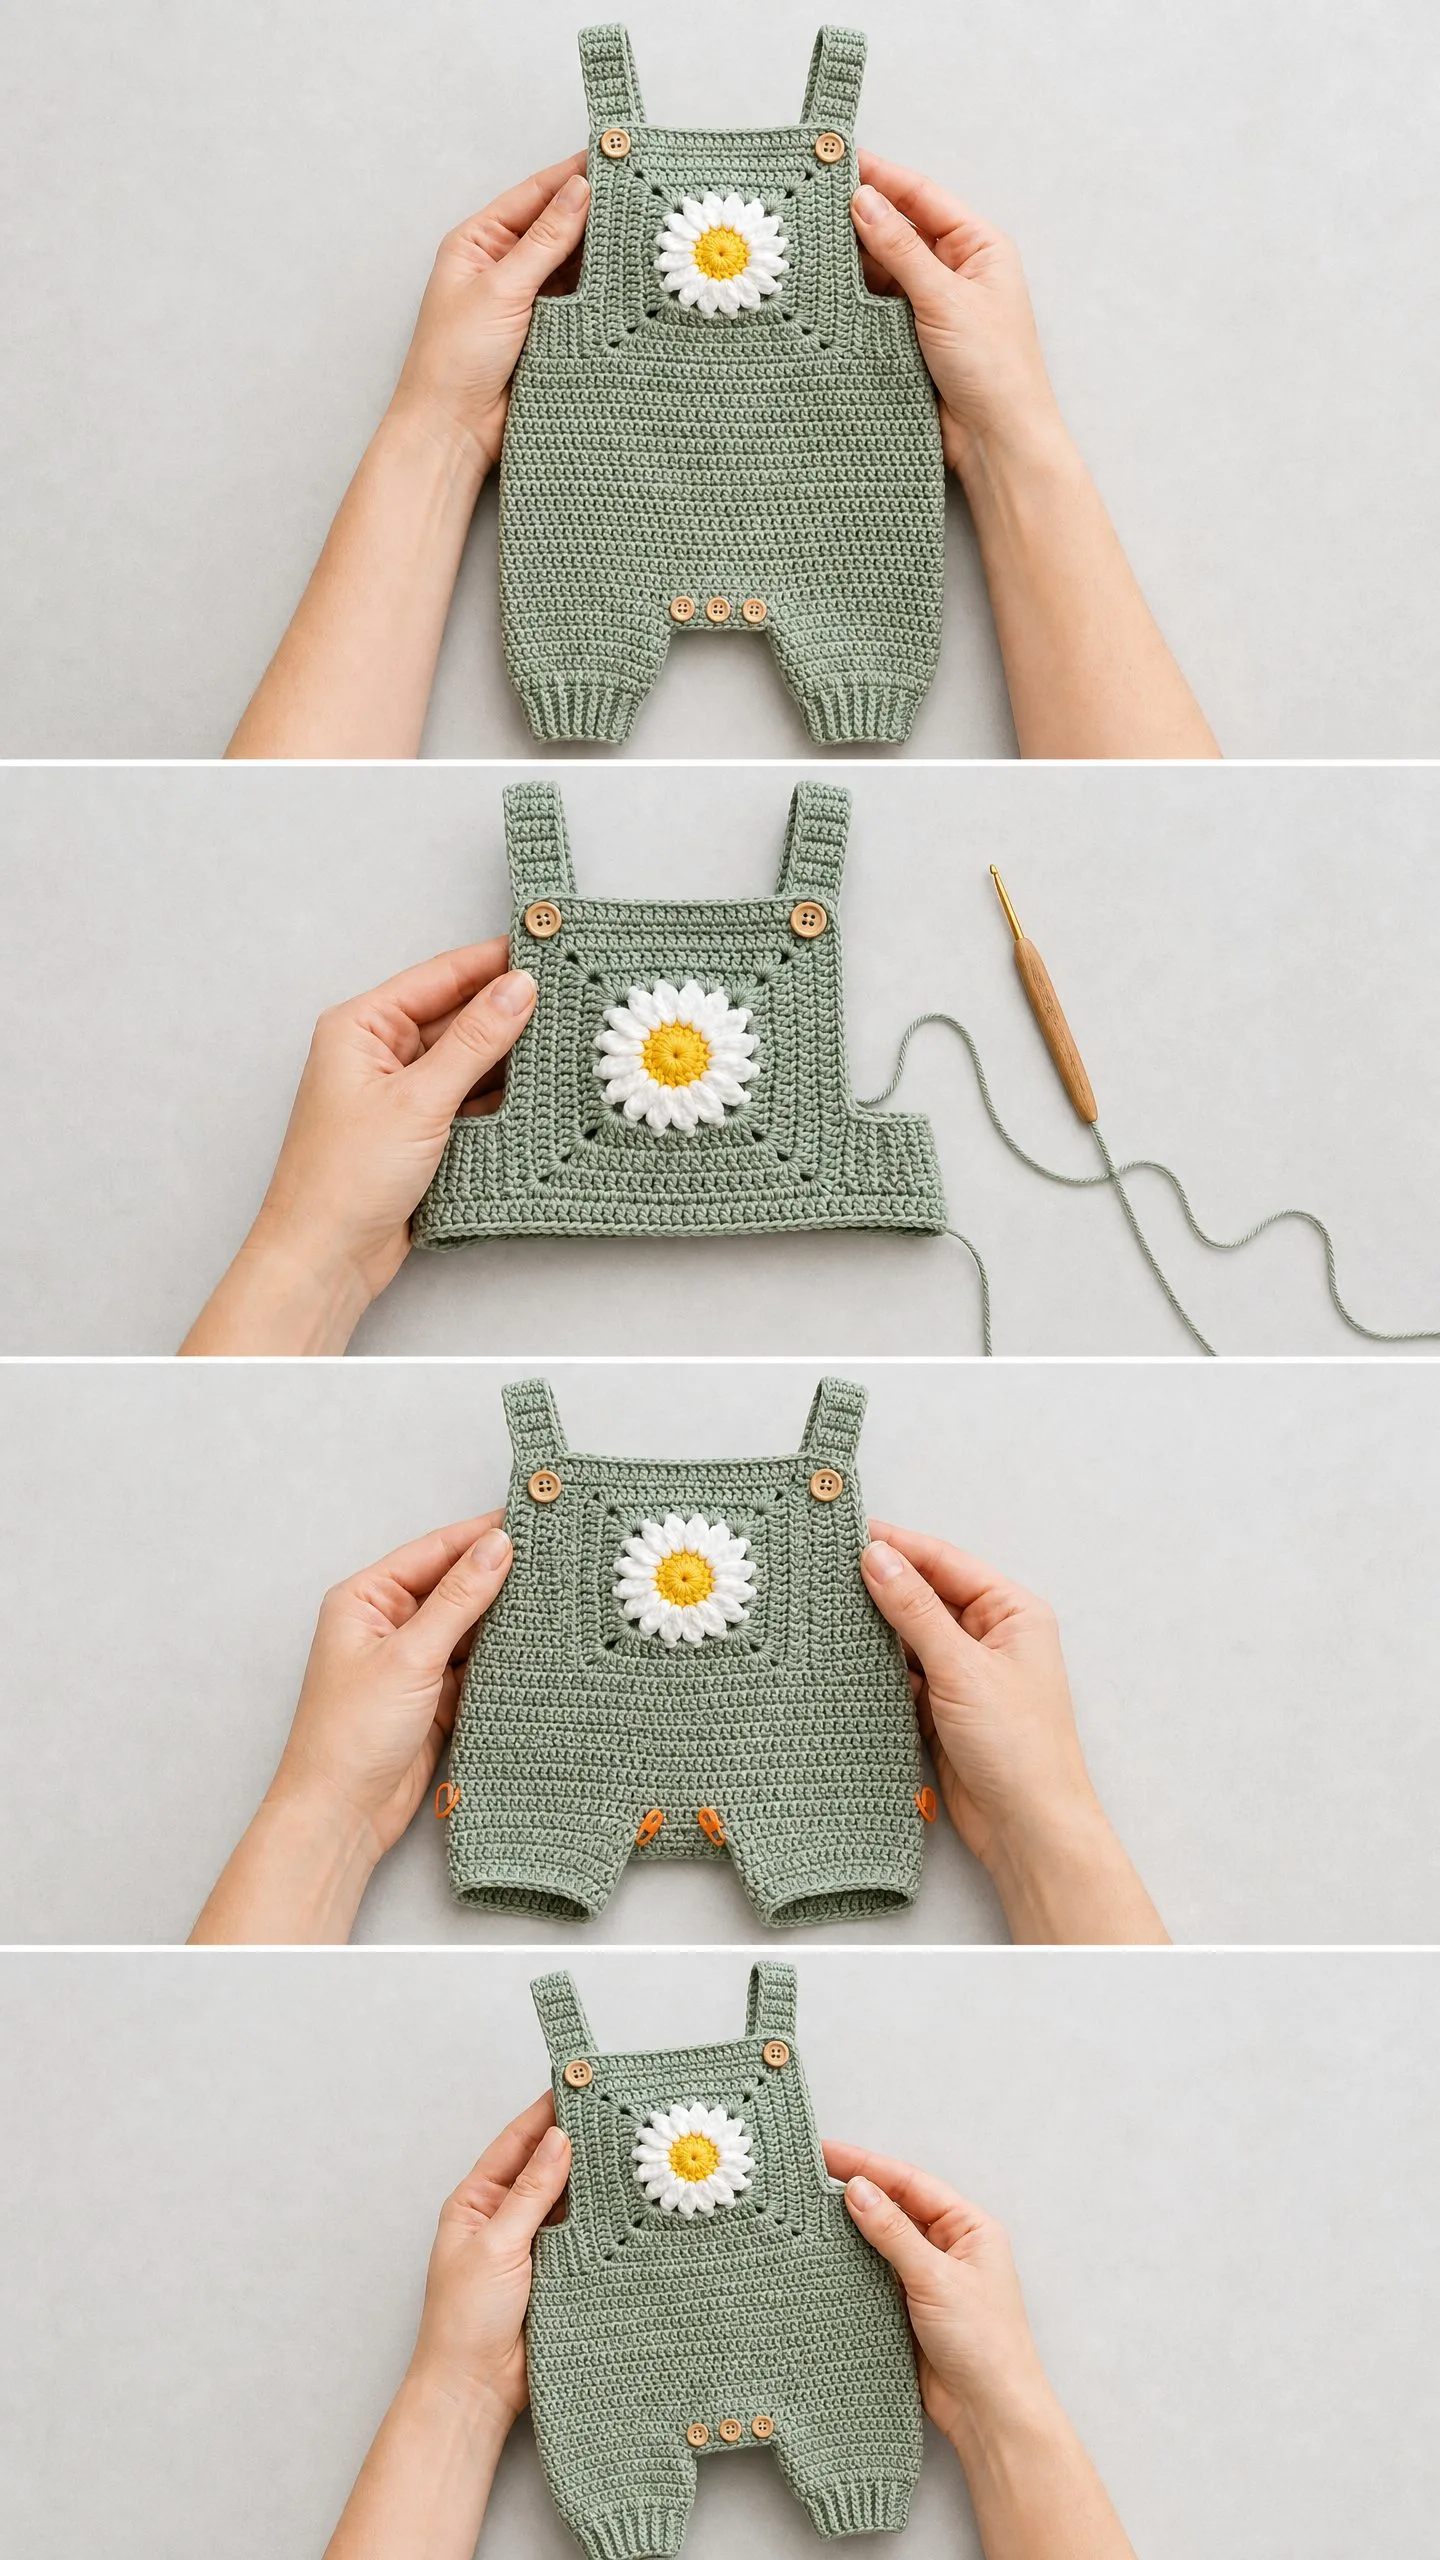
Joining Round: Ch 4 (this forms the front gusset bridge). With RS facing, sl st to the last stitch of the right leg. Continue across the right leg by working hdc in each of the 25 stitches. At the end of the right leg, ch 4 (this forms the back gusset bridge). Sl st to the first stitch of the left leg. Hdc in each of the 25 stitches of the left leg, then hdc in each of the 4 gusset chain stitches on the front to create a continuous loop. Place stitch marker at beginning of round. Sl st to first hdc to join. (58 hdc)
Those chain bridges create the crotch area. You will reinforce them and add button closures during finishing.
Body Worked in the Round
Now you will work the body upward. Chain 1 at the start of each round (does not count as a stitch). Place a marker at the beginning of each round.
Rounds 1 through 15: Ch 1, hdc in each st around. Sl st to join. (58 hdc)
After Round 15, your body tube should measure approximately 6 inches / 15 cm from the joining round.
Dividing for Front Bib and Back Yoke
At the end of Round 15, you will divide the work into sections:
Mark these sections clearly before continuing.
Back Yoke (Worked Flat)
Turn so the wrong side faces you. Attach MC at the first stitch of your designated back 16-stitch section.
Row 1 (WS): Ch 2, turn. Hdc in each of the 16 back sts. (16 hdc)
Rows 2 through 9: Ch 2, turn. Hdc in each st across. (16 hdc)
Fasten off. Your back yoke measures approximately 3.5 inches / 9 cm tall.
Front Bib (Worked Flat)
Attach MC at the first stitch of the front 16-stitch section with right side facing.
Row 1 (RS): Ch 2, turn. Hdc in each of the 16 front sts. (16 hdc)
Rows 2 through 9: Ch 2, turn. Hdc in each st across. (16 hdc)
Do not fasten off.
Your bib panel should measure approximately 4.5 inches wide by 3.5 inches tall.
Daisy Granny Square Motif
This is the showstopper of the whole romper. Work it separately with your H-8 hook, then sew it onto the bib.
Round 1 (Color B, golden yellow): Make a magic ring. Ch 2 (counts as first dc), 11 dc into ring. Sl st to top of ch-2 to join. (12 dc)
Round 2 (Color B): Ch 1, 2 sc in each st around. Sl st to first sc to join. Fasten off Color B. (24 sc)
Round 3 (Color A, white): Join Color A with sl st in any st. Ch 10, sl st into same st, sl st into next st. Repeat from to 12 times total, working one petal into every other stitch. After the last petal, sl st to the first sl st. Fasten off Color A but leave a long tail for seaming. (12 petals)
Round 4 (MC, sage green): Join MC with sl st in any skipped sc between petal bases from Round 2. Ch 3 (counts as dc), 2 dc in same st. Ch 2, 3 dc in next skipped sc, ch 2, 3 dc in next skipped sc, ch 2, 3 dc in next skipped sc, ch 3 (corner), 3 dc in next skipped sc. Repeat from to 3 more times, ending with ch 3. Sl st to top of ch-3. (12 groups of 3 dc, 4 corner ch-3 spaces, 8 side ch-2 spaces)
Fasten off. Weave ends. Block flat to approximately 3 inches / 7.5 cm square.
Shoulder Straps (Make 2)
Switch to your I-9 hook and MC.
Foundation: Ch 6. Hdc in 3rd ch from hook and in each ch across. (4 hdc)
Row 1: Ch 2, turn. FpHdc in first post, BpHdc in next, FpHdc in next, BpHdc in last. (4 sts)
Row 2: Ch 2, turn. BpHdc in first post, FpHdc in next, BpHdc in next, FpHdc in last. (4 sts)
Repeat Rows 1 and 2 alternately until strap measures 9 inches / 23 cm total, or your desired adjustable length.
Final Row (Button Loop Row): Ch 2, turn. Work 1 FpHdc, ch 3, sk 2, FpHdc in last st.
Fasten off, leaving a 12-inch tail for seaming. Make the second strap identically.
Leg Cuffs (Make 2)
Switch to your I-9 hook. You will work the cuff directly onto the foundation edge of each leg after seaming the leg sides closed.
Round 1: Join MC to the foundation chain edge. Ch 1, sc in each foundation chain st around the leg opening. Sl st to join. (25 sc)
Round 2 (Begin Ribbing): Ch 2. FpHdc in first post, BpHdc in next, FpHdc in next. Repeat from to to end. Sl st to join. (25 sts)
Rounds 3 through 5: Continue alternating BpHdc over FpHdc and FpHdc over BpHdc to create the rib texture. Sl st to join each round. (25 sts)
Fasten off. Weave ends. Repeat for second leg.
Gusset Finishing
Work on the inside (wrong side) of the crotch. Join MC at the right end of the front 4-chain bridge. Sc in each of the 4 chain spaces. Fasten off. Repeat for back bridge.
Front Gusset Button Loops: Join MC at the right edge of the front crotch bridge. Ch 1, sc in first st, ch 3, sc in next st. Repeat from to 2 more times, sc in last st. Fasten off.
Sew 2 wood buttons onto the back crotch reinforcement strip to line up with the outer button loops.
Assembly and Finishing
Seaming the Legs: Each leg was worked flat. Using MC and your yarn needle, whip stitch or mattress stitch the short side edges together to form a tube. The seam sits at the inside leg position.
Attaching Straps: Sew the plain end of each strap to the top front corners of the bib using whip stitch, about 2 stitches in from each corner. Sew the button loop end of each strap to the top back corners of the back yoke. Attach wood buttons to the back yoke corners to match the button loops.
Attaching the Daisy Motif: Pin your blocked daisy square centered on the front bib, approximately 0.5 inches from the top edge. Using MC and your yarn needle, whip stitch around all four sides of the outer MC granny square border. Catch only the back of the bib fabric so stitches stay invisible on the wrong side.
Weaving Ends: Weave all ends securely, at least 1.5 inches, splitting yarn plies when possible for extra security with cotton.
Blocking: Wet block your finished romper by submerging in cool water. Gently press out excess water in a towel. Pin flat to blocking mat to finished dimensions. Allow to dry completely. Cotton yarn really benefits from wet blocking.
Size Customization Tips
For 6 to 9 months: Add 4 stitches to each leg foundation (ch 31, work 29 hdc per leg). Increase joining round to 66 stitches with 5-stitch gusset bridges. Work body rounds to Round 18. Increase bib and back yoke to 18 stitches each, 10 rows. Extend straps to 10 inches.
For 9 to 12 months: Add 6 stitches to each leg foundation (ch 33, work 31 hdc per leg). Increase to 74 stitches in the round. Work 20 body rounds. Bib and back yoke 20 stitches wide, 11 rows each. Straps 11 inches long.
For newborn size: Reduce each leg foundation to ch 23 (21 hdc per leg). Joining round will be 50 stitches. Work 12 body rounds. Bib and back yoke 14 stitches wide, 8 rows each. Straps 8 inches long.
Care Instructions
Machine wash cold on gentle cycle, inside out. Lay flat to dry. Do not tumble dry. Avoid ironing directly over the daisy motif. Store folded flat.
I really hope you enjoy making this sweet little romper as much as I enjoyed designing it. There is something so satisfying about creating a handmade garment for a tiny human, and this one always gets the best reactions at baby showers.
If you make the Daisy Bloom Baby Romper, I would absolutely love to see it. Tag me on Instagram or share a photo in my Facebook group. Your makes seriously brighten my day.
Do yourself a favor and pin this crochet pattern to your Pinterest boards so you can find it again when baby shower season rolls around. And please drop a comment below if you make one. I love hearing which yarn colors you choose and seeing how your finished rompers turn out!
You Might Also Like
- Pastel Spring Granny Square Purse Free Crochet Pattern
- Coral Peach Butterfly Wrist Cuff Free Crochet Pattern
- Lavender Purple Dreamy Peplum Crochet Top Pattern
- Dusty Rose Peplum Baby Outfit Free Crochet Pattern