
Crocheted flowers look intimidating. All those tiny petals, the fiddly centers, the sewing. I get it. But here’s the truth: if you can single crochet and make a basic chain, you can absolutely create this beautiful daisy headband.
Get the Ad-Free PDF Pattern
You can find the free pattern below, or you can purchase the ad-free printable PDF from my shop.
Get the Printable PDF →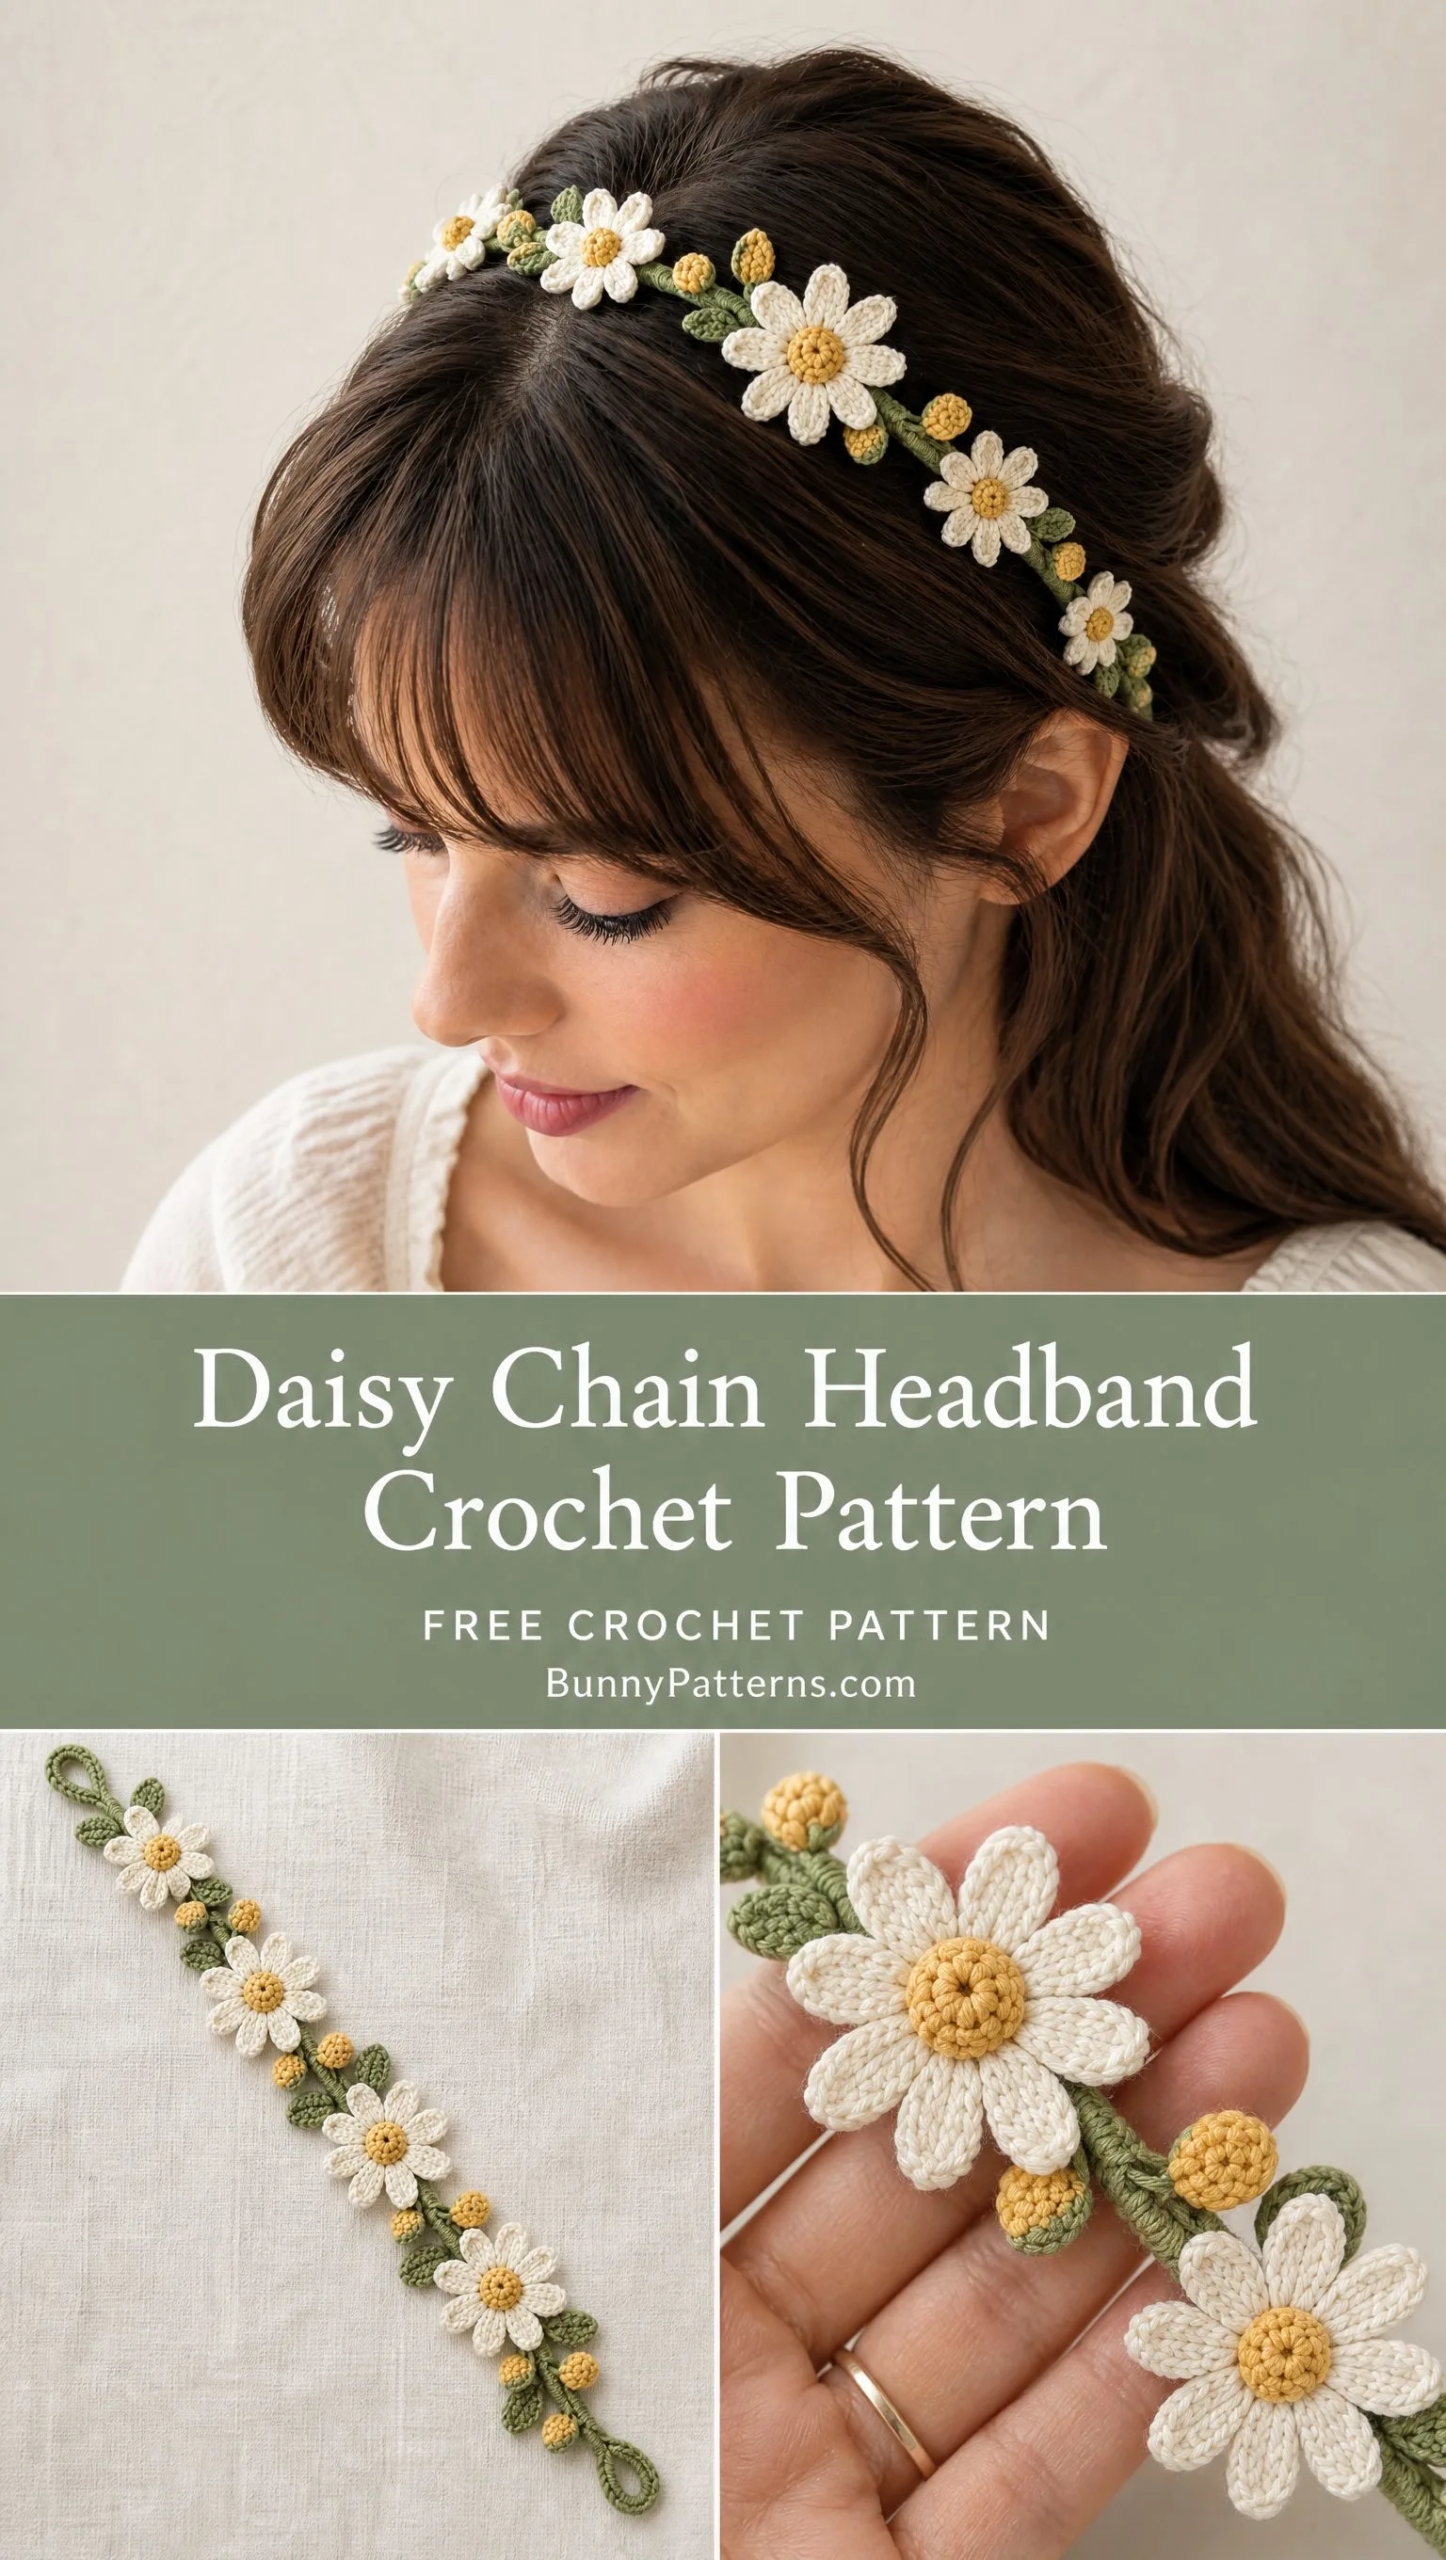
The construction breaks down into simple, manageable pieces. You make a straightforward band, work up some small flower motifs separately, then sew everything together at the end. No complicated colorwork while you stitch. No confusing decreases. Just small projects that come together into something truly stunning.
Whether you’re a confident beginner ready for your first accessory project or an experienced crocheter looking for a quick, satisfying make, this pattern meets you where you are. Let me walk you through every step.
Why You’ll Love This Pattern
This Daisy Chain Headband captures that fresh, meadow-inspired aesthetic that’s perfect for spring and summer. The slim sage green band provides a natural base, while ivory daisies with cheerful mustard centers add whimsical charm. Tiny butter yellow buds fill in the gaps, and pointed leaves tie everything together.
The best part? Each element is small and quick to work up. You can easily make a daisy or two during a lunch break, then assemble the whole headband in an evening. It’s the kind of project that feels rewarding at every stage.
The finished headband fits adult head circumferences of approximately 52 to 58 cm (that’s about 20.5 to 23 inches). The band itself measures roughly 2 to 3 cm wide, keeping it comfortable and lightweight for all-day wear.
Materials You’ll Need
Gather these supplies before you begin:
Yarn:
Cotton yarn works beautifully here because it holds its shape, shows stitch definition clearly, and has that lovely matte finish you see in the photos. Look for a fine weight, sometimes labeled as fingering or sport weight depending on the brand.
Tools:
Skill Level
This pattern suits confident beginners and above. You should feel comfortable with basic stitches and be willing to try a magic ring. If magic rings feel tricky, I’ll explain them below, and you can always substitute a simple chain loop instead.
Abbreviations and Stitch Definitions
Let me define every stitch you’ll encounter in this pattern. Even if you know these well, a quick refresher never hurts.
ch: chain – Yarn over, pull through the loop on your hook. This is the foundation of most crochet projects.
sl st: slip stitch – Insert hook, yarn over, pull through both the stitch and the loop on your hook in one motion. Used for joining and creating nearly invisible stitches.
sc: single crochet – Insert hook into the stitch, yarn over and pull up a loop (two loops on hook), yarn over and pull through both loops. A short, dense stitch.
hdc: half double crochet – Yarn over, insert hook, yarn over and pull up a loop (three loops on hook), yarn over and pull through all three loops. Slightly taller than single crochet.
dc: double crochet – Yarn over, insert hook, yarn over and pull up a loop (three loops on hook), yarn over and pull through two loops, yarn over and pull through remaining two loops. A taller stitch that creates nice drape.
bobble: raised textured stitch – Multiple incomplete double crochets worked into the same stitch, then joined at the top. Creates a puffy, dimensional bump.
st: stitch – Refers to any individual stitch.
rnd: round – One complete pass around your work when crocheting in the round.
Magic ring – A technique for starting rounds that creates an adjustable center. You wrap yarn around your fingers, work stitches into the loop, then pull the tail tight to close any hole. If this is new to you, search for a quick video tutorial. Once you get it, you’ll use it constantly.
The Band Pattern
The headband base is simply a narrow rectangle that you fold and join to create a tube effect. This gives it structure and that wrapped appearance.
Step 1: With sage green yarn, chain 90 stitches. If you have a specific head measurement to work with, you can adjust this. The chain should measure approximately 5 cm shorter than the total head circumference to account for stretch.
Step 2 (Row 1): Single crochet in the second chain from the hook and in each chain across. You’ll have 89 single crochet stitches.
Step 3 (Rows 2 through 5): Chain 1, turn your work, then single crochet across the entire row. Repeat this for a total of 4 more rows, giving you 5 rows of single crochet total.
Step 4: Now for the fun part. Fold the strip lengthwise so the two long edges meet. Using slip stitches, join these edges together along the length. This creates that narrow wrapped tube effect that looks so polished.
Step 5: Join the short ends of the band to form a circle that fits the head. Sew the yarn ends invisibly and weave in all tails securely.
Tip: Try the band on (or measure against your head) before joining the ends. Cotton doesn’t stretch much, so make sure you’re happy with the fit.
Daisy Flower Pattern
This is where the magic happens. You’ll make 5 to 7 daisies in varying sizes. For smaller daisies, you can use fewer stitches in the center or shorter chains for petals. For larger ones, follow the pattern exactly.
The Center
Step 1: With mustard yellow yarn, make a magic ring.
Step 2: Work 8 single crochet stitches into the ring. Pull the tail to close the center snugly.
Step 3: Add a round of raised bobble stitches evenly spaced around the center. This creates that textured, pollen-like look real daisies have.
Step 4: Fasten off and leave a tail for sewing later.
The Petals
Step 1: Attach ivory yarn to any stitch on the center.
Step 2: For each of the 8 petals, work the following:
This creates a tapered petal shape, wider at the base and pointed at the tip.
Step 3: After completing one petal, slip stitch into the next stitch on the center and repeat the petal sequence. Continue around until you have 8 petals total.
Step 4: Gently shape each petal upward to give them a raised, dimensional edge. Cotton yarn holds shape well, so don’t be afraid to manipulate the petals with your fingers.
Step 5: Fasten off and weave the tail toward the back. Make sure the petals are sewn securely around the mustard center.
Repeat this process 5 to 7 times, varying the chain length slightly for different sized flowers if desired.
Tiny Bud Pattern
These sweet little buds fill gaps between the larger daisies and add visual interest.
Step 1: With butter yellow yarn, make a small magic ring.
Step 2: Work 6 single crochet stitches into the ring.
Step 3: Add one round of textured stitches (small bobbles or simply single crochets worked tightly).
Step 4: Pull the ring closed tightly, fasten off, and leave a tail for sewing.
These tiny buds should be quite small, almost like little dots of sunshine peeking out between the flowers.
Leaf Pattern
The sage green leaves tie the whole design together and help the flowers look like they’re growing naturally along the band.
Step 1: With sage green yarn, chain 5.
Step 2: Working back along the chain, make:
This creates a pointed leaf shape that’s narrow at the tip and wider at the base.
Step 3: If you want a two-sided leaf, rotate your work and repeat the same stitch sequence down the opposite side of the chain.
Step 4: Fasten off and leave a tail for sewing.
Make as many leaves as you like. I recommend at least 4 to 6 for a balanced look.
Assembly
Now comes the satisfying part: bringing all your pieces together.
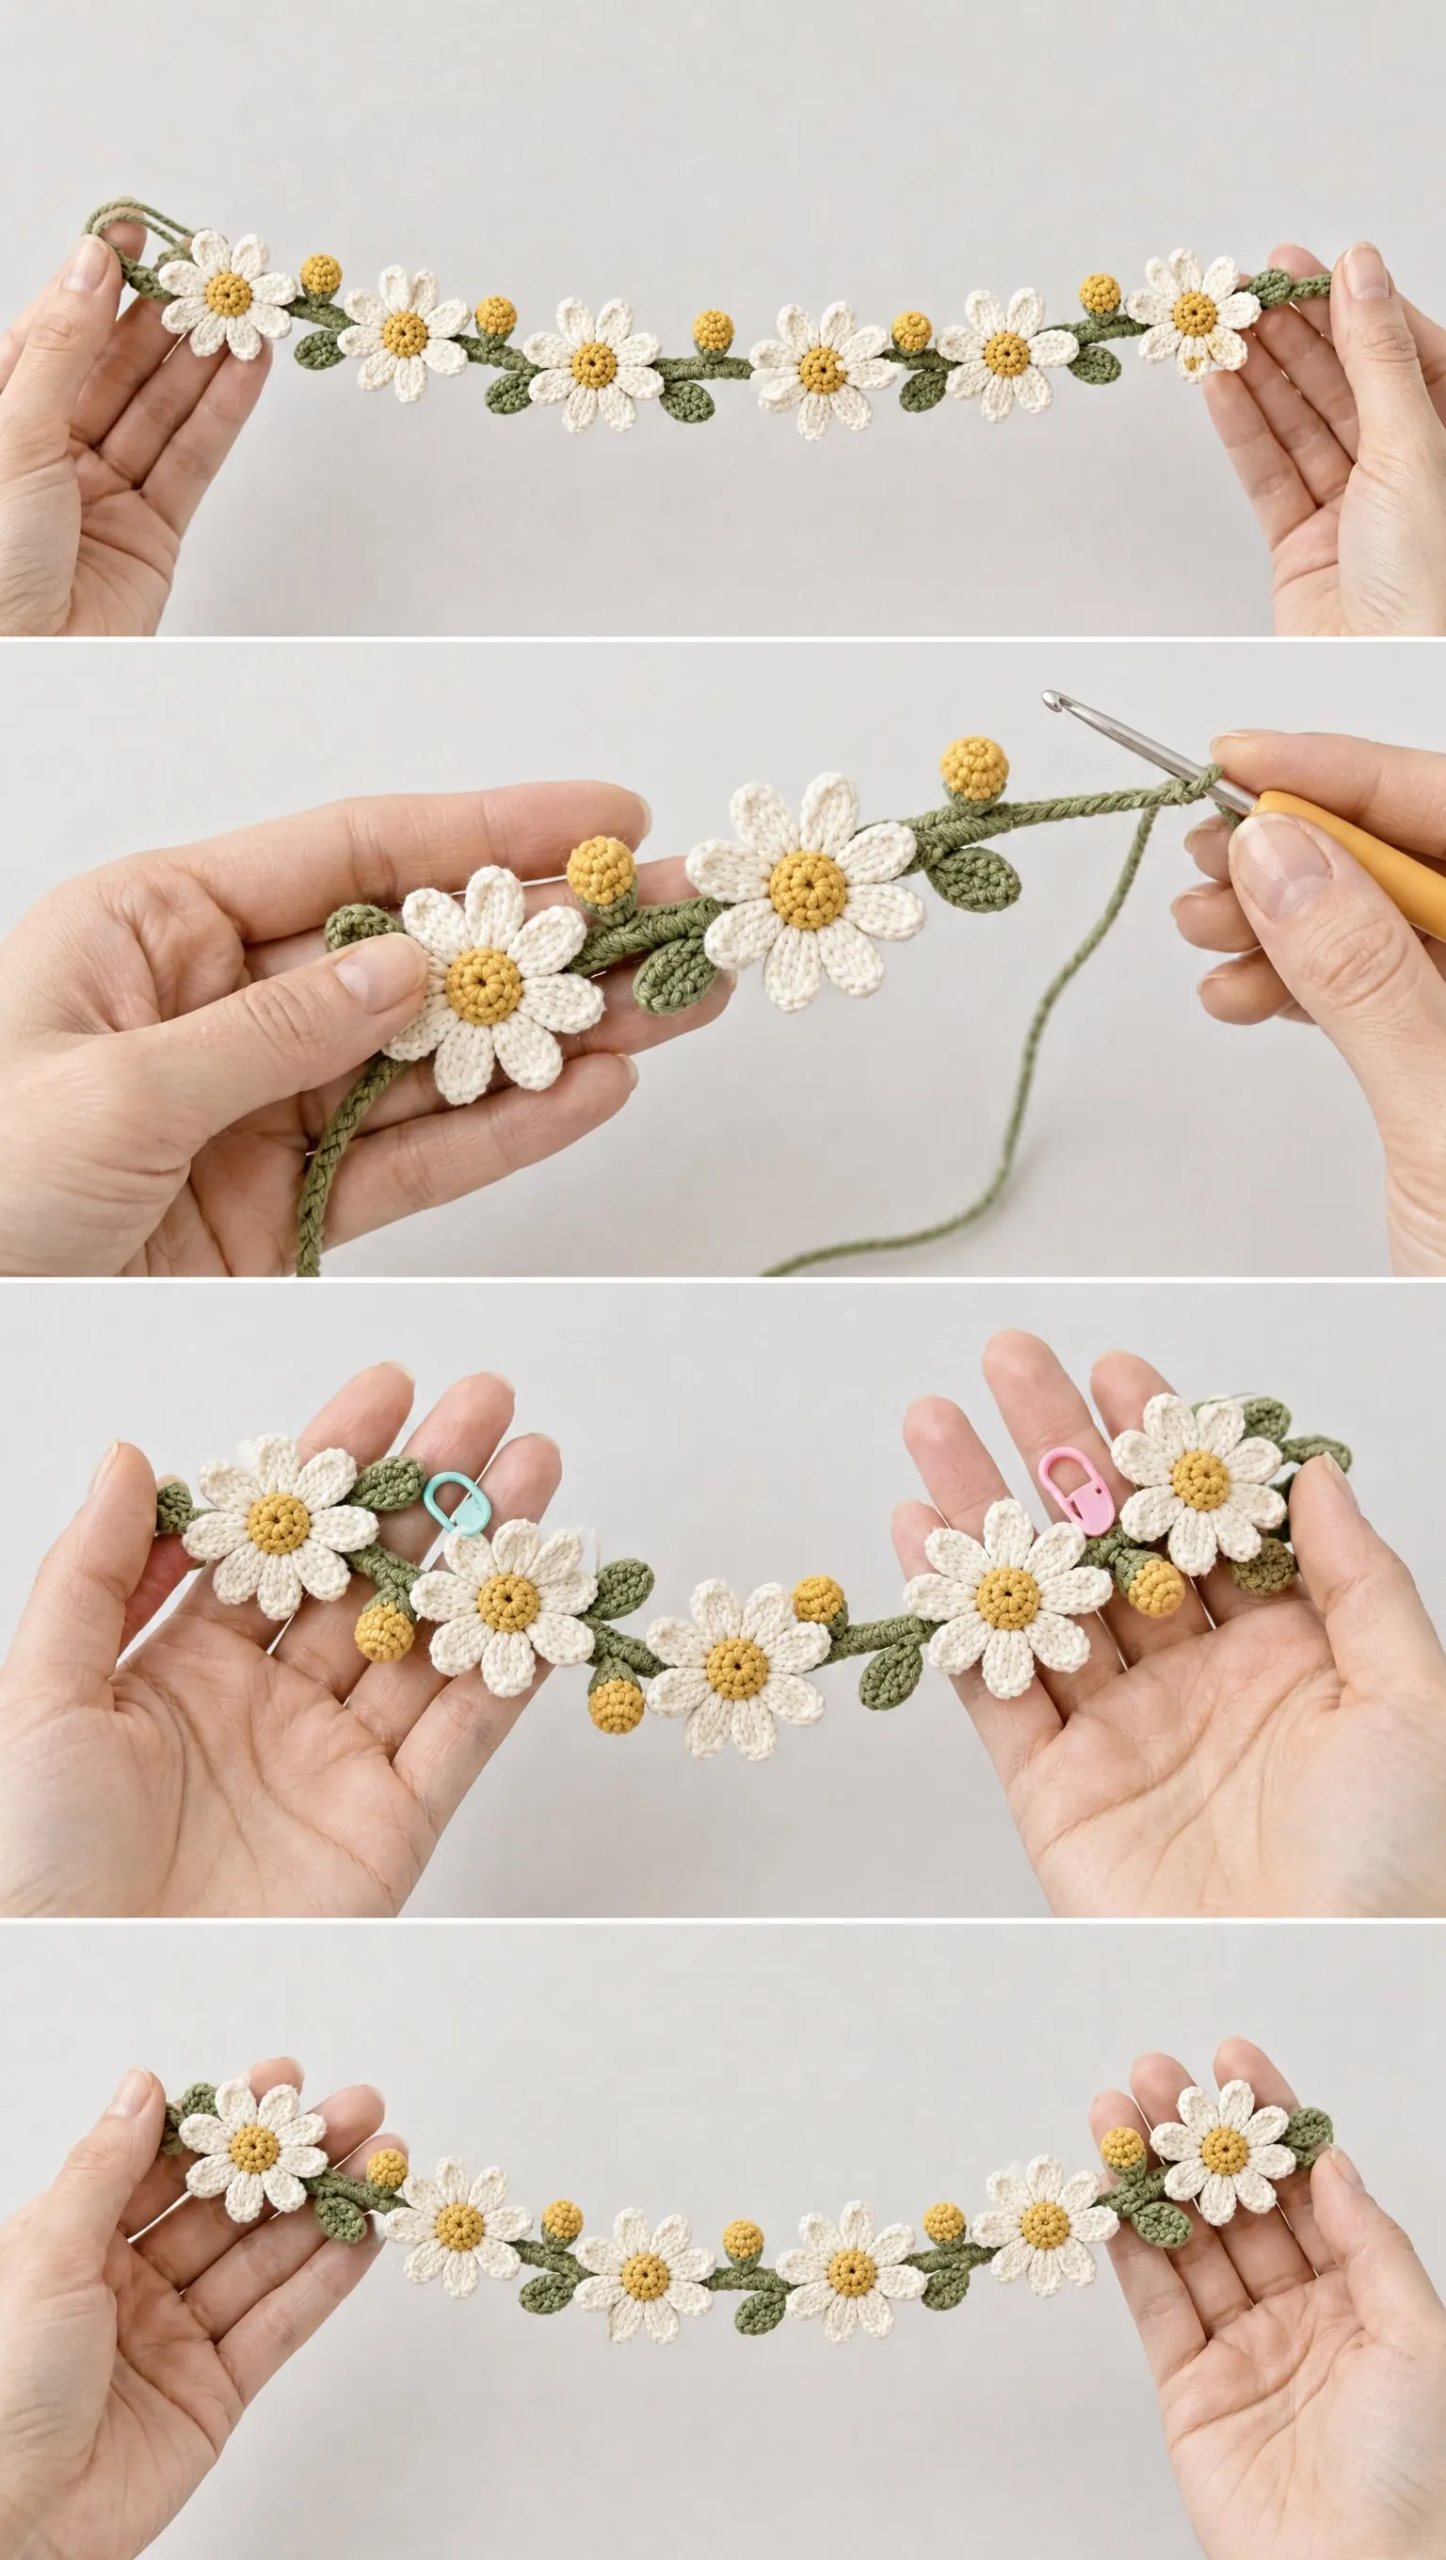
Step 1: Lay out your completed band and arrange the largest daisies above where the right temple would sit when worn. This creates an asymmetrical, natural look, like wildflowers growing along a meadow path.
Step 2: Place medium-sized daisies toward the center of the headband.
Step 3: Add smaller flowers and tiny buds toward both ends, letting the design taper naturally.
Step 4: Tuck leaves between the blossoms, positioning them at slight angles for visual movement.
Step 5: Once you’re happy with the arrangement, pin or hold each piece in place. Using matching yarn colors and your yarn needle, sew every motif firmly to the band.
Step 6: Work from the back side of the band whenever possible, using invisible joining stitches. This keeps the front looking clean and polished.
Pro tip: Take a photo of your arrangement before you start sewing. That way, if anything shifts, you can reference your original layout.
Finishing Your Headband
Block the headband lightly using steam or a damp cloth. This evens out your stitches and helps the petals and leaves hold their shape beautifully.
While the piece is still slightly damp, shape the petals and leaves with your fingers. Curve the petals gently upward and point the leaf tips.
Once dry, check all your joins carefully. Tug gently on each motif to make sure nothing feels loose. Reinforce any stitches that seem weak. You want this headband to last through many wearings.
Care Instructions
To keep your Daisy Chain Headband looking fresh:
With proper care, your handmade headband will stay beautiful season after season.
Tips for Success
If you’re new to small motifs: Work slowly and use good lighting. These pieces are tiny, and it’s easy to miss a stitch.
If your daisies look different sizes: That’s actually perfect! Natural flowers aren’t uniform, and the variety adds charm.
If sewing feels tedious: Put on a podcast or your favorite show. Assembly goes faster when you’re entertained.
If you want to adjust the fit: Add or subtract chains from the initial band. Just remember to keep the number reasonable so your rows stay even.
Make It Your Own
While this pattern uses the classic sage, ivory, mustard, and butter yellow color palette, feel free to experiment. Lavender bands with white and pale purple flowers would look gorgeous. A cream base with pink-tipped daisies could be lovely for a wedding. Let your yarn stash inspire you.
Thank you so much for choosing this pattern. I hope you love making your Daisy Chain Headband as much as I loved designing it. If you create one, I’d absolutely love to see it! Tag me on Instagram or share a photo in our Facebook group. Seeing your finished projects genuinely makes my day.
Don’t forget to save this pattern to your Pinterest boards so you can find it whenever the crocheting mood strikes. And if you make this headband, please drop a comment below. I’d love to hear how it turned out and see which colors you chose!
Want a Quick & Easy Printable Version?
Get a clean, beautifully formatted PDF of this pattern — easy to follow step by step, ready to print or save on any device. No scrolling, no distractions, just the pattern.
Get the Printable PDF →You Might Also Like
- Dusty Rose Heart Cutout Crochet Top Free Pattern
- Pastel Rainbow Flared Mini Dress Free Crochet Pattern
- Sage Green Granny Tote with Daisy Free Crochet Pattern
- Ocean Blue Granny Star Baby Bunting Free Crochet Pattern