
Crocheted flowers woven through hair might look like something only advanced crafters can pull off. I completely understand that hesitation. But here is the truth: if you can chain, single crochet, and make a basic popcorn stitch, you already have every skill you need for this project.
Get the Ad-Free PDF Pattern
You can find the free pattern below, or you can purchase the ad-free printable PDF from my shop.
Get the Printable PDF →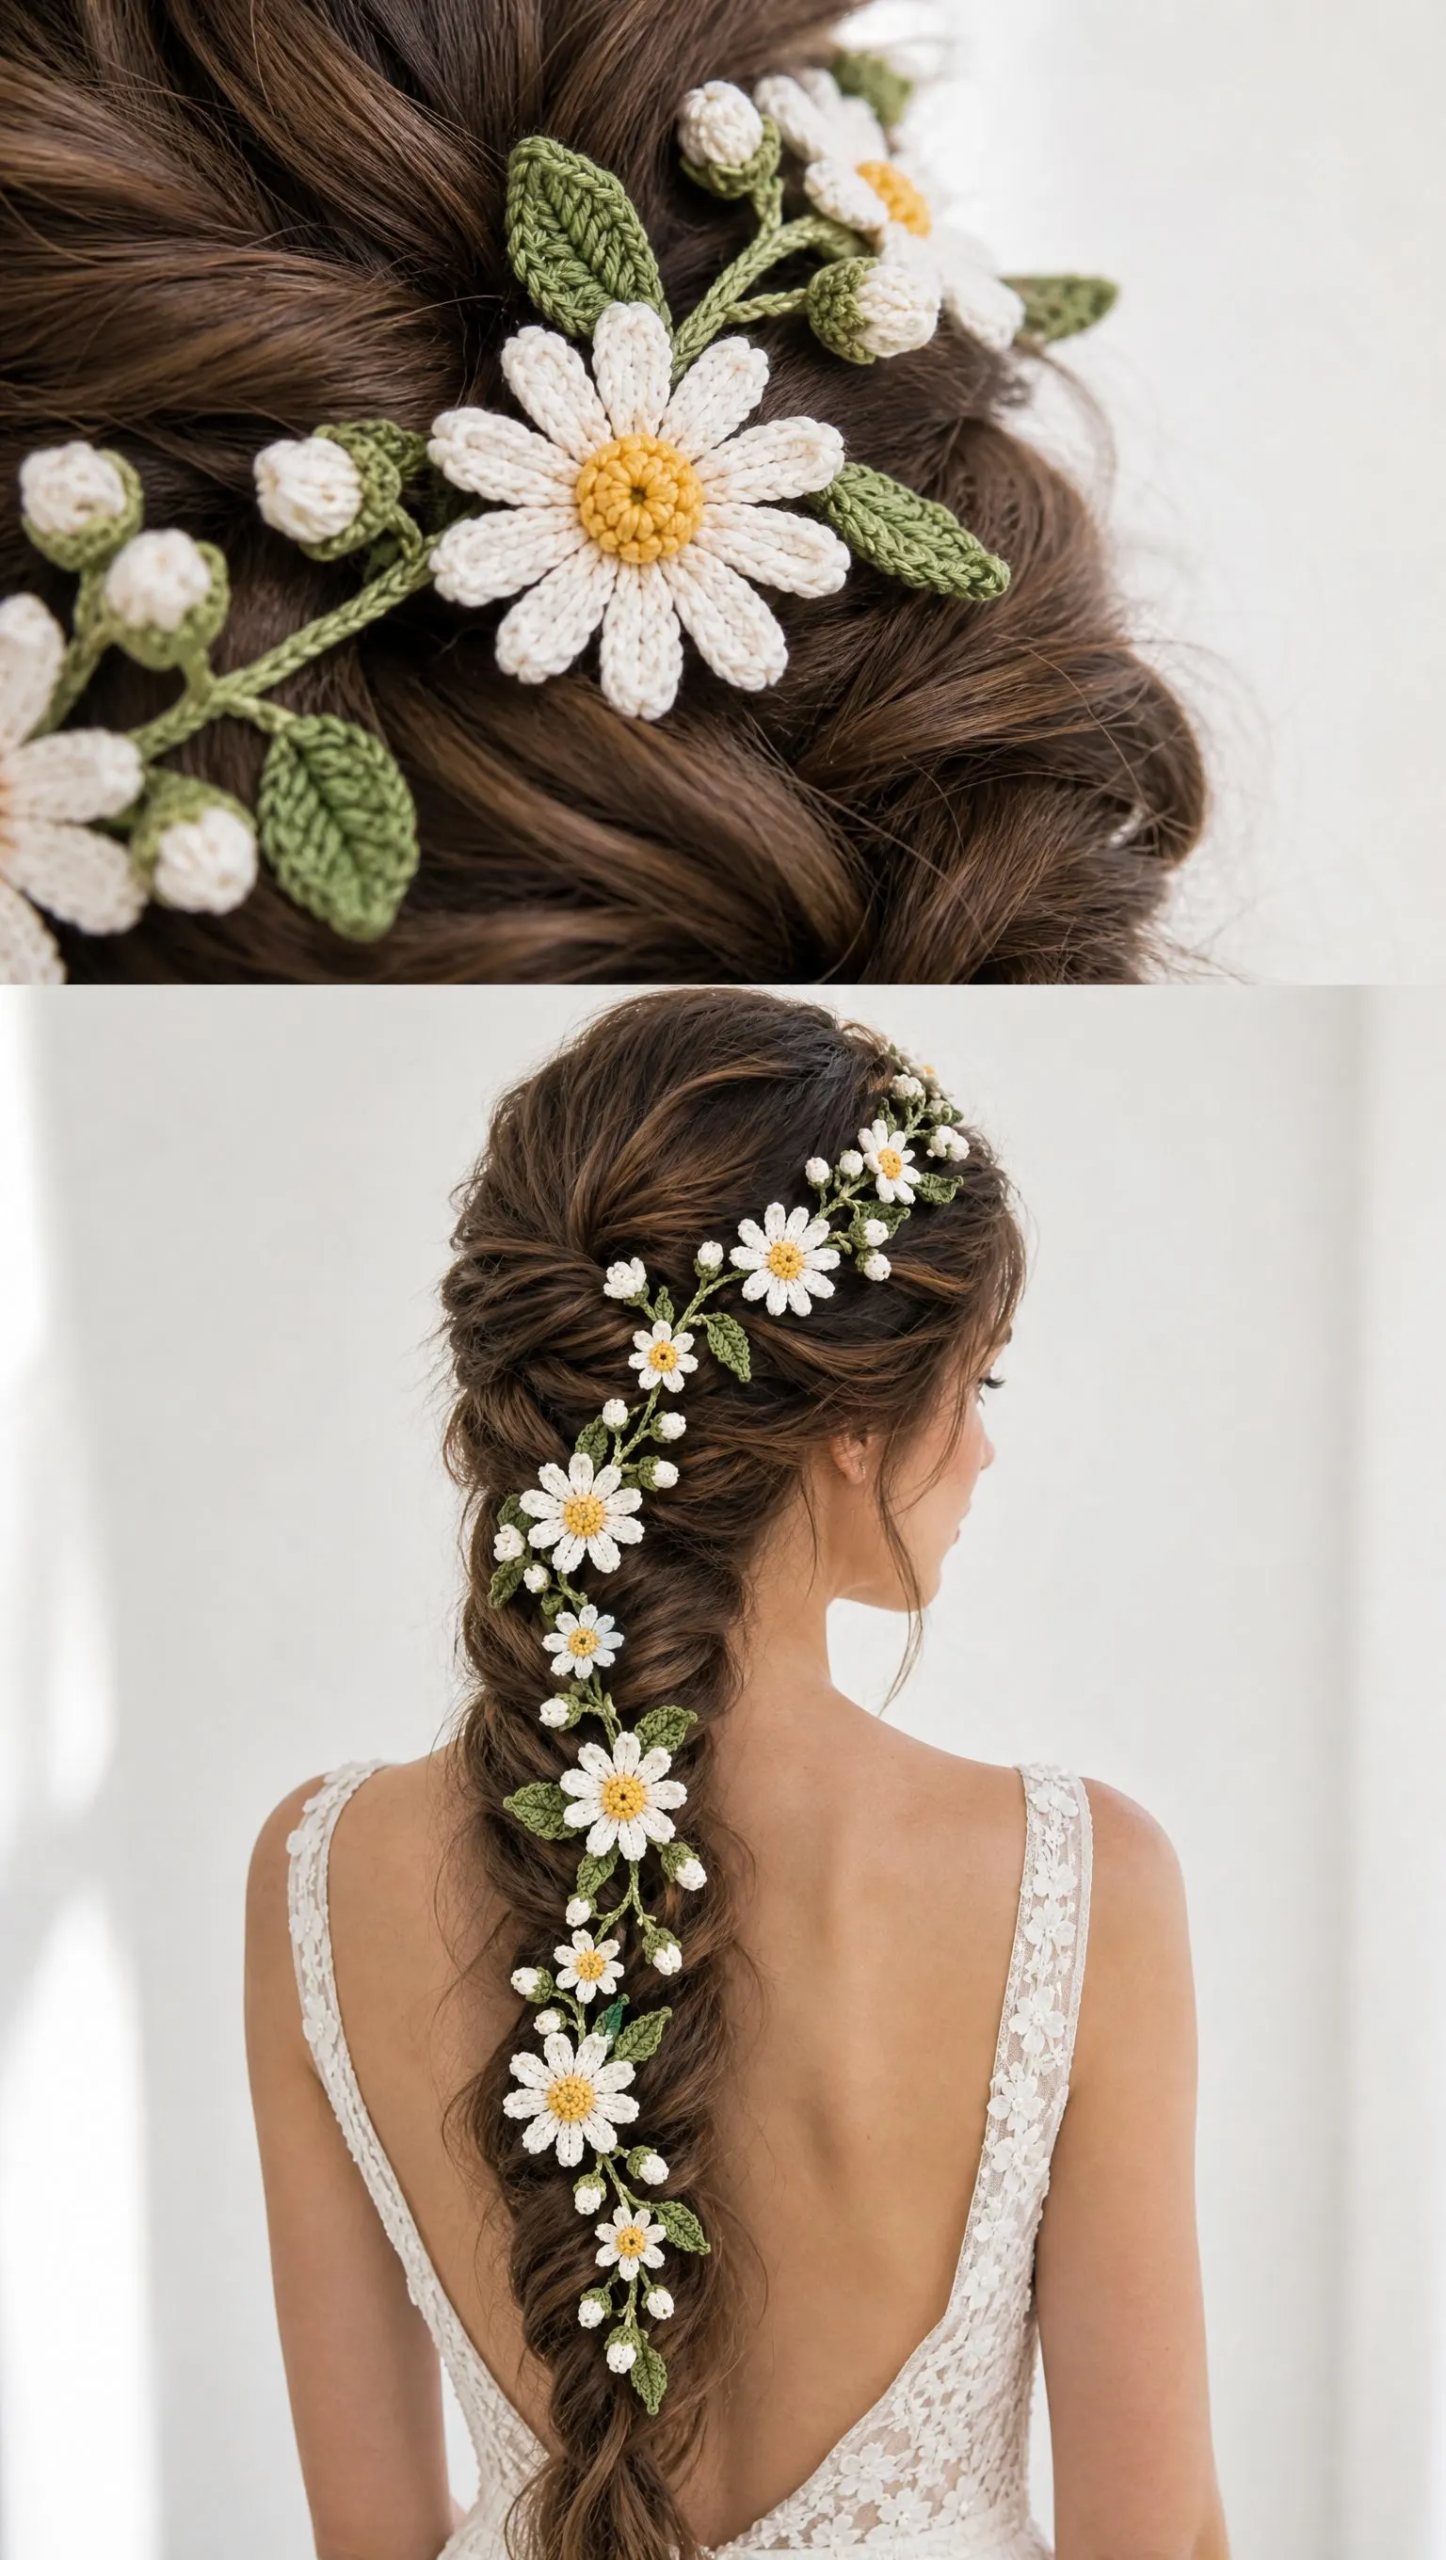
The Daisy Meadow Hair Vine breaks down into simple, repeatable motifs. You make daisies, buds, and leaves one at a time, then sew them onto a cord. No complicated shaping. No confusing construction. Just small pieces that come together into something absolutely stunning.
Whether you are an intermediate crocheter ready for a special occasion project or a confident beginner looking to stretch your skills, this pattern meets you where you are. Let me walk you through every step.
About This Crochet Pattern
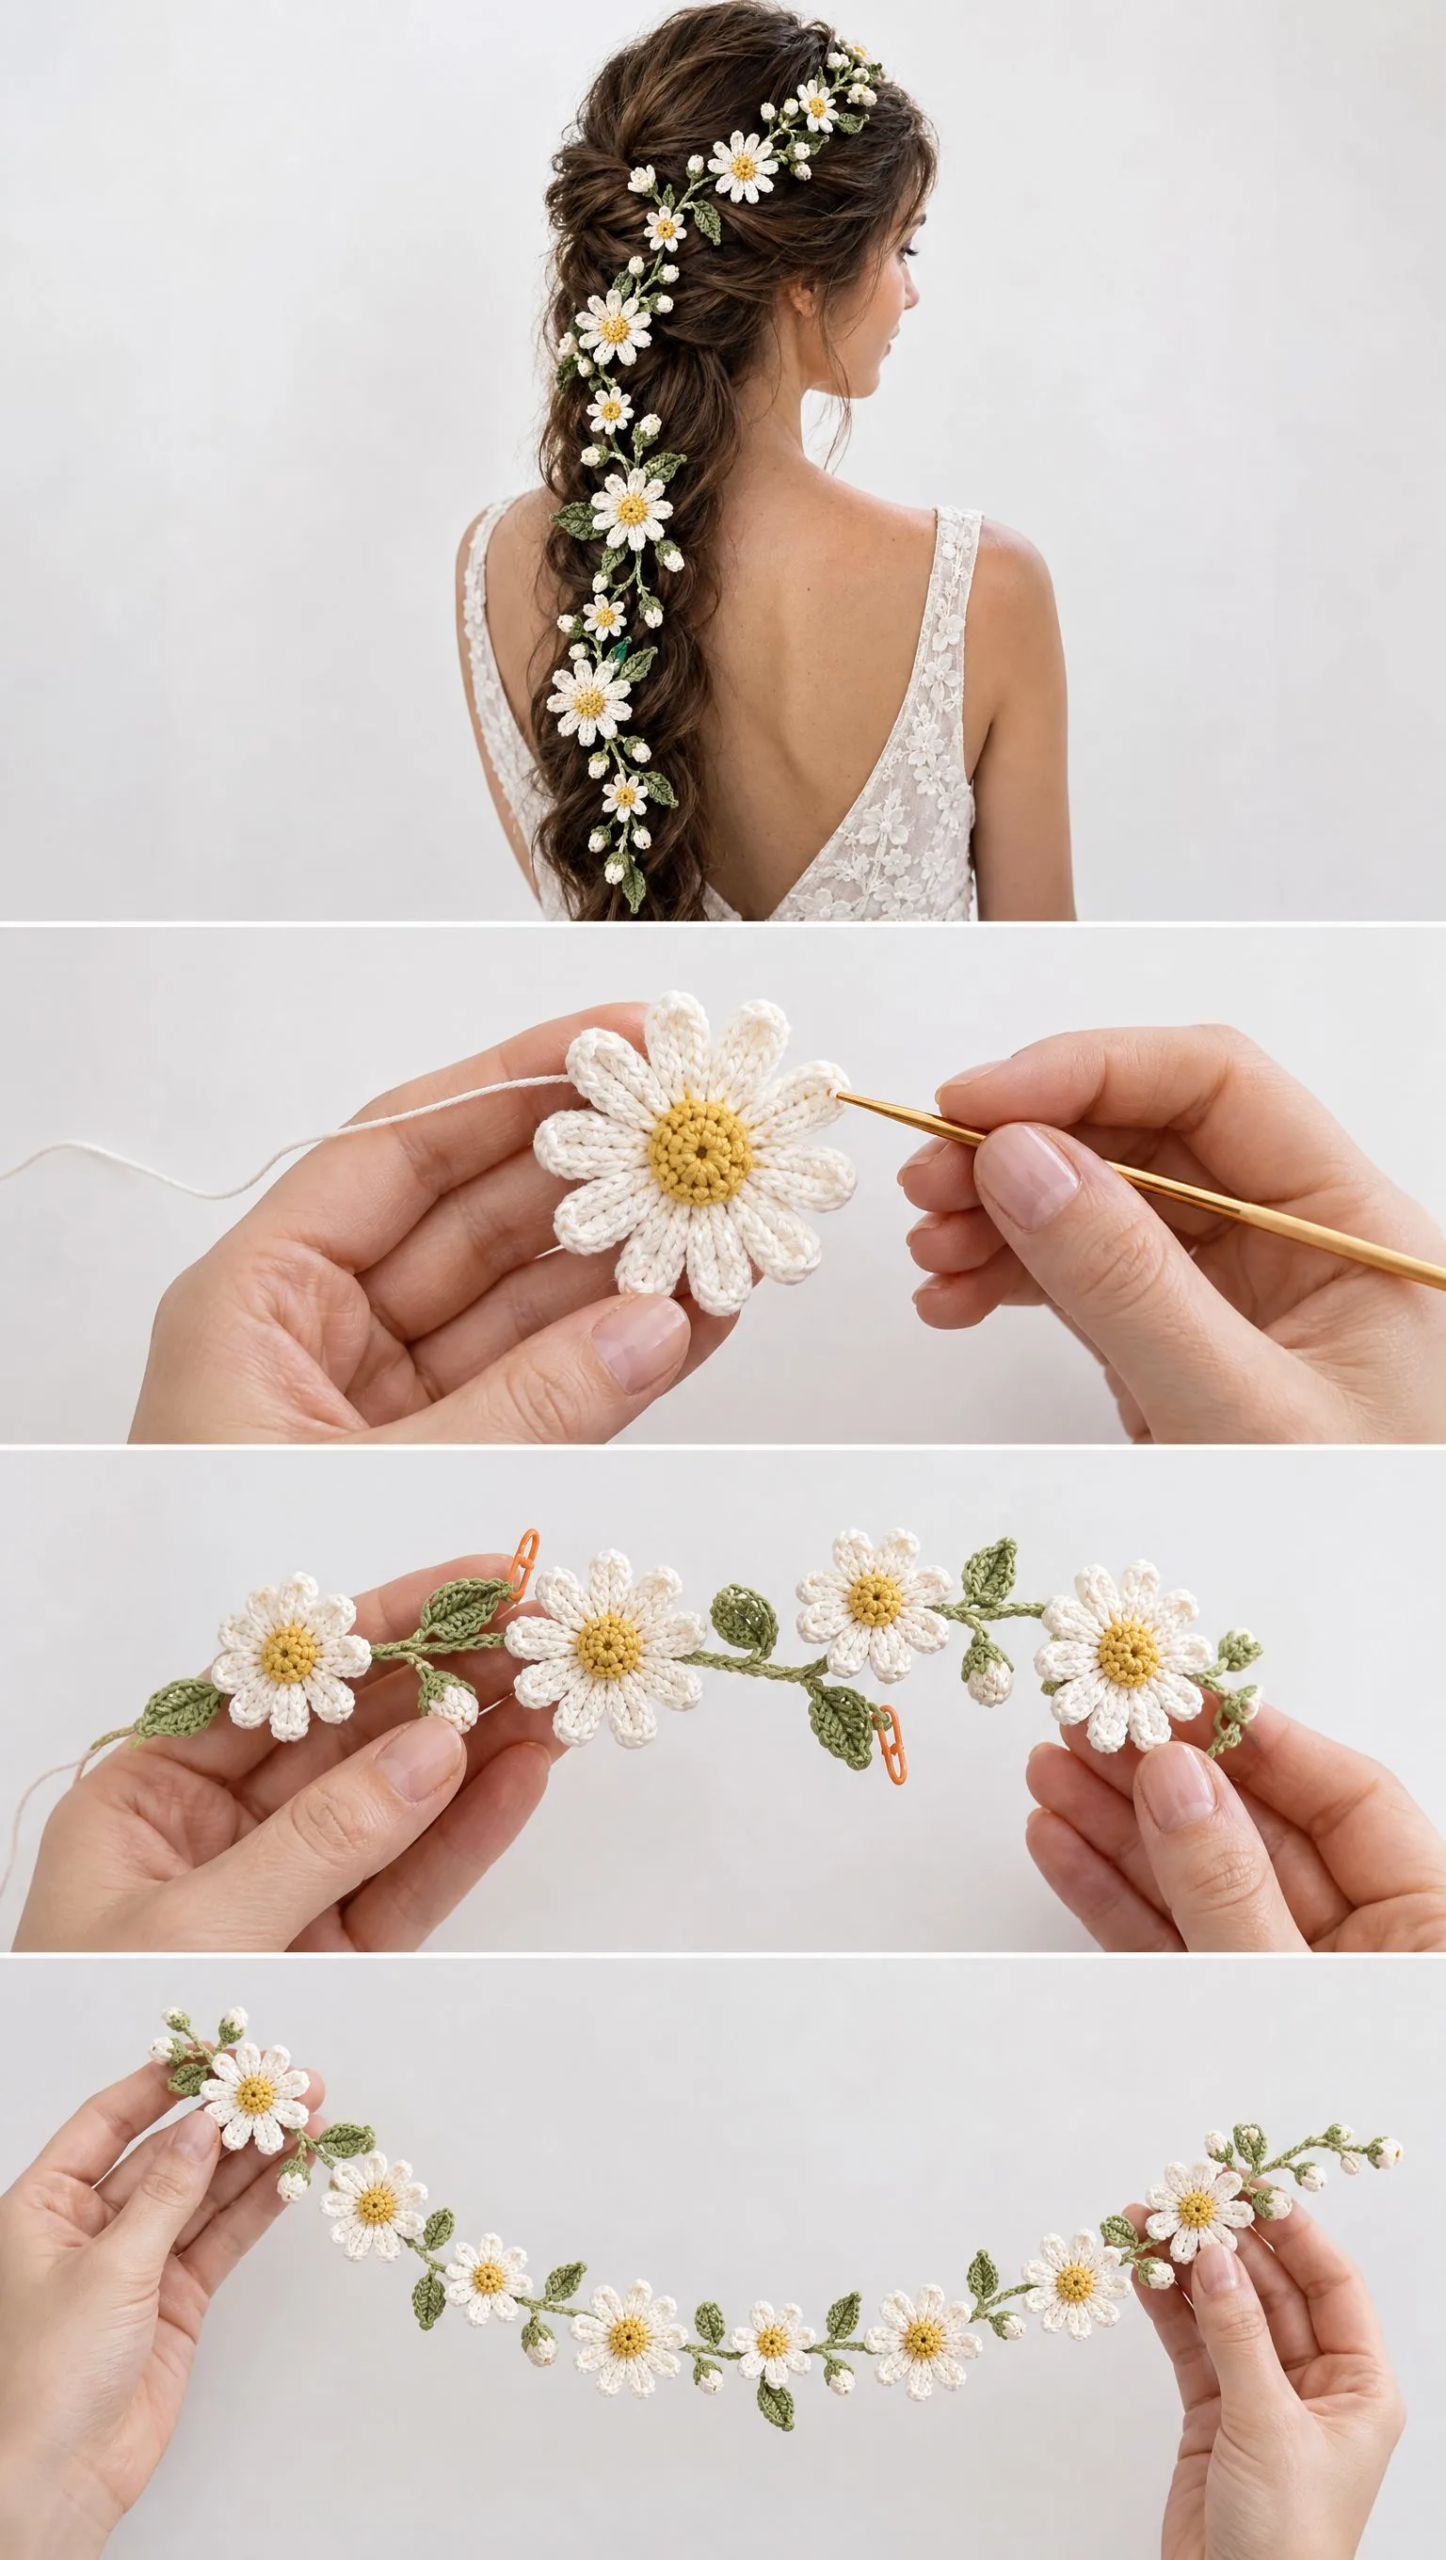
This flexible crown-to-braid floral accessory features graduated daisies, buds, leaves, and branching cords. The finished vine measures approximately 80 to 95 cm (31 to 37 inches), making it perfect for weaving through half-up styles, twisted braids, or elegant updos.
The design philosophy here is important: this is meant to be a delicate botanical accessory rather than a dense garland. You will leave 2 to 5 cm of visible cord between motifs so the hair shows through naturally. The finished piece should bend freely around twists and braids without feeling stiff.
Skill level: Intermediate
The construction method makes this pattern wonderfully modular. You crochet each component separately, then arrange and attach them however suits your hairstyle best. This means you can also customize the length and fullness to your preferences.
Finished Measurements
Understanding the sizes helps you plan your project:
| Component | Approximate Finished Size |
|---|---|
| Main vine | 80 to 95 cm / 31 to 37 inches, adjustable |
| Large daisy | 5.5 to 6.5 cm / 2¼ to 2½ inches |
| Medium daisy | 4 to 5 cm / 1½ to 2 inches |
| Small daisy | 2.8 to 3.5 cm / 1⅛ to 1⅜ inches |
| Bud | 1.5 to 2 cm / ⅝ to ¾ inch |
| Leaf | 2.5 to 4 cm / 1 to 1½ inches |
Recommended Motif Count
For one full-length vine, you will need:
You can reduce these counts for a shorter comb-length piece or add motifs for an extra-full bridal vine. The pattern is completely modular.
Materials You Will Need
Yarn:
Why cotton? Cotton is recommended because it keeps the petals crisp, photographs beautifully, and tolerates light steam blocking. Avoid fuzzy yarns if you want the slim looped-petal look shown in the photos.
Hook:
Use the size that gives firm, tidy motifs without making the cord rigid.
Notions:
Optional:
Gauge Notes
Exact gauge is not critical for this project. Aim for a firm fabric with no visible stuffing or loose loops. A medium daisy should measure about 4.5 cm (1¾ inches) after shaping. If yours is much larger, try a smaller hook or finer thread.
I always recommend making one test flower of each size before producing the full set.
Abbreviations and Special Stitches
Standard Abbreviations:
Special Stitches:
Popcorn center (PC): Work 5 dc in the indicated stitch or ring. Drop the loop from the hook. Insert hook from front to back through the first dc. Pick up the dropped loop and pull it through. Ch 1 firmly to close.
Slim looped petal: Ch the stated number, then work back down the chain with sl st, sc, and hdc as instructed. This creates a narrow petal with a softly rounded tip rather than a broad shell.
Daisy Motifs
All three daisy sizes use the same construction principle: a raised yellow center with white petals worked around its edge. Make flower centers first, then add petals with white. Keep the petal bases close together so the center looks full, but do not crowd the outer ends.
Small Daisy (Make 8)
Center, yellow:
Make MR. Work 6 sc into ring. Join with sl st.
Round 2: Ch 1, work 1 PC in each sc around, joining each popcorn with a small ch 1. Join and FO, leaving a 10 cm tail.
Petals, white:
Join white in any ch-1 space between popcorns. Ch 5, starting in 2nd ch from hook work sl st, sc, hdc, sc. Sl st into same base space. Sl st into next space. Repeat around, placing 10 petals evenly. If only 6 spaces are available, alternate one and two petals per space until you have 10 petals. FO.
Shape: Pin petals into a slight radial curve. Steam lightly from above without flattening the popcorn center.
Medium Daisy (Make 6)
Center, yellow:
MR, 8 sc. Join.
Round 2: 1 PC in each sc around, ch 1 after each. Join and FO.
Petals, white:
Join white between two popcorns. Make 11 petals: Ch 7, starting in 2nd ch from hook work sl st, sc, hdc, dc, hdc, sc. Sl st at petal base. Distribute the 11 petals evenly around the center. FO.
Optional second texture row: For a slightly fuller flower, surface sl st once around the back of the petal bases in white. This stabilizes the flower without making it bulky.
Large Daisy (Make 4)
Center, yellow:
MR, 10 sc. Join.
Round 2: 1 PC in each sc, ch 1 after each. Join.
Round 3: With yellow, sl st loosely around the outside edge of the popcorns to create a neat raised disk. FO.
Petals, white:
Join white behind the outer edge of the center. Make 12 petals: Ch 9, starting in 2nd ch from hook work sl st, sc, hdc, dc, dc, hdc, sc, sl st. Sl st back into the base. Repeat 12 times around, spacing evenly. FO.
Curved petal finish: Pin each petal with a gentle outward bow. The petals should not lie ruler-flat. A slight curve creates that natural daisy look.
Petal-count adjustment tip: The reference style calls for 10 to 12 petals. If your center circumference is smaller or larger due to yarn choice, use 10 petals on small, 11 on medium, and 12 on large as a guide. Even spacing is more important than forcing a specific stitch ratio.
Buds and Pointed Leaves
Closed White Bud (Make 14 to 18)
White bud:
MR, 5 sc.
Round 2: 2 sc in each st. (10 sts)
Rounds 3 and 4: Sc around.
Round 5: Sc2tog around. (5 sts)
Stuff very lightly with a tiny thread scrap if desired. Draw closed and FO, leaving a sewing tail.
Green calyx:
Join green around the lower edge of the bud. Ch 4, sl st in 2nd ch, sc in next ch, hdc in next ch, sl st into bud base. Repeat 5 times evenly. FO. The five small points should hug the lower half of the white bud.
Pointed Leaf (Make 14 to 18)
With green ch 9. Starting in 2nd ch from hook work: sl st, sc, hdc, dc, dc, hdc, sc, 3 sc in last ch. Working along the opposite side of the foundation chain: sc, hdc, dc, dc, hdc, sc, sl st. FO, leaving a sewing tail.
Vein: With the same yarn, surface sl st from base to tip along the center ridge, or embroider one straight backstitch line. Tug very gently to give the leaf a natural shallow cup.
Tiny Leaf Variation (Optional)
Ch 6. Starting in 2nd ch: sl st, sc, hdc, sc, sl st. 2 sc in end. Mirror the same sequence down the opposite side. Use these near the crown and around small buds for a delicate touch.
Main Vine and Branching Cords
Main Flexible Cord
With green, leave a 20 cm (8 inch) tail for finishing. Ch 260 to 300, depending on the desired final length. For an 85 to 90 cm vine in fine cotton, 280 chains is a useful starting point. Turn and sl st into the back bump of every chain to the beginning. This creates a rounded, stable cord with a smooth front.
For an even finer vine, use only the chain and lightly block it. For more durability, use the chain-plus-slip-stitch version above. Do not work tight enough to make it springy.
Optional concealed wire version: Lay fine millinery wire along the chain after the first 20 chains. As you slip stitch back, trap the wire inside the stitches. Leave at least 2 cm of wire unexposed at each end and bend the ends into tiny closed loops before covering them with yarn. This makes the vine poseable, but it is completely optional.
Branch Cords (Make 12 to 16)
For each branch, ch 12 to 30 depending on placement, then sl st back along the chain. FO with long tails at both ends. Short branches hold one bud or leaf. Longer branches can hold a bud plus a tiny leaf or small daisy.
Suggested branch lengths:
| Placement | Length | Motifs |
|---|---|---|
| Upper crown | 4 to 7 cm | tiny leaf + bud or small daisy |
| Back of head | 7 to 10 cm | medium daisy + leaf |
| Upper braid | 8 to 12 cm | small or medium daisy + bud |
| Lower braid | 10 to 14 cm | large daisy + 1 to 2 leaves + bud |
Assembly Map
Lay the main vine flat before sewing anything. Mark the approximate center and divide the vine visually into four zones. Arrange motifs first and photograph the layout before stitching so you can preserve your spacing.
Zone 1: Upper Right Crown (First 20 to 25 cm)
Zone 2: Diagonal Back-of-Head Section (Next 20 to 25 cm)
Zone 3: Upper Braid (Next 20 to 25 cm)
Zone 4: Lower Braid (Final 20 to 25 cm)
Recommended full arrangement: 4 large daisies, 6 medium daisies, 8 small daisies, 16 buds, and 16 leaves gives a balanced full-length vine. Reserve at least 3 buds and 3 leaves until the end so you can fill visual gaps after the first assembly pass.
Step-by-Step Final Assembly
1. Block All Motifs
Lightly steam or wet-block the daisies, buds, and leaves. Shape daisy petals into gentle curves and allow everything to dry completely.
2. Prepare the Main Vine
Stretch the cord to its natural relaxed length. Mark the crown end, center, and lower end with removable markers.
3. Attach Branch Cords
Sew each branch to the main vine with 4 to 6 tiny whip stitches using green yarn or matching sewing thread. Wrap the join once or twice with yarn, then bury the tails along the cord.
4. Sew on Large Daisies
Start with the four largest blooms because they define the visual rhythm. Sew through the yellow center base and the first white petal round, not through the petal tips. Use at least 5 to 6 passes for a secure base.
5. Add Medium Daisies
Place medium flowers between the large ones and along the diagonal back-of-head section. Vary the rotation so the petals do not line up mechanically.
6. Add Small Daisies
Scatter small daisies toward the crown and at the ends of selected branches. Avoid making every branch symmetrical.
7. Add Leaves
Sew each leaf only at its base and for one additional stitch along the center vein. Leaving most of the leaf free lets it lift naturally from the hair.
8. Add Buds
Sew buds at branch tips or nestle them beside flowers. Angle some upward and some outward.
9. Reinforce the Back
Turn the vine over. At each heavy flower, add one or two extra hidden stitches through the cord to prevent twisting during wear.
10. Finish the Ends
At each end, make a small 8 to 10 chain loop, sl st back to the vine, and reinforce. These loops accept bobby pins or miniature hairpins and keep the hardware concealed.
11. Final Shaping
Place the vine on a towel in the intended curve. Lightly steam from 5 to 8 cm above, keeping the iron off the crochet. Allow to cool in shape.
How to Wear and Secure Your Hair Vine
For a half-up twisted braid, begin at the upper right crown. Anchor the first end loop under a twist with a bobby pin. Sweep the vine diagonally toward the left back of the head, catching the cord under one or two sections of hair as you go. Continue down the braid, weaving the cord loosely over and under braid edges. Use hidden pins every 10 to 15 cm and beneath each large daisy. Do not pull the vine tight. A slight drape keeps the flowers dimensional.
Helpful tips:
Customization Options
Shorter hairpiece: Use a 45 to 55 cm vine with 2 large, 4 medium, and 5 small daisies, 8 to 10 buds, and 8 to 10 leaves.
Extra-full bridal version: Use a 95 to 110 cm vine with 5 large, 8 medium, and 10 small daisies. Add approximately 20 buds and 20 leaves, but preserve open gaps so the piece remains graceful.
Color variations: For a meadow look, keep the petals ivory and vary the centers from butter yellow to warm gold. For a softer garden version, use cream petals with pale sage leaves. For an autumn daisy vine, try warm ivory petals, ochre centers, and olive green leaves.
Finishing, Care, and Troubleshooting
Weaving in ends: Because the vine is handled repeatedly, weave every tail through at least 3 cm of dense stitches, reverse direction once, then trim. On flowers, bury tails through the yellow center base rather than across white petals.
Blocking: Cotton motifs can be lightly wet-blocked or steamed. Do not press directly with an iron. Pressing flattens the popcorn centers and removes the airy petal shape.
Care: Spot clean whenever possible. If necessary, hand wash briefly in cool water with mild soap, rinse without twisting, blot in a towel, and reshape flat. Store the vine flat or loosely coiled in tissue so the petals are not crushed.
Common issues and fixes:
| Problem | Adjustment |
|---|---|
| Petals curl too tightly | Loosen chain tension or go up 0.25 mm in hook size for petals only |
| Flower center looks flat | Tighten the closing ch of each popcorn and steam around, not on top of, the center |
| Vine twists under large flowers | Add 1 to 2 hidden reinforcement stitches from flower base through the main cord |
| Leaves flop downward | Stitch one extra point along the center vein to the branch |
| Accessory feels too dense | Remove one motif from every second branch and preserve open cord sections |
Maker Checklist
Before you call your project complete, run through this list:
Final Thoughts on the Daisy Meadow Hair Vine Crochet Pattern
This project takes patience, but every single step is manageable. You are just making small pieces and connecting them thoughtfully. The result is a stunning handmade accessory that looks far more complicated than it actually is to create.
Thank you so much for choosing this pattern. I genuinely hope you love making it as much as I loved designing it. If you give this daisy hair vine a try, I would absolutely love to see your finished piece. Tag me on Instagram or share a photo in my Facebook group.
If this pattern caught your eye, go ahead and save it to your Pinterest boards so you can find it when you are ready to start. And please drop a comment below if you make one. I love hearing how your projects turn out and seeing the beautiful color combinations you choose.
Want a Quick & Easy Printable Version?
Get a clean, beautifully formatted PDF of this pattern — easy to follow step by step, ready to print or save on any device. No scrolling, no distractions, just the pattern.
Get the Printable PDF →You Might Also Like
- Coastal Blue Bell Sleeve Crochet Dress Free Pattern
- Rainbow Pastel Snake Plushie Free Crochet Pattern
- Daisy Meadow Crochet Tote Free Pattern
- Sunset Ombre Floral Square Poncho Free Crochet Pattern