
Last spring, my daughter asked me to make her a bag that was "cute but not babyish." She wanted something she could wear to farmers markets and weekend trips, something that felt grown-up but still had personality. I started sketching ideas while we sat on the porch one afternoon, and she kept pointing at the daisies growing in our garden. That’s how this bag was born.
Get the Ad-Free PDF Pattern
You can find the free pattern below, or you can purchase the ad-free printable PDF from my shop.
Get the Printable PDF →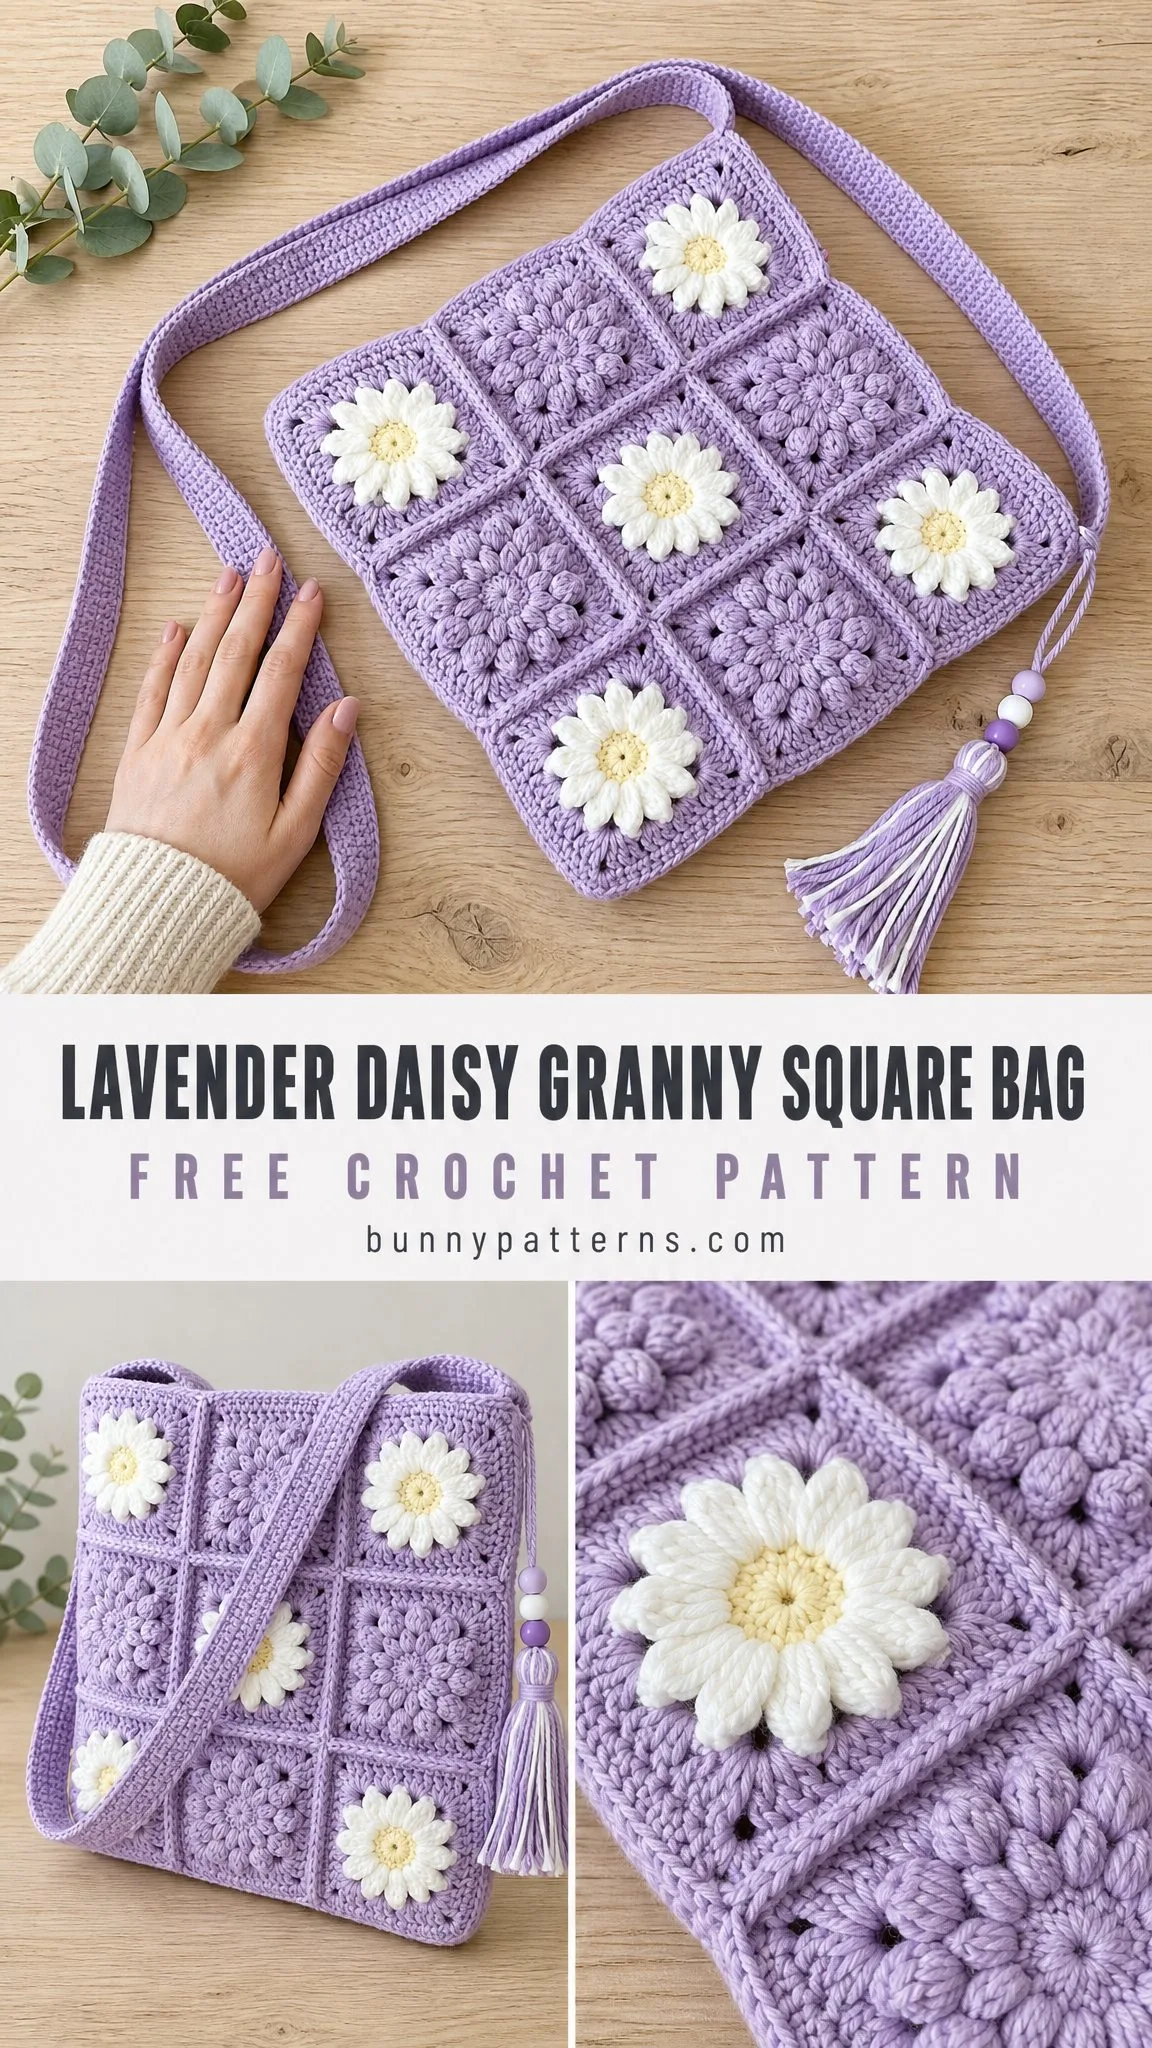
The Lavender Daisy Granny Square Bag combines textured puff stitch granny squares with sweet daisy appliques for a crossbody bag that’s equal parts practical and pretty. The soft lavender color feels fresh and modern, while the white daisies with yellow centers add just the right amount of whimsy.
This project is perfect for adventurous beginners or intermediate crocheters who want something a little more special than a basic tote. You’ll learn puff stitches, work in the round, seam motifs together, and add simple shaping at corners. It sounds like a lot, but I promise we’ll take it one step at a time.
Why You’ll Love This Granny Square Bag Pattern
This bag has so much going for it. The diamond orientation gives it an eye-catching silhouette that stands out from typical square bags. The textured granny squares create beautiful dimension, and those raised daisy appliques make people stop and ask where you got it.
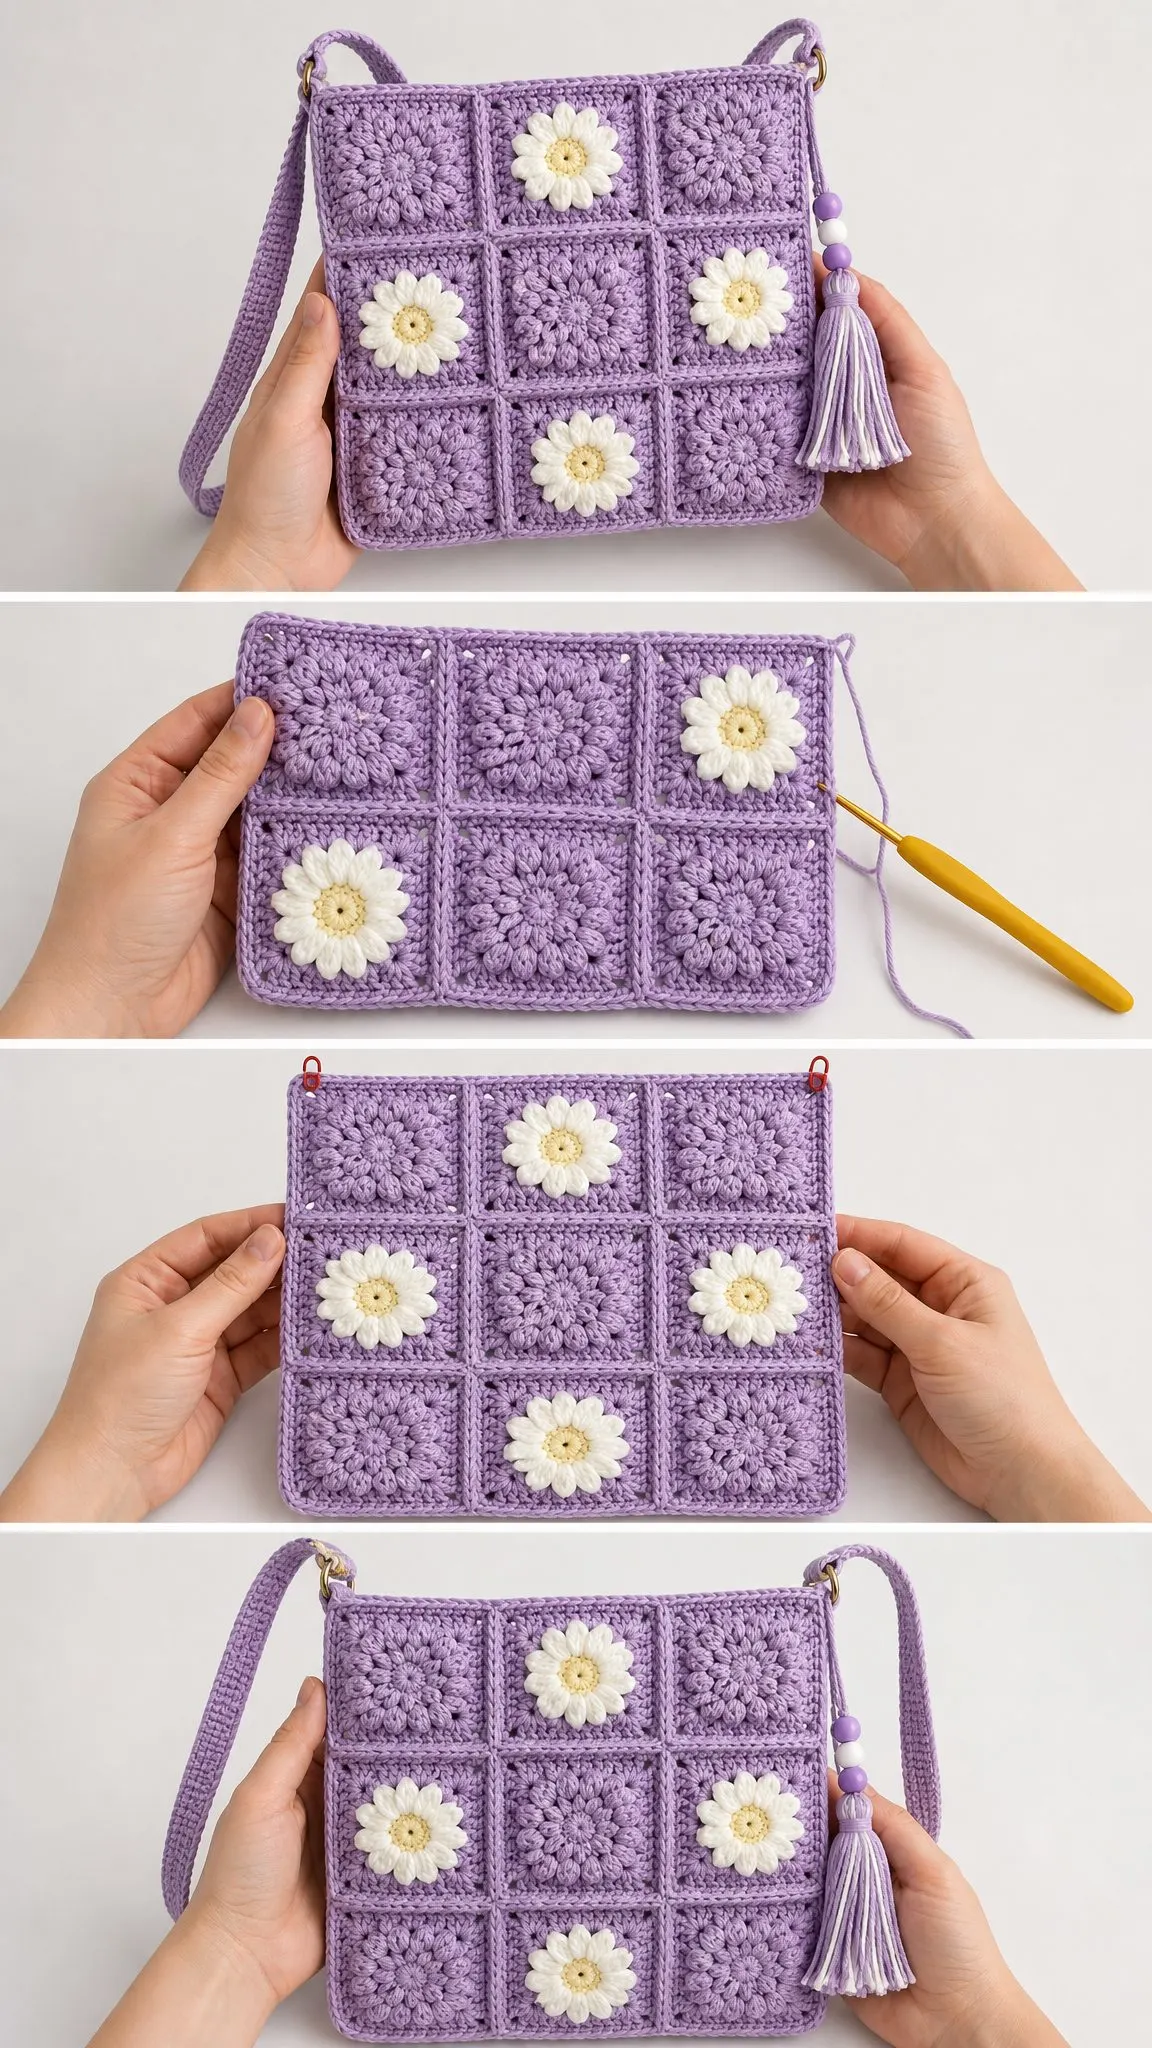
The construction is straightforward once you understand the flow. You’ll crochet 18 matching granny squares, arrange them into two panels of 9 squares each, add daisy appliques to the front panel, join everything together, then finish with a slim gusset and sturdy strap. The beaded tassel tie adds the perfect finishing touch.
Finished dimensions are approximately 9.75 inches (24.8 cm) square before rotating into the diamond display. When hung as a diamond, it measures about 13.75 inches (35 cm) from point to point. The depth is 1.5 inches (4 cm), and the strap is 44 inches (112 cm) long and 1.75 inches (4.5 cm) wide. All measurements are after light blocking.
Time estimate is 8 to 12 relaxed hours, including blocking and finishing. This makes it a lovely weekend project or something to work on over several evenings.
Materials You’ll Need
Gather these supplies before you begin:
Yarn:
Hook:
Extras:
Yarn Suggestions
Paintbox Yarns Cotton DK offers crisp stitch definition and a wide color range. Knit Picks CotLin DK is a soft cotton and linen blend with a polished handmade drape. Scheepjes Catona held slightly relaxed works beautifully with a 3.0 to 3.5 mm hook if you swatch carefully.
When substituting yarn, choose a smooth DK weight yarn that gives firm motifs without stiffness. Avoid very fuzzy yarns because they blur the puff flower texture, and you’ll lose that gorgeous dimensional effect.
Gauge
Getting gauge right matters for this project. One blocked granny square should measure 3.25 inches (8.25 cm) across. For the side gusset, work in single crochet (sc) and aim for 18 sc and 24 rows equaling 4 inches (10 cm).
Milestone check: After joining 3 squares across, one panel side should measure about 9.75 inches (24.8 cm). If your measurements are off, adjust your hook size and try again.
Abbreviations and Stitch Guide
This pattern uses US crochet terms. Here’s what you need to know:
UK crocheters: US sc equals UK dc, and US dc equals UK tr.
Special Stitches
Puff Stitch: Yarn over, insert hook in indicated stitch or space, pull up a loop to double crochet height. Repeat twice more in the same place. You’ll have 7 loops on your hook. Yarn over and pull through all 7 loops. Chain 1 to lock the puff when instructed. This creates a beautiful rounded, textured bump.
Standing Single Crochet: Place a slip knot on your hook, insert hook in indicated stitch, pull up a loop, yarn over and pull through both loops. Use this when joining a new color neatly without a visible join.
Invisible Join: Cut yarn and pull tail through final stitch. Thread tapestry needle, insert under both loops of first stitch of round, then back down through the top of the final stitch. Weave in tail. This creates a seamless finish.
Left-handed note: Work the same instructions in the opposite direction. The bag layout is symmetrical, so the daisy positions and strap placement remain the same.
Textured Granny Square Pattern
Make 18 squares in lavender. Keep the right side facing throughout unless instructed otherwise. Block each square to 3.25 inches (8.25 cm).
Round 1: Make a magic ring, chain 3 (this counts as a double crochet), work 15 double crochet in ring, slip stitch to top of beginning chain-3. (16 dc)
Round 2: Chain 2, puff stitch in same stitch, chain 1. Puff stitch in next double crochet, chain 1. Repeat from * around, slip stitch to first puff. (16 puffs + 16 ch-1 spaces)
Round 3: Slip stitch into next chain-space. Chain 3, 2 double crochet in same space, chain 2, 3 double crochet in same space. 3 double crochet in each of next 3 chain-spaces, (3 dc, ch 2, 3 dc) in next chain-space. Repeat from * 3 times, omitting final corner already made. Slip stitch to beginning chain-3. (60 dc + 4 corner ch-2 spaces)
Round 4: Chain 1, single crochet in each double crochet. (Single crochet, chain 2, single crochet) in corner chain-space, single crochet in each double crochet to next corner. Repeat from * around, slip stitch to first single crochet. (68 sc + 4 corner ch-2 spaces)
Round 5: Chain 3, double crochet in same corner space, chain 2, 2 double crochet in same space. Double crochet in each single crochet to next corner, (2 dc, ch 2, 2 dc) in corner space. Repeat from * around, slip stitch to beginning chain-3. (84 dc + 4 corner ch-2 spaces)
Motif milestone: Each side should have 21 double crochet between corner chain-2 spaces on Round 5. Count your stitches to make sure you’re on track.
Daisy Applique Pattern
Make 4 daisies. Use yellow for the center and white for the petals.
Center Round 1: With yellow yarn, make a magic ring. Chain 1, work 12 single crochet in ring, slip stitch to first single crochet. Fasten off. (12 sc)
Petals: Join white yarn in the front loop only of any single crochet. In same front loop only work: slip stitch, chain 2, 2 double crochet, chain 2, slip stitch. Repeat this petal sequence in the front loop only of each remaining single crochet around. Work an invisible join. (12 petals)
The petals naturally curl upward because you’re working in the front loops only, leaving the back loops untouched. This creates that lovely dimensional daisy effect.
Panel Layout and Joining
Arrange 9 squares for the front panel and 9 squares for the back panel in a 3 by 3 grid.
Front panel layout before rotating:
Back panel layout: All plain squares.
When you rotate the finished panel so it hangs as a diamond, the daisies will be positioned at the top, left, right, and bottom outer-middle squares. Pin one daisy to each of these four front squares. Sew through petal bases and center edge so petals stay raised.
Join Squares
Hold two squares with right sides together. Slip stitch through the back loop only of matching edge stitches, keeping the seam neat and slightly raised. This creates a beautiful textured ridge on the right side.
Join the 3 rows horizontally first, then join the rows vertically. Repeat for the back panel.
Panel edging: Work an edging around each completed panel. Join lavender in any corner, chain 1, work 63 single crochet along each side and (single crochet, chain 2, single crochet) in each corner. Work an invisible join. (252 sc + 4 corner ch-2 spaces)
Milestone check: Each side should measure about 9.75 inches (24.8 cm).
Gusset, Strap, and Tassel
Side and Bottom Gusset
Step 1: Chain 8. Row 1: Single crochet in 2nd chain from hook and each chain across, turn. (7 sc)
Step 2: Rows 2 through 189: Chain 1, single crochet in each stitch across, turn. (7 sc per row)
Step 3: Pin gusset from one upper side point, around the lower point, to the opposite upper side point. Match 1 gusset row to each panel-edge single crochet along 3 sides. (189 rows)
Step 4: Seam gusset to front panel, then back panel, using mattress stitch or slip stitch seam. Leave the top edge open. (3 joined sides)
Strap
Step 1: Chain 9. Row 1: Single crochet in 2nd chain from hook and each chain across, turn. (8 sc)
Step 2: Rows 2 through 264: Chain 1, single crochet in each stitch across, turn. Fasten off leaving long tails. (8 sc per row)
Step 3: Sew strap ends securely to the two upper side points with a reinforced square of stitches. (44 inches / 112 cm finished length)
Tassel Tie
Cut 18 strands, each 12 inches (30 cm) long. Fold together, wrap the neck firmly, and trim evenly. Make a 20 inch (51 cm) twisted cord, thread on beads, attach tassel to one upper side point, and use it as a decorative tie.
Finishing and Customization
Blocking
Steam or wet-block squares before joining. After assembly, gently block the bag flat, shaping the points and straightening the seams. Proper blocking makes a huge difference in how professional your finished bag looks.
Optional Lining
Cut two fabric squares slightly smaller than the crocheted panels plus seam allowance. Sew lining pieces together, insert into bag, and hand-stitch to the inside top edge. A lining adds structure and keeps small items from poking through.
Closure Options
The tassel tie is decorative. Add a magnetic snap inside the top edge if you prefer a firmer closure.
Adjusting Size
For a smaller pouch, use sport weight yarn or make 2 by 2 panels. For a larger tote, use 4 by 4 panels and lengthen the gusset to match the new 3-side edge count.
Adjusting Strap Length
Add or remove strap rows in multiples of 6 rows, which changes length by about 1 inch (2.5 cm) at gauge.
Care Instructions
Hand wash cool, reshape, and dry flat. If lined or beaded, spot clean when possible. Avoid hanging while wet because the strap can stretch.
Troubleshooting Common Issues
Squares cup or ruffle: Loosen or tighten Round 3 corners and re-block to 3.25 inches (8.25 cm).
Panel twists: Block all squares first and seam with matching edge stitches.
Gusset feels too long: Pin all corners first, then ease extra rows evenly near the bottom point.
Strap stretches: Sew a ribbon or fabric strip to the underside for extra stability.
Make This Lavender Daisy Bag Your Own
This crochet pattern offers so many opportunities for personalization. Try different color combinations like soft pink with white daisies, sage green with cream flowers, or navy blue with sunny yellow centers. You could add more daisies, fewer daisies, or skip them entirely for a simpler look.
The textured granny squares look beautiful on their own, so don’t feel pressured to include all the embellishments if you want something more minimalist. This bag works up beautifully as a gift for birthdays, graduations, or just because.
I hope you enjoy making this Lavender Daisy Granny Square Bag as much as I enjoyed designing it. The combination of textures, the sweet daisies, and the practical crossbody style make it a project I reach for again and again.
If this pattern speaks to you, save it to your Pinterest boards so you can find it when you’re ready to start. And please, if you make this bag, leave a comment below. I would absolutely love to see your color choices and hear how the project went for you. Happy crocheting!
Want a Quick & Easy Printable Version?
Get a clean, beautifully formatted PDF of this pattern — easy to follow step by step, ready to print or save on any device. No scrolling, no distractions, just the pattern.
Get the Printable PDF →You Might Also Like
- Lavender Mini Backpack Free Crochet Pattern
- Midnight Navy Elegant Braided Clutch Free Crochet Pattern
- Cinderella Blue Baby Dress Set Free Crochet Pattern
- Dusty Rose Lace Panel Crochet Sweater Free Pattern