
Looking for a handmade accessory that doubles as a thoughtful gift? This delicate daisy wrist cuff works up in just a few hours using basic crochet stitches and a small amount of cotton thread.
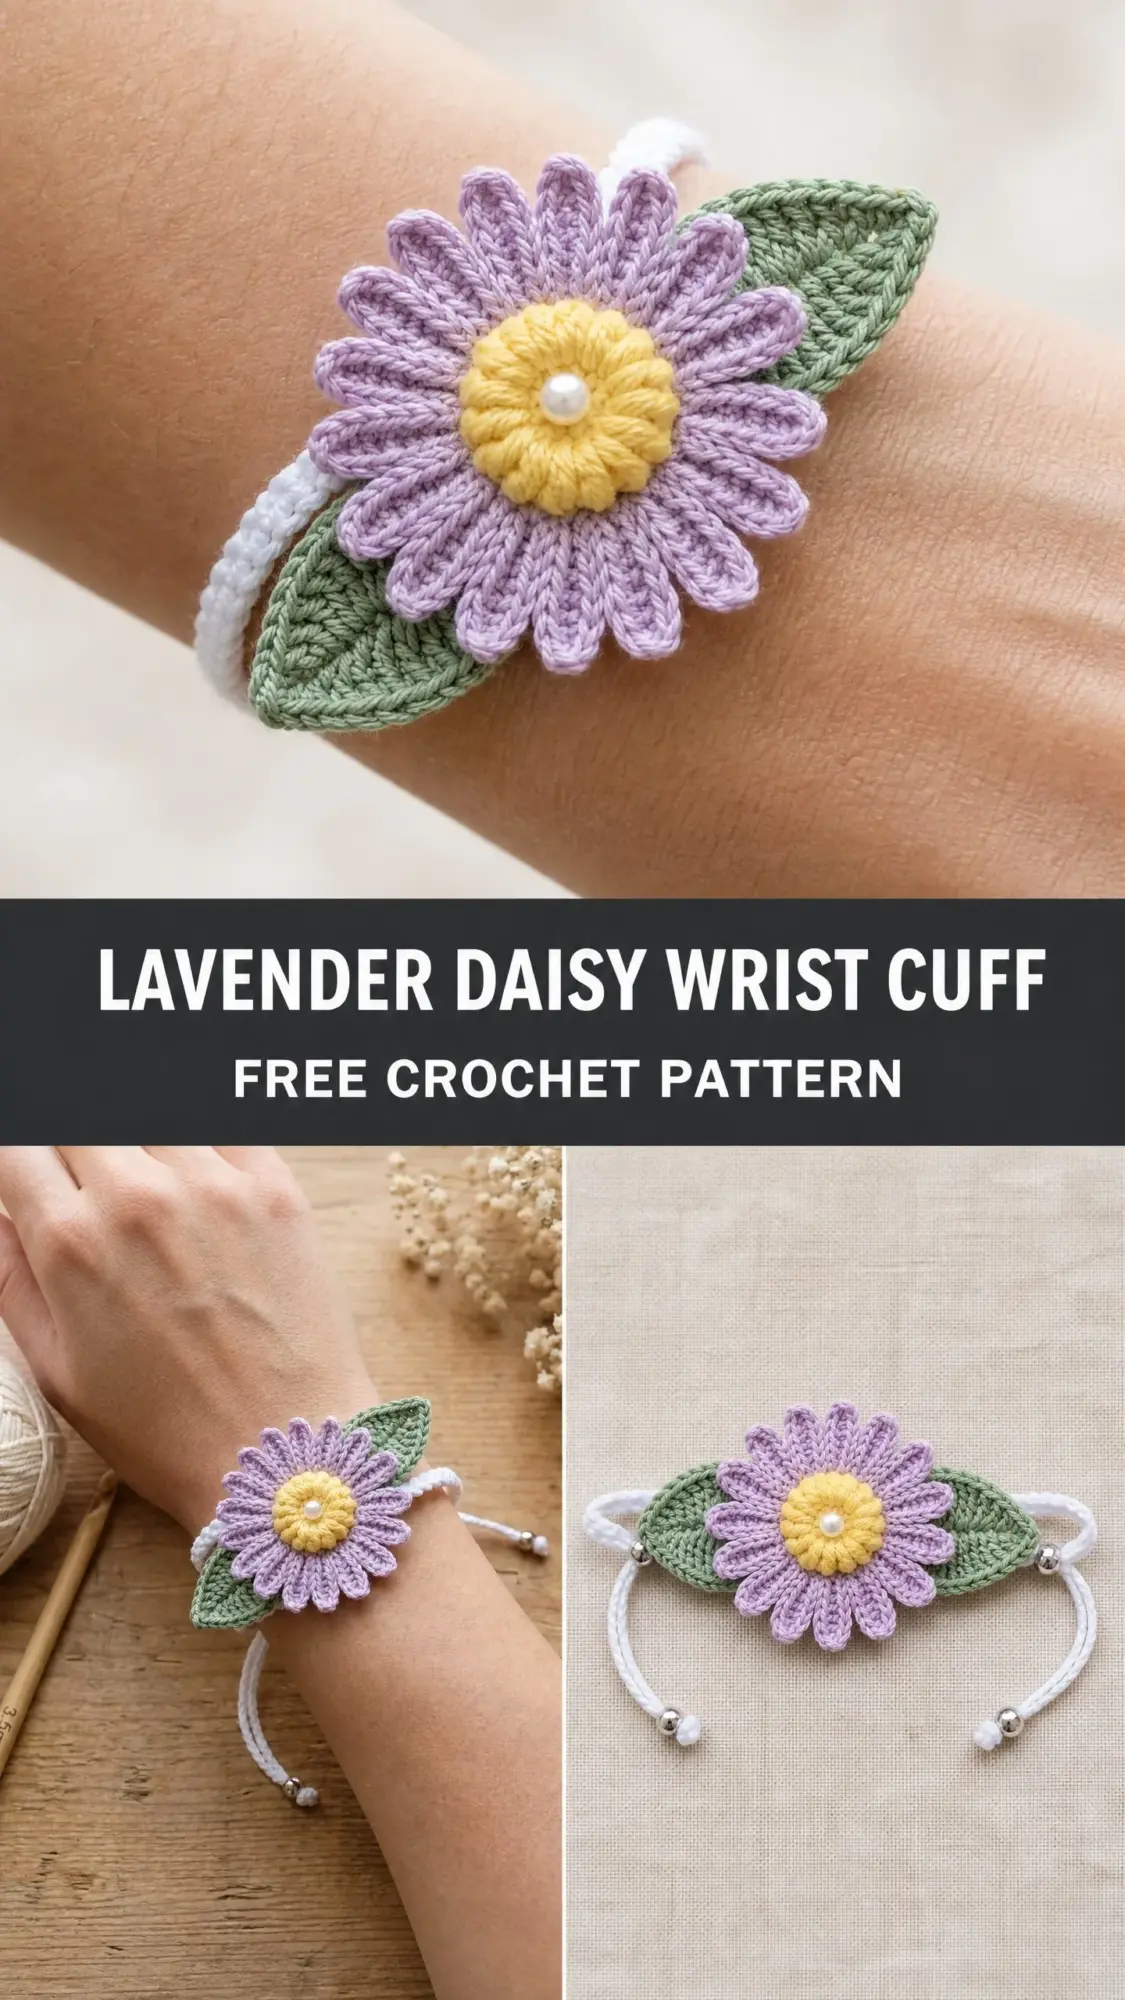
The design features a sweet lavender flower with a golden yellow center, two sage green leaves, and an adjustable cord closure that fits most wrist sizes. It is perfect for spring celebrations, bridal showers, or simply treating yourself to something pretty.
Whether you want to use up leftover thread from other projects or create matching bracelets for a group of friends, this crochet pattern delivers a polished result without complicated techniques.
Why You Will Love This Crochet Pattern
This wrist cuff sits right in that sweet spot between quick project and impressive finished piece. The flower motif looks intricate, but it comes together using familiar stitches worked in the round. The leaves are crocheted flat with simple shaping. And the cord closure? No special jewelry findings required.
I especially love how lightweight this bracelet feels on the wrist. Because you are working with fine cotton thread, the finished piece is comfortable enough to wear all day without that heavy, bulky feeling some crocheted jewelry can have.
The adjustable sliding knot closure means you do not need to worry about getting exact wrist measurements. One size genuinely fits most, which makes this an ideal gift when you cannot ask the recipient to measure themselves without spoiling the surprise.
Materials You Will Need
Gathering your supplies before you start keeps the project flowing smoothly. Here is everything you need to complete this crochet tutorial from start to finish.
Yarn and Thread:
Hook:
Additional Materials:
Yarn Suggestions:
If you are wondering which specific thread to purchase, any of these work beautifully:
1. DMC Petra Size 5 Crochet Cotton: Widely available with excellent stitch definition
2. Aunt Lydia’s Classic Crochet Thread Size 10: The closest match to the original design
3. Anchor Artiste Mercer Crochet Thread Size 10: Lovely sheen that enhances the petal texture
Avoid fuzzy or textured yarns for this project. The smooth surface of mercerized cotton shows off the stitch detail that makes this flower pop.
Gauge Information
Getting your gauge right matters here because the flower needs to sit proportionally on the cord.
Gauge Swatch: Work the flower center (Rounds 1 and 2) in Color B. After Round 2, the diameter should measure approximately 0.75 inch / 1.9 cm.
Full flower after all rounds: approximately 2 inches / 5 cm diameter
If your flower measures larger than 2.25 inches, go down one hook size. If smaller than 1.75 inches, go up one hook size.
Finished Measurements
Skill Level
This pattern is rated intermediate. You should be comfortable with working in a magic ring, joining rounds invisibly, and crocheting small-scale motifs with thread-weight yarn. The leaf shaping uses increases and decreases in sequence, but nothing too tricky.
If you have never worked with thread yarn before, give yourself extra time. The small hook and fine thread require more precise tension than worsted weight projects.
Abbreviations (US Terms)
Let me walk you through every abbreviation before we begin. If you encounter one in the pattern and cannot remember what it means, scroll back here.
Special Stitches Explained
These two techniques give the bracelet its polished, professional finish. Take a moment to read through them before starting.
Daisy Petal Cluster (DPC)
This stitch creates one raised petal. Into the designated stitch or space: yarn over twice (as for treble), insert hook, yarn over and pull up a loop (4 loops on hook), yarn over and pull through 2 loops (3 loops on hook), yarn over and pull through 2 loops (2 loops on hook). Do not complete the treble yet.
Yarn over twice again, insert hook into the same stitch or space, yarn over and pull up a loop (5 loops on hook), yarn over and pull through 2 loops (4 loops on hook), yarn over and pull through 2 loops (3 loops on hook). Now yarn over and pull through all 3 remaining loops. Chain 1 to close and lock the cluster.
This forms one rounded petal-shaped bump. It sounds complicated written out, but once you complete the first one, the motion becomes natural.
Invisible Join (inv join)
Cut yarn leaving a 6-inch tail. Thread tail onto tapestry needle. Insert needle from front to back under both loops of the first stitch of the round. Then insert needle back down through the center of the last stitch you worked. Pull gently to match tension of surrounding stitches.
This technique closes the round without a visible seam, giving your flower a seamless, professional appearance.
Adjustable Sliding Knot (for cord closure)
Take the two cord ends coming from each side of the bracelet. Cross the right cord over the left cord. With the right cord, create a small loop around the left cord. Pass the right cord end through this loop twice (a double half hitch). Pull to tighten snugly but not so tight it cannot slide.
Repeat symmetrically with the left cord around the right cord. Thread one silver barrel bead onto each knot to lock it. Thread one small stop bead onto each cord end and knot or glue to prevent fraying.
Pattern Notes Before You Begin
A few things to keep in mind as you work through this step by step crochet pattern:
1. The bracelet is constructed in four stages: flower center, outer petal layer, leaves, then assembly and cord finishing.
2. The flower is worked in two layers. The inner center (Rounds 1 to 3) uses Color B. The outer petals (Rounds 4 to 5) use Color A. Working the petals into the back loops creates that lovely raised center effect.
3. Leaves are worked flat from a foundation chain.
4. All rounds are joined with a slip stitch to the first stitch unless the pattern specifies an invisible join.
5. Do not turn at the end of rounds unless specifically instructed.
6. When changing colors, fasten off the previous color and join the new color with a standing stitch or slip knot join. Weave in all ends before assembly.
7. The cord is not crocheted. It is threaded through the back of the assembled motif and tied with adjustable sliding knots.
Step by Step Instructions
Flower Center (Color B)
Round 1: Make a MR. Ch 1 (does not count as a stitch throughout). Work 6 sc into MR. Pull tail to close ring. Join with sl st to first sc. (6 sc)
Round 2: Ch 1. Work 2 sc in each sc around. Join with sl st to first sc. (12 sc)
Round 3: Ch 1. Work 1 sc in first sc, 2 sc in next sc. Rep [1 sc in next sc, 2 sc in next sc] around. Join with sl st to first sc. (18 sc)
The center circle should measure approximately 0.5 inch in diameter at this point. Fasten off Color B. Weave in ends.
Checkpoint: Your yellow center should be a flat, even circle with 18 stitches visible around its edge. No cupping or ruffling. If it cups, go up one hook size. If it ruffles, go down one hook size.
Outer Petal Layer (Color A)
Setup: Join Color A with a sl st to the back loop only of any stitch in Round 3 of the flower center.
Round 4: Working in back loops only of Round 3. Ch 1. Work 1 sc in each sc around. Join with sl st to first sc. (18 sc)
This round is the base ring for the petals. Working into back loops causes the front loops to remain free, creating that beautiful separation between center and petals.
Round 5 (Petal Round): This round creates 9 petals. Ch 1. [Work 1 DPC in next sc, sk next sc] repeat 9 times. Join with sl st to base of first DPC. (9 petals)
Each DPC is worked into one stitch, then the following stitch is skipped. The 18 stitches divide evenly into 9 repetitions. The petals will naturally curve forward and upward, away from the center.
Fasten off Color A with an invisible join. Weave in ends.
Checkpoint: You should have 9 evenly spaced rounded petals surrounding the yellow center. The petals should fan forward. Lay the flower flat on a surface. The diameter should measure approximately 2 inches. The center should remain visible and raised above the petal layer.
Leaves (Make 2, both in Color C)
The leaf is worked flat. Each row is turned. The foundation chain counts as part of the leaf tip.
Foundation: Ch 13.
Row 1 (RS): Starting in second ch from hook, sc in each ch across. Turn. (12 sc)
Row 2 (WS): Ch 1. Sc in first sc. Hdc in next sc. Dc in next 2 sc. Tr in next 2 sc. Dc in next 2 sc. Hdc in next sc. Sc in next sc. 2 sc in last sc. Turn. (13 sts)
Row 3 (RS): Ch 1. 2 sc in first sc. Sc in next sc. Hdc in next sc. Dc in next 2 sts. Tr in next 2 sts. Dc in next 2 sts. Hdc in next st. Sc in next sc. Sc2tog over last 2 sts. Turn. (13 sts)
Row 3 increases at the wide base end and decreases at the narrow tip end, beginning to taper the leaf shape.
Row 4 (WS): Ch 1. Sc2tog over first 2 sts. Sc in next sc. Hdc in next st. Dc in next 2 sts. Tr in next 2 sts. Dc in next 2 sts. Hdc in next st. Sc in next sc. 2 sc in last sc. Turn. (13 sts)
Row 5 (RS): Ch 1. 2 sc in first sc. Sc in next sc. Hdc in next sc. Dc in next 2 sts. Tr in next 2 sts. Dc in next 2 sts. Hdc in next st. Sc2tog over last 2 sts. Turn. (13 sts)
Row 6 (WS): Ch 1. Sc2tog over first 2 sts. Hdc in next st. Dc in next 2 sts. Tr in next 2 sts. Dc in next 2 sts. Hdc in next st. Sc in next sc. Sc2tog over last 2 sts. Turn. (11 sts)
Row 7 (RS): Ch 1. Sc2tog over first 2 sts. Hdc in next st. Dc in next 2 sts. Tr in next sc. Dc in next 2 sts. Hdc in next st. Sc2tog over last 2 sts. Turn. (9 sts)
Row 8 (WS): Ch 1. Sc2tog over first 2 sts. Dc in next 2 sts. Tr in next st. Dc in next 2 sts. Sc2tog over last 2 sts. Turn. (7 sts)
Row 9 (RS): Ch 1. Sc2tog over first 2 sts. Dc in next st. Tr in next st. Dc in next st. Sc2tog over last 2 sts. Turn. (5 sts)
Row 10 (WS): Ch 1. Sc2tog over first 2 sts. Sc in next st. Sc2tog over last 2 sts. Turn. (3 sts)
Row 11 (RS): Ch 1. Draw yarn through all 3 sts simultaneously (sc3tog). Fasten off. (1 st, leaf tip)
Edging Round: Join Color C to any edge stitch along the long side of the leaf. Work 1 round of sc evenly around the entire leaf perimeter, working 1 sc into each row end along the sides and 1 sc into each remaining foundation chain loop along the bottom edge. At the tip, work 3 sc into the single tip stitch to allow the corner to turn without puckering. Join with sl st to first sc. Fasten off. Weave in ends.
Checkpoint: Each finished leaf should measure approximately 1.5 inches in length and 0.75 inch at its widest point. The leaf should lie flat with a pointed tip at one end and a rounder base at the other. Make a second identical leaf.
Assembly Instructions
Now comes the fun part. You get to see all your pieces come together into one beautiful wrist cuff.
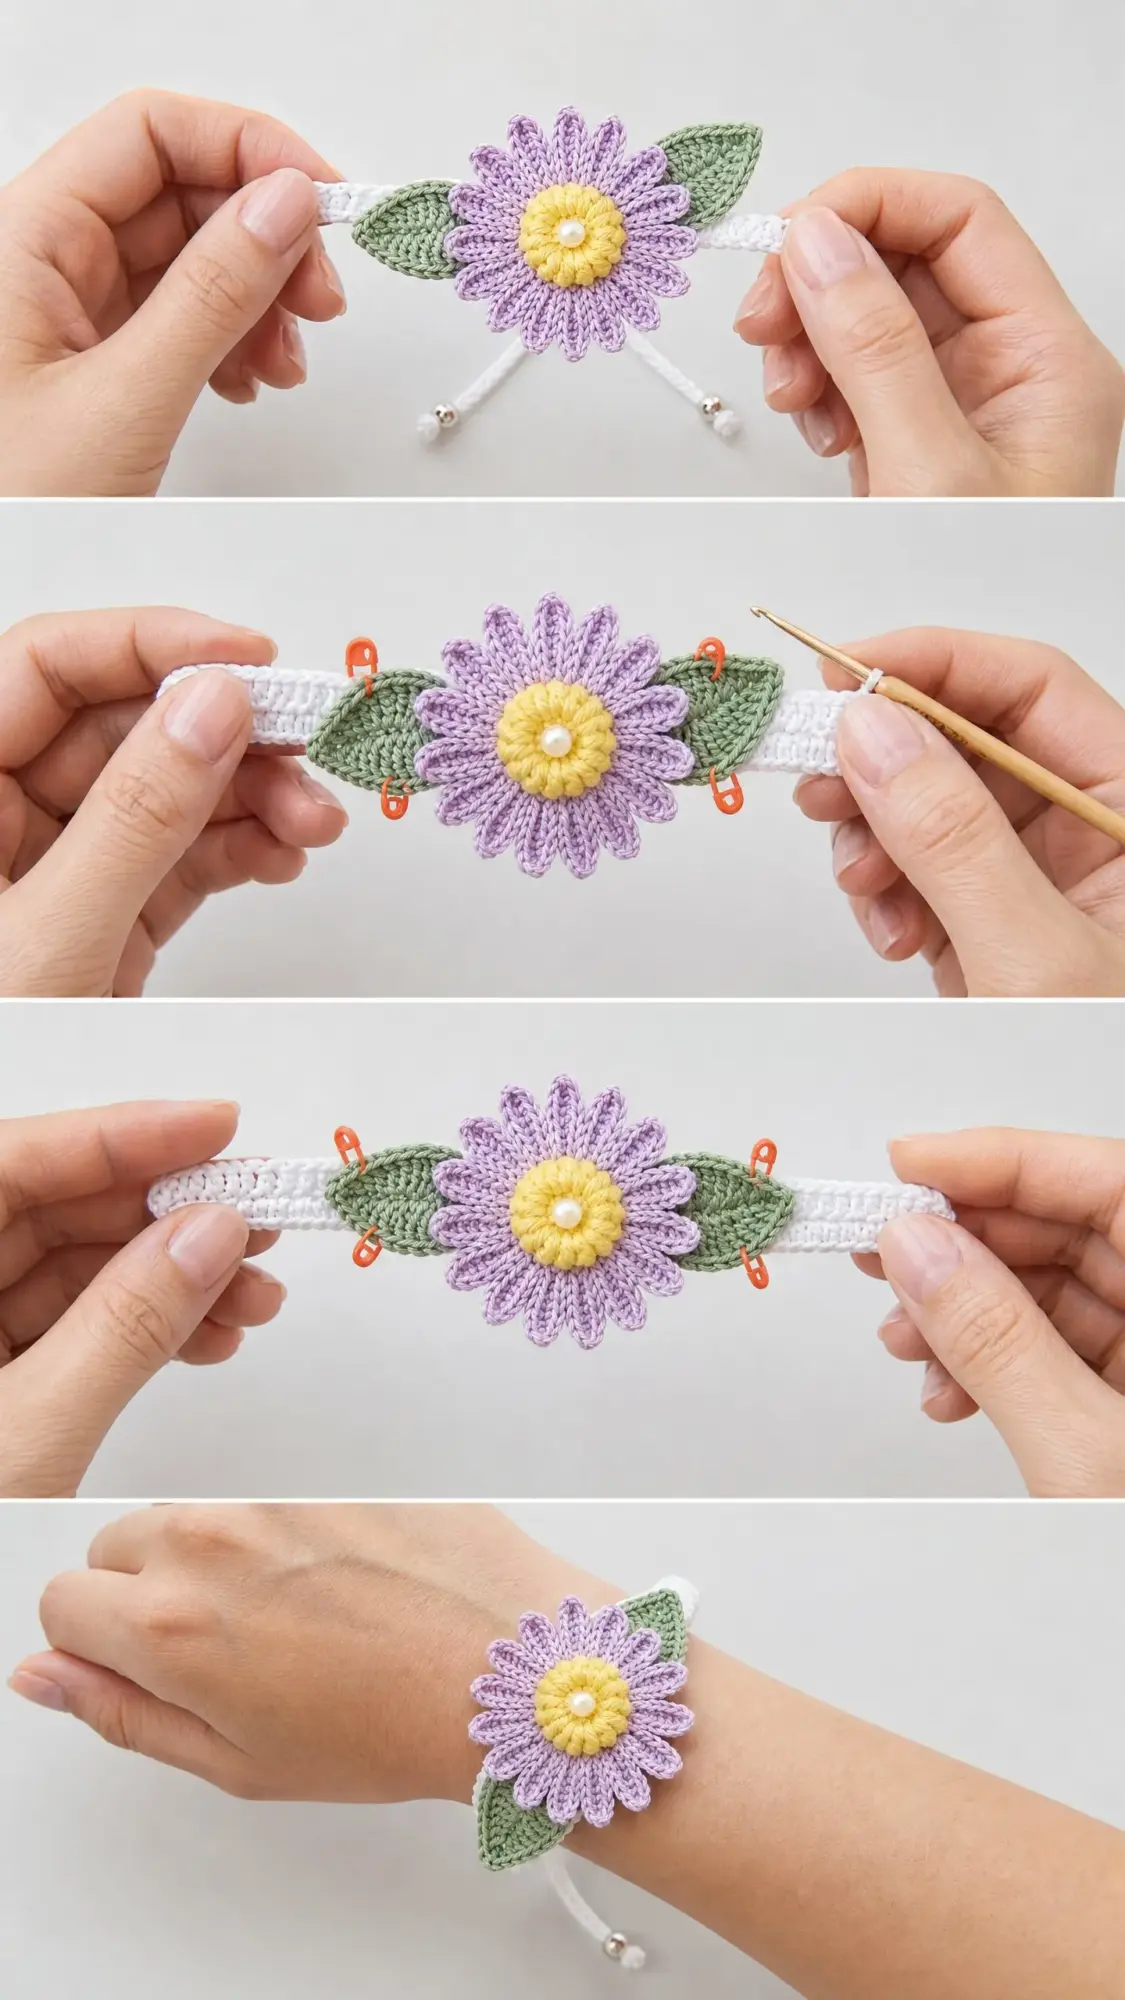
Step 1 (Prepare the cord): Cut the nylon cord into one piece measuring 20 inches. Fold it in half to find the midpoint. Set aside.
Step 2 (Layer the motifs): Lay the first leaf with its right side facing up. Place the second leaf on top, slightly rotated approximately 20 to 30 degrees clockwise. The two leaves should fan apart at the tips and overlap at their centers.
Step 3 (Attach the flower): Center the flower on top of the two layered leaves. The flower should cover the overlapping center area. Thread a tapestry needle with Color C or matching thread. Sew through the center of all three layers using 4 to 6 stitches in a cross or star pattern. Do not pull too tightly. The layers should be flat and stable but not distorted.
Step 4 (Attach the pearl bead): Thread a hand-sewing needle with doubled white or cream sewing thread. Bring the needle up through the center of the flower from the wrong side. Thread the pearl bead onto the needle. Pass the needle back down through the center, slightly offset from where it came up. Knot securely on the wrong side. Trim thread. The pearl bead now anchors everything together beautifully.
Step 5 (Attach the cord): Using a tapestry needle large enough to accommodate the cord, thread the cord through the backside of the assembled motif approximately 0.25 inch from the center, passing from right side to left side. The fold point of the cord should sit at the center-back of the motif. Pull both cord ends through so they extend equally from each side. The cord should pass behind the leaves and flower, invisible from the front.
Alternatively, sew a small horizontal channel on the back of the leaf layer using matching thread, then thread the cord through the channel. This method is more secure.
Step 6 (Finish the cord ends): On each side, thread one silver barrel sliding bead onto both cord ends. Form an adjustable sliding knot as described in Special Stitches. Thread one small stop bead onto each cord end and knot or glue in place. Apply a small drop of craft glue or clear nail polish to each cord tip to prevent fraying. Allow to dry completely before wearing.
Size Customization Tips
Wider fit: For a larger wrist, cut the cord to 22 to 24 inches before folding and threading.
Narrower fit: Cut the cord to 18 inches for a very slim wrist.
Larger flower: Work an additional petal round or add a Round 6 of sc into the front loops of Round 3 for a fuller, dimensional look.
Larger leaves: Add 4 to 6 additional chain stitches to the foundation chain and adjust the shaping rows proportionally.
Thicker cord: A 2 mm cord can substitute for the 1.5 mm cord. Just widen the back channel and select barrel beads with a larger inner diameter.
Finishing and Blocking
Blocking the Flower: Dampen the assembled flower motif with cool water. Gently shape the petals with your fingers, encouraging them to spread evenly. Pin the leaf tips to a foam blocking mat and allow to dry completely, approximately 2 to 4 hours. Do not apply steam or high heat to nylon cord.
Weaving in Ends: All ends should be woven securely using a tapestry needle, running the tail through at least 4 to 5 stitches in different directions before trimming. A small drop of craft glue on the woven tail provides extra security at this scale.
Care Instructions
Hand wash only in cool water with gentle soap. Do not wring. Lay flat on a clean towel to dry. Do not tumble dry or iron the cord portions. If the motif loses its shape after washing, simply re-block following the instructions above. Store flat or loosely coiled to prevent the cord from kinking.
You Did It!
Thank you so much for choosing this pattern for your next project. I truly hope you love making this sweet little daisy bracelet as much as I enjoyed designing it. If you create one, I would absolutely love to see it! Share your finished cuff on Instagram or Facebook and tag me so I can admire your beautiful work.
If this pattern brought you joy, consider pinning it to your favorite Pinterest board so you can find it easily later. And please, drop a comment below if you make one. I read every single comment and it makes my day to hear how your projects turn out. Happy crocheting!
You Might Also Like
- Ocean Wave Crochet Crop Top and Fringe Pants Pattern
- Rainbow Pastel Granny Square Poncho Free Crochet Pattern
- Sage Green Botanical Barrel Bag Free Crochet Pattern
- Sunflower Granny Square Bucket Bag Free Crochet Pattern