
I’ve been on the hunt for the perfect summer tote pattern for months now. Something cheerful, something that shows off all those pretty pastel skeins I’ve been hoarding, and something that actually looks as good in real life as it does in the photos.
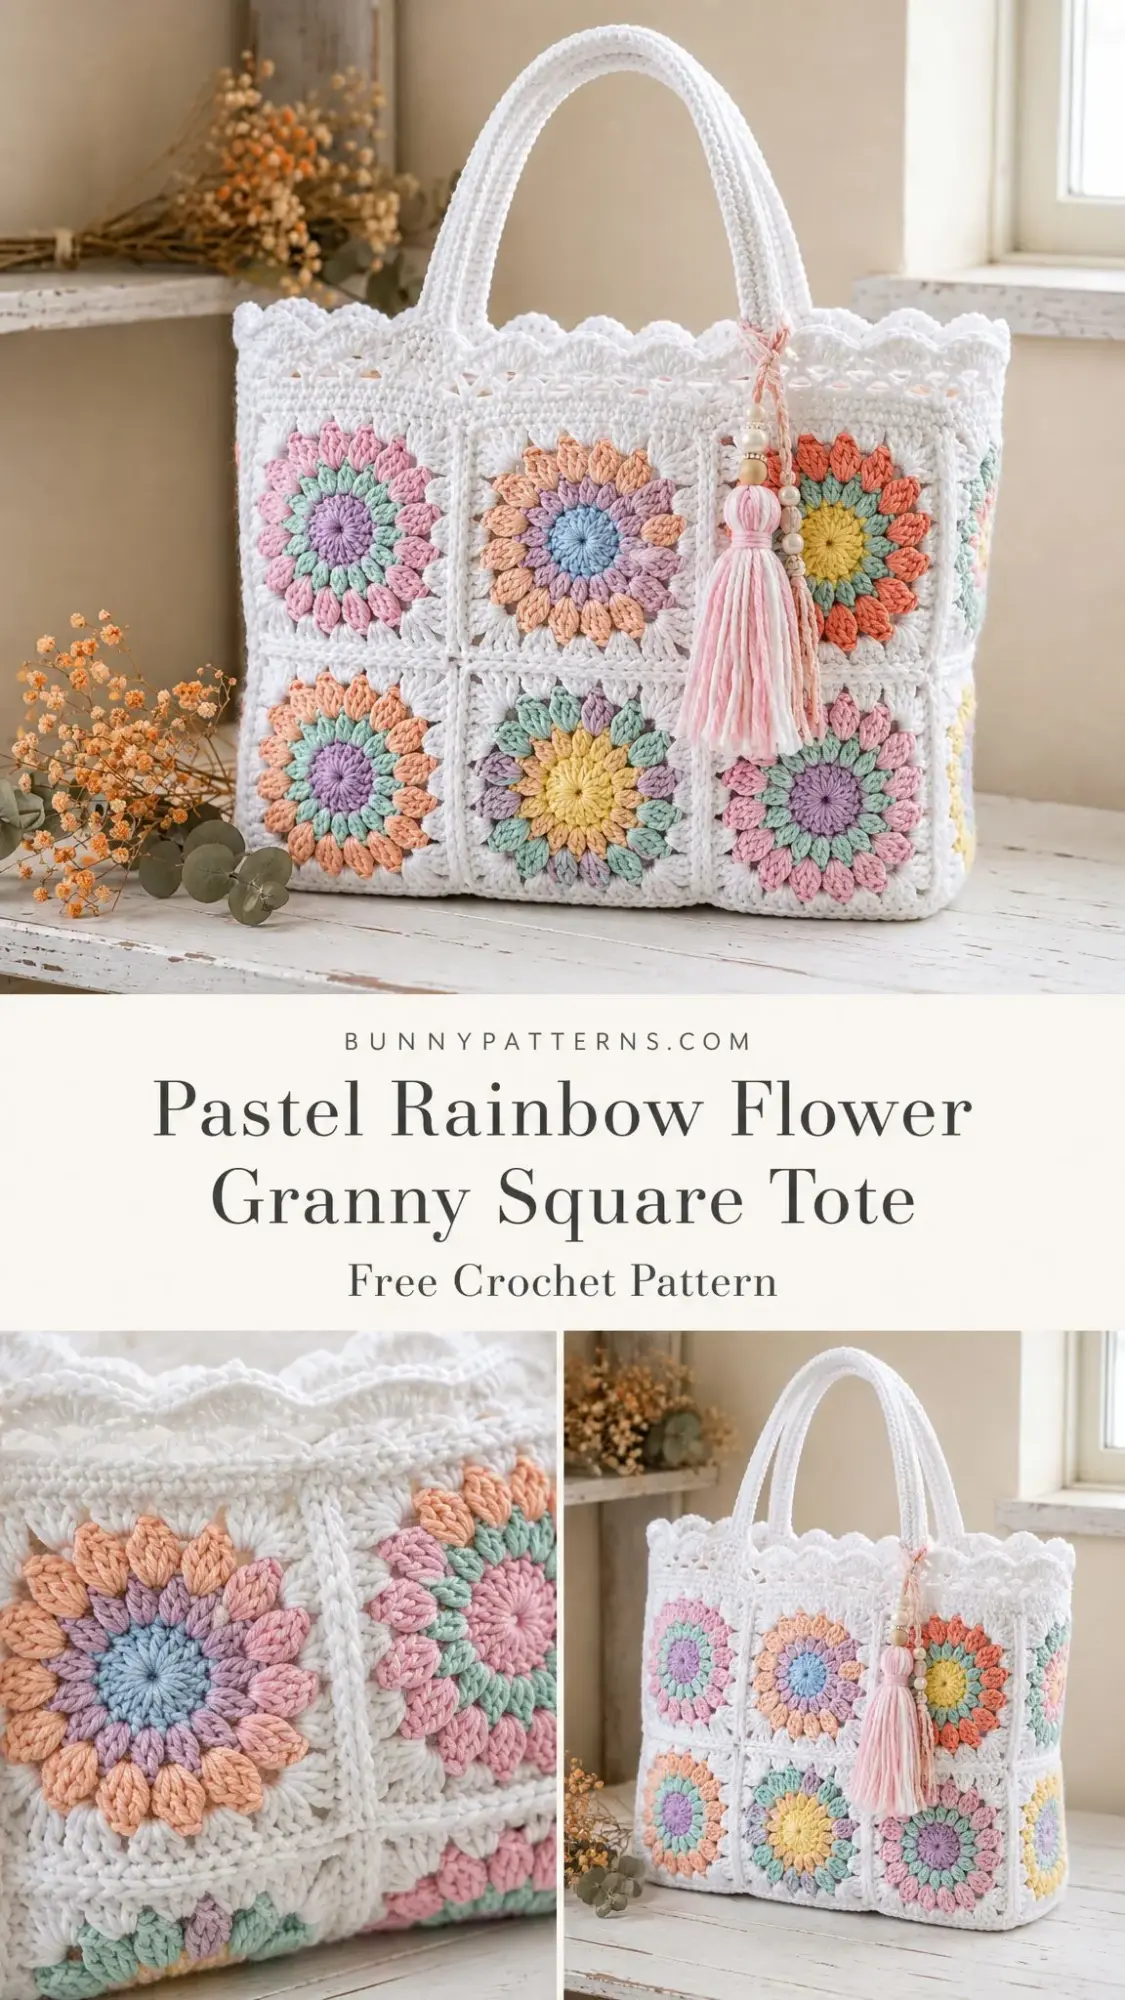
This Pastel Rainbow Flower Granny Square Tote is exactly what I was looking for. Sixteen sunburst flower squares come together into a roomy little bag with a delicate lace scalloped top and the sweetest beaded tassel. Each flower is like a tiny bloom of soft petals framed in crisp white.
The squares are wonderfully repetitive once you find your rhythm, which makes this a lovely take along project. Mix and match your colors however you like. No two flowers need to match, and honestly, that’s part of the charm.
Why You’ll Love This Crochet Tote Pattern
This granny square tote hits that sweet spot between impressive looking and actually doable. The sunburst flower square is the heart of the design, and once you’ve made one or two, you’ll have the rhythm down. The puff stitch petals create soft, raised texture that looks far more complicated than it really is.
The finished bag measures approximately 12 inches wide, 9 inches tall, and 4 inches deep. That’s plenty of room for your current crochet project, a book, your phone, and all the little things you need for a day out. The solid single crochet base gives the tote real structure so it stands on its own and holds its shape when filled.
This pattern is rated intermediate level and takes approximately 12 to 16 hours to complete. If you’re comfortable with double crochet, working in the round, and joining squares, you’ve got this.
Materials You’ll Need
Before you start, gather these supplies. Having everything ready makes the process so much smoother.
Yarn:
Suggested Yarns:
Hook and Notions:
Gauge
One finished sunburst square should measure 4 inches (10 cm) across using a 4.0 mm hook and worsted cotton.
Here’s the good news about gauge for this project. Sunburst squares are forgiving. If yours runs a little large or small, the bag simply scales to match. Just make sure all your squares are consistent with each other.
For the base, the gauge is 16 single crochet stitches and 18 rows equals 4 inches (10 cm).
Abbreviations
This pattern is written in US crochet terms. I’ve included UK equivalents where they differ.
Special Stitches Explained
Puff Stitch (puff)
This creates those gorgeous soft raised petals. Here’s how to work it:
Yarn over, insert your hook in the stitch, yarn over and pull up a loop to the height of a double crochet. Repeat this sequence two more times in the same stitch. You’ll have 7 loops on your hook. Yarn over and draw through all 7 loops, then chain 1 to close.
Don’t worry if your first few puffs look a little wonky. They even out once you’ve worked the whole round.
5-dc Shell
Work 5 double crochet stitches into the same stitch or space. This creates the pretty scalloped lace edge at the top of the bag.
Pattern Notes
Before you dive in, keep these tips in mind:
The Sunburst Flower Square
Make 16 squares total. For each square, choose a center color (A) and a petal color (B). White (C) is used for the last two rounds. Mix and match colors so every flower is a little different.
For a true rainbow scatter, rotate through pink, peach, yellow, mint, blue, and lilac for both centers and petals across your 16 squares. Pairing a warm center with a cool petal, and vice versa, gives that lively pastel mix you see in the photos.
Round 1: Center (Color A)
Make a magic ring. Chain 3 (this counts as your first double crochet), then work 11 double crochet into the ring. Pull the ring closed and join with a slip stitch to the top of the beginning chain 3. (12 dc)
Round 2: Petals (Color B)
Join Color B with a slip stitch to any double crochet. Chain 2, work a puff stitch in the same stitch, chain 1. Puff stitch in next double crochet, chain 1. Repeat from around. Join with a slip stitch to the top of the first puff. (12 puffs, 12 chain 1 spaces)
Round 3: White Fill (Color C)
Join Color C with a slip stitch to any chain 1 space. Chain 3 (counts as double crochet), 2 double crochet in the same space. 3 double crochet in next chain 1 space. Repeat from around. Join to the top of the beginning chain 3. (36 dc)
Round 4: Form the Square (Color C)
Continuing in white, this round shapes the 36 double crochet into a square with four corners.
Chain 3 (counts as double crochet), double crochet in next 3 double crochet, (2 double crochet, chain 2, 2 double crochet) in next double crochet. This is your first corner made.
Double crochet in next 8 double crochet, (2 double crochet, chain 2, 2 double crochet) in next double crochet. Repeat from twice more. Double crochet in next 4 double crochet. Join with a slip stitch to the top of the beginning chain 3. (48 dc and 4 chain 2 corner spaces; 12 dc along each side)
Fasten off, leaving a long tail if you like to seam with it.
Blocking tip: A quick steam block or wet block of each square to a crisp 4 inches (10 cm) before joining makes a big difference. Even, square edges make assembly much easier, and the finished tote looks polished.
Building the Panels
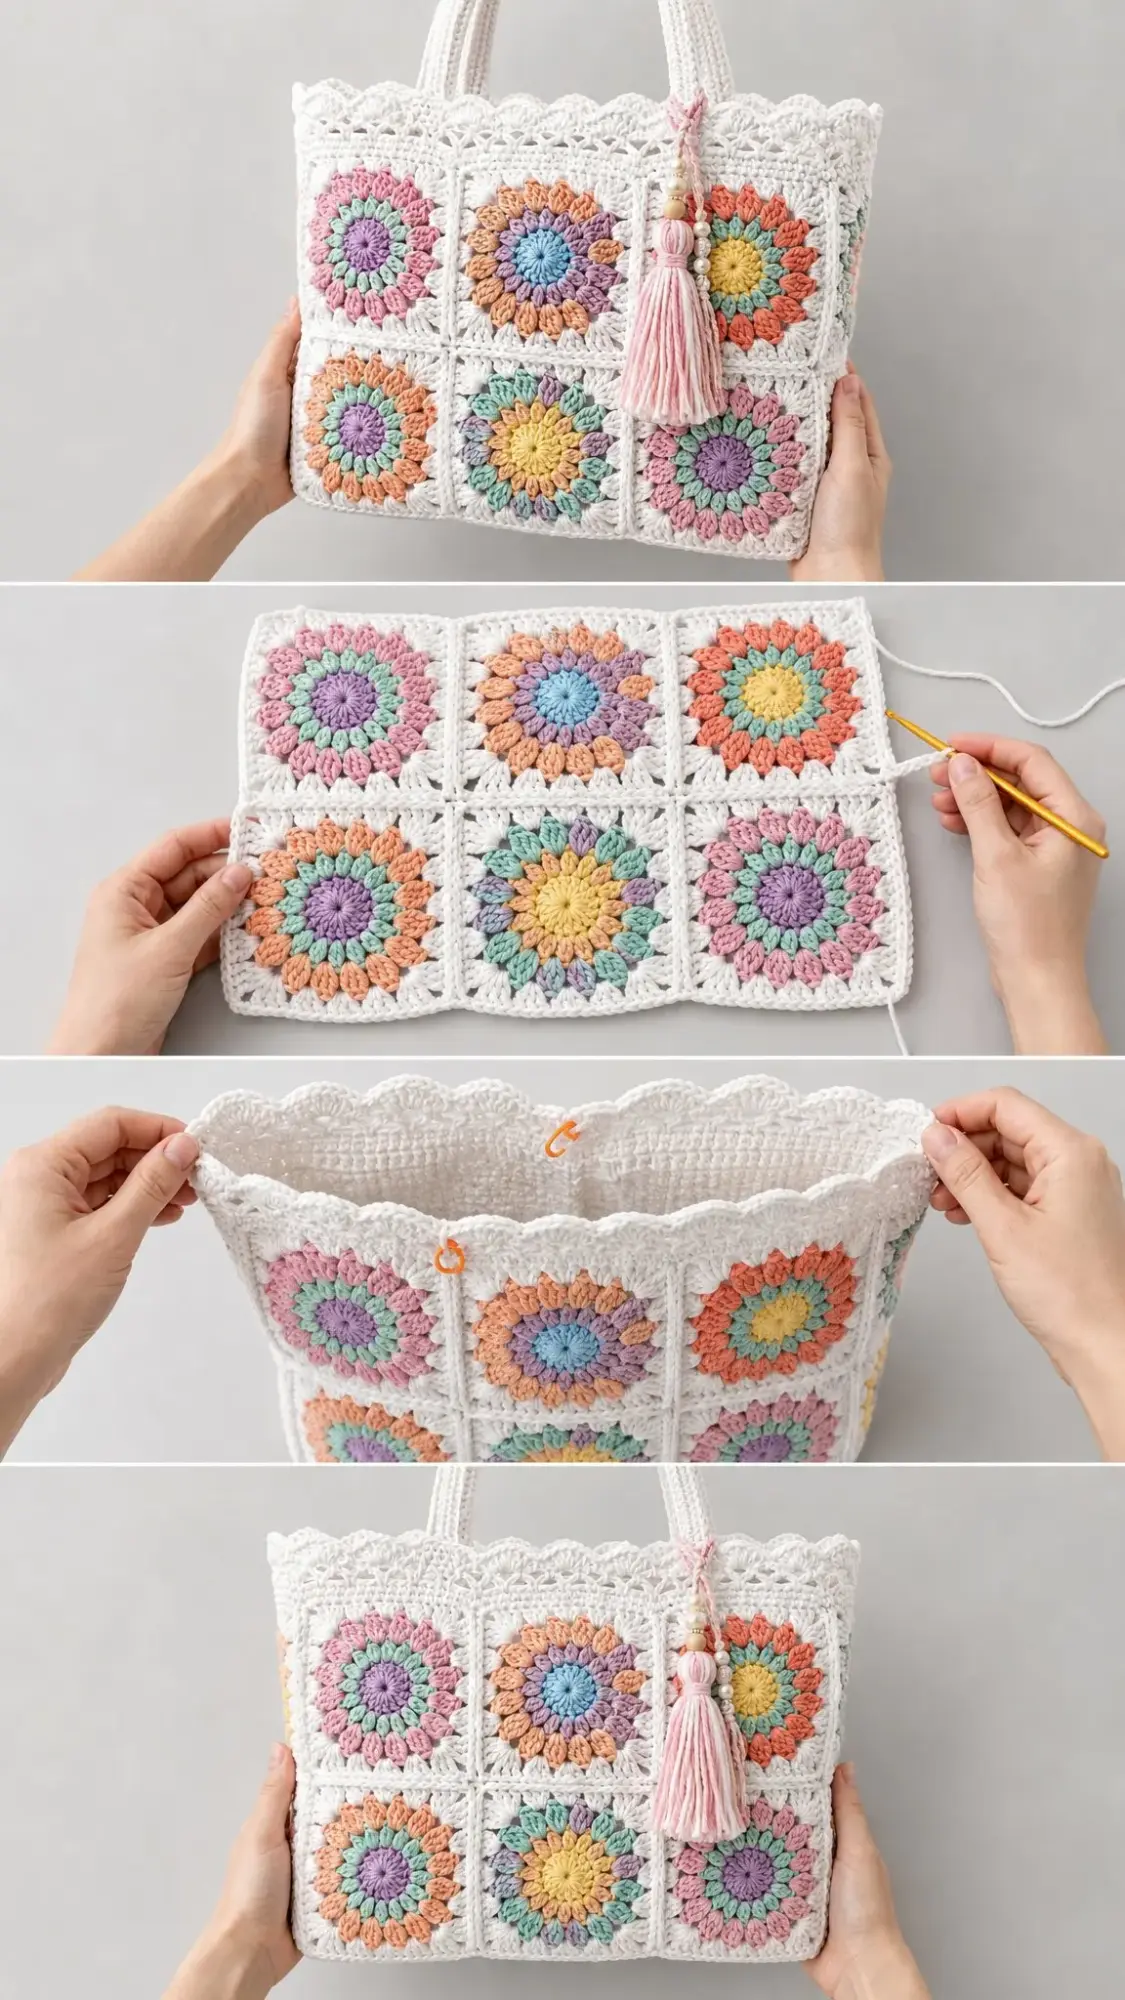
The 16 squares form four panels. With right sides up, join squares using a flat whip stitch through the back loops, or single crochet them together with white for a raised seam. Work through the chain 2 corner spaces and match stitch for stitch along each side.
Front Panel
Arrange 6 squares in a 3 wide by 2 tall block. Join into rows, then join the two rows together. (3 x 2 squares = 12 inches x 8 inches)
Back Panel
Identical to the front: 6 squares, 3 wide by 2 tall. (12 inches x 8 inches)
Two Side Panels
Each side is 2 squares, 1 wide by 2 tall. Make two. (4 inches x 8 inches each)
Square tally: 6 (front) + 6 (back) + 2 + 2 (sides) = 16 squares total.
The Base
The base is a sturdy white rectangle worked in single crochet, sized to match the bottom of the bag: 12 inches x 4 inches (30 x 10 cm).
Foundation
With white, chain 49.
Row 1
Single crochet in the 2nd chain from hook and in each chain across. Turn. (48 sc)
Rows 2 through 18
Chain 1, single crochet in each stitch across. Turn. (48 sc each row)
After Row 18, do not fasten off if you’d like to continue straight into the border round below. Otherwise fasten off and rejoin.
Border Round (Optional)
This tidies the edges nicely. Chain 1, work single crochet evenly all the way around the rectangle, placing 3 single crochet in each corner. Aim for 48 single crochet along each long edge and 18 single crochet along each short edge. Join with a slip stitch. (132 sc + 4 corners)
A single crochet base gives the tote real structure so it stands on its own and holds its shape when filled. This is much sturdier than joining squares alone along the bottom.
Assembling the Tote
Now bring the panels together into a box shape around the base. Use white yarn and the same join you used for the squares, keeping right sides facing out.
Step 1: Join the Side Seams
Stand the front and back panels up. Seam each side panel to the front and to the back along their 8 inch (20 cm) edges, forming an open box. You’ll have four vertical seams.
Step 2: Attach the Base
With the box inverted, line the base rectangle up with the bottom opening. The long edges go to the front and back, and the short edges go to the sides. Seam all the way around.
Step 3: Square It Up
Turn right side out, push out the corners, and give a light steam so the bag holds a crisp box shape. The top edge is now ready for its lace trim.
Tip: Seam with a slightly looser tension than your squares. Tight seams pull the corners in and can make the bag pucker.
Lace Scalloped Top Edge
This pretty three round trim creates the airy lace and scallops at the top of the bag. Work in white in continuous joined rounds around the top opening, which is approximately 32 inches (81 cm) around.
Round 1: Even Base
Join white at any top seam. Chain 1, work single crochet evenly around the entire top opening, adjusting to land on a multiple of 3. Join with a slip stitch. (132 sc)
Round 2: Open Lace Mesh
Chain 5 (counts as double crochet + chain 2), skip 2 single crochet. Double crochet in next single crochet, chain 2, skip 2 single crochet. Repeat from around. Join with a slip stitch to the 3rd chain of the beginning chain 5. (44 dc, 44 chain 2 spaces)
Round 3: Scallops
Slip stitch into the first chain 2 space. Work 5 double crochet in next chain 2 space (this is your shell), single crochet in next chain 2 space. Repeat from around. Join with a slip stitch and fasten off. (22 shells)
Even count note: 132 divides cleanly. 132 divided by 3 equals 44 mesh spaces, and 44 divided by 2 equals 22 scallops. So the lace meets itself neatly with no awkward gap at the join.
The Handles
Make 2 sturdy handles in white. Each is a flat strap that’s folded and seamed into a firm rounded cord, comfortable to carry and strong enough to hold the bag’s contents.
Foundation
With white, chain 46.
Row 1
Single crochet in the 2nd chain from hook and in each chain across. Turn. (45 sc)
Rows 2 through 5
Chain 1, single crochet in each stitch across. Turn. (45 sc each row)
Fasten off, leaving a long tail. Fold the strap in half lengthwise and whip stitch the long edges together to form a rounded cord. Repeat for the second handle. (2 handles, approximately 11 inches / 28 cm long)
Attaching the Handles
On the front panel, mark two points about 3 inches (7.5 cm) in from each side seam. Stitch the handle ends securely to the inside of the lace round at these points. Repeat on the back panel, matching positions so the handles align.
Extra strength tip: Reinforce each handle end with an extra round of stitches in a small box or cross shape. This is where a loaded tote takes the most strain.
Tassel and Finishing
The soft pink beaded tassel is the finishing flourish. Use a leftover pastel, blush pink in the sample, plus a few wooden and pearl beads.
Make the Tassel
Wrap yarn about 30 to 40 times around a 4 inch (10 cm) piece of cardboard. Slide a 10 inch (25 cm) strand under the top and tie tightly. Cut the loops at the bottom.
Wrap a separate strand several times around the bundle about 0.5 inches (1.3 cm) below the top to form the neck. Knot and hide the ends inside. Trim the skirt level.
Add the Beaded Charm
Thread the tie ends up through a large hole wooden bead, then alternate a few wooden and pearl beads to taste. Knot above the beads to hold them, then use the tails to tie the charm to the lace edge near one corner.
Final Finishing
Weave in any remaining ends. Give the whole bag a gentle steam block, shaping the corners and smoothing the lace. Let it dry fully before use.
Care Instructions
Your finished tote will last longer with proper care:
Make It Your Size
Want to customize? Here are some easy modifications:
Bigger tote: Add a column of squares to the front and back (4 wide), and add a square to each side, widening the base to match.
Taller tote: Work each panel 3 squares tall instead of 2 and lengthen the side seams.
Mini version: Use a 3.0 mm hook and sport weight cotton for a dainty 8 inch (20 cm) bag.
Handle length: Add or remove foundation chains in pairs. Longer handles turn it into a shoulder bag.
Lining: Add a fabric lining for extra structure and to keep small items secure.
Adjusting the lace: If you change the bag width, keep your top Round 1 single crochet count a multiple of 6 so the mesh (divided by 3) and scallops (divided by 2) still divide evenly.
Wrapping Up Your Pastel Rainbow Tote
This granny square tote is one of those projects that looks stunning but is actually very approachable once you break it down. The repetitive squares are perfect for working on while watching your favorite show, and the assembly goes faster than you might expect.
I hope this crochet tote pattern brings you as much joy to make as it will to carry around. There’s something so satisfying about using a bag you made yourself, especially one this pretty.
If you make this Pastel Rainbow Flower Granny Square Tote, I would absolutely love to see it! Save this pattern to your Pinterest boards so you can find it when you’re ready to start, and please leave a comment below sharing your color choices or any questions you have. Happy crocheting!
You Might Also Like
- Sage Green Textured Baby Outfit Set Free Crochet Pattern
- Dusty Rose Spiral Flap Backpack Free Crochet Pattern
- Coral Reef Charm Bracelet Free Crochet Pattern
- Ocean Blue Daisy Granny Square Blanket Free Crochet Pattern