
I’ve been on the hunt for the perfect summer tote pattern for ages. You know the kind: colorful enough to turn heads, sturdy enough to actually use, and satisfying enough to keep you hooked through all those squares. Well, this is my favorite find so far.
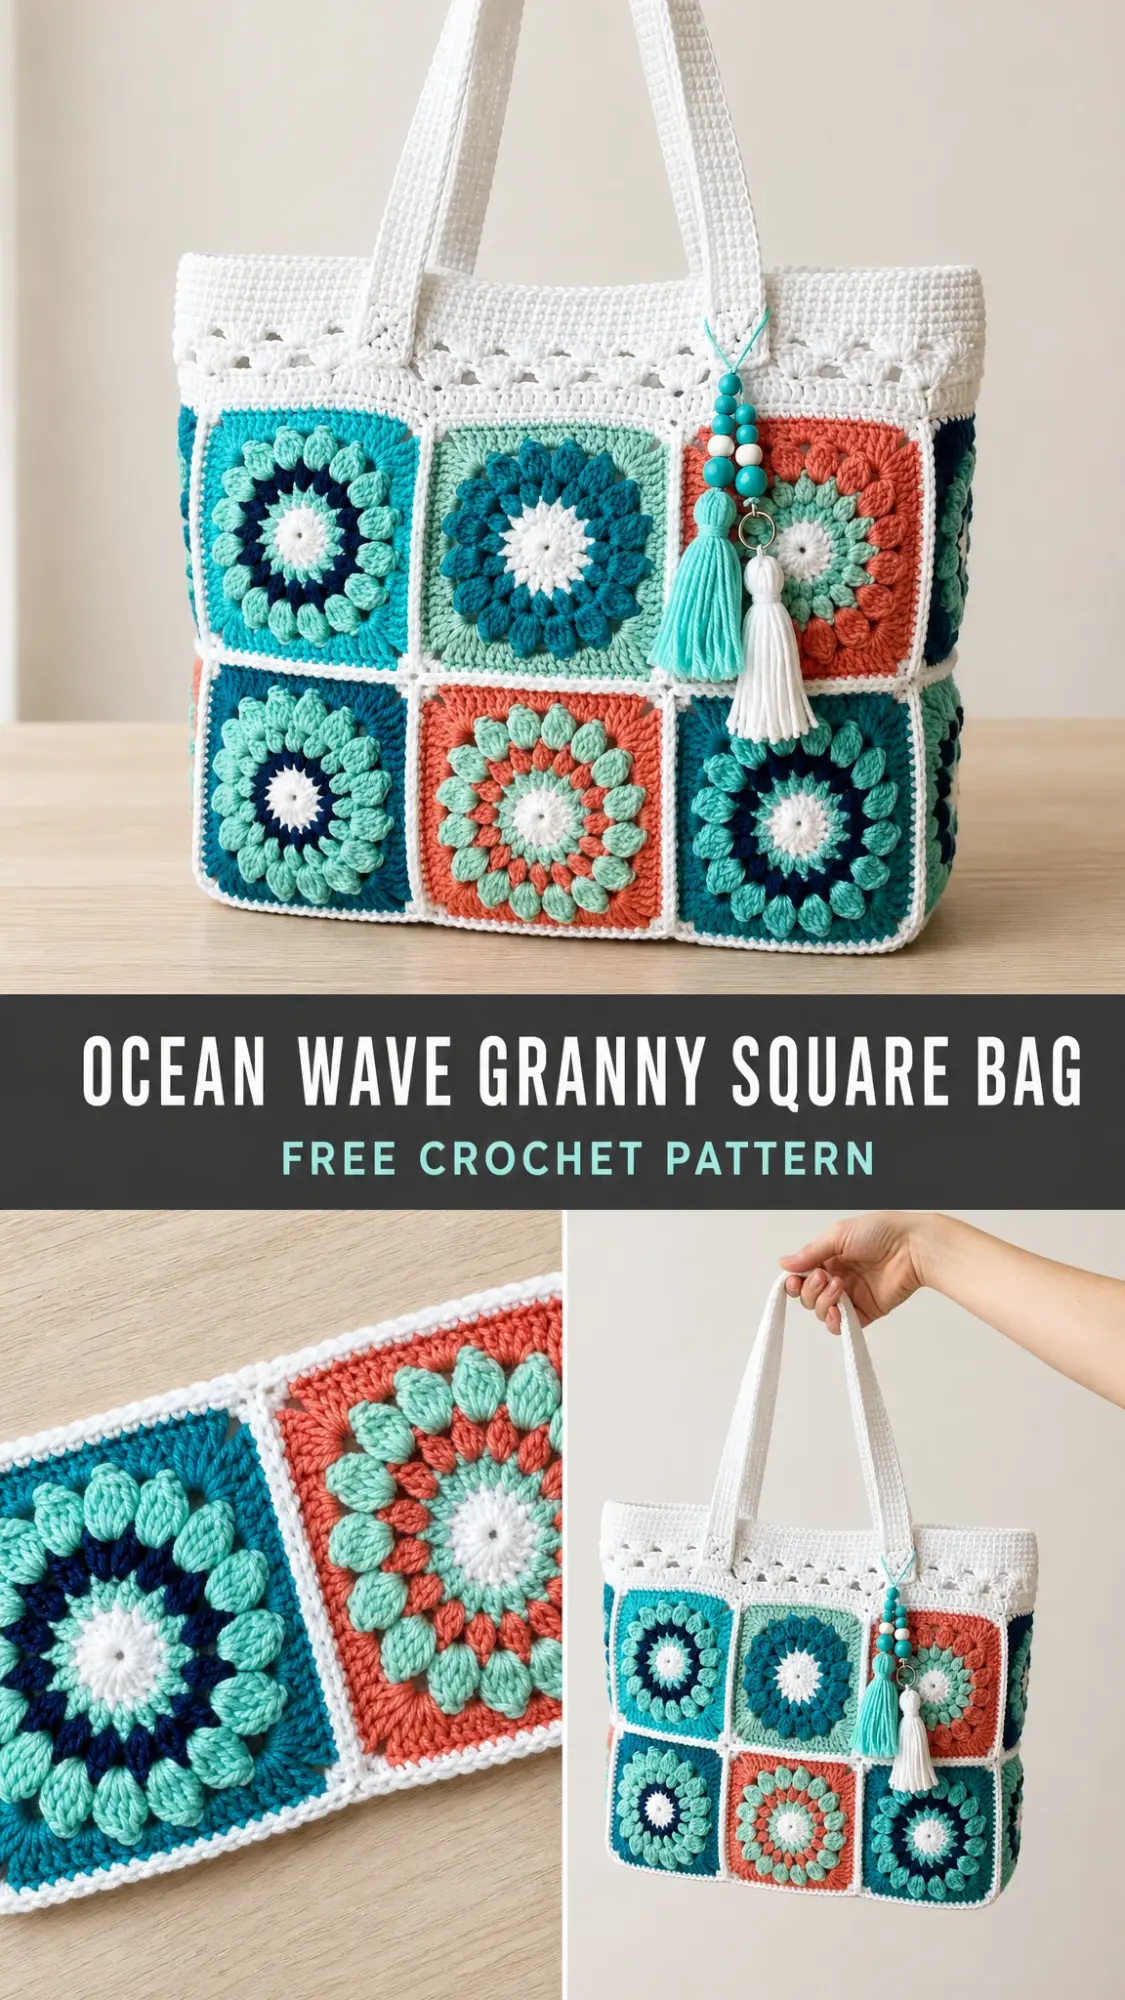
The Ocean Wave Granny Square Bag brings together everything I love about granny squares with a fresh coastal color palette that just screams beach days and farmers market runs. Those sunburst motifs with their plump puff stitch petals create such gorgeous texture, and the crisp white joining keeps everything looking polished.
Whether you’re looking for a project to use up your cotton stash or want to make something truly special as a gift, this tote delivers. Let me walk you through exactly how to make one of your own.
About This Crochet Pattern
This sunburst square tote features twelve bloom motifs arranged in a 3×2 grid on both the front and back panels. The squares are joined with clean white seams, topped with a solid band, and finished with an airy shell trim that adds just the right amount of feminine detail. Sturdy double-thick handles and a swingy beaded tassel charm complete the look.
Skill Level: Intermediate. You should be comfortable with puff stitches and joining techniques before diving in.
Time to Complete: Approximately 12 to 16 hours, spread over a few cozy evenings.
Finished Measurements
Your completed bag will measure approximately 12 inches wide by 10.5 inches tall (30.5 x 26.5 cm), measured flat and excluding handles. The handles add about 9 inches (23 cm) of drop. Each finished sunburst square measures 4 inches (10 cm) square after light blocking.
Materials You’ll Need
Yarn
You’ll be working with Aran or Worsted weight cotton yarn. Here’s what you need:
Suggested Yarn Brands
Hooks and Notions
Gauge
One completed sunburst square measures 4 inches (10 cm) square after light blocking, using a 4.0 mm hook and aran-weight cotton. Gauge isn’t critical for fit, but a consistent square size keeps your panels even. If your square runs large or small, change hook size before starting the bag.
Abbreviations and Stitch Definitions
This pattern uses US crochet terms. If you’re a UK crocheter, remember: US sc equals UK dc, US hdc equals UK htr, and US dc equals UK tr.
Special Stitches
Puff Stitch (puff): This creates those beautiful plump petals you see in the squares. Work it like this: [yarn over, insert hook in stitch or space, yarn over and pull up a loop] 4 times in the same place. You’ll have 9 loops on your hook. Yarn over and pull through all 9 loops, then chain 1 to close.
Shell: 5 double crochet stitches worked into the same stitch or space. This creates that pretty scalloped edge on the trim.
Magic Ring: An adjustable loop used to start each square. This allows you to pull the center closed tightly.
Pattern Notes Before You Begin
The Sunburst Square Pattern
Make 12 squares total. The colors below are a guide, so feel free to swap them around. Use White for the final border on every square so the bag joins seamlessly.
Round 1 (Center Color)
Work into a magic ring: chain 3 (this counts as your first double crochet), then work 15 double crochet into the ring. Slip stitch to the top of the chain 3 to join. Pull the ring tight. (16 dc)
Round 2 (Ring Color)
Join your new color in any stitch. Chain 3, double crochet in the same stitch, then work 2 double crochet in each stitch around. Slip stitch to the top of the chain 3. (32 dc)
Round 3 (Contrast Color)
Join your contrast color. Chain 1, then work: puff stitch in the next stitch, chain 1, skip the next stitch. Repeat from * around the entire round. Slip stitch to the first puff stitch to join. (16 puffs and 16 chain-1 spaces)
Round 4 (Petal Color)
Join your petal color. Chain 3, double crochet in the same puff stitch, then working around: work 2 double crochet in each chain-1 space and 1 double crochet in each puff stitch. Place a corner of (2 double crochet, chain 2, 2 double crochet) in every 4th chain-1 space. You’ll create 4 corners total. Slip stitch to the top of the chain 3. (56 dc and 4 corner spaces; 14 dc per side)
Round 5 (White Border)
Join White in any side stitch. Chain 3, double crochet in each stitch around, working (2 double crochet, chain 2, 2 double crochet) in each corner chain-2 space. Slip stitch to the top of the chain 3. Fasten off. (72 dc and 4 corners; 18 dc per side)
Pro Tip: Block each square to a true 4 inches (10 cm) square before joining. This makes your panels crisp and helps the corners line up perfectly.
Colorways and Layout Guide
Each square uses five colors worked from center to border. Here are six suggested colorways to create visual interest:
1. White center, Turquoise, Navy, Sage, Teal frame, White border
2. White center, Navy, Teal, Sage, Teal frame, White border
3. White center, Coral, Navy, Sage, Coral frame, White border
4. White center, Sage, Navy, Coral, Teal frame, White border
5. White center, Teal, Navy, Sage, Navy frame, White border
6. White center, Coral, Teal, Sage, Navy frame, White border
Mix all twelve squares for a scrappy look, or repeat a few favorites. The border (Round 5) stays White on every square.
Panel Layout
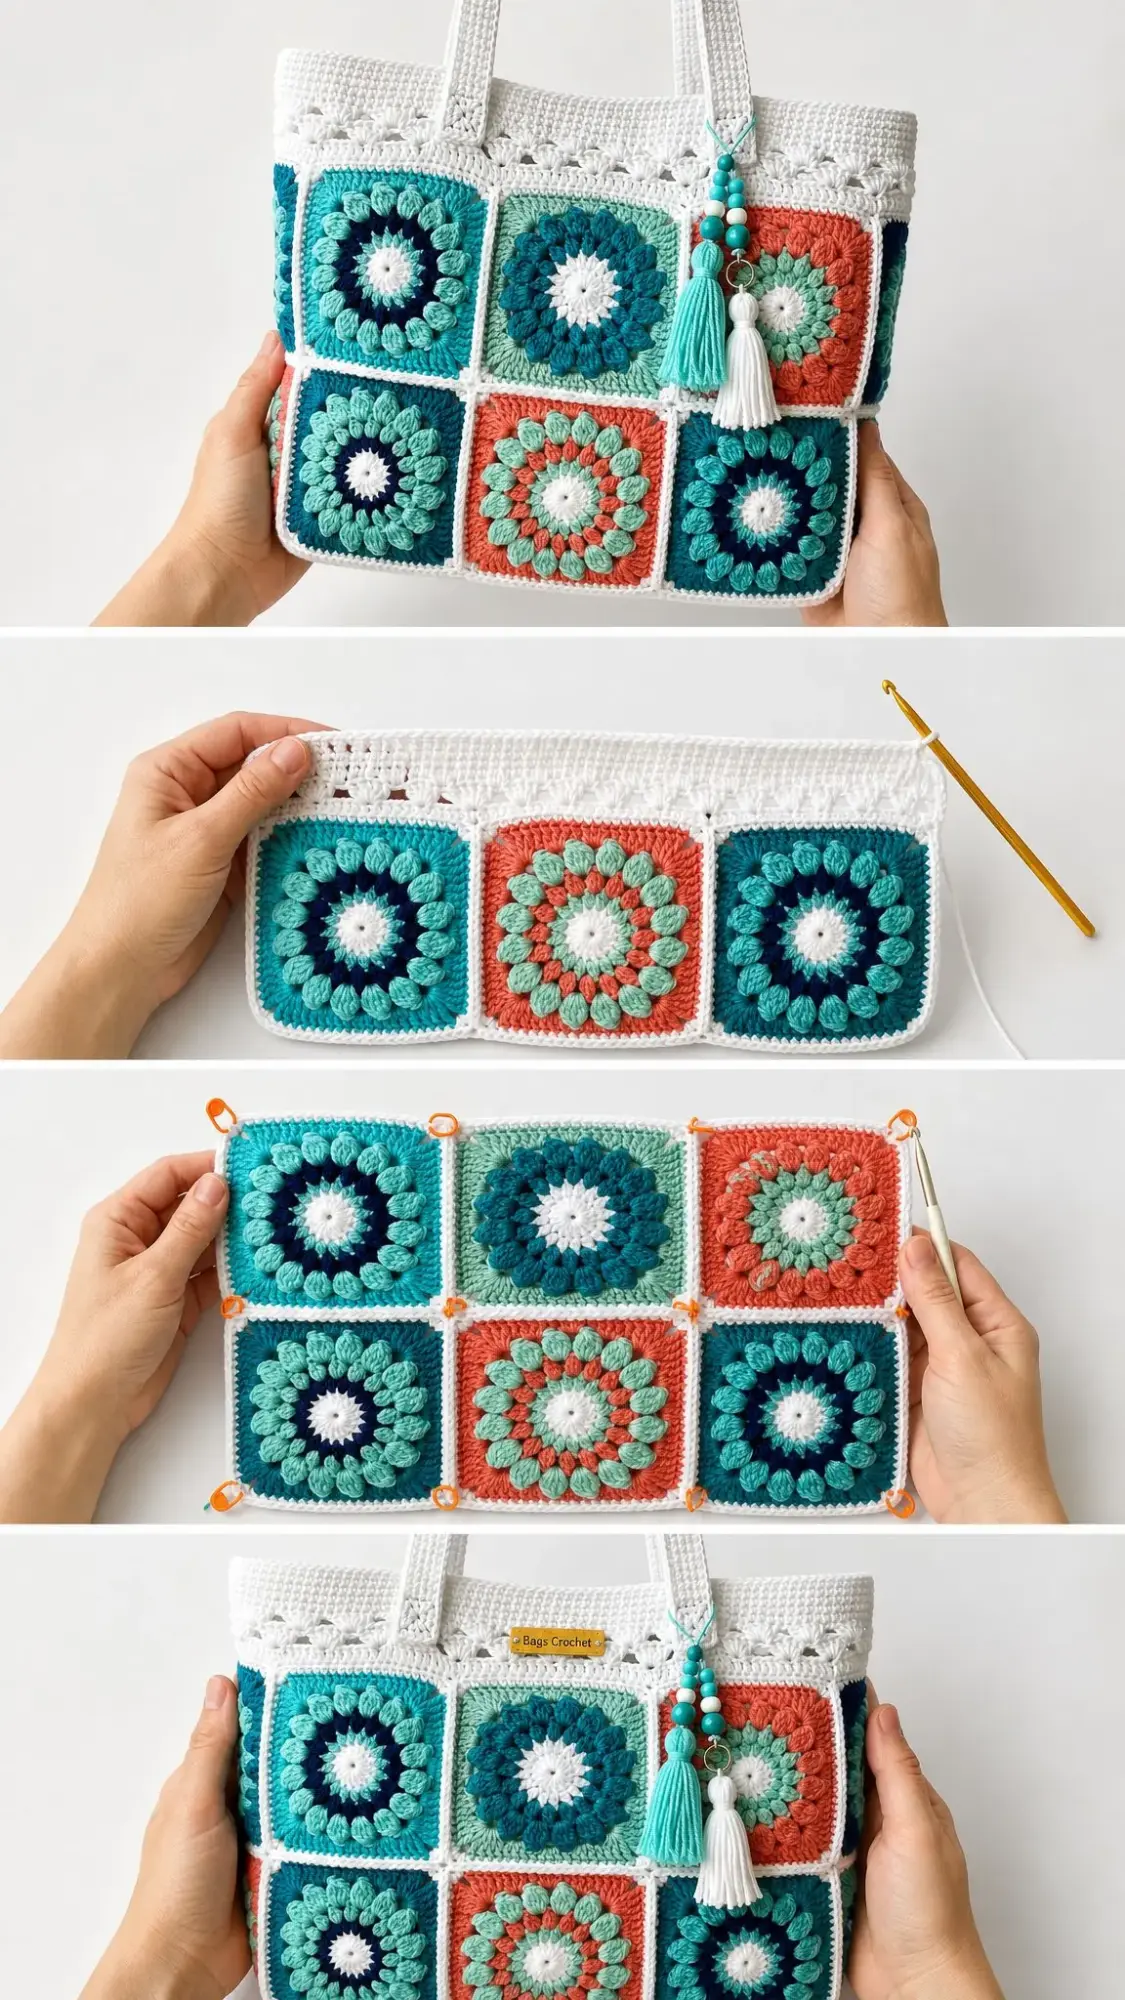
Arrange six squares in a 3 across by 2 down grid for the front panel, and create the same arrangement for the back panel. Scatter the coral squares so no two sit side by side. This creates that lively, washed-ashore rhythm you see in the photos.
Joining the Squares
Lay out one panel (3 squares by 2 squares). With White yarn and right sides together, join squares using a flat slip stitch seam through the back loops only. This keeps a tidy raised ridge on the right side, just like in the photos.
Step 1
Join the top row of 3 squares side by side. With White, slip stitch through the back loops of both squares, corner to corner, working into each pair of stitches across one side. (18 sl st per seam)
Step 2
Join the bottom row of 3 squares the same way. (18 sl st per seam)
Step 3
Join the two rows along their long edges to complete the panel. (54 sl st across)
Step 4
Repeat steps 1 through 3 to make the second panel. (2 panels of 6 squares)
Alternative Method: If you prefer no ridge, whip stitch the squares together through outer loops with a tapestry needle for a flatter, near-invisible seam. Either method works. Choose the texture you like!
You now have two flat panels, each 3 squares wide and 2 squares tall, measuring about 12 inches by 8 inches (30.5 x 20 cm).
Assembling the Bag Body
With right sides together, seam the front and back panels into a bag body, then turn right side out and even up the opening.
Step 1
Hold both panels with right sides facing each other. With White, slip stitch (or whip stitch) the two side edges from top to bottom. (36 sl st per side seam)
Step 2
Seam the bottom edge across, joining the lower edges of both panels. (54 sl st across base)
Step 3
Turn the bag right side out. To give a flat base a little depth, you may fold and tack each bottom corner inward about 1 inch (2.5 cm). This step is optional but adds nice structure.
Step 4: Opening Round
Join White at a side seam. Chain 1, and single crochet evenly around the top edge, adjusting your spacing so you end on a multiple that totals 108 (54 across the front, 54 across the back). Slip stitch to the first single crochet. (108 sc)
Top Band Instructions
Work the firm white band upward from the opening, then add the airy shell trim at the seam where band meets squares.
Solid Band
Round B1: Continuing from the opening round, chain 1, single crochet in each stitch around. Slip stitch to the first single crochet. (108 sc)
Rounds B2 through B8: Repeat Round B1 until the band measures about 2.5 inches (6.5 cm), roughly 7 to 9 rounds. Do not fasten off if adding handles next. (108 sc each round)
Shell Trim
Rejoin White at the base of the band, working into the top loops of the upper row of squares with right side facing.
Round T1: Chain 1, then work: single crochet in the next stitch, chain 2, skip the next stitch. Repeat from * around. Slip stitch to the first single crochet. (54 sc and 54 chain-2 spaces)
Round T2: Slip stitch into the first chain-2 space, then work: single crochet in the next chain-2 space, shell (5 double crochet) in the next chain-2 space. Repeat from * around. Slip stitch to the first single crochet. Fasten off and weave in ends. (27 shells and 27 sc)
Handle Instructions
Make two sturdy double-thick straps in White. These are worked flat, then folded lengthwise for strength.
Row H1: Chain 61. Single crochet in the 2nd chain from hook and in each chain across. (60 sc)
Rows H2 through H6: Chain 1, turn, single crochet in each stitch across. Work 5 rows total. (60 sc per row)
Row H7: Fold the strip in half lengthwise and single crochet the long edges together through both layers for a firm, rounded handle. Fasten off, leaving a long tail for sewing. (60 sc)
Make a second handle the same way. (2 handles total)
Attaching the Handles
On the front, pin each handle end to the inside of the top band, lining the ends up over the gaps between squares 1 and 2 and squares 2 and 3 (about 3 inches or 7.5 cm apart at center). Sew firmly through several stitches with the tails. Repeat on the back, mirroring placement so the handles align front to back.
Beaded Tassel Charm
This adorable charm adds the perfect finishing touch!
Step 1
Cut a 10 inch (25 cm) length of Turquoise yarn. Thread on 5 to 6 wooden or silicone beads, alternating colors, then fold and secure both ends onto a split ring.
Step 2
Make two yarn tassels (one Turquoise, one White): wrap yarn approximately 20 times around a 3 inch (7.5 cm) card, tie the top, cut the bottom loops, and wrap a neck 0.5 inches (1 cm) down. Trim level.
Step 3
Attach both tassels and the beaded strand to the split ring. Loop a short tie of Turquoise through the ring and knot it around the base of one handle.
Finishing Your Bag
Optional Lining
For a tote that holds its shape, cut a fabric rectangle to the bag’s inside dimensions plus 0.5 inch (1 cm) seam allowance, sew into a pouch, fold the top edge under, and hand stitch it just below the band.
Care Instructions
Customization Ideas
Bigger tote: Add a column of squares (4 across) for width, or a third row for height. Keep the opening a multiple of 2 so the shell trim repeats evenly.
Mini bag: Use a 3.0 to 3.5 mm hook and fingering or sport weight cotton for daintier 3 inch squares.
Crossbody: Work a single long strap (chain to your drop length, 4 to 5 rows of single crochet) instead of two handles.
Deeper base: Add a row of squares folded under as a true gusset, or seam in a fabric-lined base.
Even-square tip: Whatever size you choose, block every square to match before joining. Consistent squares are the secret to a professional-looking tote.
You Did It!
I hope you love making this Ocean Wave Granny Square Bag as much as I do. There’s something so satisfying about watching those colorful squares come together into a functional, beautiful tote. The combination of those plump puff stitch petals and the clean white joining creates such a polished finished piece.
Thank you so much for choosing this pattern for your next crochet project! If you make this bag, I would absolutely love to see it. Tag me on Instagram or share a photo in our Facebook group. Seeing your creations honestly makes my day.
Don’t forget to save this Ocean Wave Granny Square Bag pattern to your Pinterest boards so you can find it when you’re ready to start. And if you give it a try, please drop a comment below. I love hearing how your projects turn out and seeing which colorways you choose!
You Might Also Like
- Lavender Heart Granny Square Baby Blanket Free Crochet Pattern
- Mustard Yellow Circle Purse Free Crochet Pattern
- Dusty Rose Mesh Crochet Sneaker Boots Free Pattern
- Sage Green Bobble Stitch Sweater Vest Free Crochet Pattern