
I don’t know about you, but I have a serious weakness for anything that looks like it belongs in a pastel candy shop. This granny square purse checks every single box for me.
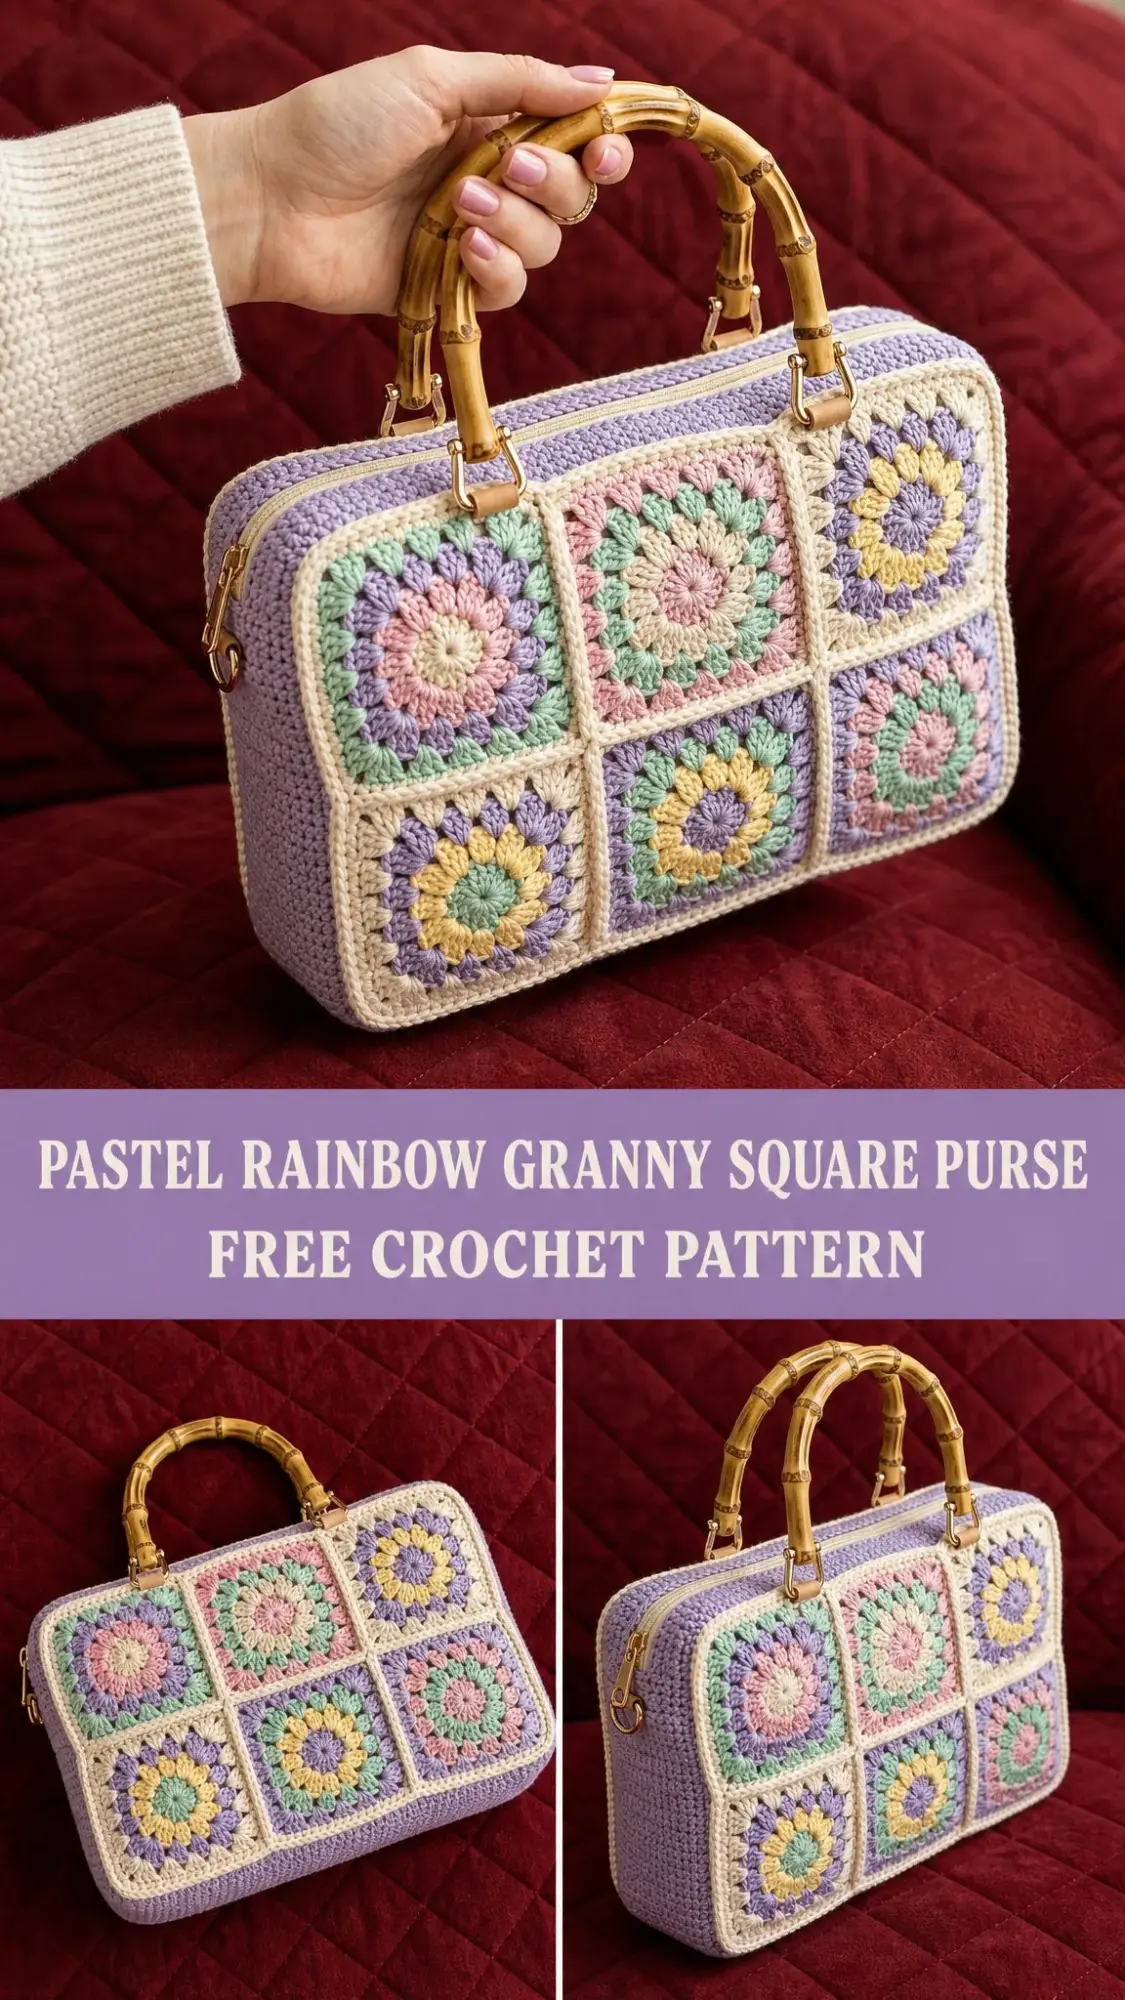
All the vintage charm of a classic granny square, but structured into a proper handbag you can actually carry around. The sunburst centers pop like little scoops of sorbet against that creamy border, and those bamboo handles give it a touch of elegance that makes it feel special without being fussy.
If you’ve been wanting to try your hand at a more structured crochet project but felt intimidated by bags, this one breaks everything down into manageable pieces. You’ll make twelve little squares, join them into panels, add a simple gusset, and suddenly you have a purse that looks like it took weeks but really comes together in a long weekend.
Why This Granny Square Purse Pattern Works So Well
The genius of this design is that it uses one simple motif repeated twelve times. Once you get the hang of the sunburst square, which only takes four rounds, you can crochet them while watching your favorite show without even looking down. The repetition builds muscle memory fast.
What makes this bag special is the box construction. Instead of a floppy tote, you get a structured handbag with actual depth. The lilac gusset wraps around three sides to create that boxy shape, and the zipper along the top keeps everything secure inside.
The color combinations give each square its own personality while the cream border on Round 4 ties everything together. It’s the kind of project where you can raid your stash for those leftover balls of cotton yarn you’ve been hoarding.
Materials You’ll Need
Before you start, gather these supplies:
Yarn:
Recommended yarn brands:
Hook:
Notions:
Gauge and Finished Size
Gauge: 20 stitches × 22 rows = 4 inches (10 cm) in single crochet with a 4.0 mm hook.
One finished square measures about 3 inches (7.5 cm). If yours differs, change your hook size to match. This keeps the bag in proper proportion.
Finished bag dimensions: approximately 9½ inches wide × 7 inches tall × 3 inches deep (24 × 18 × 7.5 cm), excluding handles.
Abbreviations and Special Stitches
This pattern uses US crochet terms throughout. If you typically use UK terms, remember that US single crochet (sc) equals UK double crochet (dc), and US double crochet (dc) equals UK treble crochet (tr).
Standard abbreviations:
Special stitches:
Magic ring: An adjustable loop you work the first round into, then pull closed for a neat, gap-less center. If you’ve never made one, there are plenty of video tutorials online. It’s easier than it sounds!
Petal (5-dc shell): Work (sc, 5 dc, sc) into one space. This creates the "ray" of the sunburst motif.
Corner: Work (3 dc, ch 2, 3 dc) into one stitch or space to turn a crisp 90-degree corner.
Pattern Notes
A few things to keep in mind before you begin:
The Sunburst Square Pattern
This four-round motif is the whole bag’s personality. Make 12 squares in total. Six squares for the front panel, six for the back. Colors A, B, and C change from square to square (see the color combinations below), but Round 4 is always worked in Cream.
Round 1 — Color A (center)
Into a magic ring: ch 3 (counts as dc), 15 dc into the ring. Join to top of beg ch-3 and gently pull the ring closed. 16 dc
Round 2 — Color B
Join B in any st. Ch 1, sc in same st, [ch 3, skip next st, sc in next st] 7 times, ch 3, skip last st, join to first sc. 8 sc & 8 ch-3 spaces
Round 3 — Color C (the rays)
Sl st into first ch-3 sp. Ch 1, work (sc, 5 dc, sc) into the same sp and into each ch-3 sp around. Join to first sc. 8 petals
Round 4 — Cream (squaring round)
Sl st across to the center dc of any petal. Ch 3, (2 dc, ch 2, 3 dc) in same st (first corner).
Ch 1, 3 dc in center dc of next petal, ch 1, (3 dc, ch 2, 3 dc) in center dc of next petal; rep from twice more.
Ch 1, 3 dc in center dc of last petal, ch 1; join to top of beg ch-3. Fasten off. 36 dc, 4 corner spaces, 8 ch-1 spaces
Each finished side now has 9 dc with a corner ch-2 sp at each end. This creates a tidy edge for joining. Block lightly to 3 inches (7.5 cm) if needed.
Color Combinations for Your Squares
For that scattered sorbet look, give every square a different trio of colors. Here are the six combinations used on the front panel. Mix and shuffle them for the back so no two neighboring squares match.
| Square | A (Center) | B (Mid) | C (Rays) |
|---|---|---|---|
| 1 | Cream | Pink | Mint |
| 2 | Pink | Cream | Lilac |
| 3 | Lilac | Cream | Buttercup |
| 4 | Cream | Lilac | Buttercup |
| 5 | Lilac | Buttercup | Mint |
| 6 | Mint | Pink | Lilac |
Pro tip: Keep Cream as Round 4 on every square. It’s the quiet frame that lets the pastels sing and makes the panels read as one cohesive piece.
Joining the Squares and Adding the Panel Border
Lay Out Your Panels
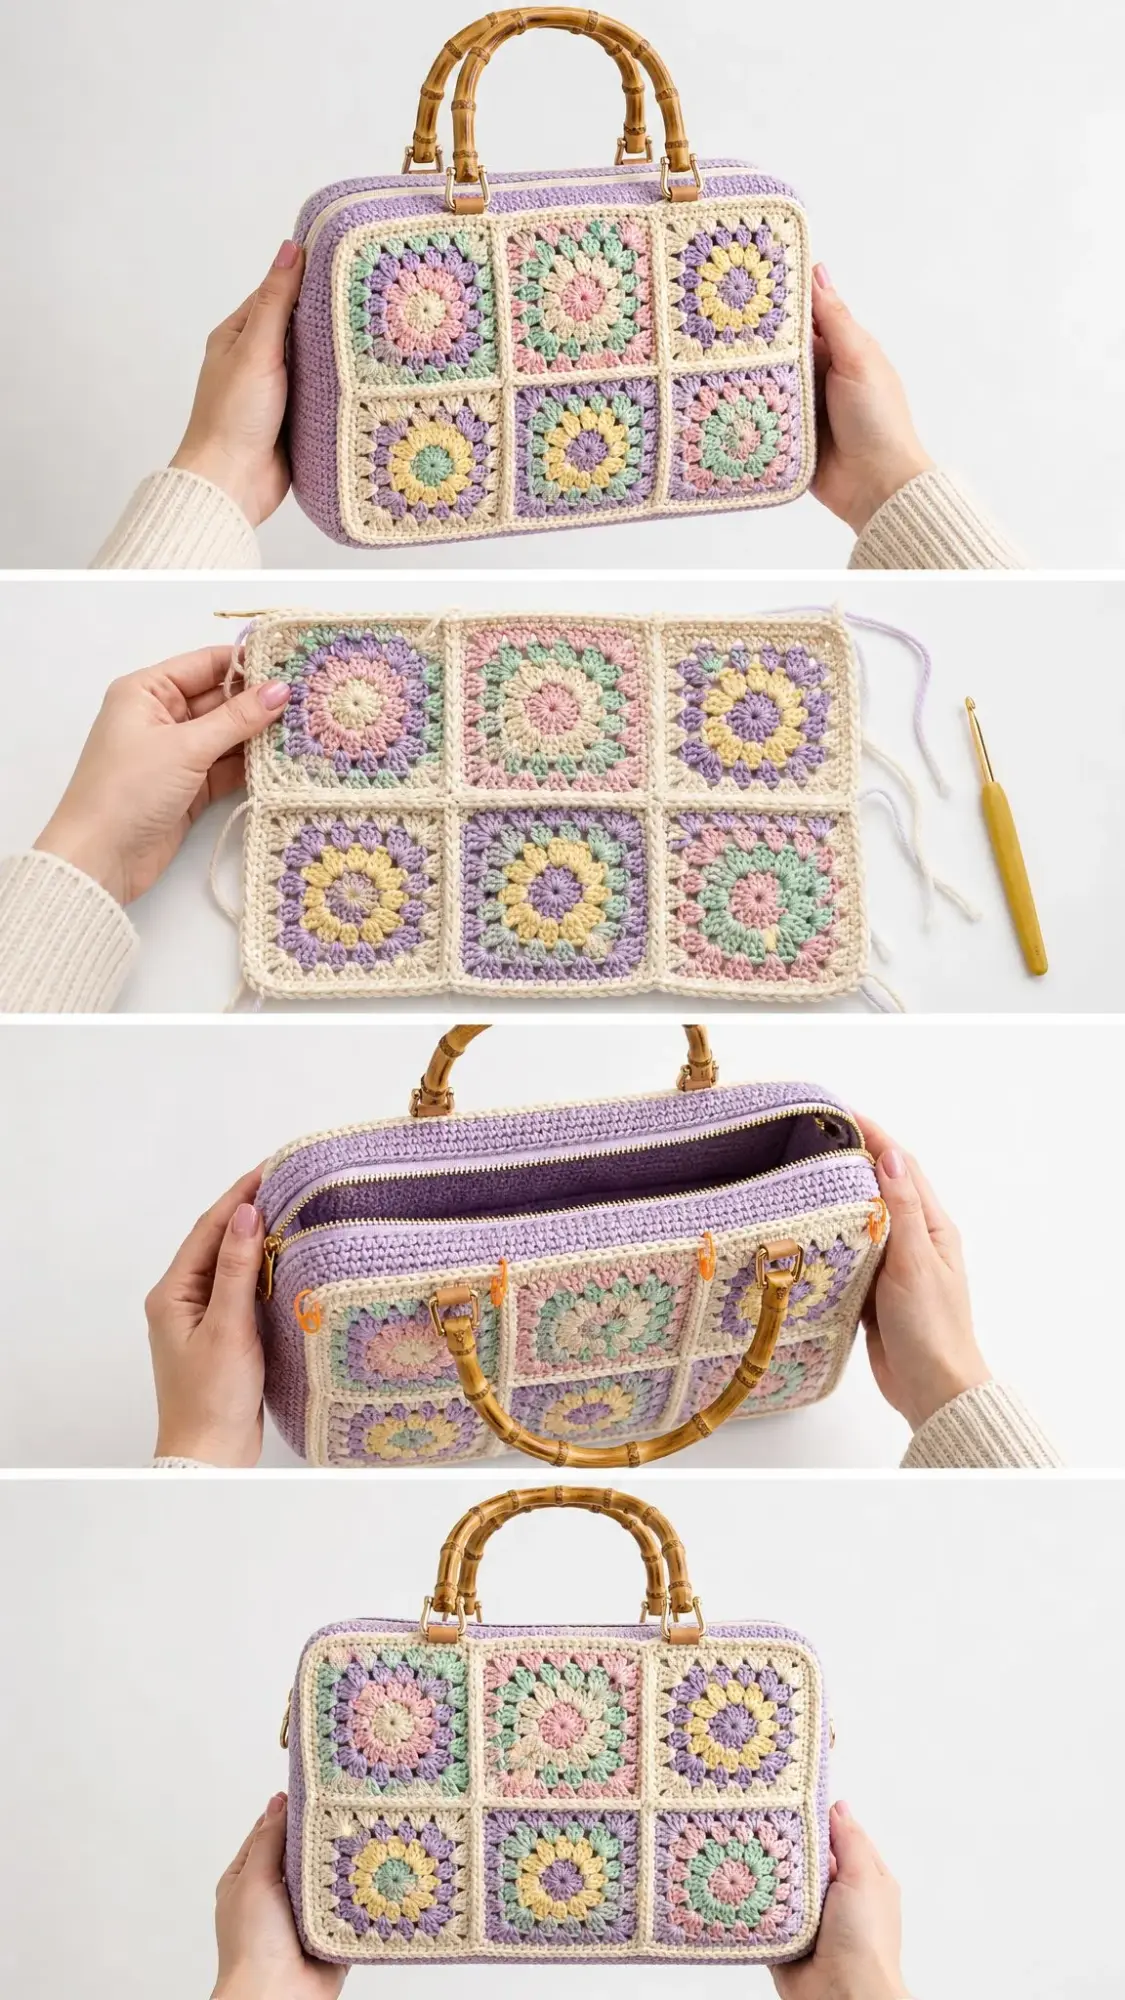
Arrange six squares into a 3-across × 2-down rectangle for the front. Repeat for the back panel. Shuffle the squares around until the colors feel evenly scattered and no identical squares sit next to each other.
Join the Squares (Cream)
With cream yarn and a yarn needle, whip stitch squares together through the back loops only. Match stitch-for-stitch along each seam (9 dc plus the corner spaces per side).
Join all rows of each panel first, then join the rows to each other. Work one continuous line through each corner so the joins lie flat. 2 panels complete
Panel Border — Cream
With the panel right-side up, join cream in any corner sp. Ch 1 and sc evenly all around: about 39 sc along each 3-square edge (top and bottom) and 26 sc along each 2-square edge (sides), working (sc, ch 2, sc) in each outer corner sp and 1 sc into each seam. Join to first sc. 130 sc & 4 corner spaces
Work the border on both panels so they finish the same size. These cream edges become your seam line when the bag is assembled.
Gusset and Zip Bands
The lilac gusset is one long strip that wraps the two sides and the base, giving the bag its boxy depth. The two zip bands sit along the top opening to carry the zipper.
Gusset — Lilac (make 1)
Ch 16.
Row 1: sc in 2nd ch from hook and in each ch across; turn. 15 sc
Rows 2 onward: ch 1, sc in each st across; turn. 15 sc
Repeat Row 2 until the strip measures about 23½ inches (60 cm). This is long enough to travel up one side, across the base, and down the other side. Fasten off.
Zip Bands — Lilac (make 2)
Ch 40.
Row 1: sc in 2nd ch from hook and in each ch across; turn. 39 sc
Rows 2 to 4: ch 1, sc in each st across; turn. 39 sc
Fasten off. Each band is approximately 9 inches (23 cm) long to match the panel top.
Handle Tabs — Lilac (make 4)
Ch 4.
Row 1: sc in 2nd ch and across; turn. 3 sc
Work in sc until the tab measures approximately 2 inches (5 cm). Fasten off, leaving a long tail for sewing. Each tab folds around a swivel clasp later.
Handles, Hardware, and Assembly
Now comes the exciting part where your pieces become an actual purse!
Step 1 — Box the Bag
With lilac (or cream) yarn and a yarn needle, sew one long edge of the gusset to the front panel. Start at the top of one side, down to the base, across the bottom, and up the far side. Ease gently around the lower corners so they stay square.
Sew the opposite edge of the gusset to the back panel the same way. 3 sides closed
Step 2 — Add the Zip Bands
Sew the lower edge of one zip band along the top of the front panel (and the gusset ends), and the second band along the back.
Pin the zipper between the two bands, right side up, and back-stitch it neatly in place with sewing thread so the bands meet when closed.
Step 3 — Mount the Handles
Thread each handle tab through a swivel clasp, fold it in half, and sew the ends firmly to the inside top edge. Position two tabs per side, spaced to match the handle rings (about 7 cm or 2¾ inches apart).
Clip each clasp to the bamboo handle’s ring. 4 tabs and 4 clasps complete
Step 4 — Optional D-Ring
For a crossbody option, fold a short lilac tab through a D-ring and sew it into one side seam. Attach a strap with a swivel clasp whenever you want hands-free carrying.
Lining (Optional But Lovely)
Cut cotton lining to the bag’s inner dimensions plus a 1 cm seam allowance. Stitch the lining pieces into a pouch, and hand-sew it just below the zip bands.
A lining hides all your seams and keeps small items from peeking through the stitches. It also gives the bag a more polished, professional finish.
Finishing Touches and Care Instructions
Final Steps
Caring for Your Purse
Sizing Tips for Customization
The square count is your size dial. Change it and everything scales with it!
Bigger bag: Use a 4-across × 3-down layout (12 squares per panel) and lengthen the gusset to suit.
Smaller pouch: 2 × 2 squares per panel makes a sweet mini version perfect for evenings out.
Taller squares: Add a second cream round to Round 4 for a roomier motif. Remember to lengthen the gusset and zip bands to match.
Hook tuning: If your gauge runs loose, drop to 3.5 mm. If tight, go up to 4.5 mm to hit a 3 inch (7.5 cm) square.
Deeper bag: Start the gusset with a longer foundation chain (for example, ch 20 for approximately 4 inches or 10 cm depth).
You Did It!
I really hope you love making this pastel rainbow granny square purse as much as I enjoyed designing it. There’s something so satisfying about watching those individual squares come together into a structured, usable bag. And those bamboo handles? Chef’s kiss.
If you make one, I would absolutely love to see it! Tag me on Instagram or share a photo in my Facebook group. Nothing makes my day like seeing your beautiful creations.
Don’t forget to save this pattern to your Pinterest boards so you can find it easily when you’re ready to start. And please drop a comment below if you give it a try. I’d love to hear which color combinations you chose!
You Might Also Like
- Lavender Purple Dreamy Peplum Crochet Top Pattern
- Ocean Breeze Granny Square Tote Free Crochet Pattern
- Cream White Nursery Wall Organizer Free Crochet Pattern
- Sage Green Boho Crochet Backpack Free Pattern