
THIS IS ONE OF THE MOST IMPRESSIVE CROCHET PROJECTS YOU WILL EVER MAKE. Seriously. A complete coordinating furniture set that looks like it belongs in a high-end home décor magazine? Yes, please.
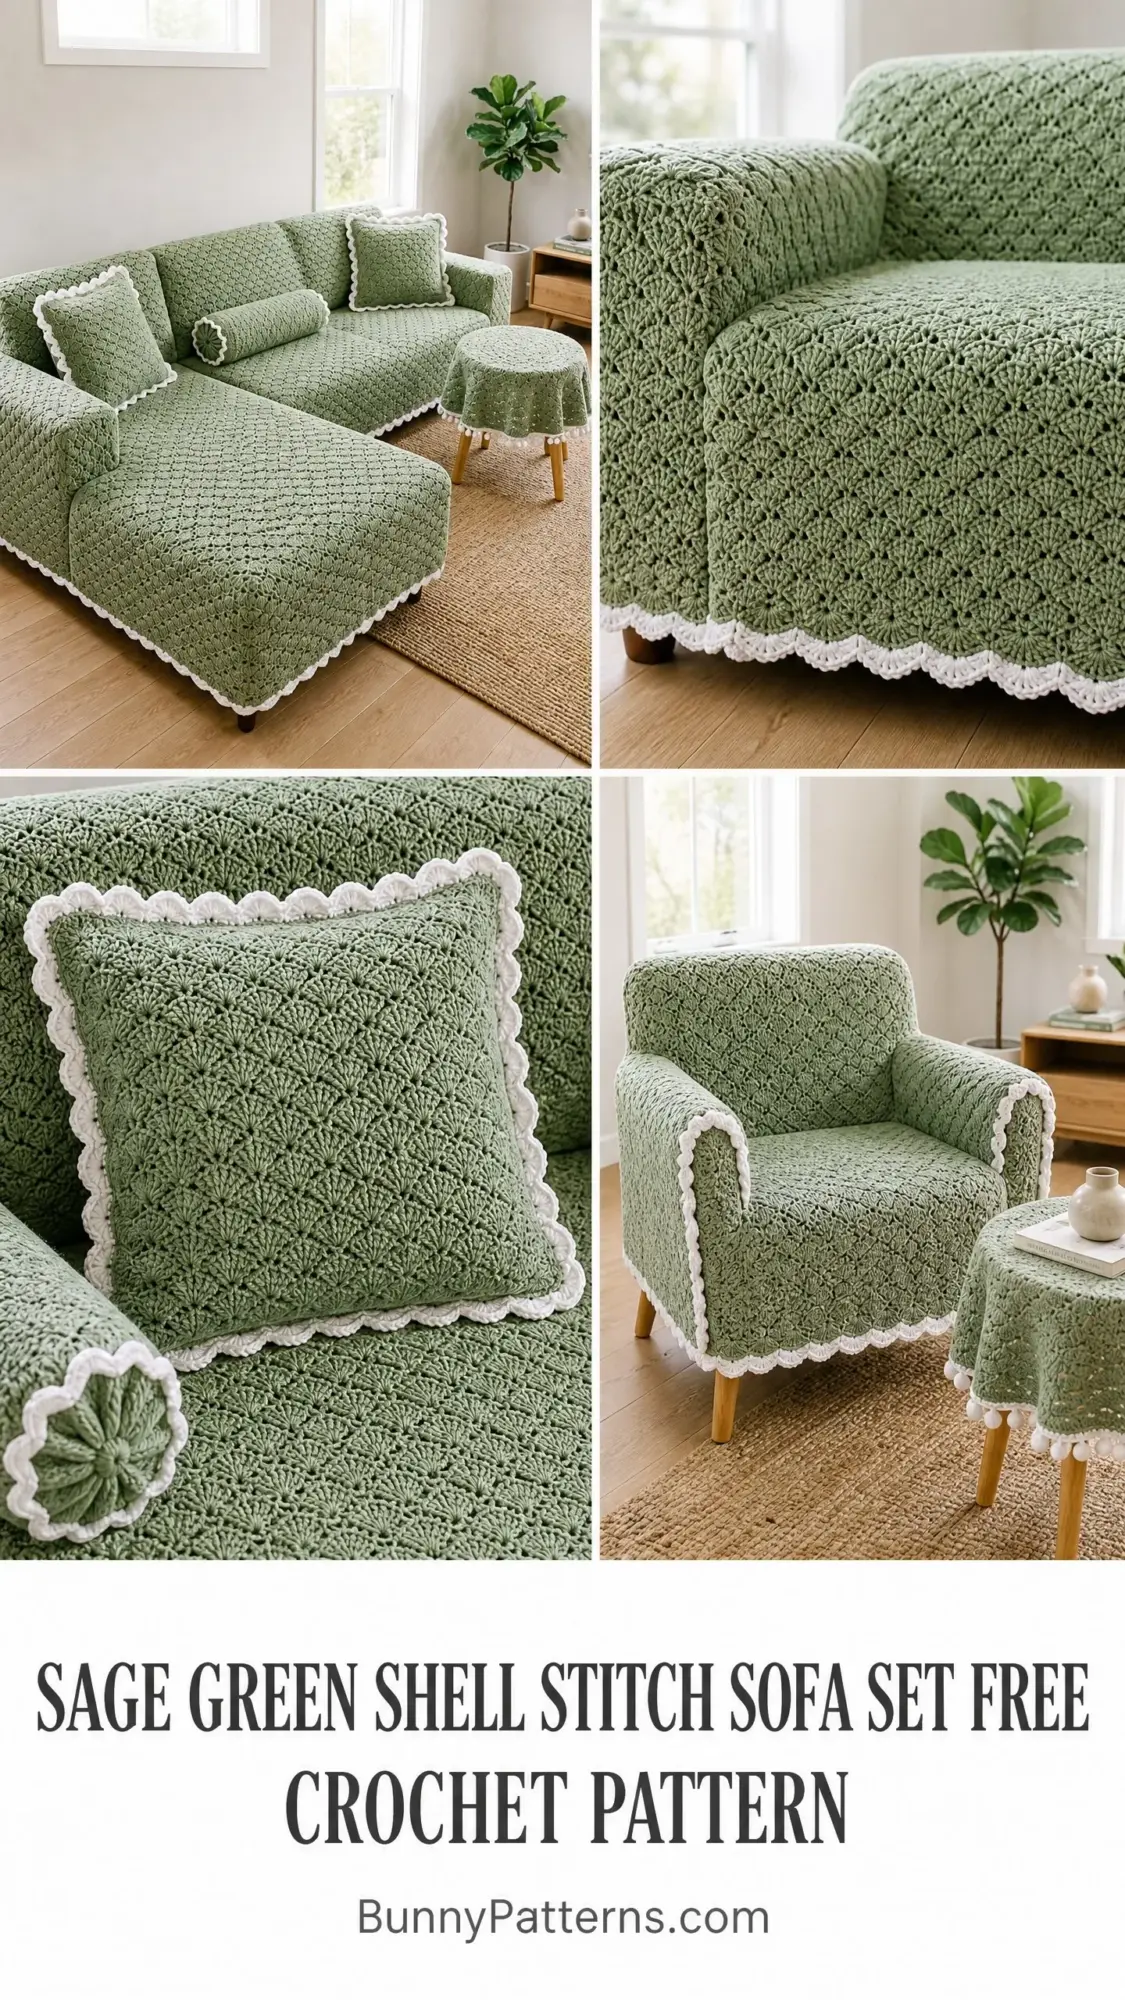
I know what you’re thinking. A full sofa cover sounds intimidating. But here’s the thing. The shell stitch pattern is surprisingly simple once you get the rhythm going. You’re basically repeating the same row over and over until you have gorgeous, textured panels ready to drape over your furniture.
The complete set includes a sectional sofa cover, two throw pillows, a bolster pillow, a round side table cover, and an armchair cover. Every piece shares that beautiful sage green color with delicate white picot edging. Gift potential? Through the roof. Time investment? About 75 to 105 hours total. But each piece stands alone beautifully, so you can absolutely start with just the pillows and work your way up.
Why This Sage Green Sofa Set Pattern Works So Well
The magic of this crochet pattern lies in its consistency. Every single component uses the same shell stitch texture, creating that stunning diamond-grid appearance you see across the entire set. The sage green colorway feels fresh and modern, while the white scallop-and-picot border adds a lovely cottage-core aesthetic that softens the whole look.
What I love most is how the shell stitch creates a fabric that looks almost lace-weight but is actually made with worsted yarn. You get visual delicacy with practical durability. Perfect for furniture that actually gets used.
The construction is straightforward too. Most pieces are worked flat in rows, then finished with that gorgeous edging. The round table cover is the only piece worked in the round, and even that follows a logical increase pattern that keeps everything flat and smooth.
Skill Level and Time Commitment
This crochet tutorial is rated intermediate. The shell stitch repeat itself is simple once established, but you need consistent tension across large flat panels. If you’ve made a few blankets or scarves and feel comfortable tracking stitch counts, you’re ready for this.
Here’s what to expect time-wise:
My suggestion? Start with a throw pillow. It’s the perfect way to learn the pattern and see how the finished fabric looks before committing to the larger pieces.
Materials You Will Need
Yarn (Main Color, MC): Sage green, worsted weight (category 4), approximately 6,200 yards total for the complete set
Yarn (Contrast Color, CC): White or off-white, worsted weight (category 4), approximately 400 yards total for all edging
Crochet hook: US size J / 6.0 mm
Additional supplies:
Yarn Suggestions
Lion Brand Heartland works beautifully for this project. It’s 100% acrylic with excellent stitch definition for shell work, and it’s machine washable. Essential for furniture covers! Choose shade Joshua Tree for the sage green and Natural for the white. You’ll need approximately 25 skeins MC and 2 skeins CC.
Paintbox Simply DK produces a drapier fabric that lays flat nicely. Choose Grass Green or Pistachio for MC and Paper White for CC. You’ll need approximately 46 balls MC and 3 balls CC.
Caron Simply Soft is a great budget option with excellent softness. Choose Soft Green for MC and White for CC. You’ll need approximately 20 skeins MC and 2 skeins CC.
Whatever you choose, look for smooth worsted weight yarn with a matte finish. Avoid fuzzy or heavily plied yarns that obscure stitch definition.
Gauge
With MC and J hook, in shell stitch pattern:
14 stitches and 8 rows = 4 inches by 4 inches (10 cm by 10 cm)
One full shell repeat equals approximately 1.7 inches wide. One shell repeat height equals approximately 1 inch tall.
Gauge matters here because you want the covers to fit standard furniture. Make a swatch at least 6 inches square, wash and dry it, then measure. Adjust your hook size if needed.
Abbreviations and Special Stitches
Let me walk you through every stitch abbreviation you’ll encounter:
Shell Stitch
Work 5 double crochet (dc) all into the same stitch or space. This forms one complete shell. Each shell counts as 5 stitches. You’ll be making hundreds of these, so get comfortable with the motion.
Picot
Chain 3, then slip stitch into the first chain of those 3 to form a small decorative loop. This creates those pretty little knots in the white edging.
Scallop Edging
Join CC with sl st to any corner. Chain 1. Work sc in same st. [Skip 2 sts, work 5 dc into next st, skip 2 sts, sc into next st] repeat across. At each corner work (sc, ch 2, sc) into the corner stitch.
Finished Sizes
Sectional sofa cover, main panel: Approximately 86 inches wide by 34 inches tall (218 cm by 86 cm)
Sectional sofa cover, chaise panel: Approximately 60 inches wide by 34 inches tall (152 cm by 86 cm)
Throw pillow covers (each): 18 inches by 18 inches (46 cm by 46 cm)
Bolster pillow cover: 6 inches diameter by 18 inches long (15 cm by 46 cm)
Round table cover: 24 inches diameter (61 cm)
Armchair cover: 54 inches wide by 34 inches tall (137 cm by 86 cm)
All measurements are before blocking. Finished dimensions after blocking increase approximately 5 percent.
Pattern Notes Before You Begin
All pieces start with the right side (RS) facing on the first row. Flat panels are turned at the end of each row.
The shell stitch pattern requires a foundation chain that is a multiple of 6 plus 2. The extra 2 chains account for the edge sc stitches on each side.
When counting stitches across a completed shell row, count each shell as 5 stitches. The sc stitches at the edges are included in the total stitch count.
Do not turn with a chain at the end of shell rows. Instead, ch 1 and turn. The ch 1 does not count as a stitch.
For furniture covers, work at a slightly looser tension than your swatch gauge. This allows for easier placement and removal. Consider going up half a hook size for the large panels if your fabric feels stiff.
Sofa Cover Main Panel Instructions
This panel covers the back and seat of the main sofa section. It drapes over the sofa and tucks under cushions.
Foundation:
With MC, ch 302.
Row 1 (RS): Sc in second ch from hook, [sk 2 ch, 5 dc in next ch, sk 2 ch, sc in next ch] 50 times. Ch 1, turn. (301 sts)
Row 2 (WS): Sc in first sc, [sk 2 dc, 5 dc in next dc (center dc of shell), sk 2 dc, sc in next sc] 50 times. Ch 1, turn. (301 sts)
Row 2 establishes the pattern: each new shell is worked into the center (3rd) dc of the previous shell, and each sc is worked into the previous sc.
Rows 3 through 68: Rep Row 2. Ch 1, turn after each row. (301 sts per row)
After Row 68, do not fasten off. Proceed to scallop edging described in the Finishing section.
CHECKPOINT: After Row 68, the panel should measure approximately 86 inches wide and 34 inches tall. Count the shells across the top edge. You should have 50 shells and 51 sc stitches for a total of 301 stitches.
Sofa Cover Chaise Panel Instructions
This panel covers the chaise extension of the sectional. It’s worked identically to the main panel but narrower.
With MC, ch 212.
Row 1 (RS): Sc in second ch from hook, [sk 2 ch, 5 dc in next ch, sk 2 ch, sc in next ch] 35 times. Ch 1, turn. (211 sts)
Row 2 and all subsequent rows: Sc in first sc, [sk 2 dc, 5 dc in center dc of next shell, sk 2 dc, sc in next sc] 35 times. Ch 1, turn. (211 sts)
Rows 3 through 68: Rep Row 2. (211 sts)
CHECKPOINT: Chaise panel should measure approximately 60 inches wide and 34 inches tall with 35 shells across.
Joining the Two Panels
Lay main panel and chaise panel on a flat surface with wrong sides together, aligning along the short vertical joining edge. The right side of main panel joins to the left side of chaise panel.
Using MC and tapestry needle, work a mattress seam through the outermost dc posts of each panel along the vertical short edge, joining approximately 34 inches (68 rows) of each panel together. This forms the inside corner seam of the sectional cover.
Throw Pillow Cover Instructions (Make 2)
Each pillow cover consists of a front panel and a back panel seamed together on three sides.
Front Panel
With MC, ch 62.
Row 1 (RS): Sc in second ch from hook, [sk 2 ch, 5 dc in next ch, sk 2 ch, sc in next ch] 10 times. Ch 1, turn. (61 sts)
Row 2 and all subsequent rows: Sc in first sc, [sk 2 dc, 5 dc in center dc of shell, sk 2 dc, sc in sc] 10 times. Ch 1, turn. (61 sts)
Work rows 2 through 36 in pattern. (61 sts)
Fasten off.
Back Panel
Work identical to front panel. Fasten off.
Assembly
With RS facing out, hold front and back panels together. Using MC, sl st around three sides through both layers. Leave the top edge open. Insert pillow form, then sl st the fourth edge closed.
Work scallop and picot edging around all four sides of the assembled pillow cover in CC.
CHECKPOINT: Before assembly, each panel measures approximately 17 to 18 inches wide by 17 to 18 inches tall.
Bolster Pillow Cover Instructions
The bolster cover consists of a rectangular tube for the body and two circular end caps.
Body Rectangle
With MC, ch 62.
Row 1 (RS): Sc in second ch from hook, [sk 2 ch, 5 dc in next ch, sk 2 ch, sc in next ch] 10 times. Ch 1, turn. (61 sts)
Rows 2 through 36: Rep shell pattern row. (61 sts per row)
After row 36, do not fasten off. Sl st the short edges together to form a tube.
End Cap (make 2)
Work in rounds with MC.
Round 1: Magic ring, ch 1, 6 sc into ring, sl st to first sc to join. (6 sc)
Round 2: Ch 1, 2 sc in each st around, sl st to join. (12 sc)
Round 3: Ch 1, [sc in next st, 2 sc in next st] 6 times, sl st to join. (18 sc)
Round 4: Ch 1, [sc in next 2 sts, 2 sc in next st] 6 times, sl st to join. (24 sc)
Round 5: Ch 1, [sc in next 3 sts, 2 sc in next st] 6 times, sl st to join. (30 sc)
Round 6: Ch 1, [sc in next 4 sts, 2 sc in next st] 6 times, sl st to join. (36 sc)
Round 7: Ch 1, [sc in next 5 sts, 2 sc in next st] 6 times, sl st to join. (42 sc)
Round 8: Ch 1, [sc in next 6 sts, 2 sc in next st] 6 times, sl st to join. (48 sc)
Round 9: Ch 1, [sc in next 7 sts, 2 sc in next st] 6 times, sl st to join. (54 sc)
Round 10: Ch 1, [sc in next 8 sts, 2 sc in next st] 6 times, sl st to join. (60 sc)
Round 11: Ch 1, [sc in next 9 sts, 2 sc in next st] 6 times, sl st to join. (66 sc)
Round 12: Ch 1, [sc in next 10 sts, 2 sc in next st] 6 times, sl st to join. (72 sc)
Fasten off with a 12-inch tail for seaming. Sew each end cap to the open ends of the body tube using mattress stitch. Leave one cap partially unstitched for inserting the bolster form, then close fully after insertion.
Round Table Cover Instructions
This piece is worked in rounds from the center outward.
Round 1: With MC, magic ring, ch 1, 8 sc into ring, sl st to join. (8 sc)
Round 2: Ch 1, 2 sc in each st around, sl st to join. (16 sc)
Round 3: Ch 1, [sc in next st, 2 sc in next st] 8 times, sl st to join. (24 sc)
Round 4: Ch 1, [sc in next 2 sts, 2 sc in next st] 8 times, sl st to join. (32 sc)
Round 5: Ch 1, [sc in next 3 sts, 2 sc in next st] 8 times, sl st to join. (40 sc)
Round 6: Ch 1, [sc in next 4 sts, 2 sc in next st] 8 times, sl st to join. (48 sc)
Continue increasing rounds:
Round 7: [Sc in next 5 sts, 2 sc in next st] 8 times. (56 sc)
Round 8: [Sc in next 6 sts, 2 sc in next st] 8 times. (64 sc)
Round 9: [Sc in next 7 sts, 2 sc in next st] 8 times. (72 sc)
Round 10: [Sc in next 8 sts, 2 sc in next st] 8 times. (80 sc)
Round 11: [Sc in next 9 sts, 2 sc in next st] 8 times. (88 sc)
Round 12: [Sc in next 10 sts, 2 sc in next st] 8 times. (96 sc)
Round 13: [Sc in next 11 sts, 2 sc in next st] 8 times. (104 sc)
Round 14: [Sc in next 12 sts, 2 sc in next st] 8 times. (112 sc)
Round 15: [Sc in next 13 sts, 2 sc in next st] 8 times. (120 sc)
Round 16: [Sc in next 14 sts, 2 sc in next st] 8 times. (128 sc)
Round 17: [Sc in next 15 sts, 2 sc in next st] 8 times. (136 sc)
Round 18: [Sc in next 16 sts, 2 sc in next st] 8 times. (144 sc)
Round 19: [Sc in next 17 sts, 2 sc in next st] 8 times. (152 sc)
Round 20: [Sc in next 18 sts, 2 sc in next st] 8 times. (160 sc)
Round 21: [Sc in next 19 sts, 2 sc in next st] 8 times. (168 sc)
Round 22: [Sc in next 20 sts, 2 sc in next st] 8 times. (176 sc)
Round 23: [Sc in next 21 sts, 2 sc in next st] 8 times. (184 sc)
Round 24: [Sc in next 22 sts, 2 sc in next st] 8 times. (192 sc)
Round 25: [Sc in next 23 sts, 2 sc in next st] 8 times. (200 sc)
Round 26: [Sc in next 24 sts, 2 sc in next st] 8 times. (208 sc)
Round 27: [Sc in next 25 sts, 2 sc in next st] 8 times. (216 sc)
Shell Drop Rounds
Round 28: Ch 1, sc in first st, [sk 2 sts, 5 dc in next st, sk 2 sts, sc in next st] 36 times, sl st to join. (216 sts: 36 shells)
Round 29: Ch 1, sc in first sc, [sk 2 dc, 5 dc in center dc of next shell, sk 2 dc, sc in next sc] 36 times, sl st to join. (216 sts)
Rounds 30 through 35: Rep Round 29 six more times. (216 sts)
Proceed to scallop and picot edging in CC.
CHECKPOINT: The table cover should lie flat with approximately 20 inches diameter at the flat portion and approximately 3 inches of hanging drop around the perimeter.
Armchair Cover Instructions
The armchair cover is a single wide panel sized to drape over the chair back, seat, and front edge.
With MC, ch 188.
Row 1 (RS): Sc in second ch from hook, [sk 2 ch, 5 dc in next ch, sk 2 ch, sc in next ch] 31 times. Ch 1, turn. (187 sts)
Row 2 and all subsequent rows: Sc in first sc, [sk 2 dc, 5 dc in center dc of shell, sk 2 dc, sc in sc] 31 times. Ch 1, turn. (187 sts)
Rows 3 through 68: Rep Row 2. (187 sts)
Proceed to scallop and picot edging in CC.
CHECKPOINT: Armchair cover should measure approximately 54 inches wide and 34 inches tall with 31 shells across each row.
Finishing Your Sage Green Shell Stitch Sofa Set
Scallop Edging
Before beginning the edging, count the stitches along the top and bottom edges of each flat panel. The stitch count must be a multiple of 6 plus 1 for the scallop repeat to work evenly.
With CC, join to any corner st with sl st.
Set-up: Ch 1, sc in same corner st, ch 2, sc in same corner st (this creates a double-sc corner marker).
Along each edge: [Sk 2 sts, 5 dc in next st, sk 2 sts, sc in next st] across to next corner. At corner, work (sc, ch 2, sc) into corner st. Continue around all four sides. Sl st to first sc to join.
Picot Enhancement Round (Optional)
With CC still attached, sl st to any sc between shells.
[Sc in same sc, ch 1, sc in first dc of next shell, ch 1, sc in second dc, ch 3, sl st in first of these 3 ch (picot made), sc in third dc (center), ch 1, sc in fourth dc, ch 1, sc in fifth dc, sc in sc between shells] rep around.
Fasten off CC.
Decorative Rosette (for bolster end caps)
With MC, ch 4, sl st to form a ring.
Round 1: Ch 1, 10 sc into ring, sl st to join. (10 sc)
Round 2: [Ch 4, sk 1 sc, sl st in next sc] 5 times. (5 loops)
Round 3: Into each ch-4 loop work (sc, hdc, 3 dc, hdc, sc). (5 petals)
Fasten off with a long tail. Sew to center of each bolster end cap.
Weaving Ends and Blocking
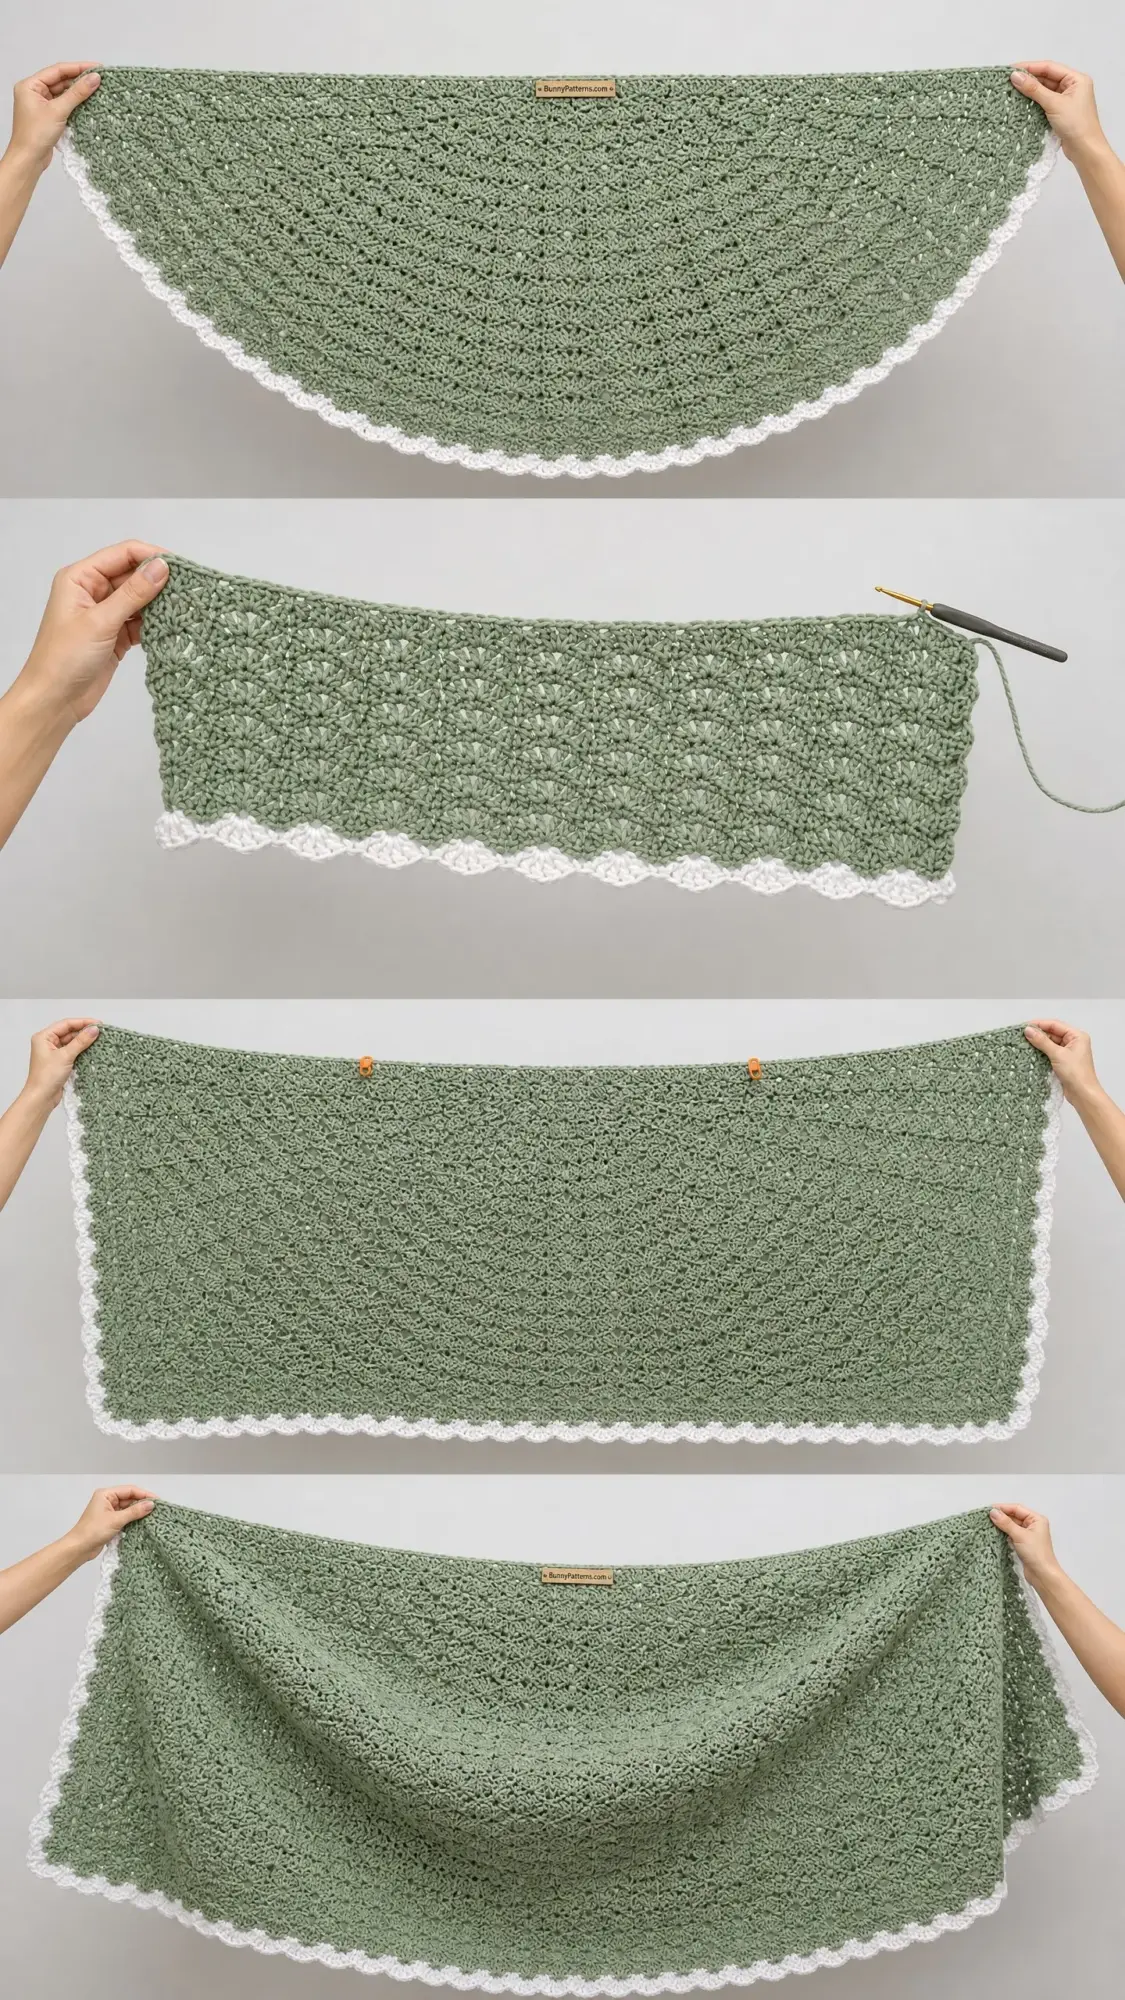
Thread all yarn tails onto your tapestry needle and weave them in securely. For best results, wet block all pieces on blocking mats, pinning to measurements. Allow to dry completely before placing on furniture.
Tips for Success with This Crochet Pattern
Track your rows. Seriously. Use a row counter or tally marks. When you’re working 68 rows, it’s easy to lose count.
Work in good lighting. The sage green is beautiful but can strain your eyes in dim conditions.
Take breaks. This is a marathon, not a sprint. Your hands will thank you.
Consider working pieces simultaneously. Switching between a pillow and the main sofa panel keeps things interesting.
Thank you so much for choosing this pattern for your home. I hope your sage green shell stitch sofa set brings you years of cozy comfort. If you make this project, I would absolutely love to see it! Share your photos on Instagram or Facebook and tag me so I can admire your beautiful work.
If you loved this step by step crochet tutorial, save it to your Pinterest boards so you can find it whenever you’re ready to start. And please drop a comment below if you give it a try. I love hearing how projects turn out, and your tips might help another crocheter too!
You Might Also Like
- Mint Green Tiered Shell Dress Free Crochet Pattern
- Cream Boho Tassel Fringe Clutch Free Crochet Pattern
- Periwinkle Hydrangea Sweater in Closet Free Crochet Pattern
- Cinderella Blue Baby Dress Set Free Crochet Pattern